Blog

  • 7 Common Alpine Climbing Hazards And How To Overcome Them

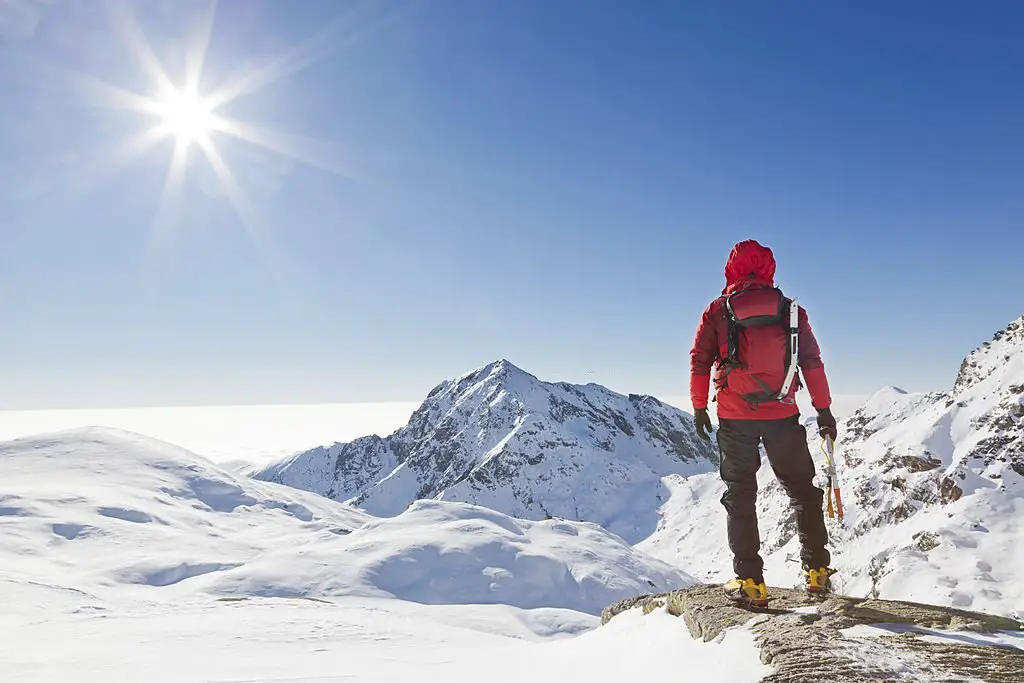
    Alpine climbing is a fun and exciting adventure. But we all know that it is not an easy pursuit. And in most cases, hazards could arise without you knowing. Learn what these hazards are so that you can prepare and overcome them. 

    A Quick Overview

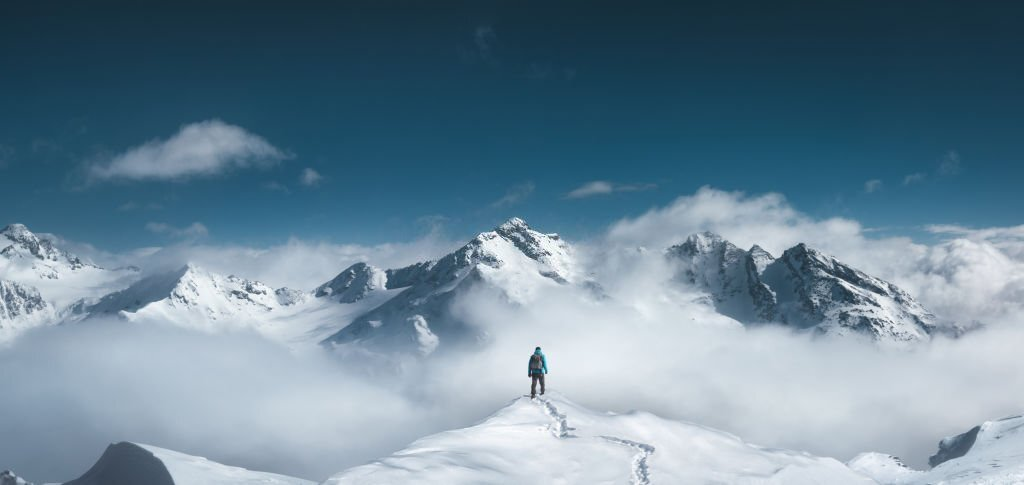
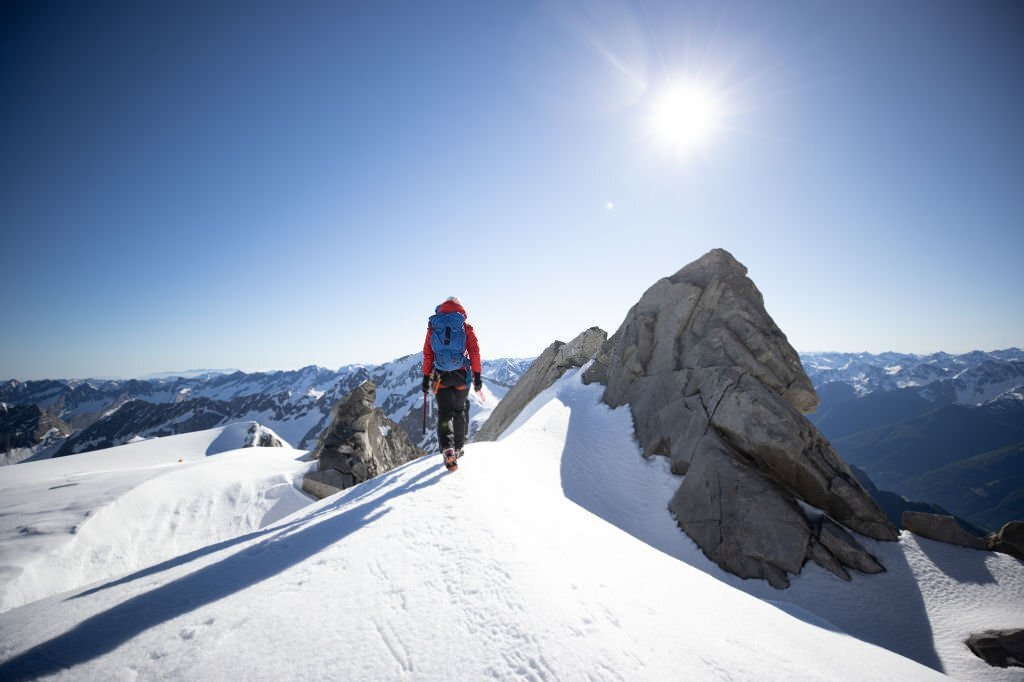
    Many outdoor enthusiasts have long dreamed of traversing different alpines in the world. The most popular ones, such as the Gran Paradiso in Italy and Traverse of Weissmies in Switzerland, are commonly sought by the most avid climbers. But of course, even the amateur one’s desire to conquer these peaks as a form of overcoming their final frontiers. 

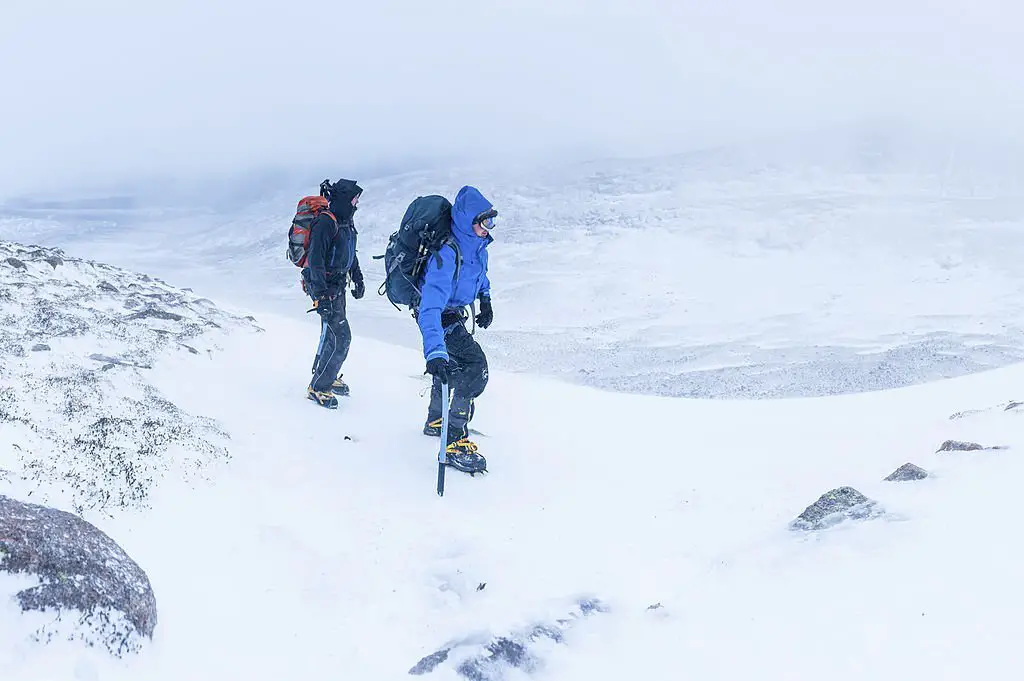
    Still, the alpines are a challenge because they throw unpredictability in your way. For instance, the weather there can change in a matter of minutes. Furthermore, the terrains are usually technical and unbearable for inexperienced climbers. Of course, don’t underestimate the temperature or snow. Someone can get buried by avalanches, and that’s pretty lethal. 

    So when you think about these dangers, canceling your trip would really cross your mind. But that’s not how you should approach these ordeals. After all, the highest summits can only be reached if you are prepared to overcome the treacherous paths. 

    Being aware of what possible dangers you could encounter is one way of being prepared for them. Moreover, it is also important that you don’t focus too much on the negative aspects of your adventure; there are a lot of good things that you can encounter while ascending different peaks. Just be prepared for the worst-case scenario. 


    What Are The Common Alpine Climbing Hazards

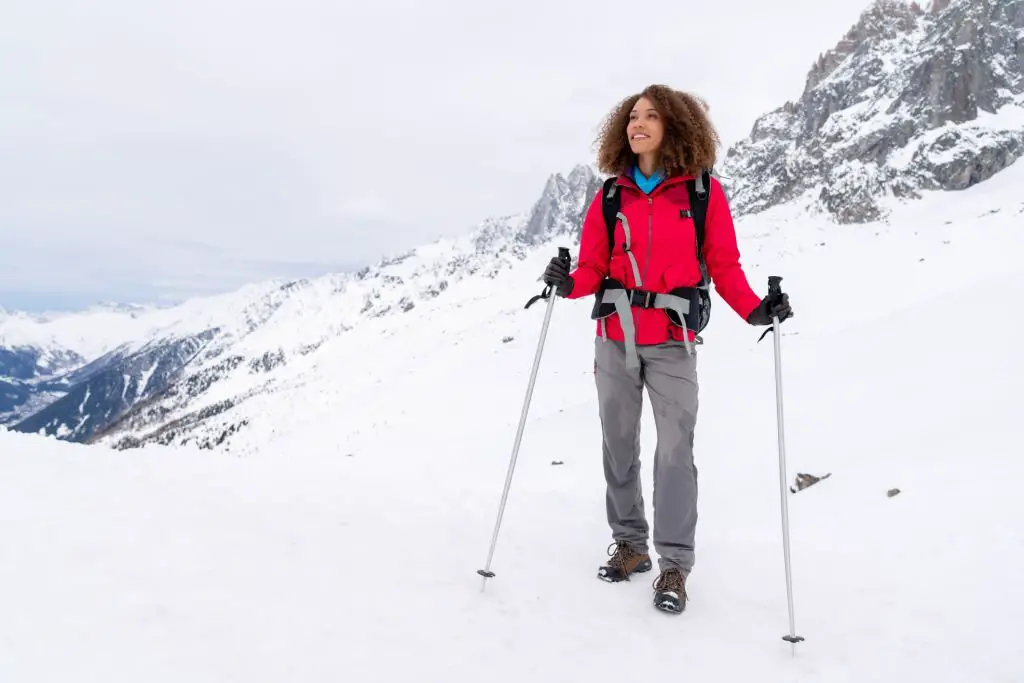
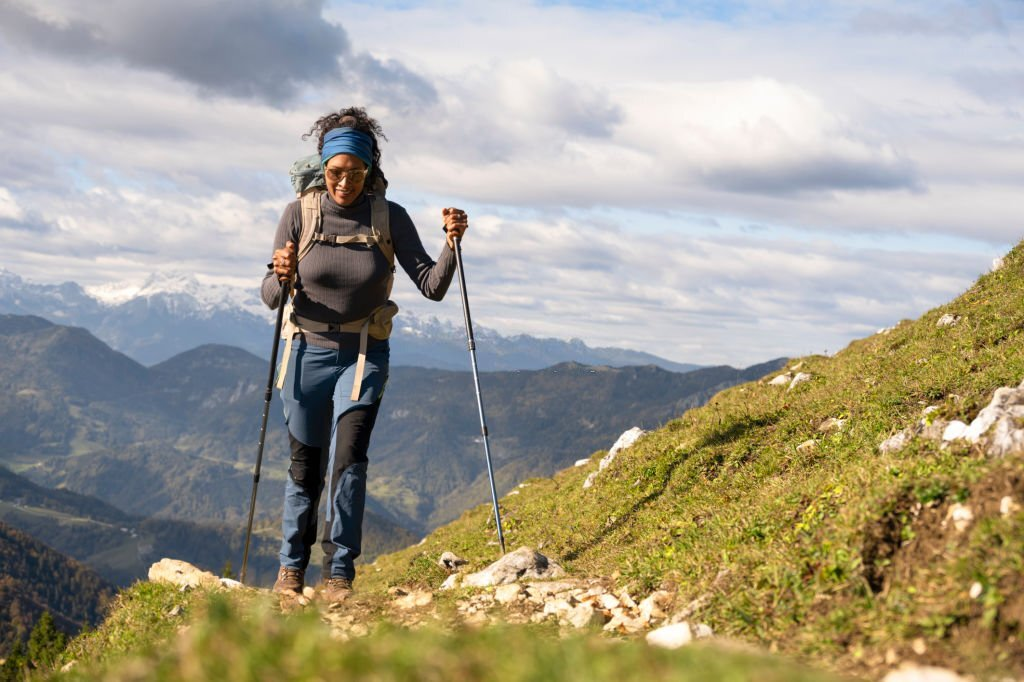
    One should know that the mountains can expose people to different types of ordeals. Everything there could become the root cause of accidents and SHTF situations. Even slippery terrain could cause irreversible injuries. At the same time, not wearing the proper gear could also spell disaster. That’s why the proper hiking pants, windbreakers, and hardshell jackets are important in these endeavors. 

    With these things in mind, being over prepared isn’t a wrong thing. In this way, you can compensate for the unpredictable and inevitable risk factors that you could encounter. 

    For starters, these are the typical hazards that you can encounter while climbing alpines and mountain peaks. 

    A Drop On The Oxygen Level 

    Let’s start with the most important one.  

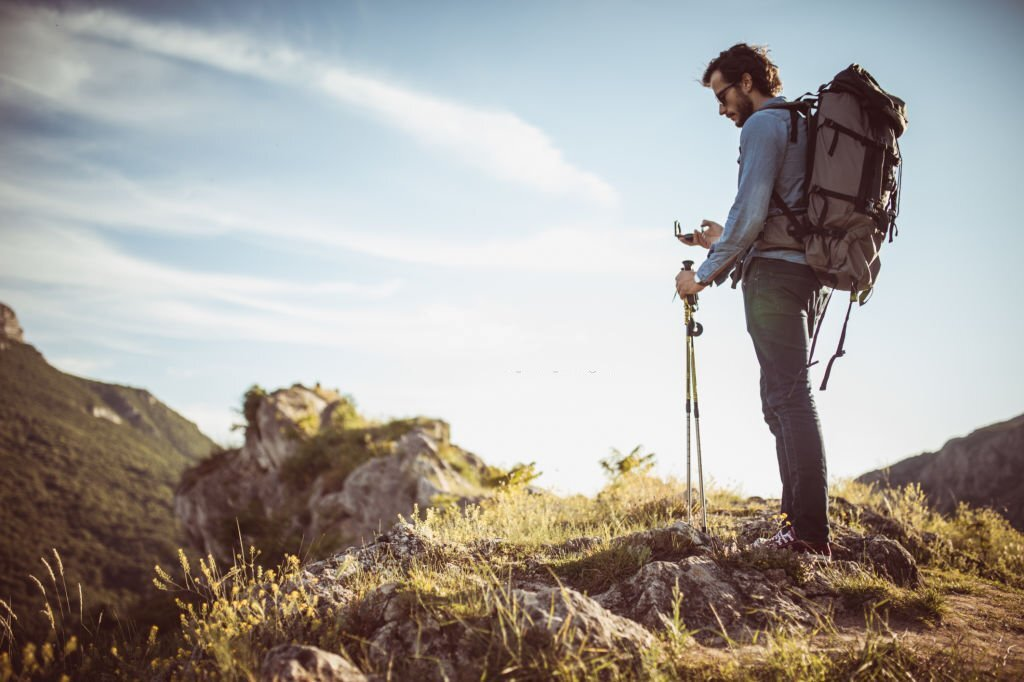
    You see, ascending in high altitudes exposes your body to different elements and atmospheric conditions. The higher you go, the more you can notice the unusual (and often uncomfortable) changes to your setting. 

    Depending on how fast you climb, the intensity and suddenness of these changes could be really unpleasant. For example, ascending an altitude of 1,500 meters above sea level could cause quick exhaustion and a series of bodily discomforts such as dizziness and headaches. This is because the oxygen level on the top is lower than when you are at sea level. And as humans, our bodies are used to oxygen-rich environments. 

    Technically speaking, summits and mountain peaks aren’t the playgrounds designed for us. They can be reached, but necessary caution is required. 

    How To Avoid / Prevent This Hazard:

    • Every time you ascend fast, you are more susceptible to altitude sickness–and this one becomes deleterious. After all, quickly exposing yourself to low-oxygen environments can take a toll on your body. 
    • Hence, avoiding altitude sickness can be as easy as gradually conditioning your body to get used to this setup. Your body can actually do this; give it some time, and it can produce a sufficient amount of red blood cells to compensate for the lack of oxygen molecules. But how long will this process take? Well, it could be half a day, two days, or a span of a week! 
    • While your body is adjusting, it requires more nourishment to sustain the changes. Therefore, drinking lots of water and eating healthy meals could help solve this matter for you.

    Here’s a comprehensive guide on how to acclimatize on high altitudes.
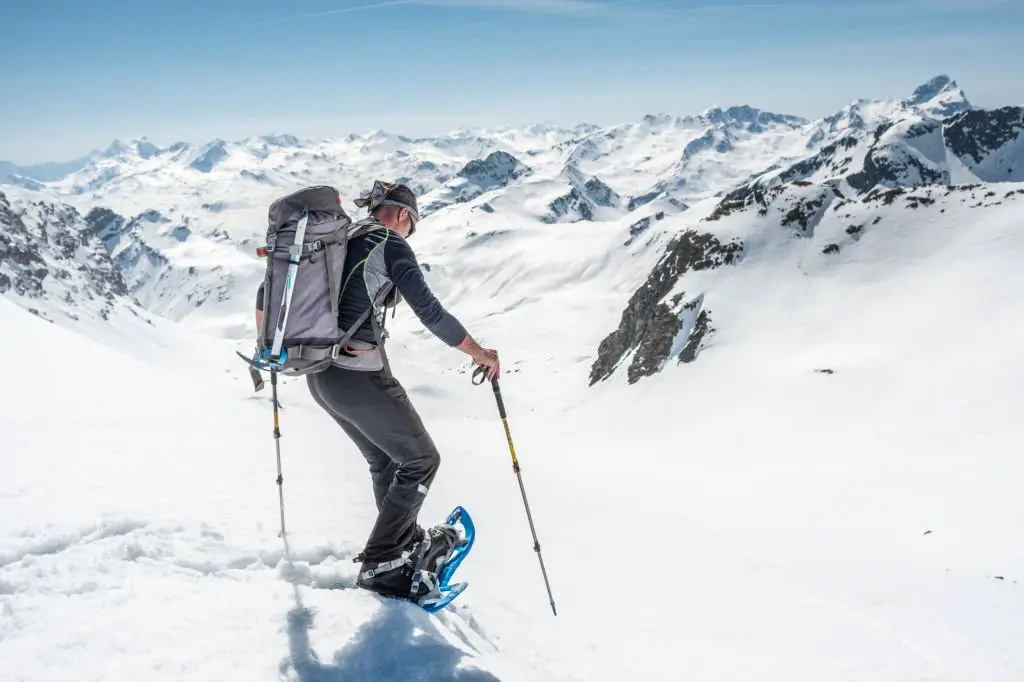
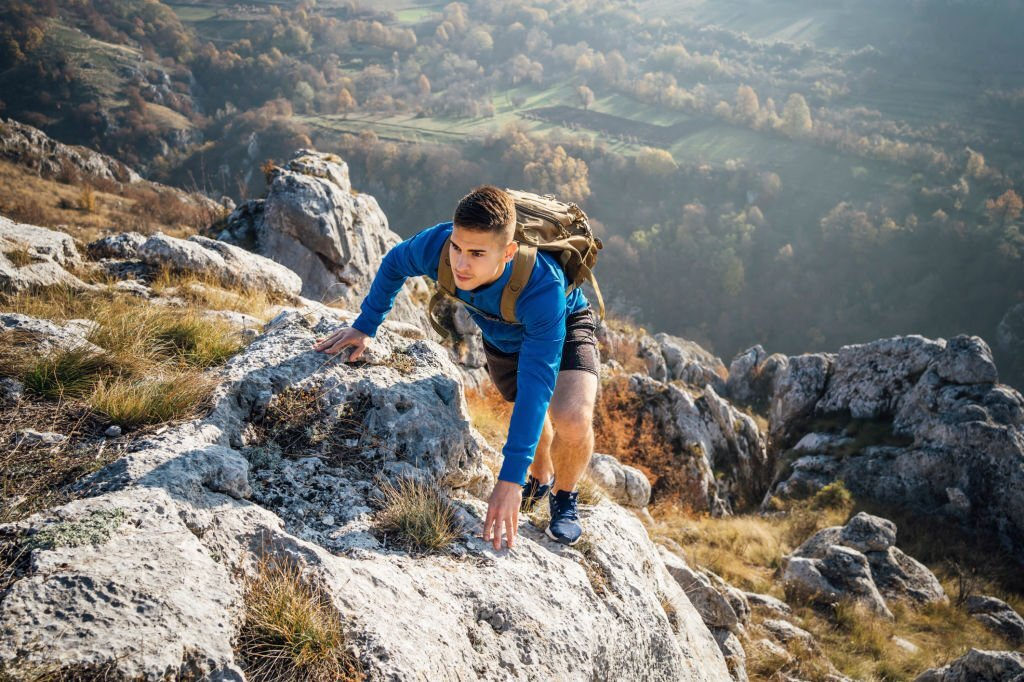
    The Terrain

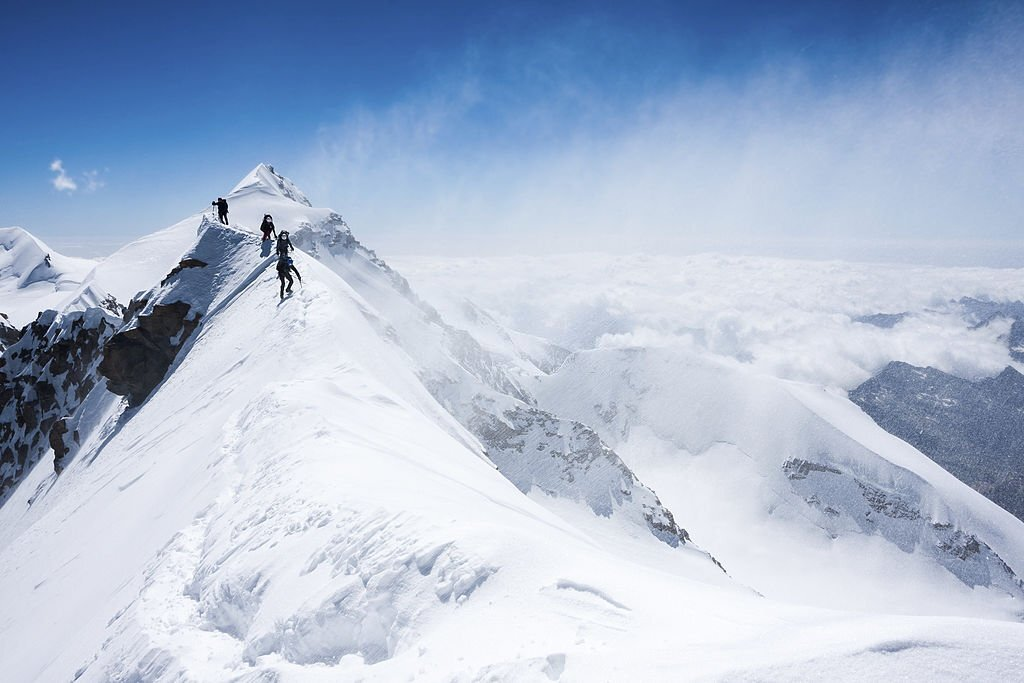
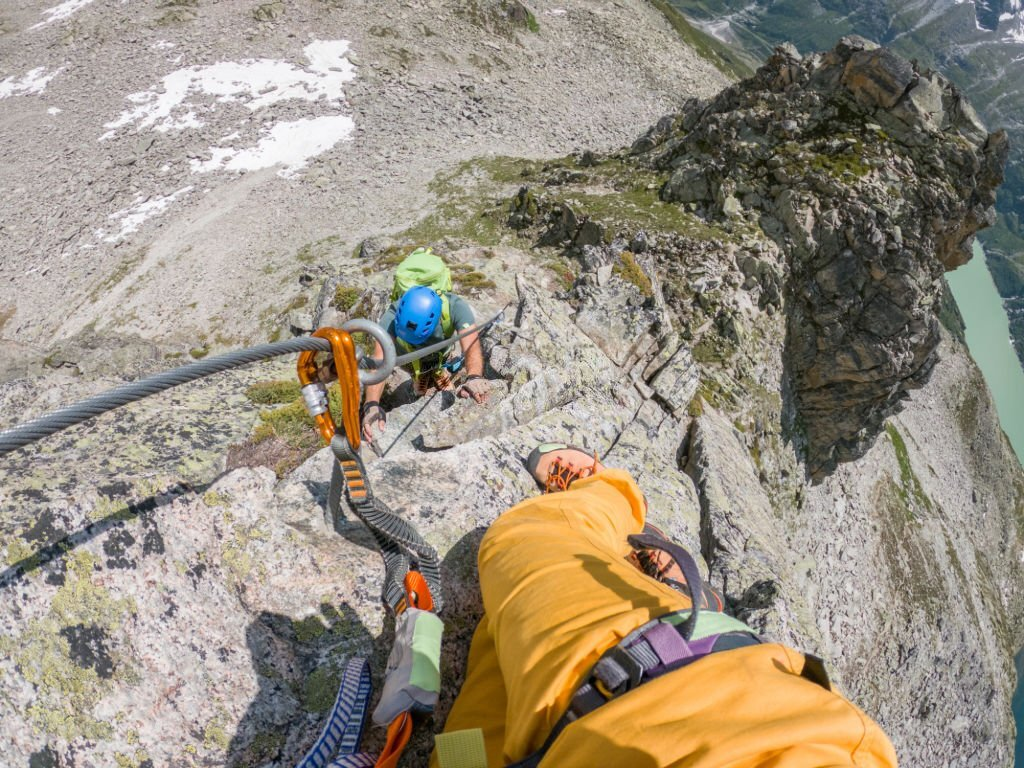
    As mentioned and implied earlier, the alpines don’t have friendly terrain. They aren’t for the faint-hearted, or people don’t have enough training. Tight, narrow paths and steep cliffs are among the things you could encounter along the way. In some cases, there’s a need to traverse rocky walls by climbing them. 

    Of course, the fear of falling isn’t unwarranted. After all, we often hear stories of climbers that fell to their death while climbing. But even if you don’t fall, there are still risks of tripping or stumbling over, especially if the ridge is slippery. And simple slips could cause injuries. 

    How To Avoid / Prevent This Hazard:

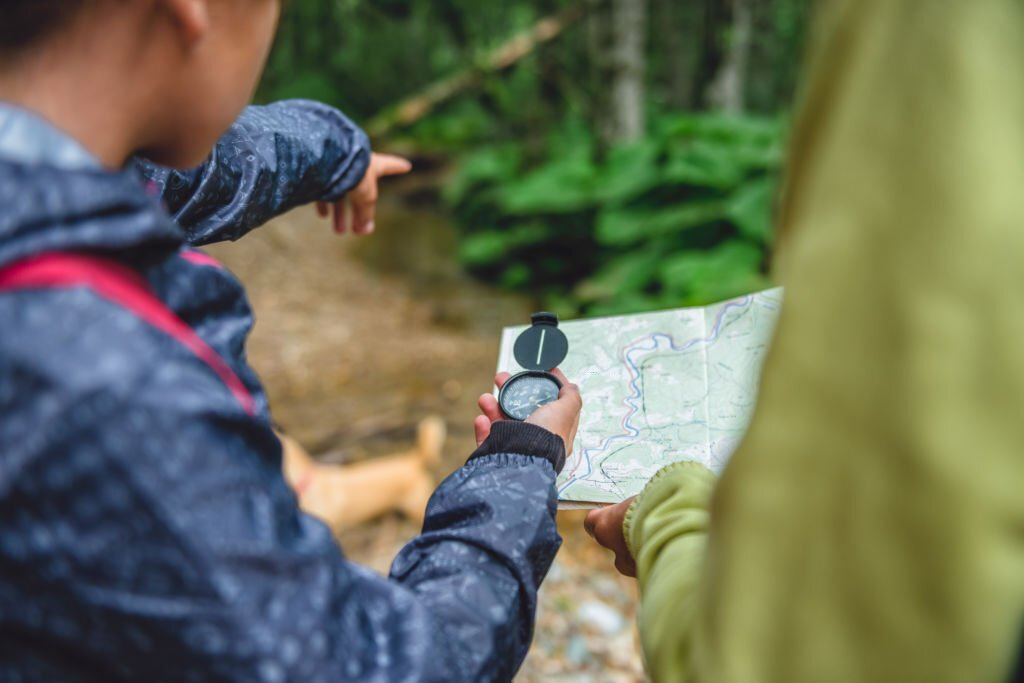
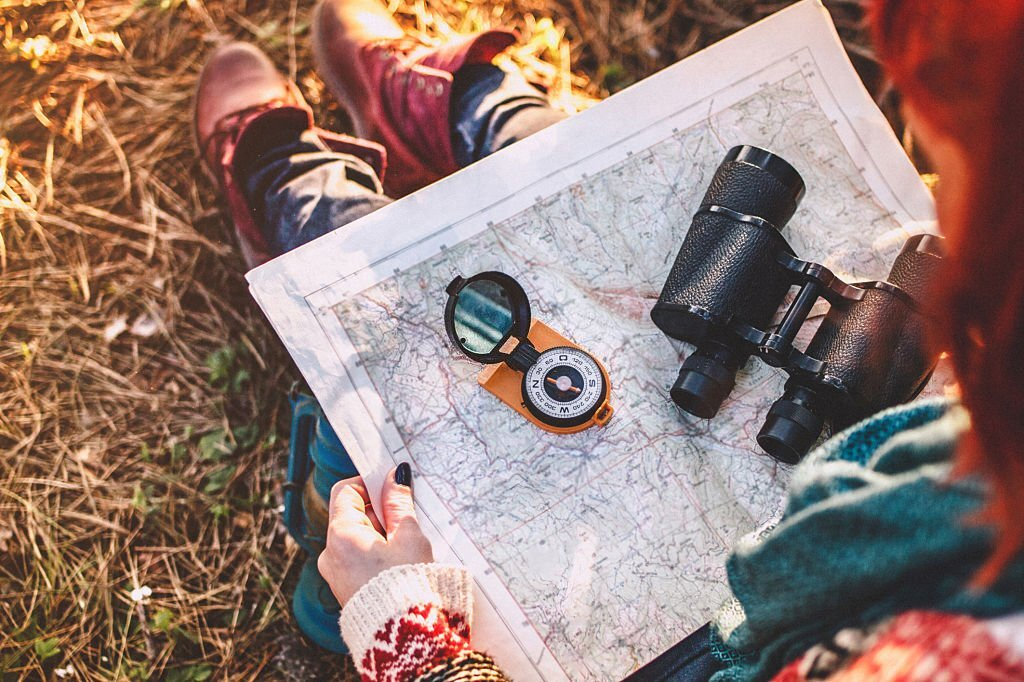
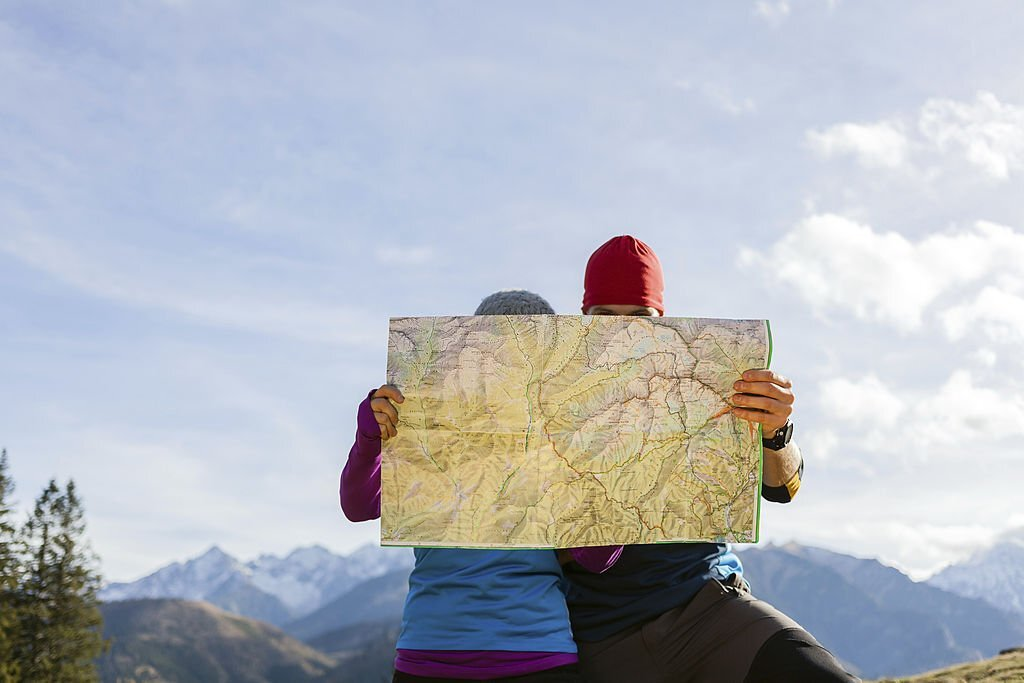
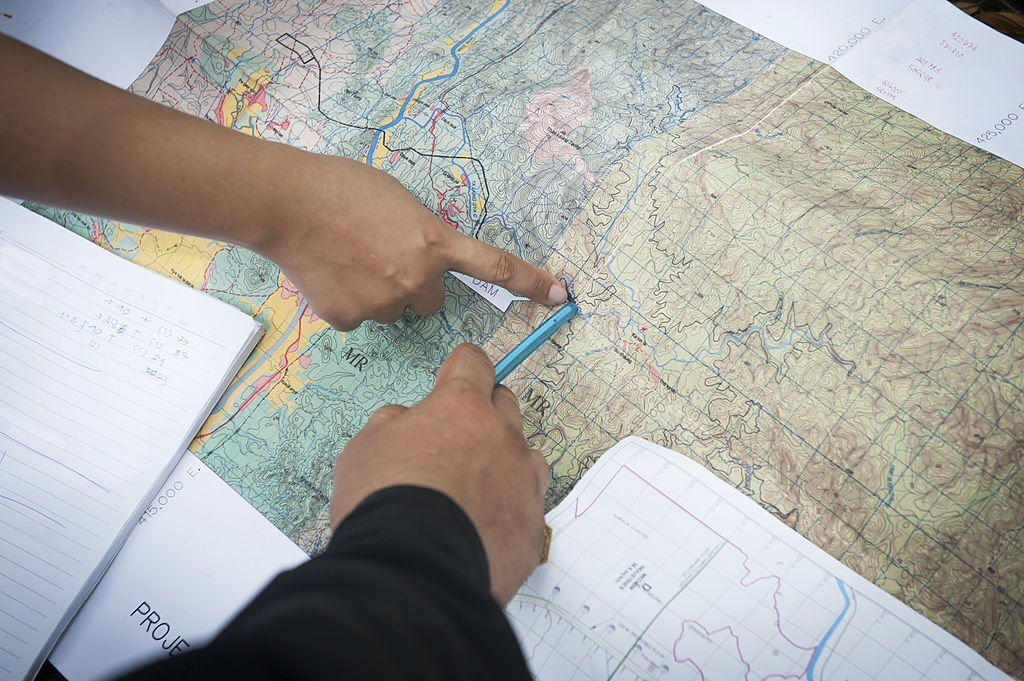
    • Well, prevention is better than cure, right? So before the trip takes place, you need to plan for it already. Study the terrain you are heading and assess if it is something that you can take on. If you think that it is too difficult for you, there’s no shame in changing your destination. That’s how things should be. 
    • And while you are on the terrain already, you should keep your focus on the path. Have an awareness of your surroundings so that you can spot potential hazards (i.e., sharp objects and fragile, slippery paths). If there’s a climb required, make sure that you complete the essential climbing gear. 
    • Don’t forget to wear the best hiking boots or shoes. They can keep your feet steady on the ground thanks to their exceptional traction.

    Ice And More Ice

    Let’s keep things clear: ice and snow are different. And this means that they pose different types of risks, which I’m going to discuss all here. 

    Specifically, alpine climbers and mountaineers are prone to being injured by falling ice. On the flip side, hikers don’t usually encounter this danger. 

    When alpine climbing, you have to pass terrains where there are hanging glaciers. If the temperature remains low, the hanging ice will just stay intact. They also remain stable when there isn’t too much movement around. Here’s a rule that you might need to know: if the ice freezes fast, the risk of it breaking or falling is minimal. 

    How To Avoid / Prevent This Hazard 

    • So when dealing with icy terrains, it is important that you exercise an optimal degree of caution. The more attentive you are to your surroundings, the faster you can react to these dangers.  
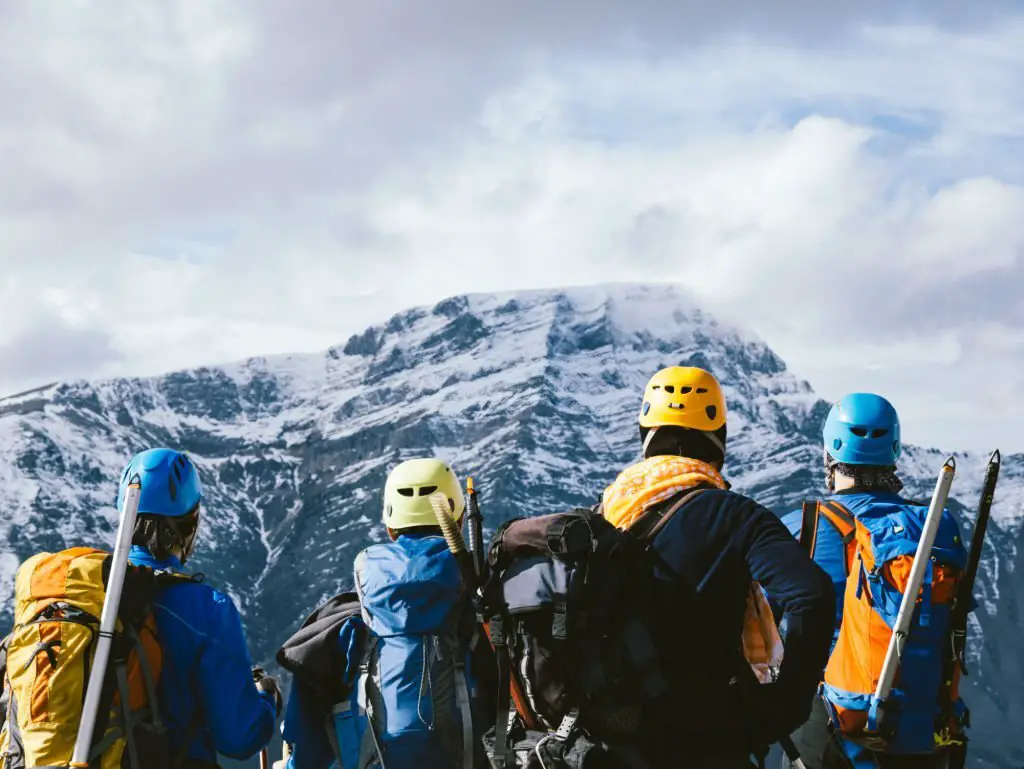
    • If the ice overheard starts to break and fall off, it is important that you move fast. Veer off from the trajectory while trying to cover your head using your arms or backpack. Of course, climbing helmets, trekking poles, and ice axes could also serve a crucial role in protecting your head from potentially lethal injuries. 
    • Planning is an integral part of preventing accidents caused by ice. Assess the time of the year and the existing conditions at the summit. If there’s a risk of the ice melting off due to ice, you might want to cancel the trip or do it earlier. 
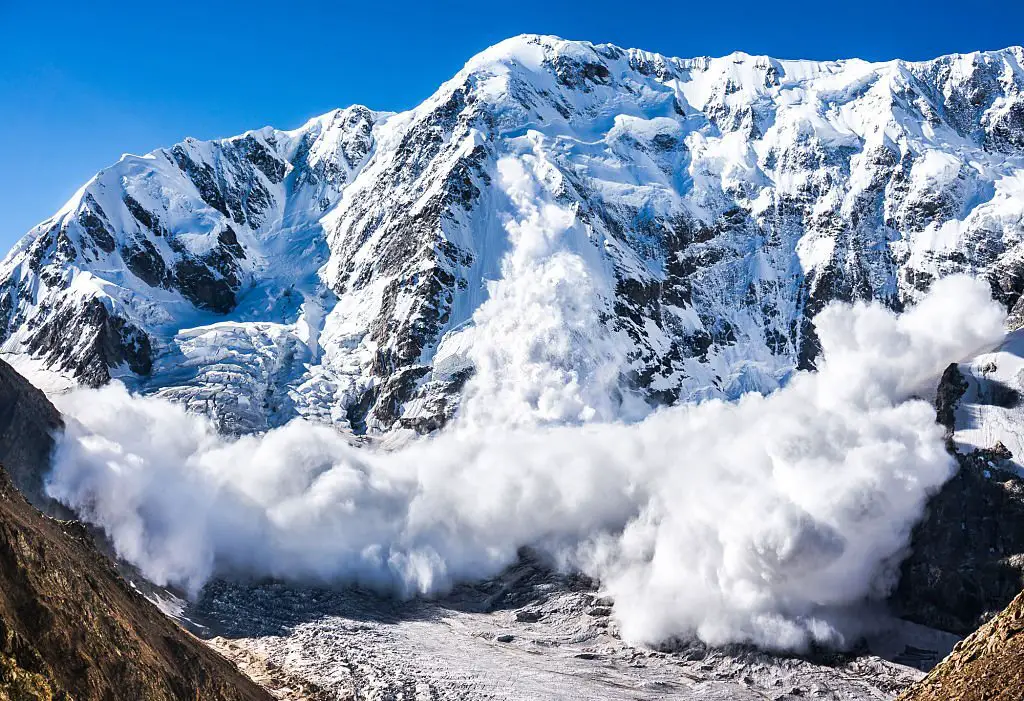
    Snowy Disasters

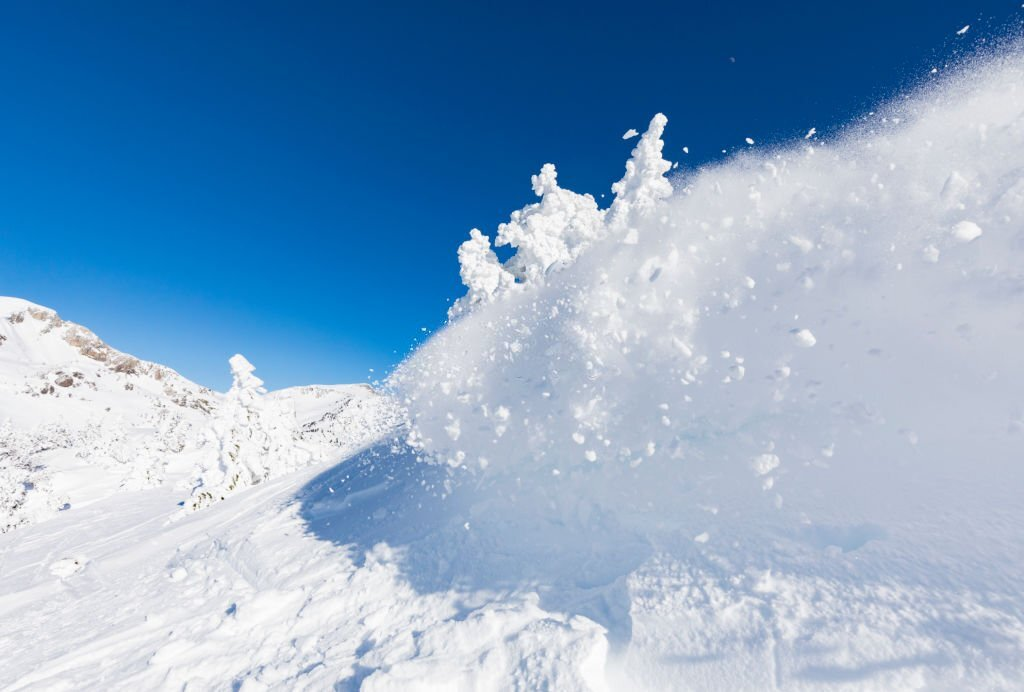
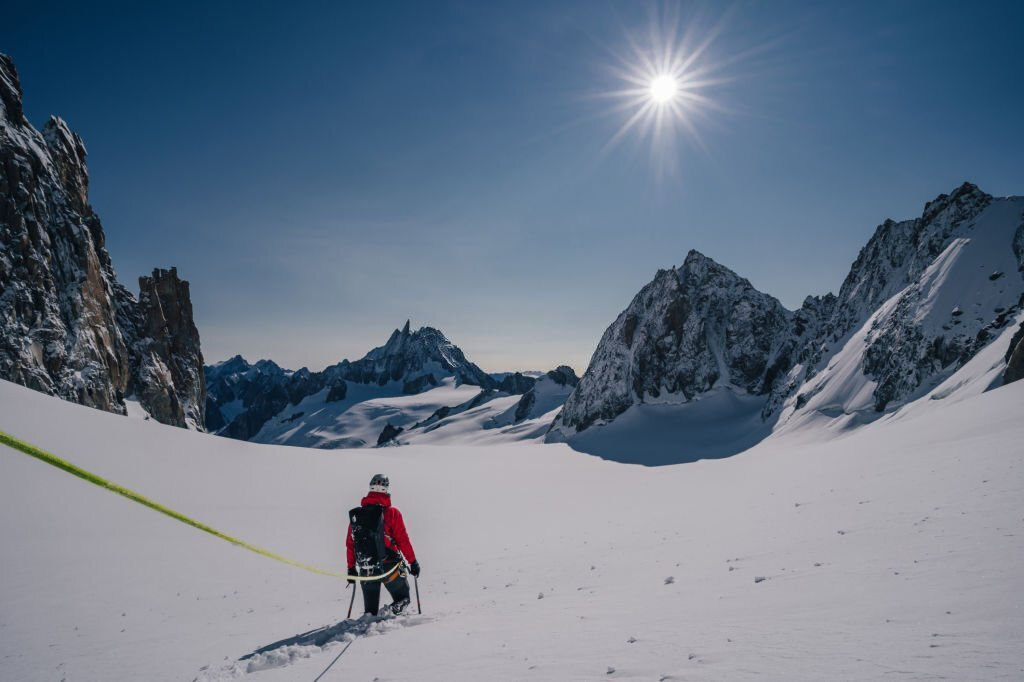
    Avalanches are a thing on mountain peaks. They occur more frequently than you expect them to be. So if you are going to ascend these summits, it is essential that you prepare for the possible instances of an avalanche. 

    It is not easy to identify when an avalanche is coming. And when it comes, it is more difficult to outrun it. So preparedness and situational awareness are quite crucial in ensuring that you won’t be buried in deep snow. 

    How To Avoid / Prevent This Hazard 

    • Avalanches tend to occur suddenly. But there are signs that could let you know that they are going to happen. According to statistics, at least 90 percent of avalanche accidents are caused by snow slides. And these snow slides are usually created by the victims, or in this context, the climbers. 
    • There are different tools that could help you survive these avalanches. For example, locator beacons can help rescuers find your location–if you got buried deep. So it is worth considering bringing one. Survival equipment, such as shovels, can also aid in your survival. 
    • Before things go south, you can always notify yourself about these avalanche warnings. The National Weather Service and the NOAA Weather Radio have regular updates when it comes to avalanche advisories. Keep updated about these reports because they could just save your life!

    Those Huge (And Small) Rocks

    In your ordinary hiking and backpacking trips, these rocks are almost unremarkable. They virtually don’t pose any danger, except if there are snakes hiding under them or a huge boulder suddenly rolls in your direction. Otherwise, these rocks and stones are almost decorative in nature. 

    However, things are different when you are traversing mountain peaks and alpine terrains. Keep in mind that erosion and weathering are almost frequent in those areas. Whenever rock structures start to crumble, they could catapult small to large-size blocks that could seriously hurt you. They call these things either rock slides or rockfall. 

    When the rockfall becomes massive, it is already a landslide. Regardless, these natural occurrences are dangerous. Even the best hiking helmet could not deter them from injuring you. 

    Interestingly, many alpines all over the world have monitoring systems for these rockfalls and landslides. They are a reliable source of reports when it comes to predicting these land-based hazards. However, the presence of these monitoring systems should not make you too overconfident. Mother Nature could still get unpredictable. 

    How To Avoid / Prevent This Hazard:

    • A protective hiking or climbing helmet is one of the best ways to protect yourself from serious injuries should you get overwhelmed by a stream of loose rocks. As a matter of fact, you should wear these helmets all the time since you don’t have any means of determining when a rockfall could occur. 
    • Situational awareness matters here. You need to stay alert and attentive to your surroundings. In this way, you can react quickly when something is off. When you see that the rocks are starting to roll down, you need to move fast so that you can get away from them. While doing this, make sure that you are sticking close to the slope face. 
    • It is essential that you also cover your head using your backpack and arms. The more protection your head has, the more you can protect it from sustaining injuries. 
    • While you are climbing, there’s also the risk of the surface or rock giving out. It could be in your foot, hand, or anchor. This could be dangerous, especially if you have already ascended a considerable height. To prevent this from happening, check the stability of the wall. Do this by tapping the rock. If the sound is almost quiet, it is stable. If it is loud and hollow, then you might consider looking for another spot to climb. 
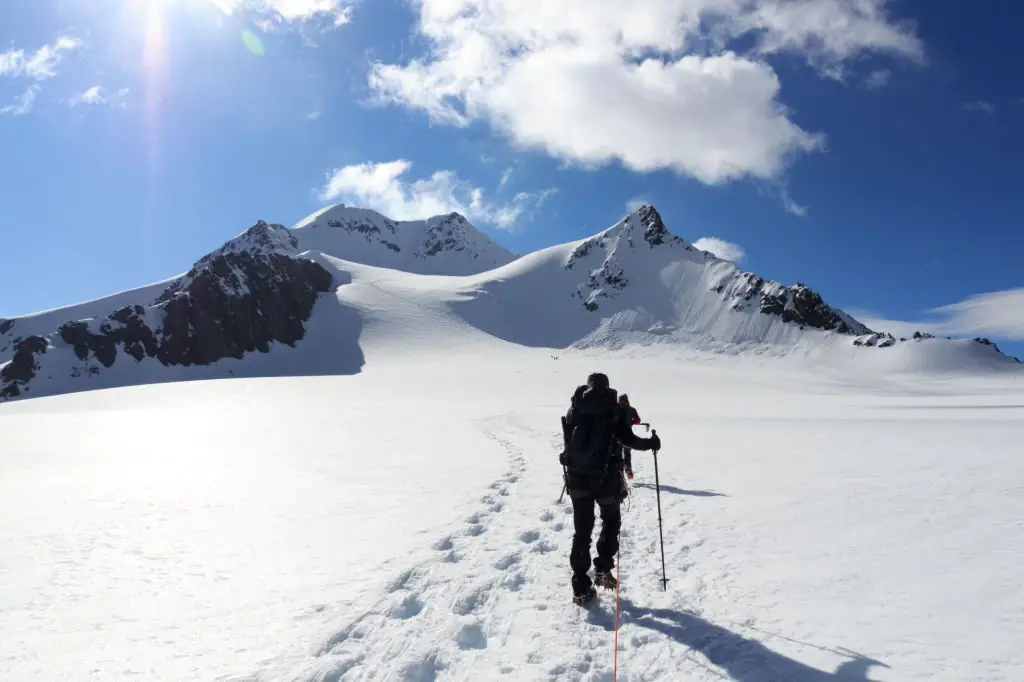
    The Heat Of The Sun

    Just because the alpines are cold doesn’t mean that you don’t have to worry about the heat of the sun. In fact, the higher you go, the more you need to be worried about the harmful UV rays. 

    You see, high altitudes are the regions where the UV rays don’t get reflected that much because of the thin atmosphere. Hence, there’s always a likelihood that it can directly penetrate your skin. And that itself is quite harmful. 

    Furthermore, heat can quickly exhaust you in high altitudes. Combine it with thin air, and you will feel drained quickly. Also, keep in mind that snow reflects sun rays. The reflection intensifies, causing harmful glares to the eyes. That’s the reason why “snow blindness” is a thing for mountaineers and alpine climbers. 

    How To Avoid / Prevent This Hazard:

    • The best way to counteract the harmful heat is by simply wearing the right protective clothing. Have your entire body properly layered, ensuring that your extremities are covered by gloves and shoes. At the same time, it is not a bad idea to wear a pair of glacier glasses or protective goggles to protect your eyes from painful glares. 
    • And while at it, make sure that you apply a good sunblock lotion to your skin so that harmful rays won’t penetrate easily. 
    • Drink water regularly. Take small sips so that you don’t get thirsty while doing high-exertion activities. 

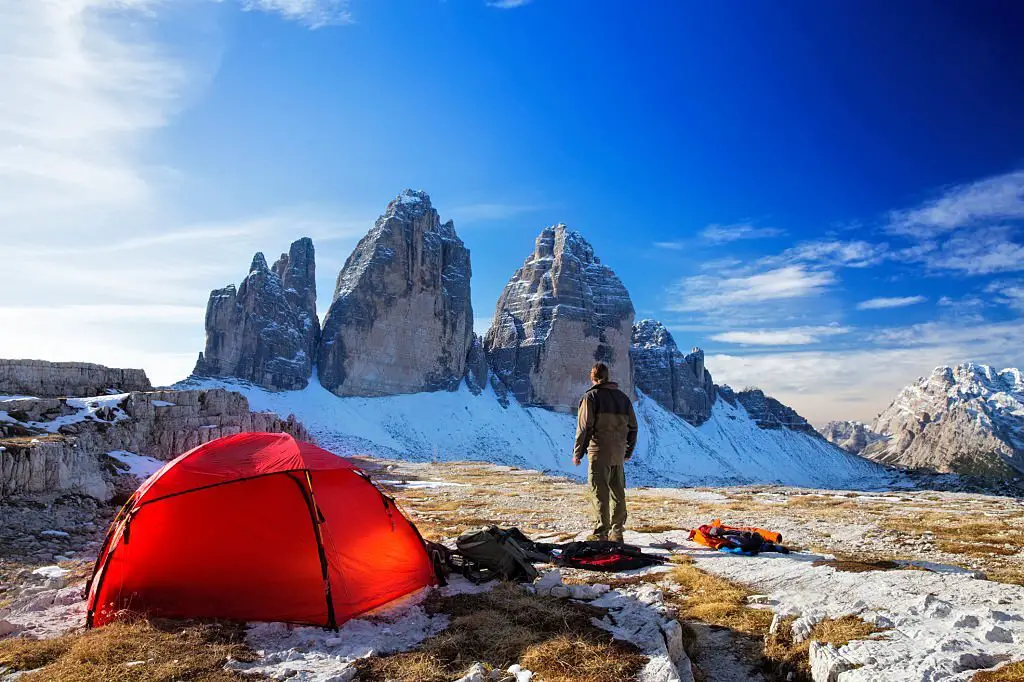
    Unavailability Of Nourishment And Supplies

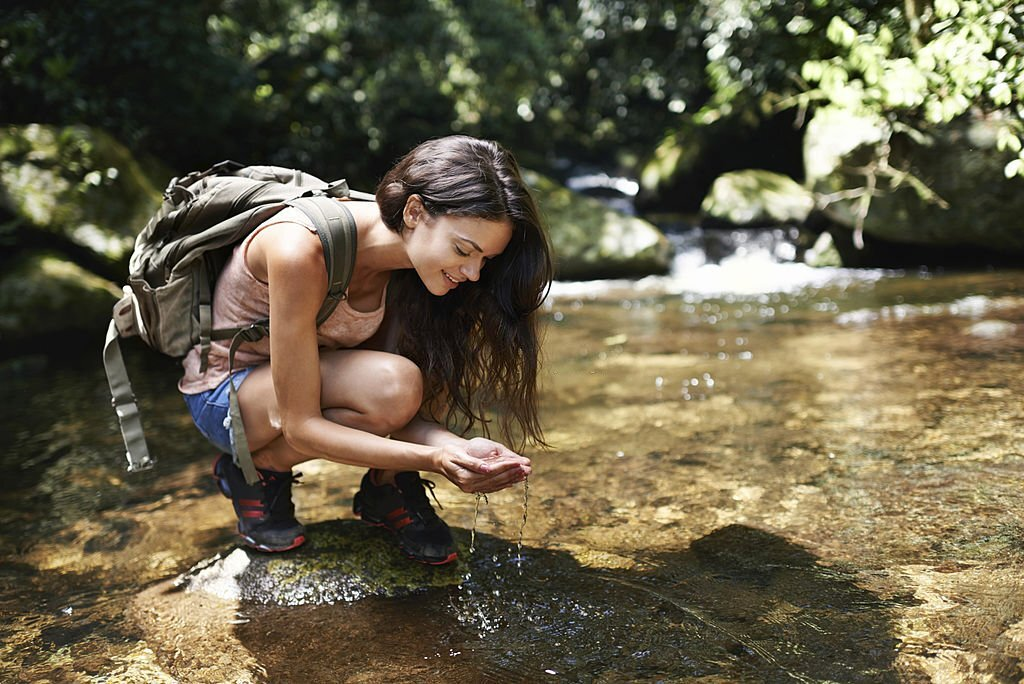
    Climbers are required to have enough supply of food and water. Obviously, these things are essential for one’s survival and nourishment. You can’t just traverse the treacherous alpines by just sheer will alone. Instead, you need your body to be physically fit. It should have enough energy reserves to complete the trip. 

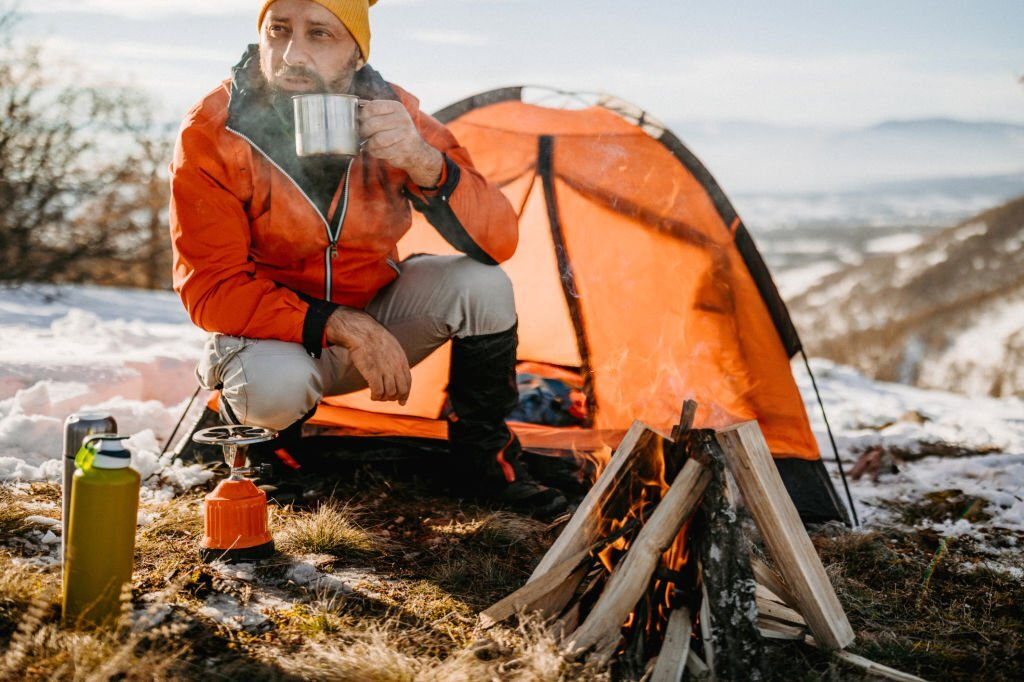
    At the same time, food and water can add to your body’s thermoregulation. For instance, coffee can make you feel extra toasty while dwelling in frigid regions. More calories could also help heat up your body. So if you don’t do any basic meal planning for your expedition, there’s a good chance that starvation, dehydration, and hypothermia could wreck you. 

    But the story doesn’t just end there. You also need to prepare for potential injuries and accidents. Basic first aid skills matter here, alongside the ideal first aid kit

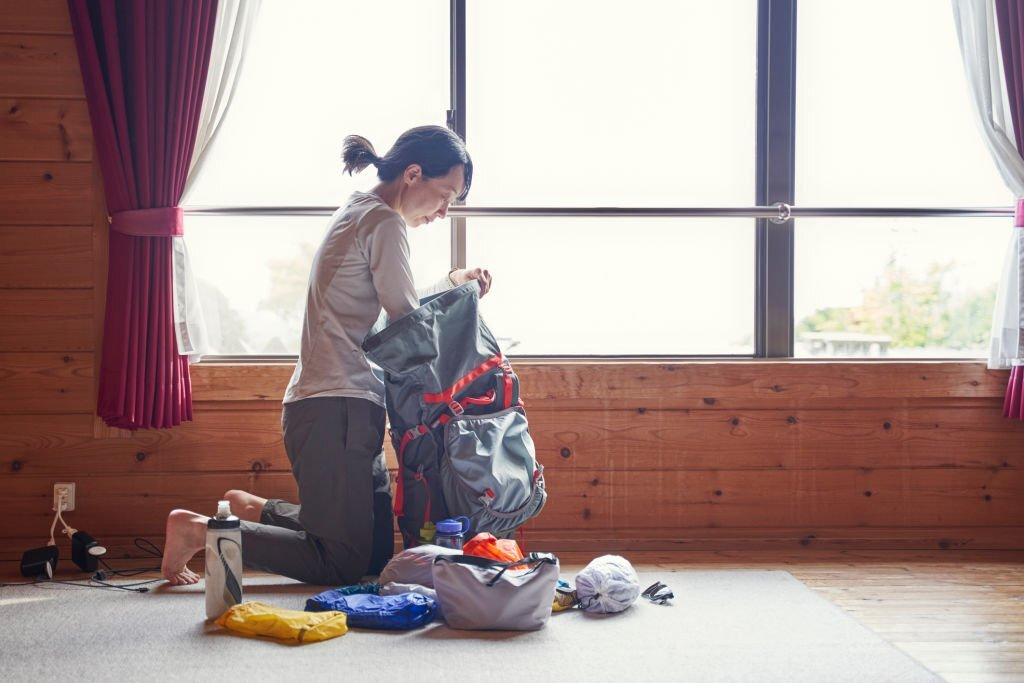
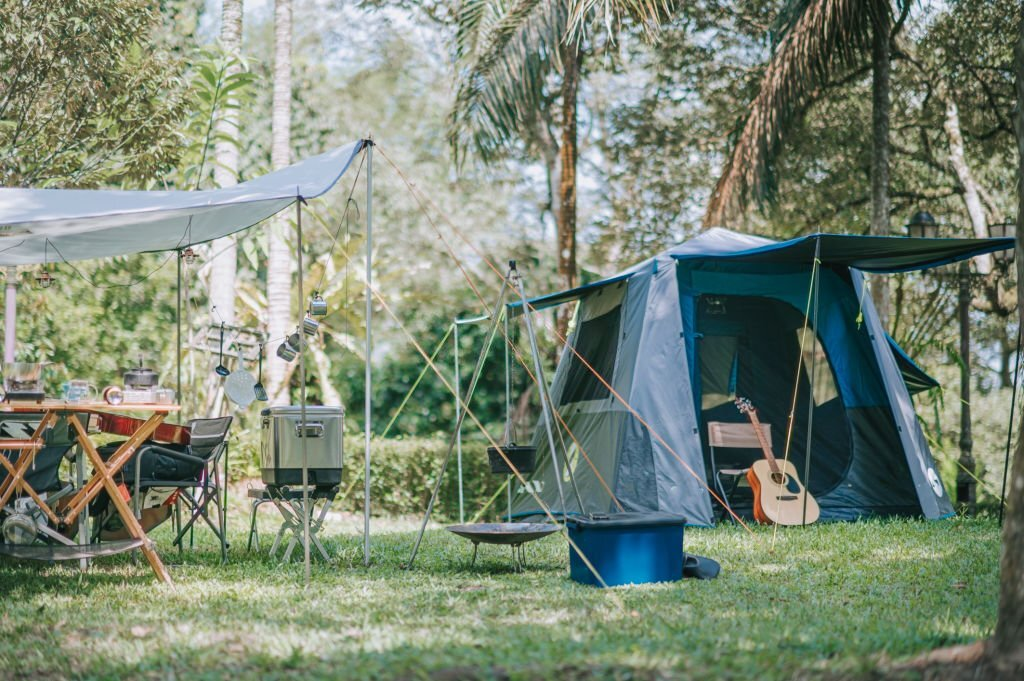
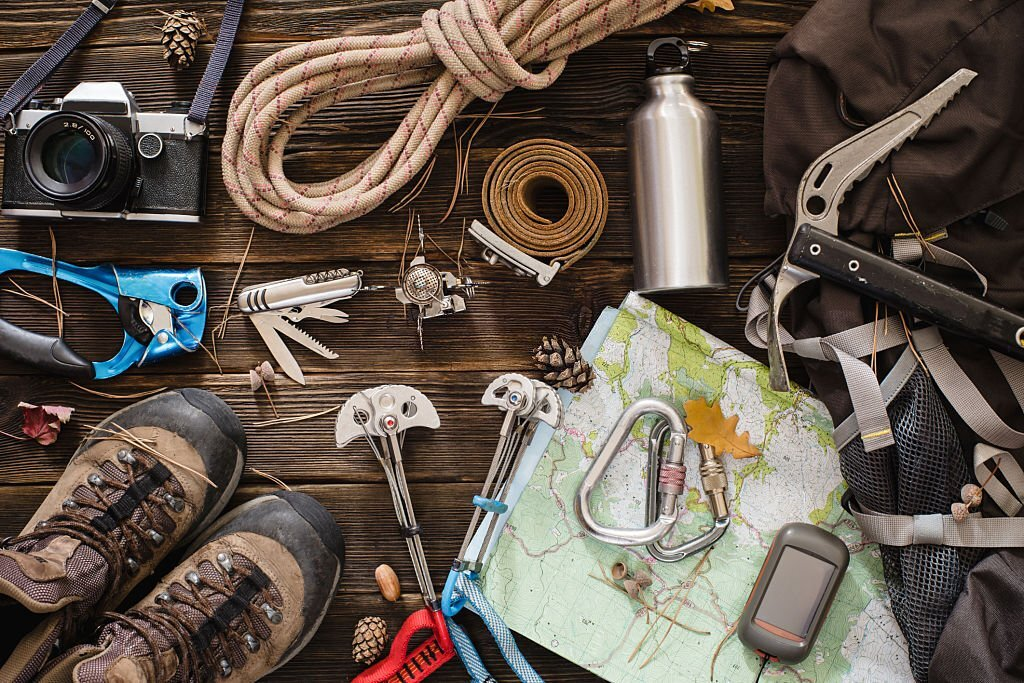
    Being prepared is important. And that means that you need to plan for the things that you need to bring. A successful mountaineering trip could depend on how thorough your preparation is. Go get a checklist and ask yourself what are the things you need to pack up. Are survival knives essential? Do you need a portable stove? How about a fire starter for making fires? Don’t forget a winter tent, too!

    Check our other informative posts:

  • 7 Tips for Successful First-Time Winter Mountaineering 

    These are some expert tips that can help amateur mountaineers and alpine climbers conquer cold conditions. 

    A Quick Overview

    Being able to traverse the steep slopes to reach the summits has always been a dream of many mountain climbers. As a person who has reached the peak of different mountains, I can say that the feeling is indeed exhilarating and satisfying. 

    But then again, we all know that mountaineering isn’t the simplest of all outdoor expeditions. In fact, it is the most technical and rigorous; do this pursuit with half-baked preparation, and you will never be able to reach the top. At the same time, the adventure relies heavily on the weather. It could get easier during the warm months. But during the cold, snowy season, things would be different. 

    Winter mountaineering, or winter climbing, is a challenging activity. It doesn’t just require the right gear but the right kind of preparation, too. Your skills and ability to read the situations are crucial factors that could determine the overall success of your trip. And as you ascend farther from the sea level, you will realize that the more arduous things could become. And it is not just the low temperatures and thick layers of snow. The terrain itself can be a challenge itself. 

    Of course, I am not discouraging you from doing a winter climb. Aside from the satisfaction this adventure provides, it is also a way of preparing yourself to ascend mountains and summits where winter-like conditions exist all year round. Hence, to avoid various mountain climbing hazards during winter, I suggest that you follow the tips I listed below. 


    Tips For First-Time Winter Climbing And Mountaineering

    Winter climbing is an outdoor pursuit that requires heavy investment. And I am not just talking about money here (for the gear and equipment, of course). I also refer to the time required for training and the effort needed to get all the essentials covered before the big day. 

    Tip 1: Pack The Right Clothing

    Winter mountaineering is all about being protected from the harsh elements. This means that from head to toe, your body should be covered with clothing pieces that have insulation and weather resistance.

    As a reminder, go with those winter climbing gear that has the right fit. If the fit is poor, you will never find comfort in those clothing pieces. Here is the list of essential winter mountaineering clothing. 

    • Hardshell jackets
    • Windbreakers
    • Hiking pants 
    • Winter jackets
    • Hardshell or softshell pants
    • Insulated wool socks
    • Baselayer bottoms (synthetic or wool)
    • Baselayer tops (long sleeve and hooded; synthetic or wool)
    • Down parka
    • Sunglasses (with category 4 or 3 lenses)
    • Beanies or sunhat
    • Balaclava
    • Gloves

    Depending on the condition you are about to engage in, you might need to sacrifice your dexterity for comfort and protection. It’s a necessary trade-off, but some outdoor clothing manufacturers were able to resolve this issue. For instance, some pants and jackets have articulated construction that enables you to flex your arms and legs conveniently.

    Also, don’t forget about the breathability and waterproofing of these items. As much as possible, go for those clothing pieces that strike the perfect balance between these two factors. Brands like Patagonia, REI, Marmot, Arc’teryx, and Mountain Hardwear are among those who can provide you with high-quality winter climbing clothing. 

    Tip 2: Pack The Right Winter Climbing Gear

    Aside from the clothing and layers you need to wear, it is important that you have the right winter climbing gear. These are the items and tools that you need to survive the potentially harsh conditions. And if things go south, some of these pieces of equipment could probably save your life. 

    As you can see, there are a lot of things that you need to bring for a winter climb. And this begs the question: isn’t winter mountaineering expensive? 

    Well, the answer to that question is yes. As I’ve mentioned, this trip requires the utmost preparation. Among those things that you need to prepare are your clothing and gear. If you are a beginner, you will need to invest gradually in these items. Buy one stuff at a time so that the price will not overwhelm you. 

    Alternatively, you can also borrow items from other mountaineers. Renting is also an option. But if you have the means, I highly suggest that you buy your own climbing equipment. In this way, you can ensure that they are always in the best condition. 

    Tip 3: Only Bring The Essential Protective Gear

    Not all the gear that I listed above will be needed in your next winter climbing adventure. Some of those are situational items, so it is recommended that you assess the terrain and weather to determine if a particular tool is needed. 

    For example, those spring-loaded cams are great for summit climbs during summer. However, they will not do any good in icy terrains or in conditions where the temperatures can drop below freezing point. Here, you would need tri-cams and stoppers since they can function regardless of how icy your path is. Passive protection is often more needed in a winter climb. But if the route has some rocky obstacles, just bring spare cams. 

    Most of these protective gear are needed when the terrain has risky portions that you need to traverse. If you don’t think that you can handle these tensions yet, I suggest that you go with the easy routes first. 

    Tip 4: Be Knowledgeable About Avalanches (Seriously)

    When it comes to winter climbing, the biggest danger that you could probably encounter are avalanches. Now, this is not the point that you have to be scared or back out. Instead, you simply need to be aware of the tell-tale signs that a big white splash could be coming your way. 

    As much as we want to tell you a thing or two about avalanches, the best way to learn about them is by enrolling in an avalanche crash course. Numerous platforms offer this kind of course, such as Avalanche.org.

    At the same time, different avalanche-prone mountain ranges have data centers that provide forecasts as to whether or not there’s a risk of an avalanche. An example would be the Alaska Avalanche Information Center and the Colorado Avalanche Information Center. For a comprehensive list of these avalanche information centers in the United States, just proceed to this link

    Essentially, an avalanche course will teach you how to climb during winter without triggering an avalanche. It will also teach you about the dangers of cornices, which is a common hazard while mountaineering in the snowy seasons. 

    Wind and snow build cornices along mountain ridgelines. These are heavy and unstable constructions that can cause avalanches. Snow and ice on the cornice can break off the ridge and hurl a lot of snow and ice down the mountain. This debris can cause a violent avalanche that endangers skiers, hikers, and anybody nearby.

    Tip 5: Choose An Easy Route (For Beginners)

    If you are still new to winter climbing or mountaineering, then it is easy to get overwhelmed by the number of routes you can take. But believe it or not, only a few of them are beginner-friendly. As a starter, what you want is an expedition that works well with your skill level. 

    There’s nothing to be ashamed of if you want to start on the easy routes. I mean, the best climbers out there started on the easiest paths. It is not the other way around. 

    I suggest that you choose non-technical terrains. These are routes that offer the same winter climate but don’t pose too many risk factors (i.e., avalanches, rockfalls, and scary drops). Furthermore, go for those routes that have established trails already. In this way, the chances of getting lost will be minimal. 

    Of course, it would also be best if the chosen route is near your home. The closer it is to your abode, the less distance you need to travel. And that could make things convenient and less stressful on your path. 

    Go for those mountains that are properly managed. As much as possible, don’t venture into those unchartered territories. Ask local guides, rangers, and land administrators about the details of the area so that you can have a good idea of what to expect during the trip. 

    Tip 6: Identify Your Sleeping Solutions

    If you are just training for winter climbing, there’s no real need to spend several nights in the mountains. A day climb could be enough, especially for first-timers. 

    However, you should never exclude the fact that sleeping systems are integral for every winter climb. The higher the peak is, the more nights you are going to spend on the ascent. This means that you have to pack the right sleeping gear here. 

    Since we are talking about winter climbs, what you need are four-season tents and sleeping amenities. You should never bring three-season tents since they don’t have the ability to handle harsh and unexpected elements. They couldn’t bear heavy snow, strong winds, and even low temperatures. 

    Fortunately, there are single-wall, four-season tents available in the market. They are lightweight but have the qualities that are essential for a winter expedition. If you are camping on the base, double-wall tents are a viable option since they are good for dealing with condensation

    Insulated sleeping bags and sleeping pads are essential, too. They are non-negotiable amenities since you don’t want to lose good hours of sleep because of extreme cold. 

    Tip 7: Look For Someone Who Can Teach You The Basics

    It is not easy to look for a guide or teacher for winter climbing or mountaineering. Believe me or not, those people are rare these days. But as much as possible, you should have someone that could help you understand the unwritten rules of this adventure–as well as the things that could only be learned through first-hand experience. 

    While it is true that I have listed the basics here, it is integral that someone can teach you the nitty-gritty aspect of the climb. They can guide you on the proper way of navigating through thick piles of snow, acclimatizing into high-altitude conditions, and even the process of selecting the right snacks for the trip. 

    So how do you even find a winter mountaineering guru? Well, this is a tricky question. But based on my experience, the first place to look would be your local mountaineering groups. With the advent of social media, you can search for these groups easily. Plus, it would really be great if someone could refer you to someone who is already an expert.

    Ideally, look for a teacher that is not only willing to teach you but also climb with you. After all, practical experiences are the best form of mentoring. 

    Next, you should affiliate yourself with mountaineering or climbing groups. In the United States, there’s such a thing as The American Alpine Club. It is a collective of enthusiasts and serious climbers. You might want to link yourself to these groups so that you can find some like-minded individuals who will be willing to mentor you. 

    Related posts:

  • 3 Money-Saver Tips For Hiking

    Hiking is fun. But it costs money. And in some cases, it could be an unbelievable sum of money. Read on to learn more about how you can hike on a budget. 

    A Quick Overview

    I have been hiking for over two decades already. That’s quite a long time already, even in the metrics of experienced hikers. Modesty aside, I have hiked different trails inside and outside the United States. Of course, these adventures were truly worthwhile. But at the same time, I could say that some of those trips were truly costly. 

    Of course, this doesn’t mean that you shouldn’t hike at all. Just because there are attached costs to this particular adventure doesn’t automatically translate that you have to cancel it. Hiking should be pursued, especially if you are still able to do it. What you need to do right now is to apply frugal-friendly ways to scale down the expenses related to the trip. 

    Here, I am going to discuss some of the tested-and-proven tips on how to save money while experiencing the best that hiking can give you. Read on, as this will be useful, especially during these tough times!


    Is Hiking An Expensive Hobby? 

    Before I go to the nitty gritty details of this post, allow me to break down one important question that many people ask.

    Is hiking expensive? 

    Well, the short answer to this question is yes. But allow me to explain this answer in detail. 

    Hiking can get expensive over time, especially if you are going to do it frequently and if you are heading to more technical and distant trails. The more rugged your environment becomes, the better equipment you need to invest. For example, hiking on cold, snowy terrains would require you to wear winter jackets or windbreakers (or if it is windy). 

    At the same time, you also have to pick properly designed hiking pants and hiking boots since they can let you traverse trails more comfortably. Of course, this also calls for the need for the best hiking or camping tents if you are planning to stay on the trail for several nights. 

    There are a lot of other gear that you should consider acquiring, including backpacks and emergency kits. The bottom line is hiking will need you to invest in different hiking-appropriate items. 

    Now, you have the option to rent these things or borrow some of the equipment from your trusted friend. These are good routes to take, and many hikers (including me) do them from time to time, especially if the circumstances require me to do so. However, there’s also a limit to the frequency of outsourcing your equipment from other people. Eventually, you will realize that having your own gear would save you much time, money, and face. 

    But hiking gear is not the only thing that makes hiking expensive. You will also have to prepare for the logistical costs, especially if you are hiking interstate or overseas. At the same time, you will also have to deal with potential fees and reservations. 

    Again, these accumulative costs are just normal. They might get expensive over time, but they shouldn’t overwhelm you. There are still some things that you can do to “circumvent” the expenses, effectively reducing them in the process. 


    Hiking On A Budget

    Here are some of the practical tips so that you can hike on a budget: 

    Research The Hiking Destination First

    One of the most overlooked means of saving money while hiking is through prior research. Essentially, you need to research the area you are planning to hike before you embark on the trip. 

    By being able to know the weather and terrain, you can save money from buying optional gear. Preferably, you should go on beginner-friendly hiking trails on sunny days. In these conditions, you don’t need to purchase expensive waterproof jackets, rain gear, and traction-oriented boots. 

    The more technical the hike is, the more money you are going to spend on your gear and supplies. Now, there’s no stopping you if you want to experience these kinds of hikes. However, if you are planning to save money, I strongly suggest that you go easy on your trip. 

    There are various sources of information when it comes to a particular hiking trail. Government websites are great, especially if you intend to tread on government-managed lands and forests. You can also seek relevant information from local guides and forums. They will be able to tell you about shortcuts, inexpensive parking areas or camping spots, and low-cost hiking amenities. 

    You may also want to research regulatory fees and permits. Who knows? You might get caught off guard by them. It is better that you prepare for them; otherwise, you might pay penalties that could be more expensive than the fees themselves. 

    Only Pack The Necessary Hiking Gear And Supplies

    It’s a common syndrome for hikers, especially first-timers, to overpack. Now, I’ve particularly stated that over-preparing is far better than being unprepared for any outdoor trip. 

    But here’s the catch: 

    When you bring more items, these things don’t just add to your luggage. If it is only just the case, then that would be acceptable. However, it is not. For frugal hikers, they should avoid packing lots of stuff because that would also mean an additional weight in their wallets. 

    Hiking checklists aren’t always tailored for one-size-fits-all solutions. Just like I’ve mentioned, you don’t actually need a thick hardshell jacket on a summer hiker. Moreover, a hike doesn’t need any form of tent if it is just a day hike. There’s no point in bringing a shelter if you are not going to sleep within the trail. 

    Does a portable stove make sense if you are not planning to cook while hiking? 

    Hence, learning to identify your needs could actually help you minimize the expenses of your hiking trip. The appropriate hiking clothing and gear will cover everything that you need to make it stress-free. 

    Shop For Affordable Hiking Gear

    Once you have identified your hiking essentials, it is time that you purchase them. 

    Now, I am not going to recommend you automatically jump to expensive brands such as Arc’teryx, REI, Patagonia, and other big shots in the outdoor gear market. That doesn’t just make sense, especially if you are just starting out or if you are just going to hike an easy trail. 

    Is buying a brand new a bad idea? Not necessarily. After all, there are affordable, entry-level brands out there that offer decent hiking gear. They will let you purchase suitable clothing and equipment for hiking. 

    But of course, you also have to be careful when purchasing used hiking gear. It’s your duty to assess the quality of these items to ensure that you can use them without encountering any problems while you are out already. Thrift stores are common sources of these used outdoor equipment, so it would be better if you could check the products personally. 

    Do you like to shop online? Then the Facebook Marketplace is a good start to buy these used gear. You can even try negotiating to see if you can still steal better deals. 

    Of course, don’t forget to take advantage of those holiday seasons. After all, sales are always around these days. Whether it is Christmas, Fourth of July, or even Black Friday, there are a lot of deals that you can get on these special occasions. So if you want to save money on your hiking gear, you better prepare for these shopping spree seasons!


    Conclusion

    By following these three tips, you will be able to save big from each of your hiking trips. Things are getting expensive these days because of inflation and all of those economic shenanigans, so it would be better to apply all the recommendations that I listed in this post. They worked for me, so I am quite confident that they could work for you, as well!

    Related blogs:

  • How To Use A Hiking Compass Like A Pro

    Discover the essential skills necessary to navigate the wilderness with confidence. This comprehensive guide will teach you how to use a hiking compass effectively so that you never become lost on outdoor excursions. Read further and become a navigation master!

    A Quick Overview

    A hiking compass can be an indispensable asset when exploring the great outdoors, enabling you to navigate unfamiliar terrain safely and remain on track. For instance, in climbing expeditions, these compasses can help adventurists to find their camps and prevent themselves from experiencing unwanted hazards. No matter if you are an experienced or novice hiker, understanding and using a compass are integral to safe wilderness exploration.

    A compass is among the essential tools for hiking, or any outdoor adventure that comes to mind. They have the same value as survival knives, flashlights, and first-aid kits, especially during SHTF situations. Being able to utilize these navigational compasses properly can make a difference in your trip.

    In this comprehensive guide we will delve into all the complexities associated with using one – giving you all of the skills and knowledge needed for confident navigation – so grab your compass and let’s embark on our journey together!


    Understanding the Basics: Components of a Hiking Compass

    Before diving into the practical aspects of using a hiking compass, it’s essential to become acquainted with its key components. A typical hiking compass consists of several parts. A common example includes these:

    • Baseplate: The rectangular-shaped baseplate serves as the foundation for compass use, often featuring rulers or measurement scales to aid map navigation.
    • Rotating Bezel: Also referred to as an azimuth dial, the rotating bezel (also referred to as azimuth) helps determine which direction you need to travel by using degrees ranging from 0-360 on its markings. This helps identify where exactly to go.
    • Magnetic Needle: The magnetic needle is an essential part of a compass, aligning itself with Earth’s magnetic field to point toward magnetic north.
    • Orienting Arrow: To ensure accurate navigation, the orienting arrow located beneath the magnetic needle aids you in aligning the compass with a map for accurate navigation.
    • Direction-of-Travel Arrow: This arrow, typically found on the baseplate, indicates your intended travel direction.

    Now that we have an understanding of all its components, let’s move onto their application in practical use for hiking compass navigation.


    How To Use A Hiking Compass

    Step 1: Orienting Your Compass

    To properly use a hiking compass, the initial step should be orienting it correctly. Follow these steps.

    1. Lay out your map on a flat surface and position the compass so its orienting arrow aligns with its north-south grid lines.
    1. Rotate the bezel until the magnetic needle lines up with the orienting arrow.
    1. Be mindful of the direction-of-travel arrow. Make sure that it points you toward your intended destination.

    By correctly aligning your compass, you can establish a reliable source of navigational accuracy.

    Step 2: Establish A Bearing

    To establish your bearing, follow these steps:

    1. Keep the compass level and stable by holding it firmly in your hand, taking care that its orientation remains even and vertical.
    1. Rotate your body until the magnetic needle aligns with the orienting arrow, with its red end pointing toward magnetic north on your bezel.
    1. As you observe the bezel, make note of any degree markings which correspond with the direction-of-travel arrow. This degree represents your bearing, indicating in which direction to travel.

    Step 3: Follow Or Track A Bearing

    Once you have identified your bearing, the next step should be following it and remaining on course. Here is how:

    1. Hold the compass flat in front of you, making sure that its direction-of-travel arrow points away from your body.
    1. Rotate your body until the magnetic needle lands directly under the orienting arrow, while keeping its red end aligned with magnetic north marking.
    2. Locate an object or landmark in the distance which coincides with your bearing, and head in its direction.
    1. As you travel along, regularly review and adjust your compass to maintain your bearing. If necessary, adjust accordingly in order to maintain accuracy of direction.

    Step 4: Adjusting For Declination

    Declination refers to the angle between true north and magnetic north; its value will depend on where your geographical location lies. To ensure accurate navigation, declination must be properly adjusted – follow these steps:

    1. Determine your location’s declination value using topographic maps or reliable sources.
    1. Locate the declination adjustment scale on your compass – typically it can be found near its bezel.
    1. Rotate the bezel until its declination value lines up with its respective orientation arrow.
    1. By adjusting for declination, you can better align your compass with true north and achieve more accurate navigation results.

    Proper Compass Maintenance And Storage

    Aside from learning how to use a hiking compass, it is also essential that you learn proper maintenance for this tool. It is key to the health and longevity of any compass, which, in turn, could prevent you from being lost in the woods. By following these tips, you can keep yours in good shape so it provides accurate readings while adventuring outdoors.

    Tip 1: Keep Your Compass Clean and Dry

    Regular cleaning of a compass is crucial to its effective functioning, as dirt, dust, and debris build-up may reduce performance significantly. To clean your compass:

    • Utilize a soft, lint-free cloth to gently wipe down the surface of the compass to remove visible dust or dirt particles. For tough stains or grime build-up, dampen the cloth slightly with mild soap or solution specifically formulated for compasses before wiping.
    • Carefully wipe down the compass, making sure no cleaning solution enters its housing or harms any sensitive components. After cleaning, use a dry cloth to wipe away moisture from any remaining spots on the device before storing.

    Regular cleaning not only keeps your compass looking its best but also ensures its functionality is uncompromised.

    Tip 2: Proper Compass Storage

    Proper storage of your compass can protect it from being damaged and ensure its accuracy; for optimal compass maintenance when not in use, follow these guidelines for optimal storage:

    • Store your compass in a dry and secure place, preferably inside a protective pouch to guard against scratches or impacts. 
    • Also avoid extreme temperatures – both hot and cold – as this could impact its accuracy and change its fluid levels, leading to possible compromise of its accuracy.
    • Avoid keeping your compass near moisture to reduce rust or corrosion and ensure its best performance. 
    • Store it away from damp environments or direct contact with water, while direct sunlight can damage materials and affect performance negatively – to keep this at bay, store in an area with shade so as to limit exposure to UV rays.

    By following these storage practices, you can ensure your compass remains in excellent condition and ready for its next journey.

    Tip 3: Check Your Compass Regularly

    Conduct a regular inspection of your compass for damage and calibrate it regularly to maintain accuracy. Here’s what to do:

    • Conduct a visual inspection of your compass for signs of damage, such as cracks, scratches or bent parts. If any issues arise, professional repair or replacement should be sought to ensure reliable performance of your instrument.
    • Maintain a regular calibration process to account for magnetic deviations. You can do this by comparing your compass with one known reference point or another reliable compass in an area without magnetic interference.
    • Make sure to follow manufacturer’s instructions regarding calibration; different compasses may have specific calibration procedures.

    By keeping your compass in good repair and calibrating it as needed, you can rely on its accuracy during outdoor navigation.

    Tip 4: Avoid Magnetic Interference

    Magnetic interference can somehow mess up with the accuracy of compass readings. To minimize this effect, do the following:

    • Keep your compass away from magnetic objects like smartphones, electronic devices and metal objects when using it – these objects may produce magnetic fields which interfere with its needle’s alignment and should be treated as potential sources of interference.
    • When taking bearings or referencing a compass, make sure it is away from your body to reduce magnetic interference from personal magnetic fields. Doing this ensures accurate readings and reliable navigation guidance from your compass.

    Tip 5: Learn from Experience and Practice

    Like any skill, mastering navigation requires practice in both familiar and unfamiliar environments. Don’t pass up every opportunity to hone your navigational abilities! These additional tips for developing and sharpening compass skills:

    • Explore various terrains and weather conditions when practicing compass reading exercises to develop your adaptability. Speak to experienced navigators or enroll in navigation courses to gain advanced techniques and gain invaluable insights.
    • Reflect upon and learn from your experiences, reflecting upon any mistakes or challenges encountered as opportunities to enhance and grow. Each navigation opportunity offers the chance for growth and improvement; by learning from experience and practicing regularly with your compass you’ll build up confidence while honing navigational skills.

    Frequently Asked Questions About Compasses

    Q: How can I locate the North using a compass? 

    A: To locate North with a Compass, hold it level and steady while rotating your body so the needle lines up with either the orienting arrow or north marking on the bezel of the compass bezel – this direction corresponds to North.

    Q: Can a compass work without a map? 

    A: Absolutely, although maps can certainly aid navigation, a compass alone can still provide vital assistance in terms of determining direction, taking bearings, and following specific courses.

    Q: Are compasses accurate?

    A: Compasses can generally be accurate when used properly, however their accuracy can be affected by magnetic interference from nearby metal objects or electrical devices causing magnetic flux leakage, thus it’s essential that regular calibrations of your compass take place to maintain maximum precision.

    Q: Can a compass help me navigate in any type of terrain?

    A: Absolutely. Compasses are reliable ways of finding direction, taking bearings and finding your destination regardless of terrain type.

    Q: When should I calibrate my compass? 

    A: Calibration frequency depends on a variety of factors, including the type and environment in which you use your compass. As a general guideline, however, recalibrate it periodically if any readings seem inconsistent, changes, or appear unusual based on geographic changes; additionally recalibrate when moving geographic locations as magnetic declination varies based on location. Always refer to manufacturer instructions for assistance when calibrating a compass.


    How Can I Train To Use A Compass Correctly?

    In all honesty, it’s difficult to learn how to use a compact without understanding its fundamentals. Utilizing a compass effectively doesn’t require extensive training; however, some practice and understanding is helpful for ensuring its proper usage. 

    While compasses are user-friendly tools, having the necessary skills can greatly increase navigation skills. Here are a few points worth keeping in mind regarding training for compass usage:

    Understand Compass Components

    To properly use a compass, it is essential that you familiarize yourself with its components and how they function together. Understanding its baseplate, rotating bezel, magnetic needle and direction-of-travel arrow will establish a solid basis for using it effectively – you can learn this information via instructional resources, tutorials or experienced navigators.

    Basic Compass Skills

    Acquiring basic compass skills through training or practice sessions is an invaluable way to become adept with using it accurately. Training may include hands-on activities that simulate real world navigation scenarios, like taking bearings, following courses and aligning it with maps – this practice helps build confidence while reinforcing concepts behind compass navigation.

    Master Cardinal Directions and Bearings

    Training can deepen your understanding of cardinal directions and how to interpret bearings on a compass. Learning how to align it with true north or magnetic north and take accurate bearings accurately will allow for efficient navigation of any location. Training exercises provide invaluable practice that will develop these essential skills allowing for confident navigation of any journey.

    Advanced Navigation Techniques

    To develop more complex compass navigation skills, advanced training may include more complex techniques. 

    This may include topics such as using topographic maps in combination with compass navigation; understanding magnetic declination; triangulation; or using it under challenging terrain or adverse weather conditions. These advanced skills will equip you to tackle more demanding navigation scenarios successfully.

    Practical Application and Experience

    While training provides a solid foundation, practical application and experience are equally crucial to mastering compass usage. 

    Regular practice in different environments and terrains will enhance your ability to adapt to various navigation challenges, while engaging in real-world navigation experiences like hiking, orienteering events or wilderness exploration gives you an opportunity to apply your compass skills directly while learning through firsthand experiences.

    While compass navigation can be done without formal training, investing the time in learning and practicing compass skills will greatly enhance your navigational abilities. 

    From self-study to attending navigation workshops or seeking guidance from experienced navigators, training provides invaluable insights that will bolster confidence and competence when using a compass effectively.

    Remember, with practice comes proficiency; harnessing all its potential becomes second nature over time!


    Conclusion

    Congratulations! You now possess all of the essential skills required to use a hiking compass effectively! Practice makes perfect, so seize every opportunity to strengthen your navigational abilities and feel secure exploring nature knowing you have the ability to navigate back home should things go astray! So grab your compass, embark on new adventures, and let nature lead the way!

    Related posts:

  • How To Use A Topographic Map

    Learning how to use topographic maps is not easy. But trust me; it can help you navigate your way better while outdoors. Read on to get started. 

    A Quick Overview

    Topographic maps are invaluable tools when it comes to exploring and navigating the great outdoors, offering invaluable information about terrain, elevation, and natural features of an area. 

    Knowing how to read topographic maps is vital, whether it’s your hiking trip, mountaineering expedition, or simply wanting a better understanding of your surrounding land; in this comprehensive guide, we’ll walk through every step, from understanding contour lines to deciphering symbols and accessing more details.


    Learning Topographic Maps

    What Is a Topographic Map?

    A topographic map provides an accurate representation of the Earth’s surface, depicting both natural and man-made features. Contour lines show changes in elevation for easy visual reference, providing crucial data for hikers, campers, geologists, and outdoor enthusiasts. 

    Topographic maps are typically created by surveying land by various means, including aerial surveys or satellite imagery, to capture elevation data.

    Why Use A Topographic Anyway? 

    Topographic maps serve several important functions, including:

    • Navigation: Topographic maps facilitate accurate navigation by clearly outlining terrain features like mountains, valleys, and rivers. They aid hikers and adventurers by helping them plan routes around hazards as well as estimate travel times more accurately.
    • Terrain Analysis: Geologists and environmental scientists utilize topographic maps to study landforms, identify geological formations, and evaluate changes in elevation. This information provides crucial insight into natural processes and land management.
    • Outdoor Recreation: From hiking and camping, fishing, and hunting – topographic maps provide outdoor enthusiasts with essential information regarding recreational areas, trails, and access points.

    Importance Of Topographic Maps On Hiking And Outdoor Adventures

    Reading topographic maps is essential when camping and hiking, providing invaluable information that can enhance your experience outdoors while increasing safety. Let’s examine why understanding and interpreting these maps are an integral component of camping and hiking adventures.

    Navigation and Route Planning

    Topographic maps are invaluable tools for accurate wilderness navigation. By studying them closely, they depict in great detail information about elevation changes, valleys, ridges, and water bodies. 

    These maps provide essential data that allows for precise route planning by reading these maps accurately and making informed decisions about which paths are the best choices. In turn, it prevents people from getting lost, ensuring that they can find suitable trails accurately and estimate distances and travel times.

    Understanding the Terrain

    Topographic maps provide valuable insights into the characteristics of the landscape. Through studying contour lines, you can visualize the shape and steepness of the land; this information allows you to anticipate challenging sections like steep ascents or descents and prepare accordingly. 

    A better understanding of terrain enables campers to select suitable camping spots, locate water sources and navigate safely through various natural features.

    Safety and Hazard Identification

    Topographic maps reveal potential hazards that are not evident on the ground, such as cliffs, gorges, unstable slopes and other dangerous areas that should be avoided. By recognizing these hazards early enough, alternative routes can be planned out, your safety ensured and decisions made that mitigate risks during camping and hiking adventures.

    Water Sources and Campsite Selection

    Topographic maps often feature details about rivers, streams, lakes and other sources of clean drinking and cooking water – providing reliable access during camping or hiking trips. 

    Furthermore, topographic maps offer insights into suitable campsites which are located nearby water sources or boast scenic views – information which allows campers to plan overnight stays to optimize their experience and make the most of camping adventures.

    Off-Trail Exploration

    Topographic maps can be an invaluable asset for those who enjoy venturing off the beaten path, as they enable users to identify unmarked trails, hidden valleys and lesser explored areas. Armed with this knowledge gained by reading topographic maps, off-trail explorers can confidently explore off-trail areas; discover natural treasures tucked away behind mountain passes; and create memorable hiking experiences.

    Emergency Preparedness

    Topographic maps are essential resources in emergency situations, from inclement weather and injuries, to navigation difficulties or navigation challenges that require rescue operations. An understanding of reading topographic maps ensures prompt and effective rescue operations.

    Key Elements of a Topographic Map

    In order to accurately read a topographic map, it’s crucial to comprehend its key elements. These elements include:

    • Contour Lines: Contour lines are one of the key elements of any topographic map, connecting points of equal elevation and giving a visual depiction of its contours and steepness.
    • Scale and Grid System: The scale and grid system of topographic maps determine their level of detail as well as coverage area. Grid systems like Universal Transverse Mercator (UTM) lines facilitate accurate location referencing for accurate topographic mapping.
    • Legend: A legend provides the key to understanding the symbols, colors, and patterns found on a map. It explains what various features mean, such as roads, rivers, vegetation, and man-made structures.
    • Marginal Details: Topographic maps also include some additional marginal details, including their title, publication date, and any notes regarding their source, accuracy, or coordinate systems used.

    Understanding The Contour Lines Of Topographic Maps

    What Are Contour Lines?

    Contour lines are curved or straight lines connecting points of equal elevation on a topographic map. Each contour line represents a specific elevation value, while their spacing indicates the steepness of the terrain. By studying contour lines, you can gain invaluable insights into their shape and relief of land mass.

    Reading Contour Intervals and Index Contours

    Contour intervals, or the vertical distance between contour lines, are usually indicated on a map’s legend. 

    Contour Intervals

    Contour intervals play an integral part in deciphering vertical changes to elevation on topographic maps. Representing the vertical distance between adjacent contour lines, these intervals offer a standardized measure of elevation change that helps us grasp the scale of terrain.

    You’ll often find them listed as part of the map’s legend to help navigate contour lines with confidence; for instance if set at 20 feet this means each contour line represents an elevation change by 20 feet as we trace these contour lines and estimate their differences.

    Index Contours

    When looking at maps, index contours should stand out with their bold, distinctive contour lines carrying weight; those are index contours. They’re marked with their specific elevation values to help us quickly establish their height relative to other contour lines on the map and act as anchoring points to help understand elevation changes depicted on it. 

    By identifying their elevation values we can accurately gauge neighboring contour lines without needing additional measuring tools; their darker and thicker appearance makes them easy to locate among an intricate web of contour lines.

    Identification of Landforms and Elevation Changes

    By carefully studying contour lines, you can easily recognize various landforms and elevation changes on a topographic map. Here are a few key points:

    1. Closely spaced contour lines indicate steep slopes, while more widely separated contour lines represent gentle slopes. 
    2. Concentric closed contour lines represent hills or depressions, with their innermost line marking either their highest point (hilltop) or lowest point (depression).
    3. V-shaped contour lines represent valleys or ridges, with the V pointing upstream in valleys and downstream on ridges, respectively. 
    4. Contour lines that form concentric circles with hachure marks represent sinkholes or other closed depressions. 

    Understanding Topographic Symbols and Colors

    Topographic maps use symbols to represent various features on the map. Understanding their meaning is integral for reading them accurately, so here are some commonly-used symbols and their interpretation:

    • Roads and Trails: Different line styles and widths represent various forms of roads, trails, and paths.
    • Water Features: Symbols representing rivers, lakes, streams, or other bodies of water provide more information on its size or depth than just words alone can.
    • Vegetation: Different symbols and colors depict various types of vegetation, such as forests, orchards, and grasslands.
    • Man-Made Structures: These symbols depict buildings, bridges, and towers created by humans – helping you recognize landmarks while navigating urban areas more efficiently.
    • Geographical Points: Symbols represent significant geographical features such as mountain peaks, cliffs, caves, and even mines.

    Color-Coding Features and Information

    Topographic maps often use colors as another means of communicating information about terrain features and other areas. While color schemes may differ from map to map, here are some frequently employed hue codes:

    • Brown: Contour lines, landforms, elevation markings. 
    • Blue: Water bodies such as lakes, rivers, and streams.
    • Green: Vegetation forests and parks.
    • Gray: Man-made features like buildings, roads and railways
    • Red: Major roads and highways boundaries.
    • Black: Indicates cultural features such as place names and boundaries.

    Understanding the Legend

    A legend located near the corner of your map provides a key for deciphering symbols, colors, and patterns on it. Take time to familiarize yourself with it so you understand all the information communicated on it.


    Estimating Distance and Direction

    Measuring Distance on a Topographic Map

    Topographic maps can be useful tools in helping to estimate distances between points. Here are several approaches for measuring the distances:

    • Bar Scale: Most topographic maps include a bar scale that represents a distance on the ground. By comparing it with your map, it allows for accurate distance estimates.
    • Use of a String or Straight Edge: In lieu of using a bar scale, an alternative way of measuring distance on maps would be using a string or straight edge to measure between two points on it. Align this string along the desired route before comparing it to its scale on the map. 

    Determining Direction with Compass Bearings

    To use a topographic map effectively, a compass will come in handy. Here’s how it works:

    • Orient the map: Align the edge of the compass with the north-south grid lines on your map, rotating both together until its needle points toward the north.
    • Pinpoint your location: On the map, and determine which direction you wish to travel in
    • Determine bearing: To find your bearing, align the direction-of-travel arrow on a compass with your desired location on the map and read off its bezel or arrow as needed.

    Calculating Slope and Gradient

    Topographic maps provide valuable information about slope and gradient. Slope refers to the steepness of a slope, while gradient measures elevation changes over a given distance. By studying contour lines, you can estimate both slope and gradient; steeper slopes will have closer-spaced contour lines, while gentle slopes will have wider-spaced contour lines.


    Navigating Topographic Maps

    UTM Grid Systems

    Universal Transverse Mercator (UTM) grids are often employed to divide topographic maps into more precise sections for more precise location referencing. UTM coordinates provide a consistent method for establishing position, making them invaluable tools in navigation. Grid lines such as eastings and northings help pinpoint specific points on the map using UTM coordinates.

    Position and Finding Your Location

    In order to use topographic maps effectively, it’s essential that they are oriented correctly and that you locate yourself quickly and precisely. Here’s how you can do it:

    • Locate Known Features: Locate major landscape features on the map that you can spot in reality, such as mountains, rivers, or buildings.
    • Orient the Map: Align its north-south grid lines with those seen in reality using either a compass or by guesstimating their directions.
    • Verifying Your Location: By comparing features on the map with what can be seen in nature, you can confirm your location and plan your route effectively.

    Follow Trails and Plan Routes

    Topographic maps offer invaluable information for trail planning and travel. By studying contour lines, symbols, and other features on these maps, it’s possible to identify optimal routes without encountering obstacles, estimate travel times accurately, and anticipate travel costs accurately. Be mindful of trails marked on your map that indicate their difficulty level or potential dangers, such as obstacles that could present obstacles.


    Tools and Resources For Topographic Maps

    Global Positioning System (GPS) Integration

    While topographic maps can serve as an excellent navigation aid on their own, when combined with a Global Positioning System (GPS), their navigation abilities become even greater. GPS devices provide real-time location data as well as tracking your movements and additional features such as waypoints and route planning.

    Online Mapping Services and Apps

    Online mapping services and apps have become essential resources for outdoor enthusiasts in today’s digital era. Websites and apps such as Google Maps, Gaia GPS, and AllTrails provide convenient access to topographic maps, satellite imagery, and route planning tools – enabling convenient topographic information retrieval even on smartphones or tablets.

    Further Learning and References

    There are numerous resources available to expand your understanding of reading topographic maps, including books, online tutorials, and courses that offer in-depth guidance on map interpretation, advanced navigation techniques, and practical exercises to build up skills. Furthermore, consulting experienced hikers or outdoor guides may provide additional tips.


    Conclusion

    Being adept at reading topographic maps is essential when venturing outdoors. Armed with this comprehensive guide, you now possess the knowledge needed to interpret contour lines, understand topographic symbols and colors, estimate distance and direction, navigate using UTM grids, as well as discover additional tools and resources. 

    Remember: practice makes perfect; get out there, explore, and let topographic maps serve as your guide on your adventures – Happy mapping!

    Related posts:

  • What Is Orienteering: An Expert Guide

    In this comprehensive guide, we will delve into the essence of orienteering, what orienteering is, its historical roots, and its essential techniques. We will also provide you with valuable insights to ignite your passion for this remarkable outdoor sport.

    What is Orienteering?

    Orienteering is a challenging outdoor activity that combines navigation, physical endurance, and mental agility. Participants navigate through unfamiliar terrain using only a map and compass, aiming to locate a series of checkpoints called controls, in the shortest amount of time possible. It is an immersive experience that pushes individuals to test their limits, both mentally and physically, while exploring the beauty of nature.

    The History of Orienteering

    What is orienteering? Well, to know more about this outdoor sport, it is essential that you know its brief history first. 

    The origins of orienteering can be traced back to the late 19th century when it emerged as a military training exercise in Scandinavia. It quickly gained popularity and transformed into a recreational activity that captivated adventure enthusiasts worldwide. What began as a means to train soldiers in the art of land navigation soon evolved into a beloved sport that combined strategy, athleticism, and a deep connection with the natural environment.


    Getting Started On Orienteering: Equipment and Gear

    Before embarking on your orienteering journey, it’s essential to have the right equipment and gear. These items will not only enhance your performance but also ensure your safety while navigating through unfamiliar terrain.

    • Map: A detailed topographic map highlighting the terrain, controls, and other crucial information is the centerpiece of orienteering. It serves as your guide, providing valuable insights into the landscape you’ll be exploring. Familiarize yourself with the map’s symbols, legends, and contour lines to decipher the features of the terrain accurately.
    • Compass: An essential tool for orienting the map and navigating accurately. A reliable compass helps you maintain a sense of direction, even in the most challenging environments. Learn how to take accurate bearings, determine your position, and navigate effectively using the compass alongside the map.
    • Clothing: Opt for lightweight and breathable attire suitable for the terrain and weather conditions. Dress in layers to adapt to changing temperatures, and choose fabrics that wick away moisture to keep you comfortable during physical exertion.
    • Footwear: Sturdy, comfortable shoes with good traction are essential to tackle various terrains. Look for trail running shoes or hiking boots that provide ankle support and grip, allowing you to navigate confidently through uneven surfaces and slippery slopes.
    • Whistle: A safety device that should always be carried during orienteering. In case of an emergency or if you need assistance, the whistle can attract attention and help rescuers locate you more easily.

    Essential Orienteering Techniques and Skills

    To excel in orienteering, mastering a set of techniques and skills is crucial. These skills will enhance your efficiency, accuracy, and overall performance in the sport. Let’s explore the key aspects:

    Map Reading and Interpretation

    Understanding and interpreting the map is fundamental in orienteering. Pay close attention to contour lines, symbols, and legends. Contour lines indicate changes in elevation, allowing you to visualize hills, valleys, and other landforms. Familiarize yourself with common map symbols, such as roads, trails, and bodies of water. The legend provides explanations for these symbols, ensuring you can navigate confidently through the map’s intricacies.

    Compass Navigation

    The compass is your trusted guide in orienteering. Learning how to use a compass effectively is paramount to your success. Practice taking accurate bearings, establishing your position, and maintaining a steady heading. By combining compass readings with map features, you can navigate accurately even when landmarks are not immediately visible.

    Route Planning and Decision-Making

    Efficient route planning is a vital skill that can make a significant difference in your orienteering performance. Analyze the terrain, evaluate various route options, and make strategic decisions based on factors such as distance, elevation, vegetation, and your own abilities. Optimize your route to minimize time and energy expenditure while still ensuring efficient navigation between controls.

    Pacing and Timing

    Pacing and timing are essential techniques for orienteering. Pacing involves estimating the time it takes to travel a specific distance. By knowing your walking or running speed, you can gauge your progress during the course and adjust your pace accordingly. Timing is crucial for maintaining a steady rhythm, ensuring you meet time limits and manage your energy expenditure effectively.


    Orienteering Events and Competitions

    Orienteering offers a wide range of events and competitions for enthusiasts of all levels. From local club meets to regional and international championships, there’s something for everyone. 

    Participating in events not only allows you to challenge yourself but also provides opportunities to meet fellow orienteers, share experiences, and forge lasting connections within the orienteering community. Compete against others or simply enjoy the thrill of navigating through diverse terrains—each event promises a unique and memorable experience.


    Orienteering Clubs and Training Opportunities

    Joining an orienteering club can provide invaluable support and resources as you delve deeper into the sport. Clubs often organize regular training sessions, workshops, and social events where you can learn from experienced orienteers and share your passion with like-minded individuals. Engaging with a club can help you refine your skills, gain valuable insights, and stay updated on upcoming events and competitions.

    Additionally, many clubs offer beginner-friendly courses and mentorship programs to help newcomers get started. These initiatives provide a supportive environment where you can learn at your own pace while receiving guidance from experienced orienteers.


    Benefits of Orienteering

    Engaging in orienteering provides numerous benefits beyond the physical aspects. Let’s explore the remarkable advantages it offers:

    • Mental Stimulation: Orienteering enhances cognitive abilities, including spatial awareness, decision-making, and problem-solving skills. As you navigate through challenging terrains and make split-second choices, your mind becomes sharper and more adaptable.
    • Fitness and Endurance: The demanding nature of orienteering contributes to overall fitness and endurance development. As you navigate through rugged landscapes, your body gains strength, agility, and cardiovascular endurance. Regular orienteering training improves both physical fitness and stamina.
    • Connection with Nature: Orienteering takes you into the heart of nature, allowing you to immerse yourself in stunning landscapes and appreciate the beauty of the natural world. Whether it’s navigating through dense forests, crossing picturesque meadows, or conquering rocky hillsides, orienteering allows you to develop a profound connection with the environment.
    • Social Interaction: Joining orienteering clubs and participating in events provides a platform for social interaction and fosters a sense of community. You’ll meet fellow orienteers who share your passion for the sport, exchange tips and experiences, and form lasting friendships. The orienteering community is known for its inclusivity and camaraderie, making it a welcoming environment for newcomers.

    Orienteering Safety Tips

    While orienteering is a thrilling adventure, it’s crucial to prioritize safety throughout your journey. Here are some essential safety tips to keep in mind:

    • Be Prepared: Before heading out on an orienteering excursion, take the time to gather the necessary information about the area you’ll be navigating. Familiarize yourself with the terrain, weather conditions, and potential hazards. Check the local weather forecast and be aware of any specific risks associated with the location, such as wildlife or challenging terrain. Carry essential safety equipment, including a whistle, a mobile phone for emergencies,a personal locator beacon, a small first aid kit, and extra supplies like water and snacks.
    • Inform Others: Always let someone reliable know your intended route and estimated return time. This simple step ensures that someone is aware of your plans and can raise the alarm if necessary. Share details about the location you’ll be orienteering in, including the starting point, intended route, and approximate duration of your activity.
    • Stay Hydrated and Nourished: Hydration and proper nutrition are key to maintaining energy levels and preventing fatigue during orienteering. Carry an adequate supply of water and snacks to sustain you throughout your journey. Regularly hydrate yourself, even if you don’t feel excessively thirsty, and consume nutritious snacks that provide a balance of carbohydrates, proteins, and healthy fats. Consider bringing portable water filters.
    • Dress Appropriately: Dressing appropriately for orienteering is essential to ensure comfort, protection, and ease of movement. Consider the weather conditions and choose clothing that suits the temperature and potential precipitation. Opt for lightweight, breathable fabrics that wick away moisture, and dress in layers so you can adjust your clothing to regulate body temperature. Hiking pants and windbreakers are good here! Don’t forget to wear a hat, sunglasses, and sunscreen for sun protection. Additionally, wear comfortable and supportive footwear with good traction to navigate various terrains safely.
    • Respect Nature: As an orienteer, it’s crucial to respect and appreciate the natural environment you are exploring. Follow the principles of “Leave No Trace” to minimize your impact on the ecosystem. Stay on designated trails whenever possible, avoiding fragile vegetation and sensitive habitats. Properly dispose of any waste you generate during your orienteering activity, taking care to pack out everything you pack in. Respect wildlife by observing from a safe distance and refraining from feeding or disturbing animals.
    • Know Your Limits: Recognize your own abilities and limitations when participating in orienteering activities. Start with courses suitable for your skill level and gradually progress as you gain experience and confidence. Be honest with yourself about your physical fitness, navigational skills, and comfort level with different terrains. Avoid taking unnecessary risks and make informed decisions based on your capabilities and the conditions at hand.
    • Stay Oriented and Maintain Focus: Orienteering requires mental acuity and concentration. Continuously refer to your map and compass to ensure you’re on the right track. Maintain awareness of your surroundings, noting landmarks and distinctive features as you progress through the course. Avoid distractions that may divert your attention from the navigation task at hand.
    • Be Mindful of Time: Keep track of time during orienteering activities to ensure you can complete the course within a reasonable timeframe. Consider factors such as daylight hours, sunset time, and the duration of the chosen route. If participating in an organized event, familiarize yourself with the time limits and plan your progress accordingly to avoid rushing or being caught in darkness.

    Frequently Asked Questions (FAQs)

    Q: Can anyone participate in orienteering, or is it only for experienced athletes?

    A: Orienteering is an inclusive sport suitable for individuals of all ages and fitness levels. While some participants may be highly competitive athletes, many people engage in orienteering purely for recreational purposes. There are various course difficulty levels to accommodate beginners, intermediate, and advanced orienteers.

    Q: Do I need prior navigation experience to try orienteering?

    A: No prior navigation experience is necessary to start orienteering. Basic map reading and compass skills can be learned through practice and guidance from experienced orienteers. Many clubs and events offer beginner-friendly courses and introductory workshops to help newcomers get acquainted with the sport.

    Q: Is orienteering a dangerous activity?

    A: Orienteering, like any outdoor activity, carries inherent risks. However, by following safety guidelines, being aware of your surroundings, and making informed decisions, you can minimize the risks associated with the sport. It’s essential to prepare adequately, respect your limitations, and stay within your comfort zone while gradually challenging yourself.

    Q: What if I get lost during an orienteering event?

    A: If you find yourself disoriented or lost during an orienteering event, try to remain calm. Stop and reevaluate your surroundings, refer to your map and compass, and retrace your steps if necessary. If you’re unable to find your way, use your whistle to signal for help or seek assistance from event officials or fellow participants.

    Q How can I improve my orienteering skills?

    A: Practice is key to improving your orienteering skills. Participate in local events, training sessions, and workshops offered by orienteering clubs. Take advantage of the resources available, such as map reading exercises, compass drills, and route planning simulations. Analyze your performance, learn from experienced orienteers, and continuously challenge yourself to refine your techniques.

    Remember, orienteering is a dynamic and rewarding sport that allows you to explore the great outdoors while honing your navigational abilities. With practice, patience, and a sense of adventure, you’ll discover new horizons and experience the thrill that orienteering offers.


    Conclusion

    Congratulations! You have embarked on a fascinating journey to discover the captivating world of orienteering. We’ve explored the fundamental aspects of orienteering, from its origins and techniques to the benefits it offers. Now, it’s time for you to take the first step, grab your compass, and venture into the wilderness. Embrace the challenge, cherish the thrill, and let orienteering awaken the adventurer within you!

    Remember, orienteering is a sport that rewards practice and perseverance. The more you immerse yourself in this exhilarating pursuit, the more you will unravel its intricacies and experience the true joy it brings.

    Related Posts:

  • How To Navigate Outdoors Using A Map And Compass

    Learning how to navigate the outdoors using a map and compass is a crucial skill. But  how do you use these two tools altogether?

    A Quick Overview

    As someone who loves the outdoors, I find great excitement in exploring new places. But to navigate these unknown areas confidently, mastering the skill of finding directions is vital. So, in this post, I will guide you through using a compass and map for effective navigation. Whether you enjoy hiking, camping, or are simply curious about orienteering, this guide will equip you with the necessary knowledge and skills to find your way easily.


    Importance of Learning Navigation for Outdoor Activities

    When it comes to outdoor activities like hiking, camping, and mountaineering, having good navigation skills is crucial. Let’s see why learning navigation is important for these activities:

    Safety and Independence

    Learning navigation ensures your safety and helps you become self-reliant outdoors. While technology provides us with convenient GPS devices and smartphone apps, relying solely on them can be risky. 

    Batteries die, signals get lost, and there may be situations where technology is unavailable. By learning navigation with a compass and map, you become less dependent on external devices and gain the ability to navigate effectively even in challenging situations.

    Exploration of Uncharted Areas

    Outdoor enthusiasts are often drawn to the excitement of exploring uncharted territories and discovering hidden gems in nature. To fully embrace this spirit of exploration, having navigation skills is crucial. 

    With a compass and map in hand, you can confidently venture into unfamiliar terrain, uncovering beautiful landscapes, secluded trails, and peaceful camping spots off the beaten path. Navigation skills empower you to go beyond marked trails and create your own unforgettable adventures. By the way, orienteering is a sport that relies on these tools.

    Route Planning and Decision Making

    Navigation skills go hand in hand with route planning and decision making. As an outdoor adventurer, it’s important to plan your routes carefully, considering factors like distance, elevation, terrain difficulty, and water sources. 

    By studying topographic maps, you can identify potential obstacles, plan alternative routes, and make informed decisions based on the conditions you may encounter. Navigation skills enable you to choose the best paths, optimize your time, and ensure a smoother and more enjoyable experience.

    Off-Trail and Wilderness Navigation

    For those seeking a deeper connection with nature, off-trail and wilderness navigation add excitement to outdoor activities. These environments often lack marked trails or visible landmarks, requiring you to rely on your navigational abilities. 

    With a compass and map, you can navigate through dense forests, cross rugged terrains, and traverse vast expanses of wilderness with confidence. Off-trail navigation opens up a whole new world of exploration, allowing you to discover hidden lakes, remote valleys, and untouched wilderness areas.

    Emergency Situations and Rescues

    While we hope for the best, emergencies can happen during outdoor adventures. In such situations, navigation skills become crucial for self-rescue or aiding others in need. If you become disoriented or lost, using a compass and map can help you reorient yourself and find your way back to safety. 

    Furthermore, if you encounter fellow adventurers who require assistance, your navigation skills can be valuable in guiding them to safety or providing accurate information about your location to search and rescue teams.

    Deepening the Connection with Nature

    Finally, learning navigation skills can deepen your connection with nature. By relying on traditional navigation methods, you become more aware of the environment around you. You develop a keen eye for natural landmarks, observe changes in the landscape, and appreciate the subtle signs that nature offers. 

    Navigation becomes an immersive experience, allowing you to engage with your surroundings in a profound way, fostering a sense of awe, wonder, and respect for the natural world.


    Getting Familiar With Your Navigation Tools

    Navigating the wilderness requires a good understanding of the tools at your disposal. Let’s dive deeper into understanding your navigation tools—the compass and the map—to maximize their effectiveness in outdoor activities.

    The Compass: Your Reliable Guide

    A compass is a time-tested instrument that has guided explorers and adventurers for centuries. To use it effectively, it’s important to understand its components and functionality.

    • Magnetic Needle: The magnetic needle is the heart of the compass. It is a magnetized needle that aligns itself with the Earth’s magnetic field, pointing towards the magnetic north. The red end of the needle usually indicates north, while the opposite end points south.
    • Rotating Bezel: The rotating bezel is a circular ring surrounding the compass housing. It is marked with degrees or cardinal directions. The bezel allows you to measure angles, take bearings, and establish a reference point for navigation.
    • Baseplate: The baseplate of a compass is a transparent plate that allows you to see the map beneath it. It often features rulers and scales to measure distances accurately. The baseplate also has a straight edge that can be used for plotting courses and drawing lines.
    • Orienting Arrow: The orienting arrow is a crucial feature on the baseplate. It shows the direction in which the compass should align with the map. Aligning the compass with the orienting arrow ensures that the map and compass are synchronized, facilitating accurate navigation.

    READ: How To Use A Hiking Compass

    Unfolding the Map: Your Trusty Companion

    A map is more than just ink on paper—it is a detailed representation of the terrain you’re navigating. Understanding its elements helps you extract valuable information and plan your routes effectively.

    • Legend: The legend, also known as the key, explains the symbols, colors, and markings used on the map. It is important to understand the legend to interpret the map accurately.
    • Scale: The scale of a map helps you determine real-world distances represented on the map. By measuring the scale, you can calculate distances between landmarks, estimate travel times, and plan your route accordingly.
    • Contours: Contour lines are crucial features on a map. They represent changes in elevation and allow you to visualize the topography of the land. Closely spaced contour lines indicate steep slopes, while widely spaced lines represent flatter terrain.
    • Grid Lines: Grid lines divide the map into smaller sections and facilitate coordinate referencing. By using grid lines, you can pinpoint your location, communicate with others more precisely, and navigate more accurately.

    READ: How To Read A Topographic Map

    FeatureCompassMap
    PurposeProvides directional guidanceProvides visual representation of terrain
    Key ComponentsMagnetic needle, rotating bezel, baseplateLegend, scale, contours, grid lines
    FunctionalityDetermines magnetic north, measures bearingsShows topography, landmarks, and routes
    Navigation AidOffers precise direction in the fieldGuides route planning and decision-making
    OrientationAligns with Earth’s magnetic fieldAligns with physical landscape on the ground
    AccuracyCan provide accurate direction when used correctlyDepicts accurate geographical information
    Navigation TechniqueTaking bearings, following a set courseTriangulation, resection, dead reckoning
    Field of UseSuitable for use in remote and off-grid areasApplicable in various terrains and environments
    PortabilityLightweight and portable for ease of carryingFoldable and compact for convenient storage
    Backup NavigationReliable backup when other methods failEssential backup when technology is unreliable

    Combining Maps and Compasses For Navigation

    While maps and compasses are valuable tools individually, their true power lies in their combination. By integrating the information from a map with the directional guidance of a compass, you can navigate with even greater precision. Let’s explore how to effectively combine maps and compasses for successful navigation.

    Step 1: Planning Your Route

    Before embarking on your adventure, take the time to plan your route using the map. Consider the following:

    1. Identify Key Landmarks: Look for prominent landmarks such as mountain peaks, lakes, or distinctive rock formations that you can use as reference points along your journey.
    2. Trace Your Path: Use a highlighter or your finger to trace your intended route on the map, marking key waypoints and decision points.
    3. Note Compass Bearings: Along your planned route, identify specific compass bearings or general directions (e.g., northeast, southwest) you need to follow to reach each waypoint.

    Step 2: Orienting the Map

    When you’re ready to begin your journey, correctly orienting the map is crucial. This ensures that the map aligns with the actual terrain you’re navigating. Follow these steps:

    1. Find a Fixed Point: Choose a prominent feature in your surroundings, like a hilltop or a distinctive tree, and identify it on both the map and the terrain.
    2. Align the Map: Rotate the map until the identified feature on the map aligns with the corresponding feature in the terrain. Ensure the north direction on the map is also aligned with magnetic north using your compass.
    3. Verify Orientation: Check other landmarks on the map and terrain to ensure their alignment matches.

    Step 3: Taking Map Bearings

    To further assist your navigation, you can use the map to determine specific compass bearings for your route. Follow these steps:

    1. Identify Your Location: Locate your current position on the map by referencing identifiable landmarks around you.
    2. Identify Your Target: Determine the landmark or waypoint you intend to reach next on your route.
    3. Align the Straight Edge: Place the straight edge of your compass on the map, connecting your current position with the target landmark.
    4. Read the Bearing: Look at the direction-of-travel arrow on the compass. Read the degree or cardinal direction indicated where the straight edge crosses the outer ring of the compass.

    Step 4: Navigating with the Compass

    Now that you have the map bearing, you can translate it to your compass and use it to guide your actual navigation. Follow these steps:

    1. Hold the Compass Correctly: Ensure the compass is level and steady in your hand, with the direction-of-travel arrow pointing away from your body.
    2. Set the Compass Bearing: Rotate the bezel until the compass needle aligns with the orienting arrow, setting the compass bearing to match the map bearing you previously determined.
    3. Find Your Heading: With the compass bearing set, rotate your body until the compass needle aligns with the magnetic needle, ensuring they are superimposed.
    4. Navigate: Now that you’re facing the correct direction, use your surroundings and landmarks to guide your path while periodically checking your compass to maintain the correct bearing.

    Remember, combining maps and compasses requires practice. With experience, you’ll gain a better understanding of how to interpret the information on the map, account for declination, and navigate with confidence.


    Frequently Asked Questions About Maps and Compasses

    Q1: Can I rely solely on a compass and map for navigation in the modern age of GPS and smartphone apps?

    A: While GPS, smartphone apps, and personal locator beacons are convenient, they have limitations. Batteries die, signals get lost, and technology can fail. Compass and map navigation provide a reliable backup and are essential skills to learn, especially in remote areas or during emergencies.

    Q2: How accurate is compass navigation?

    A: Compass navigation, when used correctly, can provide accurate direction guidance. However, it’s important to account for magnetic declination, the difference between true north and magnetic north. By adjusting for declination, you can ensure greater accuracy in your navigation.

    Q3: Can I use a compass without a map?

    A: While a compass can be used independently for basic navigation, combining it with a map enhances your ability to navigate more effectively. A map provides valuable information about the terrain, landmarks, and route planning, which complements the directional guidance offered by a compass.

    Q4: How do I determine my location on a map using a compass?

    A: To determine your location on a map using a compass, you can use techniques like triangulation or resection. Triangulation involves taking bearings to known landmarks from two or more locations and locating the intersection point on the map. Resection entails taking bearings to visible landmarks from your current position and finding where those lines intersect on the map.

    Q5: What should I do if I get lost while navigating with a compass and map?

    A: If you find yourself lost, stay calm. Use your compass to take bearings to known landmarks or features visible in your surroundings. By comparing those bearings with your map, you can identify potential landmarks and determine your approximate location. If needed, retrace your steps or head in a known direction until you regain your bearings.

    Q6: How can I improve my map-reading skills?

    A: Improving map-reading skills comes with practice. Start by familiarizing yourself with the legend, scale, and symbols used on maps. Study topographic maps to understand contour lines and how they represent the terrain. Take opportunities to navigate using a map in familiar areas, gradually progressing to more challenging terrain as your skills develop.

    Q7: Are there additional tools or techniques that complement compass and map navigation?

    A: Yes, several additional tools can enhance your navigation experience. GPS devices can serve as backup navigation tools, but it’s important to understand their limitations. Other useful tools include altimeters to determine elevation, clinometers to measure slope angles, and pacing beads or GPS apps to track distance traveled. Learning celestial navigation techniques using the sun, stars, and moon can also be valuable for long-distance or open-water navigation.

    Q8: Can I navigate at night using a compass and map?

    A: Navigating at night with a compass and map can be challenging but possible with preparation. Use a headlamp or flashlight with a red filter to preserve night vision. Plan your route before nightfall, taking note of prominent features or waypoints. Employ techniques like dead reckoning, where you estimate your position based on known distances and directions traveled.


    Conclusion

    Mastering the art of navigation using a compass and map opens up a world of exploration. By following the techniques outlined in this guide, you can confidently navigate through forests, deserts, or mountains. Remember to practice and hone your skills, and embark on your next adventure with unwavering confidence. Enjoy your explorations!

    Related Posts:

  • 8 Essential Tips for Mountain Camping Success

    In this mountain camping tips and guides, we will teach you the essentials for a successful, safe camping-on-the-summit experience. So if you are new to this pursuit, you should check this one out. 

    A Quick Overview

    What’s better than hiking mountains? That would be camping in those mountains!

    You see, mountain camping is one of the most pleasurable adventures you can ever try. Being able to settle down on an elevated ground will let you experience the fresh breeze of the wind that you can’t feel while you are on the bottom. At the same time, the scenery that awaits you there could remove all the fatigue that you sustained from the hike. 

    Sure! These things are worth looking forward to. That’s why many of our staff here in Rilor Wilderness are quite greedy when it comes to these mountain camping trips, especially in the areas of Montana, Missouri, and Colorado. There are great mountains there. Meanwhile, my personal favorite is the Olympic National Park in Washington, United States. It had a number of different camping spots to try. 

    But similar to other outdoor expeditions, mountain camping requires a lot of preparation. But don’t get discouraged. After all, these preparations and planning will help you complete the trip safely and conveniently. If you don’t want stress or accidents along the way, we suggest that you follow the guidelines that we listed here just for you. 


    Foolproof Tips For Mountain Camping

    Here are some of the practical tips we want to impart to any individual who is interested in mountain camping.

    Prepare A Checklist

    Just like any other trip, mountain camping requires campers to identify what they need for the trip. Of course, not all trips will have the same requirements. The things that you are going to bring will actually depend on the duration of your trip, the weather and existing conditions of your destination, and the number of people you are with. 

    For a basic mountain camping checklist, refer to the following recommendations:

    Essentials

    Clothing

    Cooking And Eating

    • Portable stoves (including fuel cans)
    • Pans and pots
    • Grill and racks (optional)
    • Coffee maker (optional)
    • Water bottles
    • Water filters
    • Mugs, cups, and eating utensils
    • Food container 
    • Coolers
    • Disposable bags 
    • Biodegradable washing soap
    • Sponge

    Personal Items

    • Toiletries
    • Hygiene products

    Emergencies / Survival

    Navigation

    • Maps 
    • Compass 
    • GPS devices

    Research Your Destination

    One of the essential preparations for mountain camping is knowing your destination. Keep in mind that not all destinations are the same. Camping in the mountains can be a lot of fun. But the adventure could head south if you are not prepared for the terrain and the possible wildlife and weather conditions you could encounter along the way. 

    Several things should be included in your research. For example, you need to understand the weather patterns in your destination. In some cases, the weather in the area could change within the day. So it would be better if you could prepare your clothing and shelter to take into account the possible changes. 

    Also, you should understand the terrain. Some areas are more technical than others. So if it is your first time, then go with a beginner-friendly location to camp. Don’t challenge yourself on your first hike. We also recommend that when pitching your tent, it should be on the leeward portion of the mountain. It is in this part where the wind isn’t that strong. Notably, the weather here is gentler than on the other side. 

    Don’t forget to check the area where you can pitch your tent. Of course, it should be in a place where you can be a victim of landslides, avalanches, or flooding. Don’t put your tent directly under large trees because you are in danger if they suddenly snap.

    Be Mindful Of The Weather

    Hiking and mountain camping will expose you to the elements. The weather is prone to changes, and it can be difficult to navigate the terrain if you are not prepared for it.  

    Just because the weather on the ground is temperate doesn’t mean that the top is warm, too. Most of the time, they are covered by strong winds, low temperatures, and snowy or rainy conditions. During the night, the temperature on the mountaintop can significantly drop. 

    Notably, most of the weather forecasts are for the valleys. Mountain weather forecasts may vary, so it is better that you contact the land managers, national parks, or any local authorities to inquire about the weather. They are in a position to tell what you have to expect in the mountains. 

    Nourishment Matters

    Aside from the gear and skills, it is also essential for mountain campers and hikers to be healthy and strong. Always remember that you are dealing with high altitudes here. And in these areas, it is easy for the body to get exhausted, given that the level of oxygen gradually decreases as you ascend. 

    To combat fatigue, you need to be hydrated at all times. That’s why it is important that you bring an ample amount of water on your trip. At the same time, water filters, stoves, and pots are important here. If you can see clean water sources, you will be able to filter or boil them for consumption. 

    Also, don’t forget to energize yourself with food. Eat snacks and meals that are high in protein, potassium, and calories. They are the ones that can help restore your energy to complete the trip. They can also aid in muscle recovery and the reduction of muscle cramps and headaches. 

    Because of this, it is essential that you plan where you are going to eat on the trip. Plan for your breaks and the food that you are going to consume. Meal planning is an integral part of every successful camping trip. 

    Prepare For The Sudden Changes In Temperature

    As I’ve mentioned, the weather on the mountain is always unpredictable. Even if you reach your destination in sunny conditions, there’s no guarantee that it will remain warm and cozy there all day. 

    The morning could be comfortable and breezy. But during the afternoon and the evening, the terrain could become rainy and windy. There’s also a possibility that the temperature could just drop suddenly. 

    Hence, you should pack all the essential gear to adapt to the potential changes in the temperature. Make sure that you have the necessary layers that you can wear if the temperature gets chilly. At the same time, your shelter should be capable enough to protect you against the elements. Don’t hesitate to invest in 4-season tents if you think that the atmospheric condition is a bit challenging. 

    Have A Reliable Lighting Source

    Mountain camping will certainly detach you from various amenities that a normal campground offers. Hence, we strongly suggest that you carry a reliable lighting source with you. This could be in the form of lanterns, flashlights, and headlamps. 

    Now, lanterns can be bulky, so that could be your last choice. Your primary options here are headlamps and flashlights. Flashlights are great, especially if you have those high-lumen units that can run for extended periods even if it is raining. However, there’s a disadvantage to relying on these flashlights alone. Essentially, they limit the mobility of your hands. And it is tricky if you are cooking or doing errands at your campsite. 

    Hence, a headlamp is an excellent addition to your trip. Attached to your head, these headlamps can provide guaranteed illumination without restricting the movement of your hands. 

    Learn How To Carry Your Backpack

    You’ll be surprised that many people don’t know how to carry their backpacks when hiking.

    Of course, a lot of you would say that you simply have to strap the bag on your back, and you are good to go. In normal situations, this way of carrying your pack is just fine. But when it comes to climbing mountains, that’s not completely acceptable. 

    Be mindful of how you carry your backpack to ensure that you don’t sustain back, neck, and shoulder pain. While you are ascending, a heavy pack could put pressure on your posterior. Hence, we recommend that you adjust the strap of your backpack from time to time so that your shoulders get comfortable. 

    This is also the part where you need to invest in a high-quality, properly fitted backpack. These packs should have an ergonomic design that would let you lift heavy loads conveniently. 

    Don’t Solo 

    Mountain camping is fun. But it can expose you to lots of challenges. And some of those challenges could actually pose a threat to your life. Hence, we suggest that you don’t go on the trip alone, even if you are confident in your skills. Tag a companion or two in the expedition so that you can have someone to rely on if emergencies are to occur. 

    Besides, there’s strength in numbers. Believe it or not, you can deter the presence of potential attackers just by showing that you have company with you. Whether it is a two-legged or four-legged threat, you can back them off if you are in a group. 

    While we encourage solo camping or hiking, this doesn’t mean that it applies on extreme and distant terrains such as mountain ranges. The situation there is different on the ground, and it can expose you to situations that you might not survive if you are just alone.

    Check other checklists and other camping guides that we have prepared for you:

  • How To Survive Animal Attacks While On Outdoors

    What should you do when an animal suddenly attacks you while hiking, backpacking, or camping? How do you prepare for these scenarios? Read on to learn the answers.

    A Quick Overview 

    Hey. We know that many of you will shrug off this topic. After all, many of you have been outdoor enthusiasts for decades already, and nothing similar to an animal attack has happened. Well, good for you! And we sincerely hope that it stays that way. 

    But not all people have the same fortune as you. Just this 2022, a woman barely made it alive after being mauled by a lion while she was trail running in Mill Creek Canyon, specifically on the Pipeline Trai. Mill Creek Canyon is in Utah, by the way. 

    Well, the point here is that the worst thing that could happen might really happen. So as outdoor enthusiasts, we need to be wary of our surroundings, study our environment, and plan for any potential encounters. After all, these animal attacks could range from painful to lethal. Wildlife encounters are among the emergencies that you need to be prepared for. 

    Here are the things that you need to learn in order to survive attacks from dangerous wildlife. 


    How To Survive Animal Attacks While Outdoors 

    There are several things that you need to learn when it comes to wildlife safety. Among them is prevention. Yes. You can actually prevent these encounters from happening. If you are mindful of the things that you do, you will be able to veer away from any form of animal aggression. At the very least, being responsible could actually save your life. 

    Here are some of those preventive measures that you can try. 

    • Clean your camping area. Make sure that it is free from trash and leftovers that could attract animals to come there. If you have unfinished meals, put them in either bear-proof canisters or airtight containers. 
    • Don’t put any food and odor-causing substances inside your tent. Store them outside or hang them in trees using wires or other mechanisms. 
    • After cooking your meals, change your clothes immediately. In fact, the clothes that you wear in hiking, cooking, or outdoor errands should never be taken inside the tent. 
    • Similar to human food, pet food should also stay away from your campsite or tent. Dogs, in particular, are prey for many animals in the wild. 
    • Also, please don’t feed the wildlife that you encounter. Although they are cute, these squirrels and raccoons are natural predators. So if they flock to your area, there’s a good chance that a vicious animal would join the fray. And that’s not good news for you!

    Tools For Animal Encounter Survival

    I’ve noticed that many outdoor enthusiasts aren’t that keen on defending themselves against wild animals. But if you are going to the wild, especially those inhabited by notoriously dangerous creatures, being complacent will get you harmed. 

    Having tools like survival knives, axes, guns, and pepper sprays is not an assurance that you will be safe, especially if the thing suddenly turns into a melee. However, these things could help you fend off an attack. And if you are lucky enough, you will be able to prevent any attack from ever happening.

    Surviving A Bear Attack

    I have made a separate post on how you should act while you are exploring a bear country. But for the sake of this post, I will highlight the nitty gritty details of surviving a bear attack. 

    Truth be told, I haven’t yet experienced a close encounter with a bear. And I want it to stay that way. After all, being attacked by one is guaranteed to be deleterious on your part. 

    One thing people should know is that all bears can be dangerous, regardless of their color. So don’t get too cozy around them just because you have a large bear toy in your home. 

    Most of the time, bears attack when they are surprised or when they feel that you are threatening their cubs. If the bear is hungry, it can get aggressive, too. So if you appear threatening or scouting for food, they could attack you. 

    There are different species of bear, each having unique responses and actions. To survive, you need to know their species first. 

    How To Survive A Black Bear

    • Don’t attempt to run. Otherwise, they will attack you. 
    • When you encounter one, make slow but calculated movements.
    • Don’t attempt to approach the bear, as well. 
    • If you have pets or small children, pick them up. Bears see these little beings as their prey. 
    • When there’s a bear in the vicinity, make loud noises. You can do this by shouting or hitting objects. 
    • It would also be wise to wave your arms above you. It makes an impression that you are bigger than the bear. 
    • Don’t go into a tight area. Have a space where the bear can go so that it can leave whenever it wants to.

    How To Survive A Grizzly Bear

    • For prevention, don’t go near animal carcasses. They might be the dead bodies of the animals preyed on by the grizzly bear. 
    • Don’t go near its cubs. At the same time, tame your dog so that it doesn’t annoy the bear. 
    • When you encounter an adult grizzly bear, halt and stay calm. Then move backward slowly while talking softly. Doing so will make you appear that you have no intention of fighting the bear. 
    • Don’t turn your back on the grizzly bear. Don’t attempt to run, as well. 
    • Don’t make eye contact because that is a way of asking a bear that you want to fight. 
    • Grizzly bears like to fake their charges. However, if its ears are pinned back, and its head is lowered, then the attack would be real. 
    • When the attack is about to happen, lie with your face on the ground. Make sure that your head is covered by hands and arms. Try to play dead. The bear will still attack you in this position, but it could leave you eventually.
    • If it is still attacking you, then you have no choice but to fight back. Use your weapons or any tools available. Attack the eyes and nose of the bear, as these are the most sensitive parts. 

    How To Survive A Polar Bear

    A polar bear is probably the most desperate species among all the bear species in the world. They dwell on terrains where food is scarce, so most of the time, they are hungry and required to hunt. So if you are in their presence, you are automatically prey. When they attack you, it is not a bluff.

    • To deter an attack, make loud noises. If you are in a group, you are lucky since the noises you can create could potentially discourage the bear. 
    • If the bear still charges you, you simply need to fight back. You will get mauled and wounded, but at least you have a chance to survive. 

    Surviving A Wolf Attack

    One notable aspect about wolves is that they travel in packs. The same thing applies to their relatives, such as coyotes. So once you spot a wolf, don’t assume that it is alone. It is with its gang. If you are going to fight one, you need to deal with the rest, too. If you can’t spot the rest of the wolves, there must be hiding and circling you already. 

    Wolf attacks on humans are not uncommon. We have numerous cases where unwary hikers or travelers were ganged up by these cunning creatures. The thing about these wolves is that they are stealthy. They don’t usually attack the front; instead, they will sneak into your blind spots. They will try to aim at your vital spots (such as your legs or neck). After you can’t move, the rest of the group will feast on you. 

    To survive a wolf attack, you need to do the following:

    • Don’t attempt to run because that would stimulate the wolves into hunt mode. You can’t outrun them either, so you will be exhausting your energy from running. 
    • Make loud noises. You should yell at them aggressively. 
    • If they have surrounded you, then prepare to fight at all costs. If you have a gun, then shoot with precision. If you have a melee weapon, then fight wisely. If you don’t fight, you will end up with their meal. That’s a guarantee. 
    • Always stand your ground. Try not to stumble, either. It is easy for these wolves to tackle you once you have fallen.
    • If you are in a group, try to stick around and fight with your backs facing one another. In this way, you can deal with their coordinated attacks. 

    Surviving A Cougar Or Mountain Lion Attack

    Cougars are particularly dangerous, as they are excellent hunters and stalkers. As much as possible, you should avoid hiking or camping in an area filled with them. Otherwise, there’s a likely chance that you will get attacked. 

    If you still made a choice to venture into their territory, make sure that you practice the following precautions:

    Cougars are among those predators that deliberately follow their victims. Once it determines you as its target, then it will stalk you until it can find the opportunity where you are the most vulnerable. Interestingly, these big cats don’t deal with humans if they are in groups. But once you have encountered a cougar, do the following things. 

    • Halt and stand on your ground. Don’t attempt on the run. 
    • Try to intimidate the cat by posing as if you are bigger than it. 
    • Create eye contact. Don’t break this duel, and don’t ever turn your back. 
    • Don’t hide or crouch. That would make you a prayer.
    • If the cat is acting aggressively, create loud noises, wave your hands, and throw objects at it. 
    • If the cat attacks, the last thing that you want to do is to fall. Stand on your ground and fight as aggressively as the cat. 

    Surviving A Moose Attack

    Believe it or not, non-predatory animals can still attack you. Among the most dangerous ones is the moose. What makes these animals dangerous is their size. They are huge, so they can trample you easily. Furthermore, they are downright territorial. So if you happen to venture into their area, expect that they won’t forgive you. 

    Fortunately, the moose isn’t fast. So you always have the option to flee or fight. When a moose is attacking, it often does so by kicking forward with its burly front feet. If you fall down from the kick, you will be stomped like crazy! In some cases, the moose will use its antlers to deal with its targets. 

    • To survive a moose, do the following:
    • Don’t approach, and don’t let it close the gap between you. 
    • Run back. Don’t confront, if possible. 
    • If a moose approaches you, it is not because it is befriending you. Start backing right away. 
    • Once the moose starts stomping the ground, it is about to attack you. 
    • If you are being charged, try to run in an area where there are a lot of obstacles, such as large trees. 
    • If there’s a tree, you might want to climb. 
    • Once a moose knocks you, curl your body like a circle. Remain in this position until the animals stop attacking you. 

    Surviving An Elk Or Deer Attack

    The elk and deer are generally harmless. But they will resort to attacking if they feel that you are a threat. 

    • Don’t turn your back on these creatures, as they are good at charging from behind. 
    • Face them instead. When you do so, make sure that your arms are raised. In this way, you would look bigger. If you are wearing a jacket, take it off and swing it.
    • If you have your dog, let it run, as it might distract the animal.
    • Climbing trees could also save your life. 
    • If you get knocked, then curl your body. Cover your vital organs, such as the neck and head. Remain in this position until they leave you. 

    Surviving A Snake Attack

    A snake bite can be deadly. So if you happen to get bitten, the best thing that you can do is get immediate help. 

    Prevention matters if you want to survive a snake attack. We have a separate guide for it. You should check that one out. In a nutshell, you can survive a snake attack by doing the following. 

    • Wear protective clothing, such as long pants and snake-proof hiking boots. You should also wear additional footwear accessories, such as socks. 
    • If you feel that you are being followed by a snake, try stomping the ground. It could discourage the snake from attacking. 
    • Don’t go near any snake, especially if it is in its striking position. 
    • Don’t run when being threatened by a snake. Don’t turn your back, as well.
    • If you get bitten, don’t suck the poison. Instead, wash it with clean water and apply tourniquets. Call emergency services right away. 

    Surviving An Elephant Attack

    Elephants may appear more gentle. But the thing is, they have killed more humans than sharks

    To survive or avoid a potential elephant attack, do the following:

    • Be attentive to its body language. When its trunk is twisted and ears behind, then it is ready to pound you. If the ears are fanned out, the elephant is just bluffing. If they are backward, then you should get to a safe spot. Move gradually or look for higher grounds. 
    • If the attack is already commencing, look for an object or structure that could separate the two of you. Huge boulders or trees are excellent elephant deterrents. 

    Surviving A Bull Attack

    Bulls can cause lethal encounters. So the best way to survive them is to avoid them at all costs. 

    • Bulls tend to react to movement. Hence, if a bull spots you, stand still and don’t move around. You can use your clothes as bait that you could throw once the bull starts to approach you. 
    • Don’t get close to a bull. Maintain a distance of at least 20 feet. If the bull approaches you, try to back away, too. 

    Check other checklists and other camping guides that we have prepared for you:

  • These Are The 7 Most Overlooked Camping Items And Supplies

    We all know that camping requires the utmost preparation, especially when it comes to your camping gear. However, there are specific important camping items that are often overlooked. Read on to learn to know these things.

    A Quick Overview

    Rilor Wilderness has numerous guides and checklists for camping. We even have a separate checklist for the food and cookware, as well as a comprehensive checklist for families who want to camp. Of course, we have made a guide, too, on how you can organize your gear and a tutorial on how you can survive animal attacks while in the wild.

    So at this point, we would like to assume that all outdoor enthusiasts who read our blog know a thing or two about being prepared for their trips. But more often than not, there are some camping items that are forgotten and overlooked. For whatever reason, people forget some specific items that could actually improve the success of your outdoor adventure. And in fact, this incident happens even to the most experienced campers.

    Of course, we can’t really get mad if you leave these items, especially if it is not on purpose. However, it would really be great if you put the following items on your checklist so that you won’t skip them on your next camping trip. Do you want to know what these supplies are? Read on. 


    Most Overlooked Camping Items And Supplies

    Here’s a list of camping supplies that campers tend to overlook and forget. We also included the reasons why they should be a part of your camping essentials. 

    Duct Tape

    Surprise! One of the most important things that you should bring on your next camping trip is duct tape. You read it right. That’s duct tape. 

    You see, duct tape might not be the first thing that comes into your mind when it comes to camping essentials. After all, who would think of duct tape, anyway? But you see, duct tape is as important as a survival knife or a tent repair kit

    Well, it is because it is a tool required for repairing tents and damaged poles. It can also be used as a make-shift cover for torn backpacks and other important fabrics. At the same time, duct tape can be used as a form of a bandage, which is quite a useful addition to your first aid kits. 

    Duct tapes are essentially a survival tool; it is simple, yet they can do a lot of things–from conducting field repairs to responding to various emergencies that you can encounter along the way. 

    Water Container

    I know that we keep on emphasizing the importance of water and nourishment in every outdoor trip. Needless to say, exploring the outdoors requires some substantial form of energy, which you can attain by being able to feed yourself with food and water. 

    Despite this, a number of campers tend to overlook the importance of these water containers. Sure, your campsite may have some sort of water supply and related amenities. But still, it would be prudent that you have your own source of water. 

    Water bottles, water butts, and canteens can be your water container. They can let you drink water whenever you need to, especially if you are on the move. 

    And if you encounter a water source during the day, you better have a portable water filter, too. In this way, you can drink from those water sources as safely as possible. 

    Fire Starters

    How confident are you with your fire-making skills? Can you create fire even without the assistance of modern fire-starting tools such as fire starters, Ferro rods, and matches? 

    If you can’t answer yes to any of these questions, then you shouldn’t overlook these fire starters. These items are essential in making fire wherever you are. Campfires are pivotal since they can let you do a number of things, such as warming yourself, cooking food, or calling the attention of rescuers. 

    When choosing fire starters, make sure that they are waterproof so that you can still use them even after they get wet. At the same time, they should be able to hold fire for a given period. Ease-of-use does matter here since you will never know what situation you are going to need them immediately.

    When making fire, make sure that you practice the guidelines stated in the Leave No Trace principles. You don’t want to be the cause of forest fires, right?

    Batteries

    The modern world runs on electricity and power. Whether you agree with that or not, you can’t argue the fact that power is an integral aspect of our daily lives–unless you are a prepper or a nomad who decided to discard the modern way of living. 

    For camping, many pieces of equipment actually run on them. An example would be headlamps, flashlights, and electric lanterns. Your radios and smartphones also run on batteries. 

    The thing here is that you don’t actually know if your campsite offers charging stations. It would be better if you ask the camp management if this particular amenity is being offered so that you can prepare. Otherwise, you would need to bring extra reserves of batteries and portable power banks. 

    You see, the health of the battery is affected by temperature. Extreme heat or cold could cause the batteries of your devices carefully to drain quickly.

    In fact, some campers often decide to bring power stations, especially if they are capable of doing so. If not, then just bring batteries. 

    First Aid Kit

    I’ve heard a lot of people say that they are always prepared for their trip. But when you ask them about first aid and first aid kits, they would immediately become speechless. 

    A first aid kit is an important aspect of any outdoor trip. The reason for this is that injuries and accidents can happen anytime and anywhere, even on moments and trips that you don’t expect them to be. 

    Make sure that the first aid kit contains all the essential tools for responding to basic injuries, such as wounds, splinters, and fractures. 

    Also, don’t forget your important prescriptions and medications. You may have special conditions that require you to take certain drugs on a regular basis. 

    Furthermore, we recommend that you learn and practice basic first aid. What is the point of having a first aid kit if you don’t know how to use its content? That’s an integral part of your camping and outdoor preparation. 

    Means Of Communication

    They said that camping and other outdoor adventures are excellent ways of cutting yourself from the modern world. Figuratively, that’s true. After all, the wilderness offers a great escape from the mundane things that you are doing.

    However, this doesn’t mean that you don’t have to cease all forms of communication, especially if you still have plans to return to your home. 

    Every time you go on a camping trip, make sure that you have means of contacting your friends, relatives, and authorities. This is quite essential, especially if there are emergencies. Smartphones and radios are crucial for calling for help. So don’t overlook these modern amenities since they could save your life when push comes to shove. 

    Wipes

    Those baby wipes? Don’t underestimate them. By all means, they should have a place in your camping checklist.

    You see, baby wipes can do a lot of things for campers and outdoor goers. They are extremely versatile, as you can use them in various situations. 

    For example, these wipes can serve as cleaning cloths that you can use to clean up the mess after you eat or prepare your food. At the same time, these highly moist wipes can help you clean yourself, especially if water access is not available in your camping area. They are also important in cleaning wounds before applying treatment. 

    At the very least, there are several things that you can do with these baby wipes. So don’t overlook them, as well. The best part about these baby wipes is that they are compact. They can fit in your backpack, and you don’t worry about any additional bulk or weight. 

    Check our other posts:

  • Food Storage Basics For Camping And Backpacking

    Food is one of the essentials of any backpacking or camping adventure. Even if you decide to have a short excursion, you still need yourself to get replenished. In this way, you will have the energy to complete your journey.

    But food packing and storage aren’t the simplest things in the context of the outdoors. Preparations are necessary to ensure that your food won’t get messy or get infested by foodborne bacteria. You should be able to deter other wildlife from scavenging your food. 

    In this guide, we will teach you the basics of food storage for backpacking and camping. 

    Why Is Food Storage Important For Outdoors

    You see, the idea here is to ensure that our nourishment (food and water) will remain in edible condition. It should be us that should consume them, not the wildlife present in your destination. 

    One interesting fact is that all sorts of animals are interested in the good stuff that you bring. From rodents to bears, they are attracted to human food. If there’s an opportunity, they will join the feast with you. And this could be dangerous, especially if the wildlife is dangerous. 

    Furthermore, it is the responsibility of backpackers and campers to stop these animals from eating human food. Human food isn’t a part of their regular diet. If they keep eating the food we bring, that will disrupt their system. Eventually, they would be dependent on humans and no longer would want to hunt for food. Animals that are dependent on humans can become nuisance and threat. There’s a possibility that they will get killed, and that’s not something that we would want to see.

    At the same time, food storage and handling will help you avoid foodborne illnesses. Your wellness and health during an outdoor trip would rely on how you prepare and store your food. 

    No one can downplay the importance of food storage in any outdoor adventure. Hence, it is important that you learn all the basics before you head on another trip. 

    Fundamental Food Storage Tips While Camping And Backpacking

    The first thing that you need to do is to ensure that food and other items that generate aroma are far from the reach of animals. There are simple methods on how you can do this, such as the following:

    • Don’t leave food, aromatic products, and trash inside your tent or within your campground. They should be away from you. 
    • Next, you should never leave your food without anyone watching it. Animals, such as squirrels, will use this opportunity to steal your food even in the daytime. Other animals can snatch your food while you are sleeping. 

    Food Storage Tips While In The Campground

    If you are in an established campground, you should do the following things:

    • Secure your food in a cooler or inside your vehicle. Even if you are just exploring the environment nearby, it is still essential that you still lock your food in a secured container. In this way, you will not have to worry about foraging animals destroying your shelter. Furthermore, tight containers can also seal the scent of your food, making them elusive to the sniffing noses of nearby animals. 
    • During the night, you need to place your cooler and other food items in a metal bear box. This would make your food items difficult to access, as a metal bear box can withstand brute attacks. You may also store your food inside your vehicle on certain campgrounds. But you still need to ask local rangers and campground managers about the habit of certain wildlife in the area. You see, some animals got used to breaking into cars.
    • Some animals, such as bears and raccoons, are experts in breaking coolers that are left in the open. Many coolers today are said to be resistant to these attacks, as they come with sturdy locks. You may opt to purchase those coolers if a metal bear box is unavailable. 
    • Alternatively, you can hang the food on an elevated spot, such as a tree branch. But make sure that the food is stored in a specialized bear canister or similar durable storage. In this way, your food won’t be accessed easily. 

    Food Storage Tips While In The Backcountry

    If you are trailing in bear country within a national forest or protected trail, you need to follow the respective guidelines of the area when it comes to food storage. Those guidelines will help you complete your journey without having to worry about the safety of your food. 

    If you are heading into an area where there are no defined guidelines and rules, the following methods should help you out:

    Metal Food Boxes

    Many backcountry destinations offer backpackers metal food boxes, which are said to be bear-proof. There, you can store your food, toiletries, and trash. But of course, the size of these boxes varies, so there’s no guarantee that all your essentials would fit in. Hence, you might consider bringing one yourself. 

    At the same time, make sure that you lock its latch properly. In this way, you can ensure that bears and animals won’t be able to scavenge your stuff. 

    Bear Canisters 

    Bear canisters are designed to withstand heavy punishment. These items are made from hard-shell plastic. They include lids that you can remove via removing their screws. Most of these canisters can fit in various backpacks. However, some sizes are too big to fit inside your pack; you might need to get a small one if you are streamlining the bulk of your luggage. 

    Make sure that you bring a bear canister in areas where you are required to bring one. For instance, if a local ranger searches your belongings and you don’t have this canister, you will have to deal with a big fine. In fact, other national parks allow you to rent or borrow bear canisters. These special containers can also prevent raccoons from taking away your food. 

    The downside of these canisters is their weight. They weigh an average of 2 pounds, so bringing one can be cumbersome. 

    Bear Bags

    If your destination doesn’t require you to bring a bear canister (but there’s still a bear threat), then you should get a bear bag instead. These bags aren’t your ordinary pack. They are made from rugged polyethylene so that they can withstand the sharp claws and teeth of bears. Moreover, you can also opt to include an aluminum liner on them to provide an additional defense against punctures. 

    To optimize the container, you can also purchase odor-proof bags. You should store your food and aromatic contents in these bags before you insert them into the bear bag. If there’s no scent, then bears and other animals won’t be attracted to you. Ideally, the bags that you should get should have been certified by the Interagency Grizzly Bear Committee. 

    You can leave the bear bag on the ground. But it would still be ideal if you hang it on a tree so that other creatures won’t access it easily. To make them more effective, make sure that you follow the instructions on how to tie their cinch. 

    Hang The Food

    The next thing that you can do is to hang your food from an elevated platform, such as a sturdy tree branch. In some backcountry destinations, bear poles are already available. These poles have hooks installed on them where you can hang your food containers and backpacks. There’s a lifting pole that you can use to hoist your items toward the hook. 

    Hang your containers at least 10 feet from the ground so that bears can’t reach them. They should extend at least four feet from the pole or trunk. 

    How To Handle Your Food While Camping And Backpacking?

    You should enjoy your backpacking and camping trip. You should never spend your time outside in the toilet or looking for one. Unfortunately, there are numerous ways you can get sick through the food you eat. They are the following:

    • Fecal-oral transmission – This is when the pathogens get into your hands and mouth after you use the bathroom. This is especially true when you don’t wash your hands properly, and you use them to eat food. 
    • Foodborne illness – This is when you eat spoiled from the container
    • Incorrect handling of meat and raw food ingredients

    Avoid fecal-oral transmission

    • Every time you use the bathroom, make sure that you wash your hands properly. Use soap and clean water for this. If possible, the water you use for washing hands should be from a freshwater source. 
    • Dry hands using a clean towel
    • If there’s no clean water source, use sanitizers instead
    • Always wash your hands before you handle food

    Prevent food from spoiling

    • One way of keeping your food from spoiling is storing it in a cooler properly. Perishables, such as fish and meat, should be stored in temperatures lower than 40 degrees Fahrenheit. 
    • Ideally, you should pre-chill the cooler using ice blocks before you put any food on it. 
    • Meat should be inserted in double bags so that it won’t get in contact with other food; you should also freeze them a day before you are going to eat them. 
    • The food that you should eat must be placed on the top. Meanwhile, frozen raw meat should be placed on the bottom of the cooler.

    Proper raw meat at the campsite

    • It is recommended that you cut the raw meat into small sizes in your home before you place them in a zip bag. In this way, you don’t have to deal with extensive washing while you are at the campsite. 
    • At the campsite, you should be careful in cutting the meat so that no foreign matters would get in contact with them. After cutting them, make sure that they are put on the cookware immediately. The tools that you use, such as the knife, should be washed immediately, as well. 
    • Don’t prepare vegetables and other food ingredients on surfaces where there are residues of meat.

    Conclusion

    It is important that you practice and master the basic food storage and handling techniques while backpacking and camping. Doing these things would enable you to have a delicious meal without the fear that they will be scavenged by nearby animals. They also prevent foodborne diseases, which are something that you don’t want to encounter in the middle of your trip.

  • How To Heat Tents During Winter Camping?

    Winter camping is a nice pursuit since it gives a brand new definition of outdoor adventure. But at the same time, camping in the cold will require extra preparations. One of the things that you need to deal with is the temperature. Of course, freezing temperatures aren’t something that we can trifle with. If unprepared, you might suffer from deleterious experiences. 

    A tested-and-tried method of keeping yourself warm is through insulating your tent. Many tents these days are meant for 4-season applications; this means that these tents are ideal for cold-weather use, even in areas where the snow is heavy. But at the same time, you would still want to make sure that you can enhance their insulation. 

    In any other case, warming a tent might become a must. For instance, it tends to get chilly in the evening, even if the day is warm. 

    Fortunately, numerous ways are available to ensure that your tent remains cozy and warm throughout your adventure. Learn all of these tent-heating techniques below!

    Is It Safe To Heat A Tent?

    The answer to this question varies. Specifically, if you are going to use a safe method, then you shouldn’t worry a thing about heating your tent. On the flip side, there are also approaches that could spark danger and harm to you and your tent. 

    For instance, you should never light up a campfire too close to your tent. Obviously, doing this would potentially cause fire, especially if the wind propels the blaze toward your tent. Not all tents are fireproof, so it is recommended that you avoid this method. 

    Of course, you should never create a fire inside your tent. That’s an absurd thing to do! Your tents aren’t designed to withstand fire! 

    Here, you would only need to resort to options that are actually safe for you. Fortunately, there’s no inadequacy in methods that could improve the setting and conduciveness of your tents during a cold camping adventure.

    Why Should You Heat A Tent In Winter?

    The answer to this question is pretty obvious. No matter how insulated your tent is, you are still required to boost the heat sources you have. 

    Temperatures that are close to zero may pose a danger to your well-being. While the number of deaths caused by hypothermia isn’t that high, keep in mind that it is never zero.  

    Aside from wearing proper clothing layers, you need to make your shelter and beddings extra insulated. In this way, you will prevent yourself from catching an extreme cold. Here, you might need to invest in a 4-season tent because it has been designed to withstand harsh weather conditions. 

    The idea here is to ensure that you won’t have to worry about feeling the effects of the cold weather. Aside from the discomforts, it may also put you in dangerous situations. Being prepared and responsive will keep your safety afloat. 

    Of course, your adventure would be a lot more memorable if you weren’t feeling any inconvenience while you were inside your outdoor shelter!

    Ways To Heat A Tent

    When it comes to heating a tent, there are multiples that you can try. Specifically, you can divide these techniques into two categories: traditional and modern. Let’s explore each of them so that you’ll know which one you can use on your next trip.

    Traditional Heating Methods 

    The traditional methods of heating tents don’t involve batteries or electricity. Of course, I am not saying that these things aren’t useful. All I am saying is that there are instances where access to these technologies is impossible. In these situations, you need to be skilled and knowledgeable. Otherwise, the cold will catch you in an instant. 

    Here are some of the old-school tent-heating methods that you should learn right now!

    Method 1: Hot Water Bottles

    Of course, you should never sleep on this technique. People in the past have been using hot water to heat up their surroundings. Farmers, for instance, use heated water barrels to create greenhouses. You can apply this concept to your tent, especially if the latter is small. 

    Here, you would need a number of water bottles, preferably those that are made from hard plastic or metal. Furthermore, you would need to create fire, as well, to boil water. Surely enough, boiling pans are needed here, as well. You can’t heat water if you don’t have these camping pans. 

    Once the water is hot, you should transfer it to the water bottles. Next, place them in different sections of the tent to evenly disperse the heat. By following this procedure, you would be able to warm your tent for extended periods. 

    Method 2: Heated Rocks

    Hot rocks are also great sources of thermal heat. The principle of this approach is similar to the first method we have listed above. Interestingly, hot rocks can heat your tents faster than water bottles. But their biggest downside is that they can’t hold their heat for prolonged periods. 

    To do this method, you need to gather several stones around your area. Once you have gathered enough of them, put them near a fire. Don’t place them directly in the fire, as it would be difficult to take them out. 

    Around 10 to 20 minutes before you go inside your tent, remove the stones near the fire. After that, wrap them in a thick fabric or clothing. Be careful, as these stones can scorch you.

    Scatter the stones inside your tent. Make sure that you distribute them evenly. You can also focus on areas where you have cold spots. But as a reminder, make sure that their placement isn’t in a location where you can touch them accidentally. 

    Method 3: Insulate The Tent

    The next thing that you can do is to insulate the tent. This approach is being made to ensure that you can maintain the heat of your tent for extended periods. Instead of leaving the tent, the insulating material would reflect it back to you. If you are going to use this method with other heating approaches, you will be able to warm yourself properly. 

    Several items work as excellent insulators. Double-air reflective foils and foams are among the best options that you can use to insulate the interiors of your tent. 

    Method 4: Pitch Your Tent In A Dead Campfire

    This traditional method isn’t popular, but it is quite effective. Of course, we have to assure you that there’s no live fire involved here. You should simply follow the steps below.

    The first thing that you need to do is to create a campfire. Make sure that the fire is set on a shallow ditch. At the same time, the ditch must have an identical width to the entirety of your tent. 

    Burn as much firewood in the tent. In this way, you will be able to create lots of coals. Once the fire dies, you can already fill the ditch with soil. After that, you can set your tent on top of it. The coal buried in the soil will release heat gradually. 

    Surely enough, this method isn’t the fastest here. But it provides long-term heating effects. Hence, extra preparation is necessary to achieve this feat!

    At the same time, we have to remind you that you must never use a sleeping pad on the tent floor if you make this heating approach. After all, sleeping pads can reflect the heat back to the ground. 

    You are still free to create another campfire alongside the ditch you created. But it takes a lot of effort to do so. Again, we have to emphasize the importance of preparation in this method.

    Modern Heating Methods

    Now that we have covered all the traditional heating methods let us tackle the modern ones already. I am pretty sure that you are looking for more convenient methods than the ones we listed above. 

    We aren’t saying that those old-school methods aren’t effective. In fact, they have tested-and-proven effects. However, numerous technologies have been developed today to provide campers an extra cozy experience without pouring too much effort. 

    Let’s take a look at these modern approaches to heating tents:

    Method 1: Use An Electric Blanket

    Electric blankets will never heat up a tent. That’s the caveat. However, it is effective enough to heat up your body while you are not inside the tent. 

    These electric blankets are safe to use because they don’t involve live fire or electricity. Their wires are covered with the necessary insulating materials so that they won’t cause any problems for you. Furthermore, they have safety mechanisms, such as an automatic shutdown feature if it is too hot. 

    If you have an electric blanket, you don’t need to heat your tent any more. The heat it produces is more than enough to keep you comfortable. Specifically, the average heat of these blankets reaches up to 118 degrees Fahrenheit. 

    These blankets last long in service, especially if you don’t use them regularly. However, keep in mind that their performance drops over time, causing them to increase their power consumption. 

    Of course, we have to emphasize that they require a power source, which is not readily available in most camping situations. 

    Method 2: Use Underfloor Heating Carpets

    These underfloor heating carpets are still relatively new to the camping niche. Interestingly, they have similar features to electric blankets. But at the same time, they provide additional benefits. 

    Heating carpets can be placed on the tent floor. At the same time, you can also use a sleeping bag with them, as they aren’t susceptible to overheating. They are fairly simple to use. But at times, they can get bulky as well if you are streamlining the weight of your baggage.

    If you are going to use these heating carpets, we recommend that you place reflective material on the tent floor first. In this way, the heat won’t be released on the ground. 

    Method 3: Use Electric Radiators

    Portable electric radiators are commonly used for heating purposes. They are also the most popular option that there is when it comes to modern heating methods. With a portable radiator, you will be able to heat up your tent pretty quickly.

    Many people are using these radiators because they are easy and require minimal attention. We recommend that you go for oil-filled radiators, as they don’t generate excessive noise as those radiators that use fans.

    Similar to electric blankets, radiators would require a constant power source. They are difficult to carry, too, preventing them from becoming an amenity for your backpacking trip. 

    What Are Heat Sources Not Safe For Tents?

    We already have mentioned different ways to heat up your tent or your body while winter camping. But at the same time, we have to emphasize that not all heating methods are safe. There are those that you should avoid at all costs. 

    Among these things that you shouldn’t use are tent stoves and gas heaters. A lot of people are using these items for heating their tents, which is quite alarming. After all, these gas heaters and stoves emit carbon monoxide. Inhaling them can result in various health complications. You should only use them in open spaces and not inside your tent.

    Conclusion

    Overall, there are numerous options for heating your tent during a winter escapade. You simply have to choose which one is the most convenient and applicable to you. 

    Of course, be careful whenever you are using fire, electricity, or other sources of heat. If you touch them accidentally, injuries could take place. Always exercise proper precautions at all times.