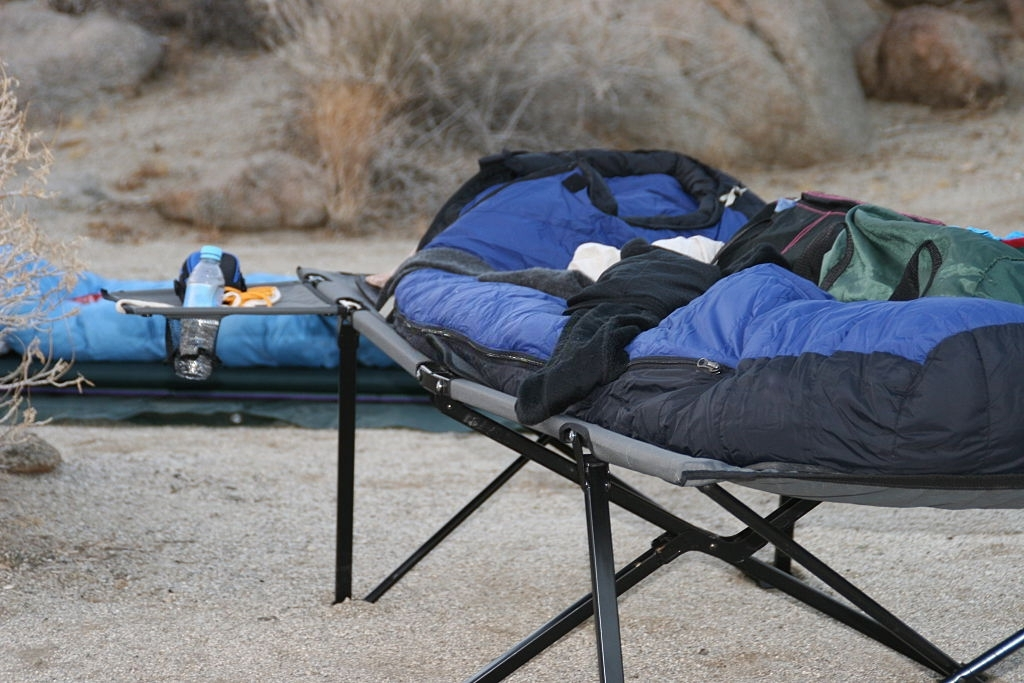
Learning how to make a camping cot comfortable is essential for every outdoor goer out there. Once you have decided to switch your sleeping bag with a cot, you will have to make adjustments to ensure maximum ergonomics and convenience.
Of course, you may find that the cot you are using right now is already cozy for you. If that’s the case, you are free to skip this guide already. But if you want to make things even more comfortable, then this guide is perfect for you!
How To Make A Camping Cot Comfortable?
Just like I’ve stated earlier, some camping cots are designed to ooze with holistic features so that you can have a better sleeping experience with them.
Surely enough, there are still those that are too cumbersome to the body. However, it doesn’t surprise me anymore. At the very least, a number of these camping cots have limited function and comfort to ensure their compactness and lightness. The lesser the components, the easier it is for the camper to bring particular outdoor equipment.
I’ve heard several people saying that desiring comfort from a camping cot is a long bow to draw. After all, camping is designed to be “rough and tough.”
For the record, there’s nothing wrong if you want to sleep in a heavenly setting, even if you are away from your bedroom. It benefits you anyway. I’m pretty sure that you don’t like the idea of being groggy because of sleeplessness. Keep in mind that lethargy from exhaustion can be cured by proper rest and sleep.
To ensure that you can have the best time with your camping cot, the following foolproof comfort tips can help you!
Use A Sleeping Pad
A sleeping pad is a foam mat that you lay on to provide a cushion while you sleep. They are particularly useful for people who sleep on their backs, and for people who camp in areas with cold temperatures. In colder temps, the ground can suck the warmth right out of you, but with a pad like this, you can sleep more comfortably, even in the winter.
A sleeping pad is compatible with any camping cot. It is a perfect choice for providing comfort, insulation, and extra support to your body. Moreover, not all cots are cushioned, so these sleeping pads can actually help.
Take Advantage Of Camping Pillows
The camping pillow is a simple but handy accessory for every outdoor activity. It keeps the head up while you are sleeping in your camping cot. It also eliminates the need for you to wake up several times because of bodily discomforts. After all, you can place these pillows in strategic parts of your body. Depending on how you sleep, you can buy multiple pillows to experience maximum comfort. There are many camping pillows available in the market these days, but the best ones are those that are compact, lightweight, and comfortable to use.
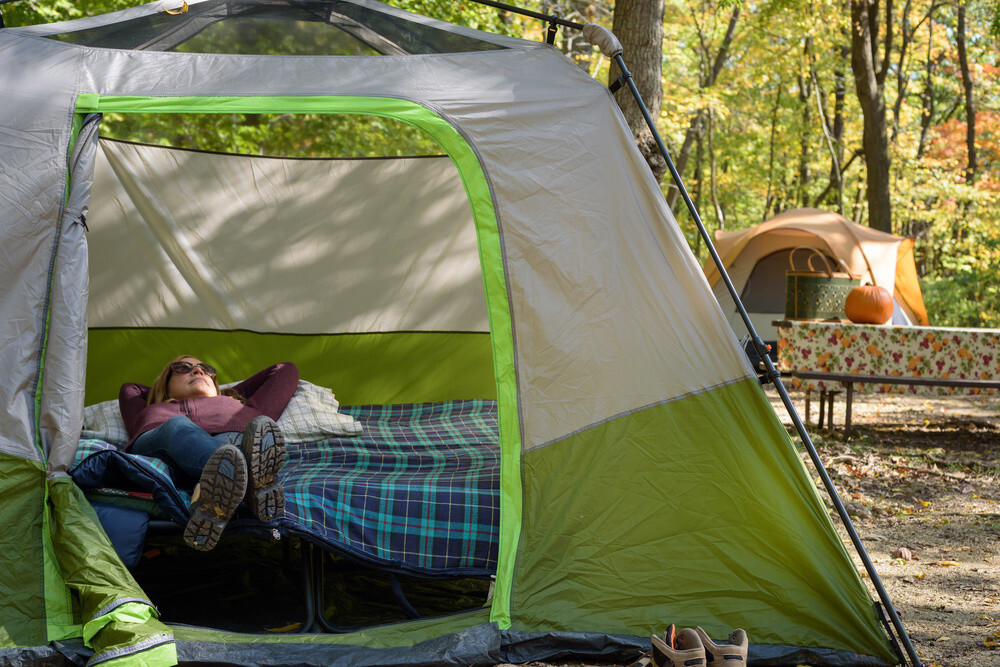
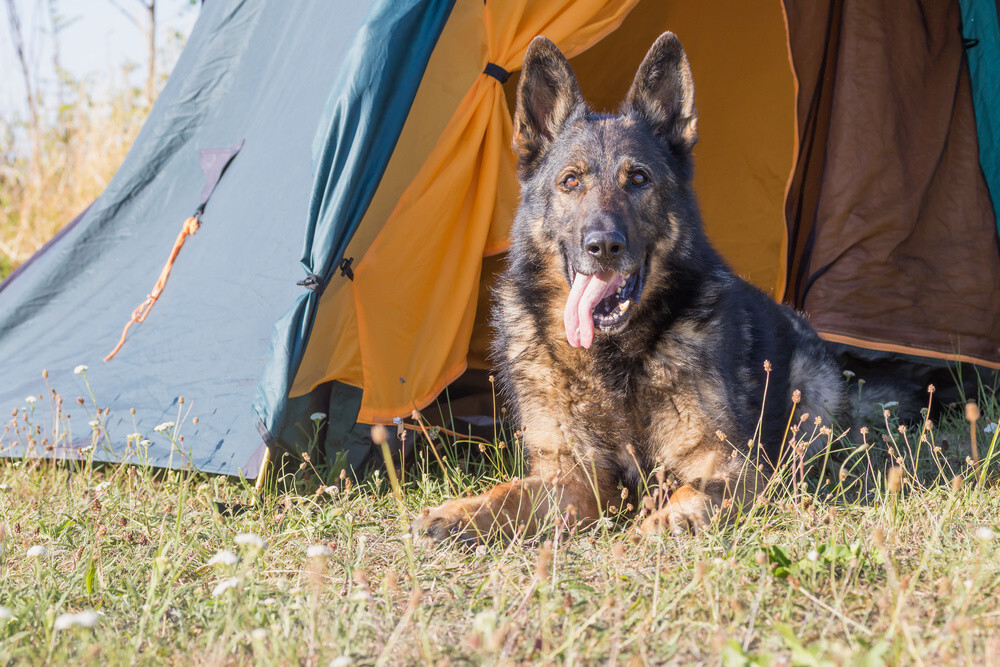
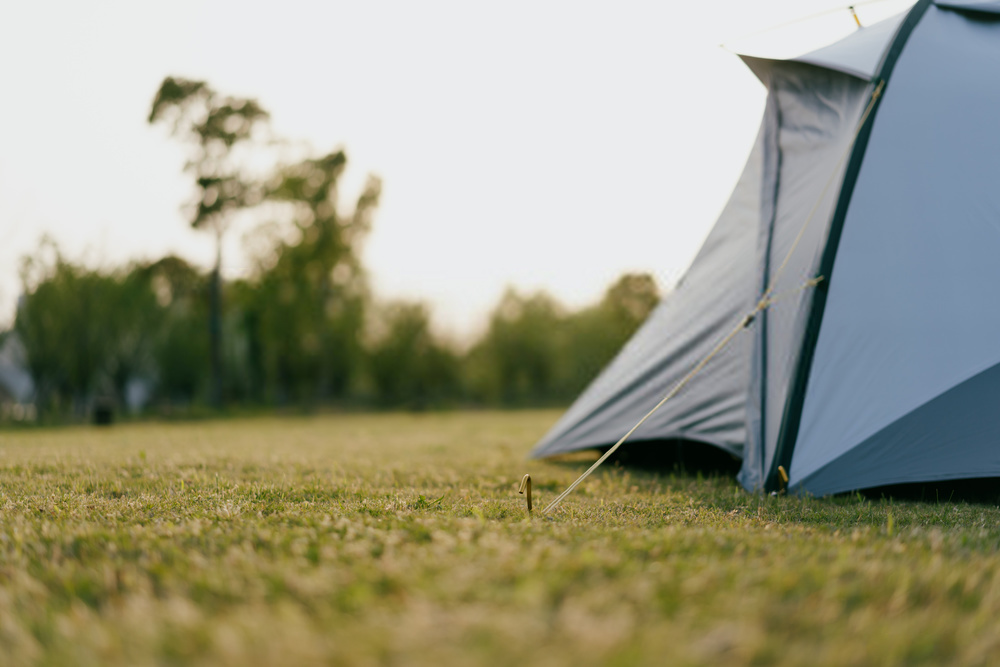
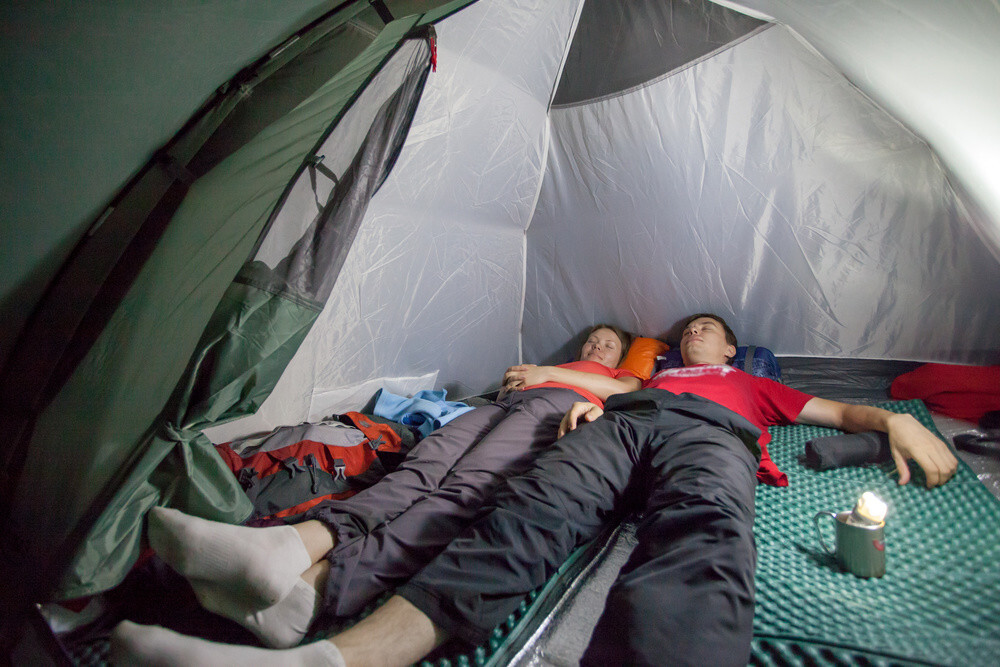
Place The Cot Inside A Tent
If you want to improve your experience using your camping cot, you have to be mindful of its placement. It is alright to place them anywhere you want, but you have to deal with the repercussions that come along with being exposed to the elements.
The discomfort that you feel whenever you lie in your cot could be due to the temperature, insect bites, and condensation. You can minimize the effects by placing a camping cot inside your tent. The insulation and shelling that your tent gives can provide you with a delightful sleeping experience. You should make this approach, especially if there’s precipitation in your area.
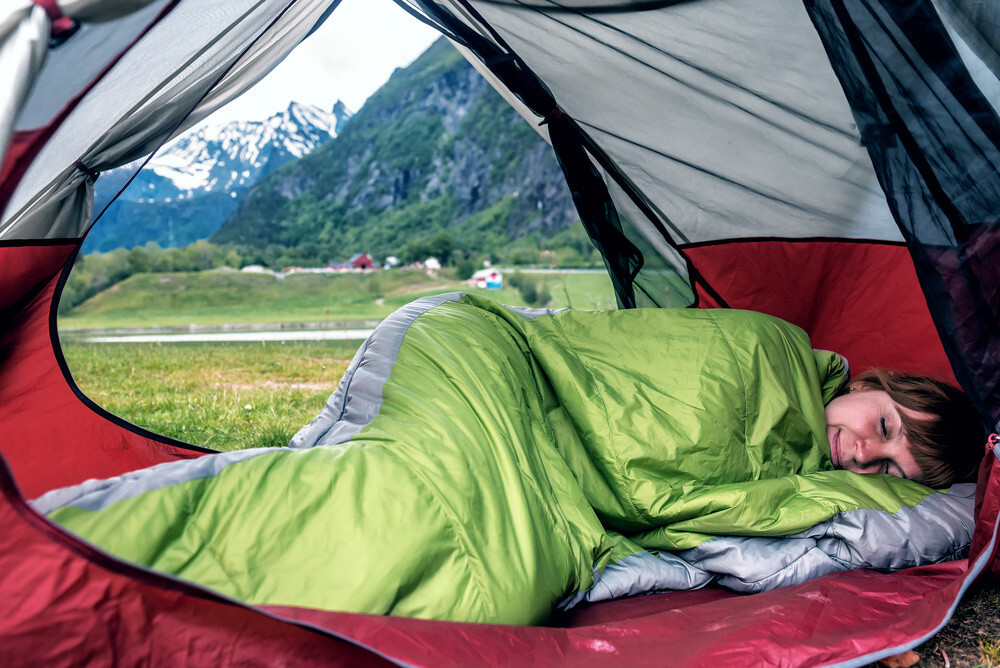
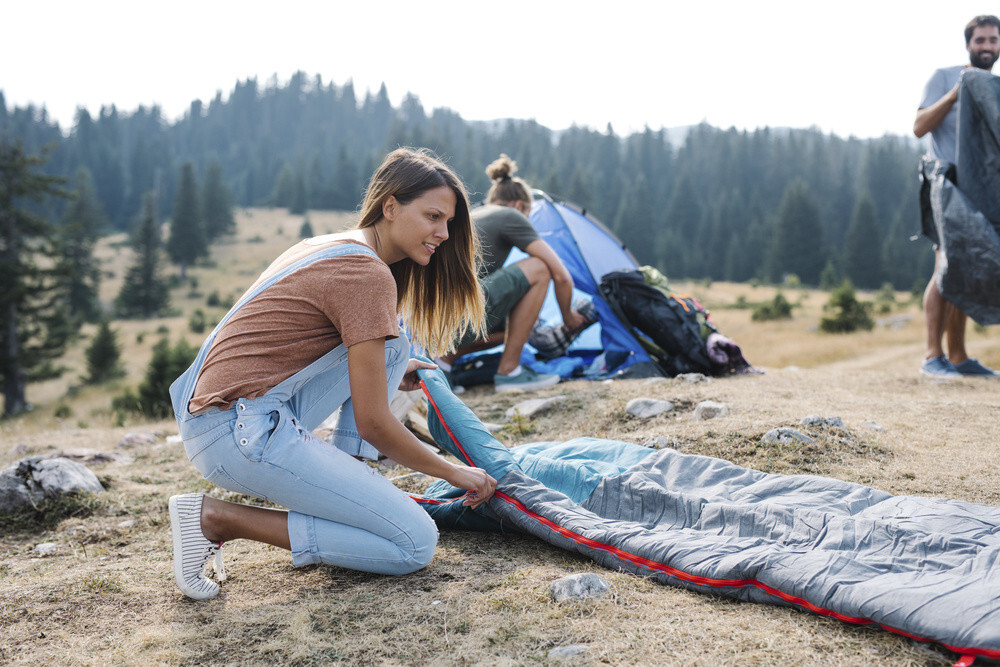
Get A Sleeping Bag
Believe it or not, you don’t need to discard your sleeping bag just because you have a camping cot already. You can actually combine the two, depending on the setting and preferences.
For instance, if you decide to sleep outside with your cot, a sleeping bag can protect your body from the elements. It can add insulation to combat the cold weather, and it can even protect you from insect bites. Furthermore, the cushion that it provides can help attain a mattress-like comfort.
Recline The Cot
If you have special needs and requirements when you sleep, it is important that you get a reclining cot. The latter offers multiple adjustment points so that you can recline it from any specific angle.
The main benefit of a reclining cot is to ensure that your body gets ergonomic and orthopedic support. It enables correct spine alignment and proper sleeping alignment, especially for those who typically suffer from body pain due to a bad sleeping position.
Of course, not all cots can recline. Hence, right from the start, you have to opt for these reclining or adjustable cots. They may cost more than your standard camping cots, but the extra price you pay will all be worth it.
Consider The Use Of Earpllugs
Earplugs are a simple, cheap, and effective way to protect your ears while enjoying the great outdoors. The loud sounds we encounter when we are camping, hiking, or a concert can wreak havoc on our ears. Constant exposure to these sounds can lead to hearing loss and tinnitus (ringing in the ears).
The wild is generally quieter than the bustling urban jungle. But at the same time, this doesn’t mean that there are no raucous disturbances that can disrupt your sleep. For instance, the constant buzzing of insects can rattle your sanity.
If you are noise-sensitive, these earplugs can help you deal with external sounds. By wearing these nifty accessories, you will be able to sleep comfortably in your camping cot!
Blanket Your Camping Cot With Mosquito Nets
When camping, it is not only essential to pack the correct equipment but also to plan your time in the wilderness carefully. A camping trip can be a lot of fun, but it is also important to keep your safety in mind. One vital item on the list of camping gear that can help you stay safe, and have fun, is a mosquito net. Mosquito nets come in a wide variety of models, but the most effective ones are designed to fit over your camping cot or tent.
The benefits of mosquito nets when camping are plentiful. The most obvious benefit is protection against bites. Mosquito bites can result in a number of health problems, including malaria, West Nile virus, yellow fever, chiggers, and other diseases. A mosquito net can also prevent you from having to spray your camp with pesticides. Additionally, the benefits of mosquito nets when camping include not having to sleep with your eyes closed, grinding your teeth, and listening to your partner whine about sand gnats.
Use A Rainfly
Before packing up a car and heading out for a weekend at the campsite, it’s important to have the right gear for the trip. One of the most important things to bring is a good rainfly (also called a rain cover or tarp). This is a lightweight waterproof cover that goes over your camping tent and provides a barrier against the rain. Not only does it help keep your place dry, but it also helps prevent moisture from getting in through the rainfly’s seams.
A rainfly can also cover your camping cot against the elements. Aside from a mosquito net, a rainfly should also be essential if ever you decide to bring your cot outside.
Conclusion
Camping cots are excellent outdoor amenities. They are user-friendly sleeping platforms for people who dislike dozing on the ground. Making them extra comfortable doesn’t only benefit your body and also the mind. After all, a good rest can take all the exhaustion from your trip!
I hope that you find this guide useful. For other related inquiries, feel free to ask me in the comment section below!
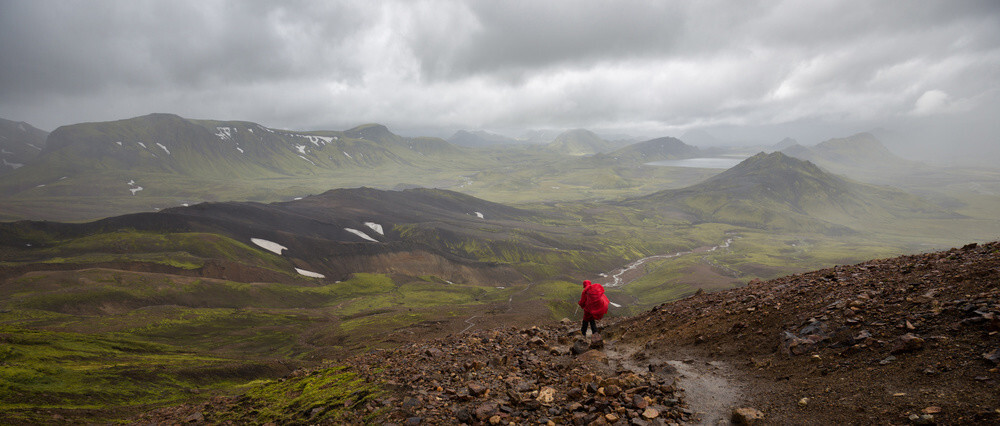
How Does Elevation Affect Precipitation?
How does elevation affect precipitation?
This seems to be a basic science question, but not many are aware of its answer. Of course, if you are a hiker or backpacker, you should have a good understanding of these factors. After all, many of your adventures will require you to set off on mountainous or hilly areas. You should come well-prepared so that you can combat the effects of elevation to the weather.
Terms You Should Know
Elevation – Elevation is the term used to describe the difference between the height of various places in the world. Low elevation means that an area is just close to or within the sea level. Meanwhile, the peak of the mountains sits higher on the ground and sea level; hence, they can be considered as highly elevated.
Average temperature gradient – The atmosphere’s upper layers can deflect most of the energy coming from the sun. But those that cannot be reflected pass through and hit the ground. Heating occurs as this happens. The lower the ground, the higher the heat becomes. Every time the elevation increases, the temperature drops significantly. It is said that for every 1,000 feet, the temperature drops at 3.6 degrees Fahrenheit.
Hence, if you are climbing a peak of 20,000 feet, the temperature on the top would be 72 degrees Fahrenheit colder than the ground. It is for this reason why mountain climbers are required to wear highly insulated clothing to combat the cold.
Elements of precipitation – Keep in mind that cold air is heavier than warm air. Every time the air in the ground rises, cold air at the top naturally falls. This process produces the convection currents in the troposphere. The currents cause the air to move freely since they have lesser density.
Meanwhile, winds at high elevations are stronger than in low elevations. The cold temperature on the top could also promote excessive precipitation. After all, cold air doesn’t hold moisture well as compared to warm air. The moisture comes from the condensation of ice and snow.
Convection currents – These convection currents pass upward in the windward portion of the slopes, which, in turn, generate eddy currents as you approach the peak. When the air condenses at higher elevations, thick clouds form. Because of this, peaks are often surrounded by clouds and hide them completely. Since these clouds are made from cold air, the moisture it holds falls as rain or snow. They combine with the strong winds at the peak, causing unfavorable weather conditions.
On the other hand, the leeward portions of these mountains remain parch because the clouds don’t reach them.
How Does Elevation Affect Precipitation?
Based on the explanations I’ve made, one could say that the elevation affects the weather in a number of ways. The higher you go, the windy and rainy it becomes. Conditions at the top are susceptible to sudden and heavy precipitation due to their proximity to the troposphere.
Always remember that most of the things that are related to weather take place in the troposphere, which contains up to 75% of the atmosphere of the total mass. It also holds roughly 99% of the Earth’s water vapor. Generally, the troposphere is just a few kilometers higher than Mt. Everest.
Within the troposphere, air pressure and temperature are volatile. The higher the elevation, the lower these factors become. Because of this phenomenon, it is not surprising that snow and rain are common on mountain tops rather than at sea level.
What Happens When You Camp / Hike Higher?
The short answer is simple: you’ll experience coldness and a lot of precipitation. You have to deal with rain and snow frequently, especially if the season is cold.
But allow me to expound these things further:
Less oxygen – When you climb mountains, you often notice that the air is thinner, and you can’t breathe as well as you can at sea level. Why is this? It’s all about oxygen. The less oxygen there is in the air, the harder it is for your body to move enough air into your lungs. It can be hard to get enough oxygen in the air that is too thin to breathe.
While you ascend to a mountain, air pressure decreases and altitude increases. At sea level, the air around us has a pressure of 14.7 pounds per square inch. As elevation increases, air pressure decreases. If you go to the top of a 10,000-foot mountain, such as Pike’s Peak, air pressure will have decreased to the equivalent of around 8,000 feet above sea level. This means you will have less oxygen in your lungs and bloodstream than at sea level.
Harsh environment – High elevations have extreme environments, just like the snow-capped mountains, the Himalayas, and the Andes. While trekking to elevated destinations, you should know how to adapt to the extreme environment to avoid altitude sickness, frostbite, and hypothermia and protect your knees, ankles, and feet. When the altitude is high, make sure you have your sunscreen, and your clothing should be appropriate to the condition. Hike slowly and have breaks whenever necessary.
Altitude sickness – High altitudes can be an incredible experience, but they are not for everyone. When you go to high altitudes, you expose yourself to new environments that your body is unaccustomed to. If you are not prepared, the lack of oxygen and high altitude can cause altitude sickness, a condition that can be dangerous. The best way to prevent altitude sickness is to know what causes it and learn how to prevent it.
As you climb to higher elevations, your body has to work harder to get oxygen to your brain. At high altitudes, there simply isn’t enough oxygen for everyone. Altitude sickness occurs when your body has trouble getting enough oxygen even when you are breathing normally.
Precipitation In The United States Per Region
Northeast
The Northeast houses some of the most beautiful summits in the United States. It gets windy and snowy in this area during the winter. Most of the time, the conditions are too brutal that high-elevation camping or hiking is not recommended during the cold season. Hence, it is ideal to go during the fall and summer season, where the daylight hours are long for an all-out adventure. The picturesque foliage can also make your trip eye-catching.
Recommended hiking destinations:
New Hampshire – White Mountains (1,917 m)
Acadia National Park – Cadillac Mountain (1,530 m)
Vermont – Green Mountains (1,340 m)
Southeast
The Southeast is popular for its panoramic mountains, rapid rivers, and the ever-conspicuous Great Smoky Mountains. It is a place that welcomes you to an all-year-round adventure. Since the winters in the Southeast are calmer than in the Northeast, you are free to do off-season hikes. During the summer, you can take advantage of the swimming holes that are scattered around its popular hiking destinations.
Recommended hiking destinations:
Tennessee – Clingmans Dome, Great Smoky Mountains (2,025 m)
North Carolina – Mount Mitchell (2,037 m)
North Carolina – Grandfather Mountains (1,812 m)
Midwest
The Midwest hides some of the finest hiking destinations that the United States can offer. On its own, the region is filled with natural grandeur. Its Great Lakes hold a lot of wonders, while the cave networks in the south will certainly marvel you. Every time you hike in the Midwest, you have to anticipate the coldness to kick in. Mountains and hills are always frequented by rain and snow. Therefore, the best time to hike remains to be in spring and summer. Interestingly enough, the elevation gains in the Midwest are quite minimal.
Recommended hiking destinations:
Illinois – Starved Rock State Park (137 m to 198 m)
Minnesota – Superior Hiking Trail (557 m)
South Dakota – Black Hills National Forest (2207 m)
Southwest
The American Southwest is a sight to behold. It boasts a plethora of natural wonders, ranging from the California Coast to the majestic American Desert. The sprawling ancient trees and the rolling hills also prove that the Southwest is heaven-on-earth for many outdoor enthusiasts. During the summer season, most trails and hiking destinations are dry and hot. In the winter months, highly elevated areas get some snow. Lower elevations don’t receive that much snow. Again the ideal time to explore the region is during the spring and fall seasons.
Recommended hiking destinations:
California – Yosemite National Park (648 m to 3997 m)
Arizona – Grand Canyon, South Rim (2,100 m)
Utah – Arches National Park (1,723 m)
Pacific Northwest
Of course, the Pacific Northwest is definitely a place-to-go in the United States, especially for hikers. It is the haven of unadulterated rainforests and exotic coastlines, all worthy of being explored. Valleys and volcanic peaks are also among the unique natural formations that this particular region has to offer. During the late fall and early spring, rain riddles its elevated landscapes. On winder, strong gusts of winds manifest on the lowlands while snow accumulates at highly elevated areas. During summer and early fall, the weather can be ideal for all-day exploration.
Recommended hiking destinations:
Washington – Olympic Mountains (2,432 m)
Washington – Alpine Lakes Wilderness, Mount Stuart (2,700 m)
Oregon – Mt. McLoughlin (2,894 m)
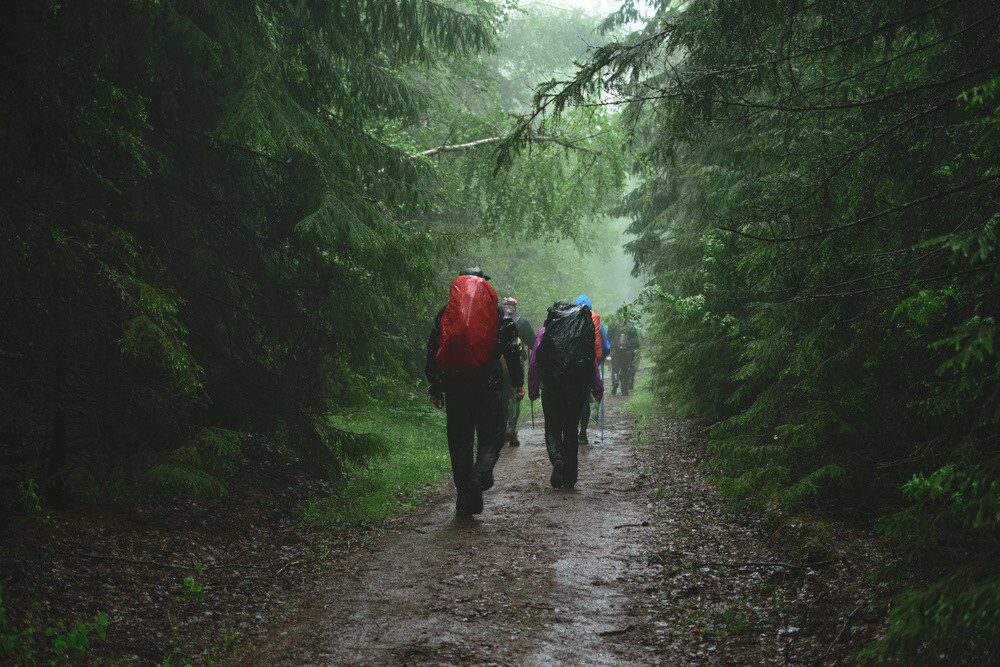
How To Deal With Precipitation While You Are Hiking?
What do you think you need to do in order to be able to hike in the rain? Most people would suggest you need to wear waterproof clothing, but that’s not the only thing you should do. Here are some tips for how to hike in the rain:
Protect Your Gears
It is essential that you provide protection to your gears if you are expecting precipitation along the way. Keep in mind that heavy downpours can defeat water-resistant fabrics. Additional defense is essential to keep your items dry.
Here are some items that can help you protect your outdoor equipment from precipitation
Waterproof cases
Dry sacks
Ziplock plastic bags
Raincovers –
Trash bags
Meanwhile, here are some pieces of hiking/camping equipment that can help you overcome the ordeals of hiking in a wet or snowy season:
Trekking poles – They can provide traction to your feet if the ground is slippery.
Hand warmers – If things get cold, you have to protect your hands and other extremities. Hand warmers can help you with that.
Headlamps – You have to consider that clouds can lower the daylight illumination. If that’s the case, you have to bring a headlamp or flashlight along with you.
Multi-towels – You might need these things to wipe off your wet equipment.
Clothing Tips
Don’t wear cotton – Cotton absorbs a lot of water, so it is a no-no when hiking during heavy downpours. It can even absorb your sweat, too. If the temperature is low, cotton clothing can contribute to the development of hypothermia. Pick polyester, nylon, and wool as your primary clothing fabrics instead. They can effectively wick moisture.
Use synthetic insulation – If you use ordinary down, you can’t rely too much on its insulation. Once it gets wet, it will not provide enough warmth to you. You should go with water-resistant down on your jacket to ensure that you can retain a certain degree of heat even if it is raining or snowing.
Apply durable water repellent (DWR) – Most rain gear today have DWR coating. The latter is an application that can help restore the water and moisture defense of your equipment. Of course, the DWR wears off over time. You should treat them with a new DWR coating to guarantee sufficient waterproofing.
Use the right footwear – It is ideal if you use waterproof footgear when hiking on a rainy or snowy season. Waterproof shoes and boots can keep your feet warm and dry throughout the hike. Footwear with a mesh design is great if you are trailing in areas with water bodies such as swamps, rivers, and creeks. If the terrain is slippery, your footwear should have deep crevices and lug soles. They can amplify the traction on your feet.
Store dry clothes – Having an extra pair of dry clothes can help you beat the chilly temperatures. Things get extra cold if you are drenched and fully wet.
How To Pick A Camping Cot?
How to pick a camping cot? How can you guarantee that you are getting the best one right from the get-go?
A camping cot is a portable bed that you can carry with you while camping, boon-docking, or having a sleepover. They are usually made of aluminum or steel and can range from simple, lightweight mats to more complex, collapsable models. And, their uses extend beyond the outdoors, as well. (For instance, they’re also great for providing extra sleeping space in an emergency.)
Camping cots are ideal for those that want to camp but have problems getting comfortable on the ground. They suit all types of camping, including family camping and RV camping. You can choose from a range of sizes and styles depending on the type of camping you prefer.
But of course, the quality of one camping cot differs from another camping cot. Hence, it is essential that you can pick one appropriately for intended use and preferences.
Why Use A Camping Cot?
Camping cots are great for camping, as they provide a safe, comfortable, long-term solution when it comes to sleeping outdoors and are ideal for those looking to get away from it all. When it comes to camping, you can sleep on a camping bed, or you can sleep on a camping cot.
There are a lot of reasons as to why you should use a camping cot. Here are some of them.
Inherent durability – Unlike your sleeping bags, these camping cots are made to withstand the elements. Their frames and legs are made from rugged steel and metal, which don’t wear even if exposed to the elements. Since the fabric of the cot is away from the ground, they are not prone to ripping or punctures. They can remain tout and water-resistant for extensive periods.
Hassle-free – With a sleeping bag, you need to snuggle in before you can lie on them. That process may take a lot of time. Of course, it is still another story if you want to get out of your outdoor bedding. But with a camping cot, you simply have to lie on it with your blanket, and you can already get a pleasant sleeping experience.
Prevents contact with the elements – Since sleeping cots have elevated construction (thanks to their frame), it is naturally easy for it to keep its users from getting in contact with dirt and insects. You will no longer have to worry about bugs and mud ruining your sleep.
Improved air circulation – During hot evenings, the lifted design of camping cots allows cool air to circulate below them. It causes a soothing, cooling effect, which is essential for you to be able to sleep comfortably.
How To Pick A Camping Cot?
I often hear people ask what to look for in a camping cot? Essentially, the process of picking a cot is not that difficult, especially if you know the determining factors that highlight their quality. But sometimes, the way you pick an outdoor cot is based on your preferences and intended application.
Capacity
Most of the camping cots today are designed for single-person use. But at the same time, you can still find bunk models, which is an excellent option for children or for those who have small tents. They are also great for those people who want to save space in their shelters.
Of course, you are also free to look for bigger camping cots if you are particularly big or you like to sleep together with a person. Do not forget to check the length of the cot, too. If it is too short, it would be impossible for you to fully stretch your body. You may end up hanging up your feet!
Simplicity In Assembly
Similar to other outdoor amenities, there are other camping cots that offer quick and hassle-free assembly than others. As much as possible, you have to identify which one of them can give you a relaxing time while camping. There are camping cots with a plug-and-play design; just unfold them, and you are good to go. Meanwhile, other outdoor cots will require you to attach threading poles and other locking mechanisms before you can set them up.
Construction
You should pick an outdoor cot that has superb construction. The better the materials used on the cots, the more reliable they are. Camping cots have two major parts: the frame and the cot (or the platform where you are going to lie down and sleep).
For the frame, you should pick either steel or aluminum. Aluminum boasts decent durability and excels in lightness. Basically, it is your best choice if you want to go lightweight. If you are expecting harsh conditions or difficult terrains, go for cots with steel frames. They are somewhat heavy, but they can endure a beating.
For the cot, it should be made from highly rugged polyester and nylon. The higher the denier rating of these fabric materials, the better. It certifies that they are not easy-to-puncture. They can remain tout even if you use them consistently.
Weight Capacity
The weight capacity of the camping cot refers to the load that it can carry. The standard cot can carry at least 300 pounds of weight, which should be enough for any regular-size adult. The heavier the weight that the cot can hold, the more people it can cater to. If you can see an outdoor cot that has a weight capacity of 600 pounds, this means that the cot can handle two adults or one adult and two kids.
Storage
While storage may not be an issue for some people, it can become for backpackers and weight-conscious outdoor enthusiasts. Camping cots are generally big and space-eaters. Once they are fully unfolded, they can already take up a significant amount of space inside your tent. It is because of this reason why others prefer to set their cots outside.
But even if these cots are folded, they can still be burly. You should go with those options that fold nicely and compactly. Aside from convenience in storage, an outdoor cot that can be folded tightly benefits portability.
Where To Buy A Camping Cot?
There are a lot of places where you can get a camping cot that can meet your needs and expectations.
First, you can always go to your local outdoor stores and outlets and see if they have a selection of camping cots. Seeing the cot in person will let you have a good feeling about its quality.
Second, you can go to the sites of known cot manufacturers. You can also go opt to shop on different online retail sites if you don’t want your choices to get restricted. You should be able to find a myriad of options for your next camping cot.
Conclusion
Learning how to pick a camping cot is essentially the best way to get a nice sleeping platform without having to risk your money. Not all cots deserve your attention, so you better scout for the right one that gives you the most pleasant experience while you are outdoors.
I hope that you find this guide hopeful. If you have inquiries, feel free to ask me in the comment section below.
Camping Cot Vs. Air Mattress: Which Is Better?
Camping cot vs. air mattress: which is better?
When it comes to outdoor sleeping amenities, camping cots and air mattresses are two common options. They are highly opted by enthusiasts due to the convenience and ergonomics they bring.
One can say that having either of these items will enable you to have a good time in the wild. They can let you sleep, relax, and enjoy your trip.
But between the two, which should you choose? Read on first before you make a decision.
Camping Cot Vs. Air Mattress: Which Is Better?
Before making our verdict, we have to make sure that we know the specific differences between air mattresses and camping cots. In this way, we can address the strong points, drawbacks, and ideal uses.
Camping Cots
Camping cots have been around for a long time. They were initially designed to be used by soldiers in wars and by medical workers in disaster zones. They have since become popular amongst people who enjoy camping and outdoor activities. Camping cots are a great way to add some extra space to your tent. With a cot, you can sleep comfortably even if the ground is hard or uneven.
Camping cots are known to be heavier and bulkier than sleeping bags. Aside from the sleeping platform, cots also have frames made of either steel or aluminum. Their weight makes them not suitable for backpacking and lightweight applications. But certainly, they are great for tailgate parties, RV camping, and backyard retreats.
One of the notable aspects of camping cots is their elevated design. Basically, the cot is lifted from the ground by its frame and legs. Because of this, sleepers can feel more comfortable, as they have to deal with uneven and rough surfaces. Camping cots also keep them away from the elements, such as groundwater, moisture, and insects.
With the added elevation, air circulation is optimized. It adds to the coolness you feel during summer and warm conditions. During the cold season, the height in these camping cots reduces the probability of heat loss.
Camping cots are more compact than air mattresses. Hence, you can fit it inside a tent, especially if your outdoor shelter has big entry points. Some camping cots come with adjustment points, which allow you to recline them for better ergonomics and comfort.
Some camping cots have padded platforms. Usually, the top is made from lightweight materials such as nylon and polyester. But in some cases, the fabric is replaced by plush and cotton pads. They are generally heavier than the standard cots, but they are downright comfortable.
In a nutshell, we can surmise camping cots with the following advantages and disadvantages:
Pros:
Comfortable
Can be adjusted or reclined
Can fit inside tents
Provides decent ground elevation
Aids in temperature regulation
Cons:
Bulky and heavy
Not suitable for backpacking applications
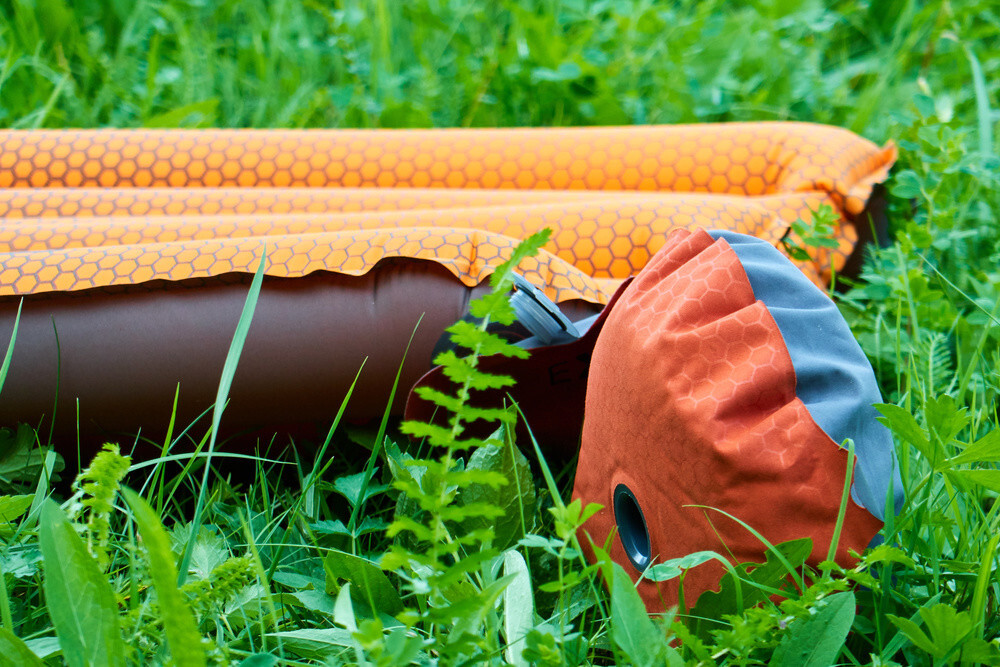
Air Mattresses
Air mattresses, otherwise known as inflatable mattresses, were first invented in the late 1950s by NASA. Nowadays, they’re used in all sorts of applications, from camping to hospitals. Although air mattresses come in a number of sizes and can be found in a variety of materials, they all have one thing in common: they’re designed to be filled with air.
Most commercial air mattresses in the market today are constructed in PVC, while others are using rubber. Regardless of the build, air mattresses are extremely popular for both indoor and outdoor use. They are used in sleepovers, tents, and motorhomes.
Unlike camping cots, air mattresses don’t provide any elevation. They don’t have built-in standing frames. Hence, just like sleeping bags, you have to place them directly from the ground.
The only plus side here is that these air mattresses are thicker than ordinary sleeping pads. Therefore, they can still separate you from the soil and other ground dirt. But of course, you can expect that they will not be able to shield you from ground moisture.
Filling the mattress with an air mattress can be done through the use of pumps or air compressors. Once deflated, you can fold and pack these air mattresses so that you can bring them anywhere you want. Some air mattresses do come with repair kits so that you can deal with small punctures.
Pros:
Offers portability
Highly comfortable
Firmness can be adjusted
Cons:
Susceptible to holes and punctures
Requires inflation before you can use them
Not compact options; will occupy room space
Ground elevation is not as significant as camping cots
Camping Cot Vs. Air Mattress: Which One Should You Choose?
As you can see, both camping cots and air mattresses have their own benefits and disadvantages. It is proof that you should pick them based on your needs and preferences.
Air mattresses are definitely great for recreational activities, especially in areas where you can access them easily. You can lie on them comfortably, which makes them great for stargazing and evening relaxation. Air mattresses can float on water. Your kids would certainly love them.
Air mattresses also offer enough space for two or more people.
But at the same time, it is not recommended that you use these air mattresses on rugged applications. After all, their construction is not fully impervious to damages, even though they are made from durable materials. Over time, the fabric of these mattresses will deteriorate. When that time comes, they will be prone to punctures caused by rocks and branches.
Furthermore, keep in mind that you can’t use the air mattresses right away. You still have to inflate them. If you got a manual pump, it would take you minutes before you can fill the mattress’s interior with air.
On the flipside, camping cots offer better sleeping convenience than sleeping bags and pads. They are a great option for those people who feel discomfort when sleeping on the ground. The elevation that these cots provide also promotes ample air circulation and a “cleaner” sleeping experience.
However, they are difficult to carry, even for backpacking and backcountry adventure. Even though they are available in foldable designs, they are still heavy due to their metal frames.
Moreover, you have to remember that these camping cots have limited space. They only allow single sleepers. It is difficult to find outdoor cots that are spacious enough to handle two or more people.
Verdict
At this point, one could say that both camping cots and air mattresses have their respective strong points. Both of these items are usable in camping applications, but I don’t suggest that you use them on backpacking or other rigorous adventures that require weight management. They are great for leisure outdoor uses or applications where your camping site is quite accessible.
I hope that you find this guide helpful. If you have questions, feel free to ask me in the comment section below.
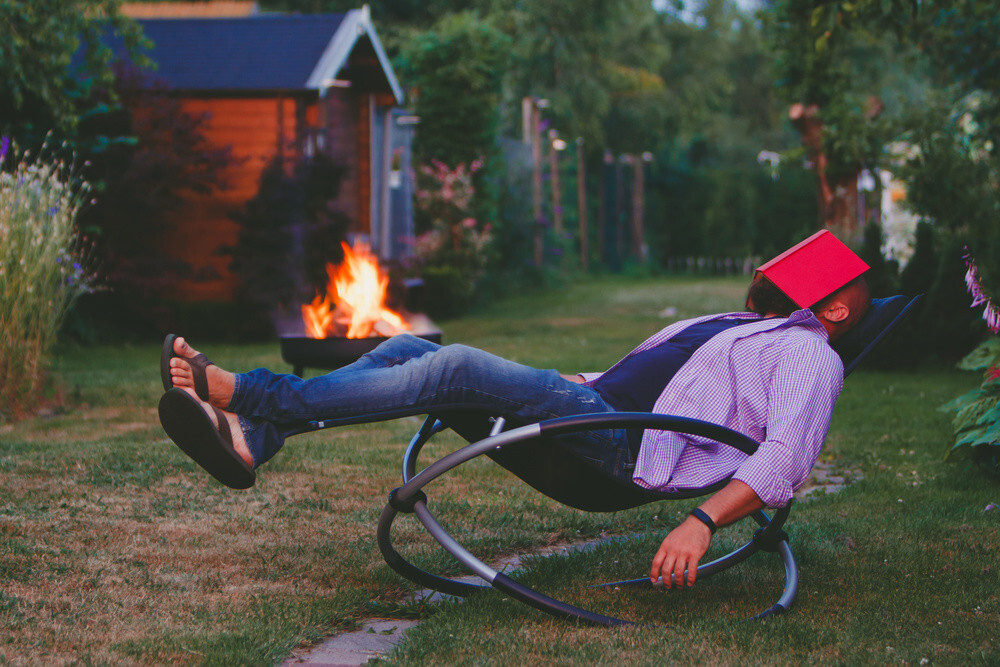
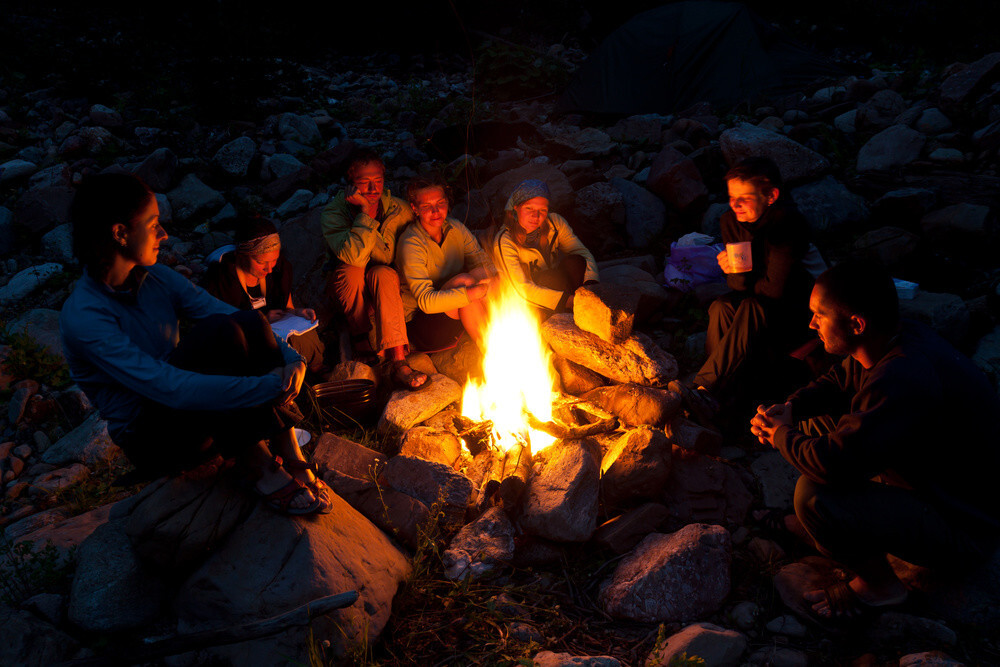
7 Fun Things To Do While Sitting Around A Campfire
Campfire camping conjures up images of cooking over a fire and roasting marshmallows, but campfires are also great for more than just munching food. Whether you are camping or simply sitting around a fire pit as the sun sets, campfires provide a great opportunity to connect with family and friends.
The next time you are planning an outdoor activity, think about adding a campfire so you can make the most of this fun activity. And of course, if you are looking for the things that you can do while you are fuzzy around a campfire, the following list will be a brilliant one.
Fun Things To Do While Sitting Around A Campfire
For Kids
Sound Train
This game is a challenging and fun way to keep the kids busy on a long drive. The rules are fairly simple, and only the first few letters of the alphabet are in play, which means this is an excellent game for even the youngest of campers.
The rules are as follows: A person starts the alphabet by saying, “I love camping because of A… B…” The next person continues with “I love camping because B… C…” and then the third person says, “I love camping because of C… D…” and so on. The game continues until someone misses a letter or can’t think of a word starting with the letter they are given.
20 Questions
For those who don’t know, The 20 Questions is a game of knowledge on a particular subject. It can be played between two or more people, and the aim is to guess the object through a series of yes or no questions. The rules are simple and easy to follow, even for children. The first player asks a question that can be answered with a yes or no answer. The second player has to think of an object that fits the question and answers it with a yes or no. The first player then asks another question to guess the object. If the question is answered in the negative, the second player tries to think of another object and so on.
Name That Tune
Competing in a Name That Tune game is all about having fun. You certainly don’t have to be musically trained to have a great time playing. But if you want to get started, you might want to play along with some of your favorite songs to familiarize yourself with the most common song structures. Even with a few songs to enjoy, you can play this game already.
To make it kid-friendly, you can limit the songs to nursery rhymes. You can also expand your musical selection to popular music that even the young ones would have no trouble remembering. Of course, you should have an audio device that will help you play the tune that you want your kids to guess. If not, bring your favorite musical instrument, such as a guitar or ukulele, to the occasion.
For Teenagers
Truth Or Dare
The “Truth or Dare” game is a classic party game. It is also a common game for teenagers, in which players take turns asking each other questions or making them do dares.
The core of the game is for a player to have both the opportunity to tell the truth, or take a dare. Whenever a player is asked a question by the leader, he or she must answer truthfully or take a dare. In this game, dares are usually sexual in nature, thus making it a game of pranking people. But of course, you should veer away from these naughty dares, especially if you are with your family or if there are kids with you.
If one person says that he or she opts to do a “dare,” you can ask them to do hilarious and embarrassing things for fun. If they go to for “truth,” you should ask them questions that you know they would hesitate to answer!
Charades
The Charades game is a fun and entertaining game that you can use to play with your friends or significant other. This game is ideal for a group of people sitting around the campfire, as it will get everyone involved and having fun.
Charades is a game that is meant to be played in social gatherings, similar to the game Pictionary. Players have to act out different words or phrases without using any words or making any noise. It is a game that requires skill and helps to develop your acting abilities since you have to portray the words you are trying to act out without saying a word.
For Adults
Make Me Laugh
“Make me laugh” is an informal game played by a group of people, usually around a campfire or other sitting arrangement. In this game, one person tells a joke or funny story, and the rest of the group has to keep a straight face while hearing it. No one is allowed to laugh or smile, nor are they allowed to indicate that they think the joke is funny in any way, even though eye contact or raised eyebrows. If anyone laughs or gives away that they think it is funny, the person who told the joke wins, and the other people must pay up.
Drink, Drink, Shot
The Two Truths and a Lie game is a great way to make campfire conversation more fun and interesting. No matter if you are at your family reunion or on a date, this game works great. Here’s how it works. Everyone writes down two true things about themselves and one lie. Then we go around the room, and each person tells a story or says something about themselves, ending with “Is that true or a lie?”
If you fail in answering correctly, you will take a drink. Continue this game, and everybody in the campfire will certainly burst in laughter and excitement!
Fast Pitch Tent Vs. Instant Tent: How They Differ From Each Other?
“Fast pitch tent vs. instant tent: what’s their difference?”
I’m pretty sure that you have heard this question before. In fact, you are here because you want to learn the answer to this curious inquiry. Well, I am here to help you get what you want.
Allow me to discuss some of the features these two types of tents have, their respective differences, and other essential things you should know about them.
Fast Pitch Tent vs. Instant Tent
These days, a tent is not only judged based on how it can shelter people; its quality is also assessed on the convenience and functionality that it can give.
Naturally, nobody wants a tent that is too difficult to pitch or assemble. One way or another, outdoor enthusiasts would automatically prefer those tents that are not quirky when it comes to this particular aspect.
Of course, that gives rise to fast-pitch tents and instant tents. They are the modern solutions to the age-old problem of dealing with clunky and burly outdoor shelters.
Fast-pitch tents and instant tents have similarities. But right from the get-go, the tents are not the same.
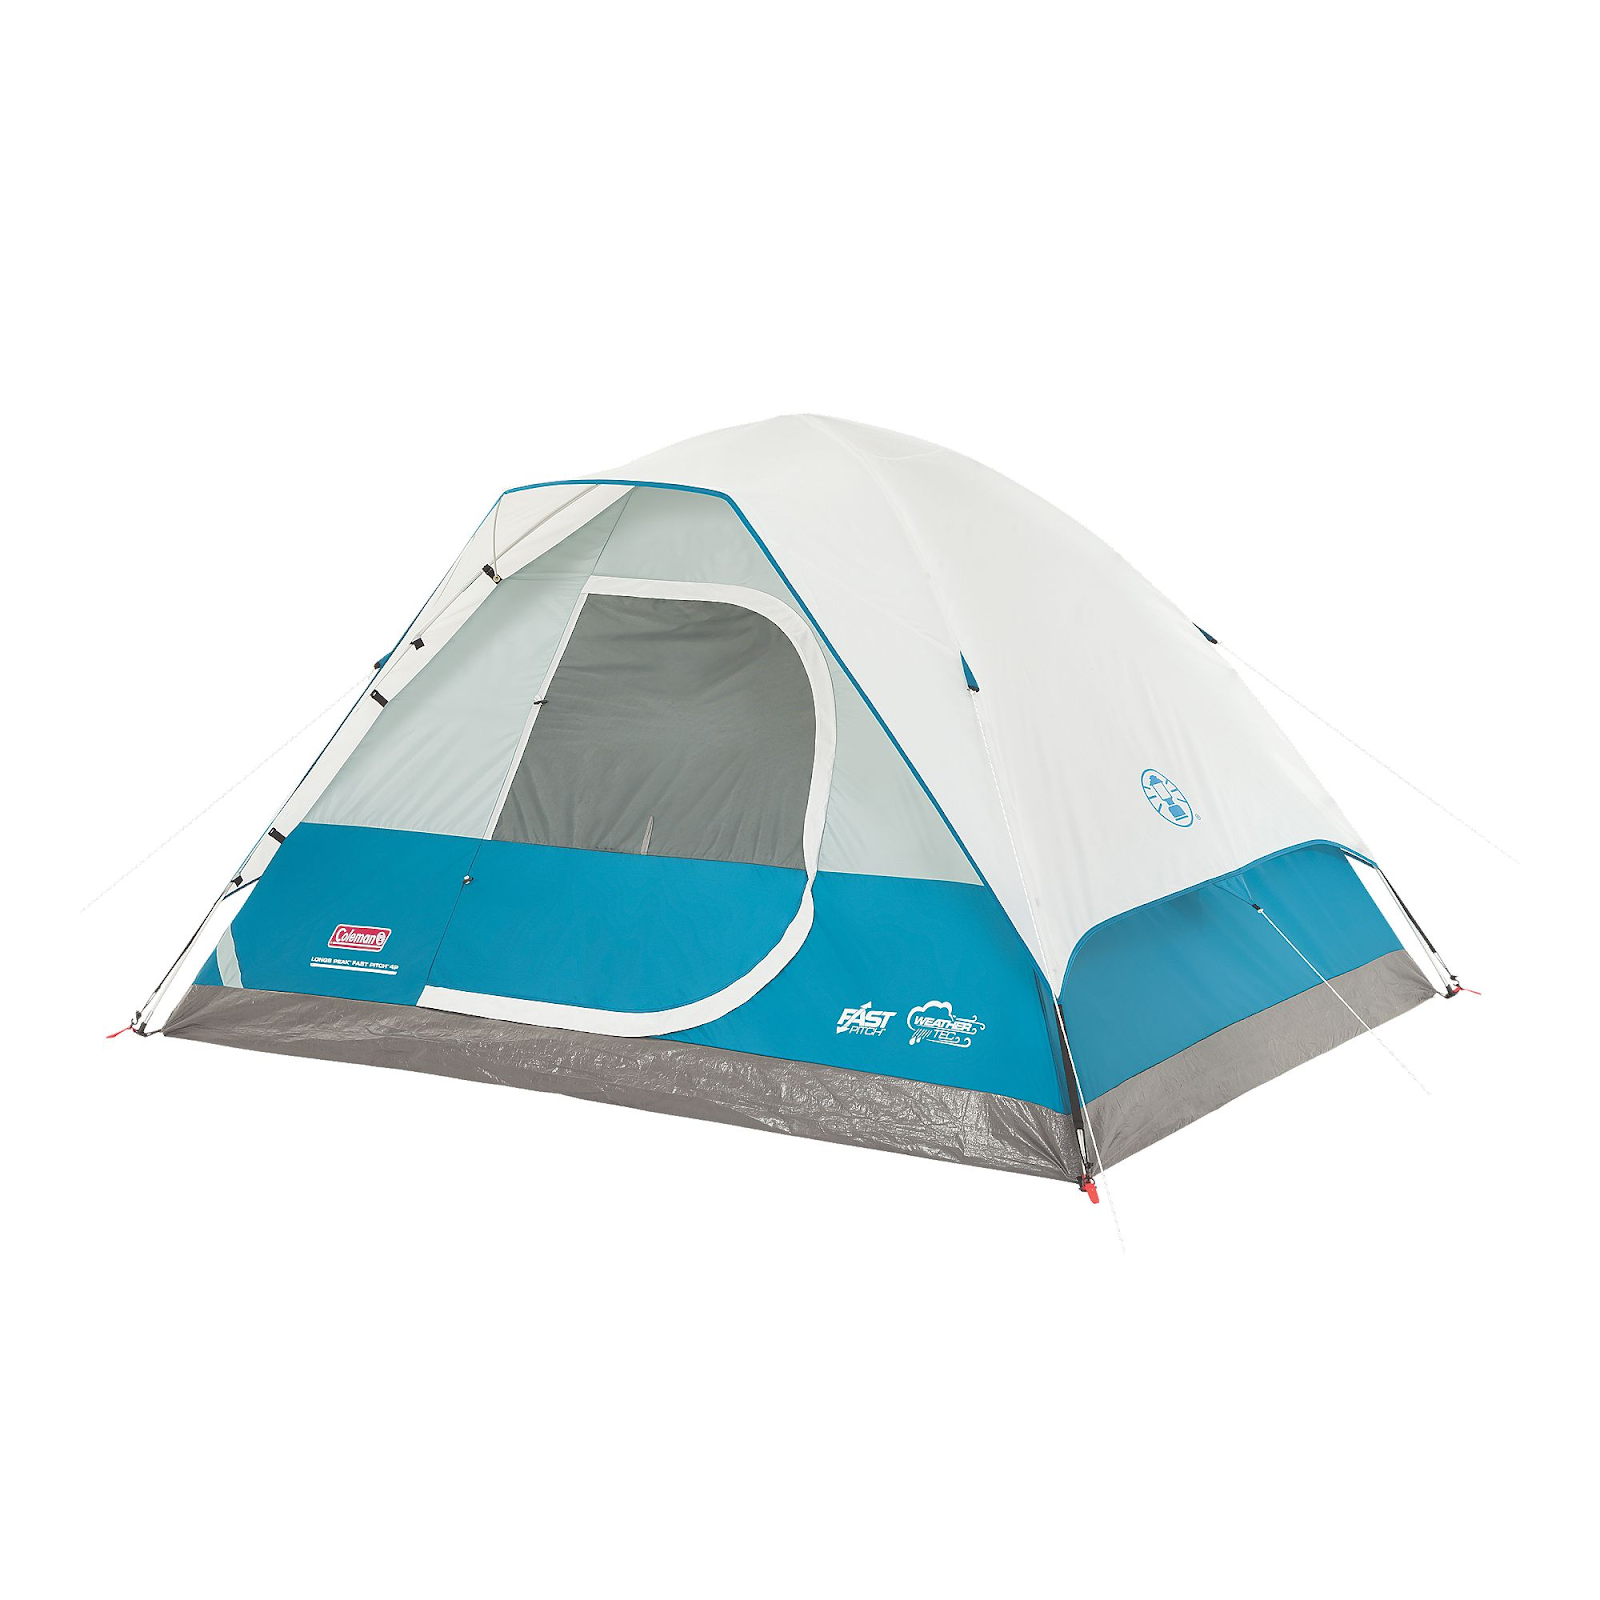
In fact, fast-pitch is a name that Coleman uses for some of their tent lines. Hence, it should be properly written as FastPitch, not fast-pitch. On the other hand, the term “instant tent” belongs to a different number of tents that have the capability to pitch themselves as quickly as a minute.
It is also notable that a Fast Pitch tent from Coleman is designed to become an instant tent–only a step-higher. If you are going to put these Fast Pitch tents with standard Coleman tents side-by-side, you’ll notice that the latter has faster assembly time.
How They Vary In Construction?
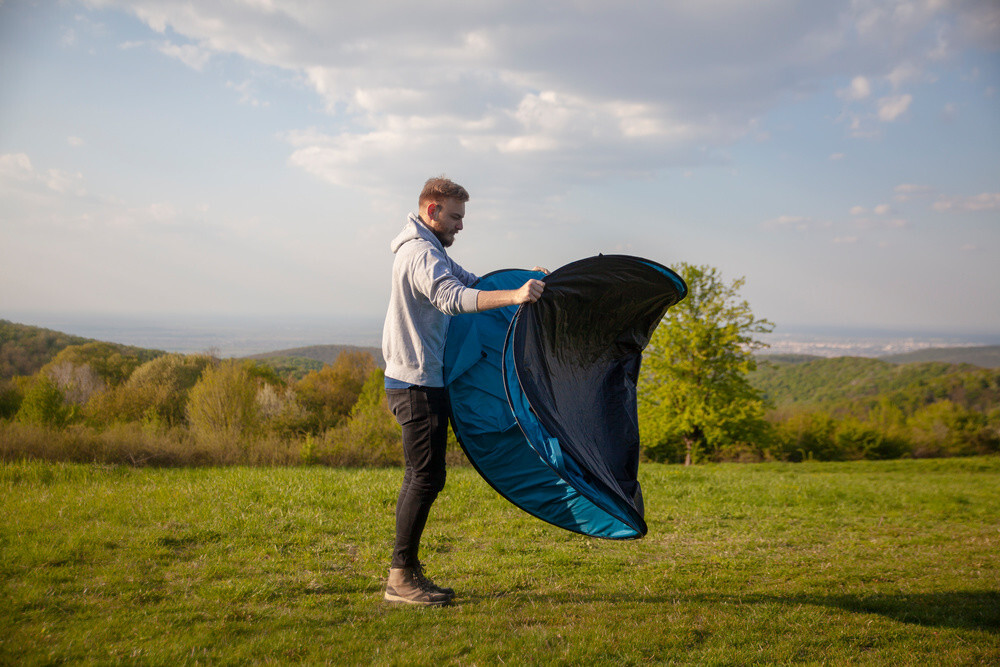
The standard instant tents and Coleman’s Fast Pitch tents may or may not follow the same build. But in general, there are some features that these two tents share. A good example is the built-in poles located at the exterior shell of the tents, allowing them to erect on a dome shape.
Because of these poles, the setup procedure for these tents has become fast and hassle-free. Furthermore, the dome shape of these instant and Fast Pitch tents allows them to negate the elements. They can fend off strong gusts of wind or even rainwater.
The poles used on them are usually made from lightweight material–typically aluminum. It is quite rare to see steel poles because they are sturdy and not flexible. Aluminum poles, on the other hand, exhibit versatility in harsh weather conditions.
Instant tents and Fast Pitch tents are capable of fast assembly and disassembly. Because of this, they give you the convenience of mobility. If you want to move the tent from one position or location to another, it won’t be a problem.
Keep in mind that most instant tents are available in 4, 6, and 8-person sizes. You have to be aware of the sizes you pick, given that they are dome-shaped tents and not cabin styles. Since their walls curve toward the roof, it is difficult for you to stand on them. Moreover, it reduces the vertical space that you have. Hence, it would be great if you pick a bigger instant tent than your prescribed needs. For example, if you are four in your group, you should get a six-person tent.
Both the Fast Pitch tents of Coleman and other instant tents are tailored from waterproof fabrics. They also come with mesh windows that provide enhanced ventilation. But if it gets rainy, you might need to get an extra tarp or rainfly to protect the tent and your belongings from getting wet.
Do They Have Any Drawbacks?
Fast Pitch tents and instant tents are great. But at the same time, they have downsides, too.
For instance, they don’t have an excellent pitch because you can’t make them stick like other types of tents. If you have no supporting utilities with you, such as stakes, guylines, and poles, these tents will not be able to hold themselves against turbulent weather elements.
Their ideal use is during favorable weather or when the day is shining bright, and no dark clouds are looming on the corner.
Of course, I have to emphasize that these tents have limited storage spaces. If you are aiming to have an outdoor shelter that can accommodate many users and their respective equipment, you should get cabin tents. Their nearly-perfect vertical walls allow higher interior peak height on the center and more floor space.
Conclusion
Camping outdoors has always been a great way to enjoy the natural world, spend time with friends and family, and have fun. But it is impossible to do that without a good tent.
Ever since they have been invented, these tents already received a number of modifications and innovations. They are available in a number of shapes and sizes. They also vary in style and application. Instant tents and Fast Pitch tents are among the variations that you can get today.
In a nutshell, Fast Pitch tents are a series of proprietary tent designs by Coleman, while instant tents are tents with capabilities that allow quick pitching. But since Fast Pitch tents are designed to work like instant tents, you can say that the former falls within the category. The stark difference is that these Fast Pitch tents have better mechanisms in their construction and setup.
I hope that you find this guide useful. For other inquiries, feel free to ask me in the comment section below.
What Tent Size Do I Need? A Detailed Guide In Picking The Right Tent Size
What tent size do I need?
Most of the time, people tend to pick their tents based on their features and ergonomics. Of course, that’s not a bad thing; that’s a by-the-book way of assessing the quality of an outdoor tent. But at the same time, these factors are not the only determining aspects that tell a tent’s quality.
You should also address the sizing issues. You have to make sure that the tent fits your requirements. Furthermore, it should strike a perfect balance between its weight and bulk.
In this guide, I will discuss the guidelines when choosing the right tent size for you.
How To Choose The Right Tent Size
Capacity Rating
When buying a tent, the most important thing to do is understand the capacity rating of the tent you are purchasing. The capacity rating is how many people the tent can hold. The second most important thing is understanding the number of people the tent’s floor space is designed for. For example, a family of four could fit in a three-person tent with room to spare.
Tents aren’t like other types of equipment: choosing a tent with the right capacity rating is more about ensuring comfort and convenience than ensuring protection from the elements. In other words, while a tent that is too small may not be able to comfortably hold all your friends or family, a tent that is too big will probably just wind up being an inefficient use of space.
Here are the technical specifications of tents based on their capacity rating:
1-Person Tents – Suitable for one person only. Gears should be stored in a vestibule.
2-Person Tents – It is comfortable for single-person use as it lets you store your items inside. It works well for two people, but it will be tight inside. Their outdoor equipment will be stashed in a vestibule.
3-Person Tents – These tents will provide enough space for two people. It can also fit sleeping pads. If there are three adults inside, it will be tight on a 3-person tent; if it is only two adults and one kid or pet, it will be roomy.
4-Person Tents – A 4-person tent is exceptionally spacious if there are only two to three persons on it. Gear storage will not become a problem. It can completely accommodate four campers, but it is going to be crampy on the interior. They have to store their equipment outside or in a vestibule.
6-Person Tents – Designed for five to six people, but it is going to be tight. It is a spacious option for four people, as it lets them store their equipment.
8-Person Tents – It is a comfortable option for five people plus their items. Of course, it is suitable for six adult individuals, plus their children and pets.
10-Person Tents – This one is highly luxurious for four people plus their outdoor equipment. It is going to be stuffy inside when there are eight or more campers using it.
Floor Space
When it comes to floor sizing, you should always go with a tent that provides you with the maximum value. Based on the recommendations of enthusiasts and other outdoor experts, a tent should provide at least 20 square feet of space per person. Therefore, if you are using a single-person tent, you have to make sure that the tent has a minimum floor size of 20 square feet. In this way, you have enough room to sleep without having to place your gear on your top.
Of course, this measurement is just the minimum. If you want more space to accommodate your sleeping pads or sleeping bags, you have to go for tents with bigger floor sizes. If possible, go for options that can provide up to 30 to 40 square feet per person.
If you are considering your children in the equation, it is best to get a tent that is spacious enough to cater to their growth. Sooner or later, they will hit puberty and become full-grown teenagers. Their body will obviously get big, which would make the tent insufficient for them. You got to invest in large multi-room tents, with partitions if possible.
Do you want to sleep comfortably on a tent? This guide should help you out!
Shape Of The Tent
There are two general types of tent shapes: cabin and dome tents.
Cabin tents feature almost-straight walls, which improve their interior space. Of course, the bigger space is, the more room you have to move around. For instance, family-sized cabin tents let their users move and stand without hitting the ceiling. Such a design is extremely comfortable as it maximizes the mobility of the campers.
A cabin tent is the perfect choice if you are going to bring camping cots are other large outdoor amenities. They have the space to cater these things conveniently.
But of course, there are downsides to these cabin tents. Because of their vertical wall design, they are not good at deflecting strong winds. During times when hard weather hits your campground, you’ll have no other choice but to rely on your stakes or anchors. If you want this kind of tent, you have to make sure that your stakes are long and durable.
Here is a rundown of some of the best tent stakes in the market today.
Meanwhile, a dome type of tent inclined or sloped walls. When strong gusts of wind are persistent in your area, this particular tent type will not have any problems. The wind simply passes on the walls of the tent, allowing it to be more stable. And since they don’t have any parts or features, they are inevitably lighter than cabin tents. But of course, their internal space of dome tents is limited due to the natural inclination of their walls. You can’t stand upright while inside them.
If you are going to buy a dome tent, make sure that it is larger than what you actually need. For instance, if you are a solo hiker or backpacker, you might want to get a two-person dome tent. In this way, you can have enough space to move around and store your equipment.
Vestibules
A vestibule is an extension of a tent, but not all tents have a vestibule. Mostly, this particular component is only available in large models. The function of a vestibule is simple: it gives additional space for you to store your items. Alternatively, you can use a vestibule for recreational purposes. You can use it for lounging and relaxation. It offers sufficient shade so that you can be shielded from rain and heat.
Of course, the general idea here is that if the tent has a vestibule, you will have more space you can utilize.
If you are gunning for tents with vestibules, make sure that you understand their coverage and capabilities. In this way, you can spot the best option for you.
Application
The application may also determine the size of the tent that you are going to buy. For backpacking purposes, you only need a 1-person to 2-person tent. That’s the standard, especially if you are making the trip by yourself. Even if you are in a group, it is still recommended that you bring your own tent, unless you are going with your partner or close friend. The smaller the tent, the more weight you can shed.
Looking for an ultralight tent? Check out this list!
For leisure camping, you are free to pick a large tent. After all, there’s no restriction to the size and weight of tents here, especially if you are going to pitch your tent on highly accessible camping grounds.
Furthermore, keep in mind that you have to upsize the tent based on your numbers. For instance, if there are four people in your group, it is suggested that you get a 6-person tent. In this way, you can all enter the tent without feeling too snugly.
Conclusion
The ideal tent size varies from one person to another. Numerous factors can affect your decision, and you have to take these things into account before buying a tent. By knowing the right tent size, you will get an outdoor shelter that can support your outdoor needs and expectations.
I hope that you find this guide useful. For other inquiries, feel free to ask me in the comment section below.
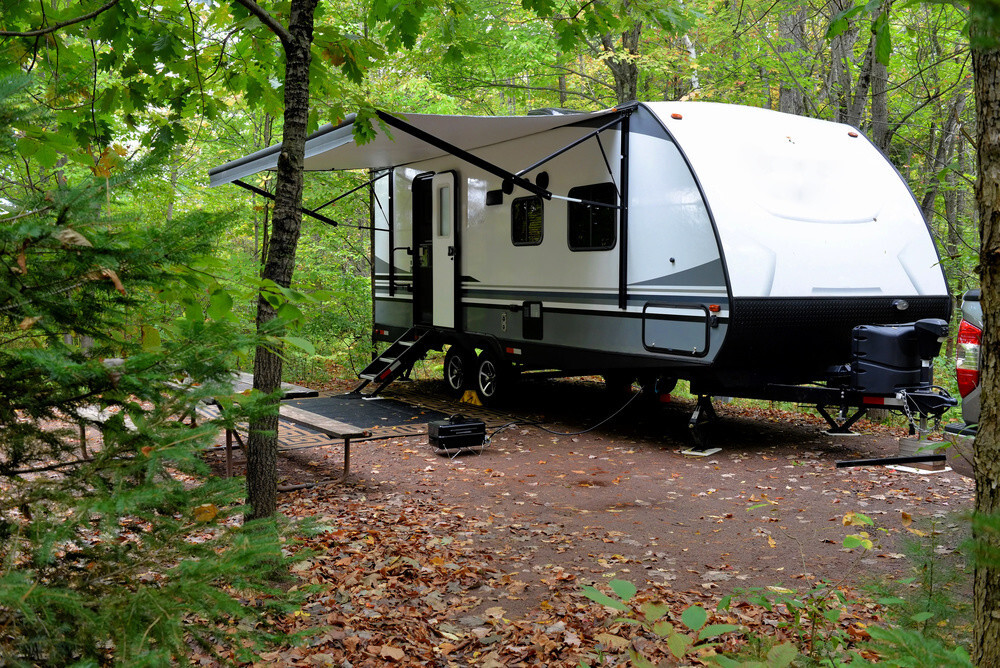
Ultimate Hybrid Camper Guide For Beginners
A hybrid camper is a brilliant investment for every outdoor enthusiast. While a standard motorhome brings fun and comfort already, there are still some things that you can only experience in a hybrid camper.
At first, I was not convinced about this matter. After all, several years of using a trailer had already compelled me to believe that it is the best that there is. However, in the summer of 2019, one of my friends invited me to venture the Highway 101 in California with his hybrid camper. After the trip, I was automatically convinced that these “new” campers could really make the good times roll.
If you are aiming to use a hybrid camper on your next trip, your decision is correct. But before you buy one or head to your destination, you might want to read this simple but comprehensive guide about this particular camper.
Hybrid Camper: What Is It?
What is a hybrid camper?
Many people are exactly familiar with motorhomes, but not with these hybrid trailers. But contrary to popular belief, these hybrid campers have been in existence for roughly two decades already. Their popularity shot up during the time where pop-up campers were steadily declining in use.
A hybrid camper combines a recreational vehicle with a practical home on wheels. The most popular hybrid designs feature pop-up or removable roofs that maximize living space by transforming the vehicle into a home. This can come in handy if you want to save space, time, and effort. In most cases, you can pack up your home and move it, saving time and effort compared to building and setting up a conventional house. Once you park your hybrid camper, you can relax knowing you have your own house to come home to.
In a nutshell, I can say that these hybrid campers are designed to be lightweight but allow more people inside. The weight management of these hybrids is inspired by pop-up campers, while their spaciousness is derived from standard motorhomes.
Why Choose A Hybrid Camper?
So why did I say that a hybrid camper can be a great alternative to standard RVs and motorhomes? Well, here are my solid reasons.
Small But Impressive
Hybrid campers are a new concept in a recreational vehicle. They are designed to be just like a regular motorhome, except instead of using a large diesel engine in the back, they use a smaller 2 to 4-liter gasoline engine and a battery pack to power it.
This allows for a lot of the same comfort and conveniences that a diesel motorhome would offer. The gas engine can be used to provide power in a lot of the places that it would be needed, and the battery pack can be charged up by the engine while in motion.
Spacious Floor Plans
These hybrid campers are far from being cramped. After all, there are two queen size beds that are rigged to these vehicles. Each of them is placed at the opposing sides of the camper.
Because of this design, there’s no need for you to bring additional beds in the interior compartment of the vehicle. It opens up the floor plan to accommodate extra amenities such as kitchens, storage compartments, and entertainment sets.
In fact, there are some hybrid campers that are equipped with bunk beds. These models are usually bigger than your ordinary pop-up and travel trailers.
It Is Cheaper Than Other Motorhomes And Trailers
One should know that the square footage of a hybrid camper is cheaper than trailers and motorhomes of the same size. Of course, the quality of finish and refurbishment can influence the prices of these hybrid campers. However, it is undeniable that these hybrid campers are a cost-efficient alternative as compared to their counterparts.
Storage Is Not A Problem
Pop-up campers have to be folded down while you are camping. Hence, it is quite impossible to store a lot of things inside them. It is the very reason why you should only bring your necessities whenever you are using a pop-up camper.
On the other hand, a hybrid camper will give you generous storage space. It is almost similar to standard travel trailers. The expendable beds free more space for you to store other essential items such as food, clothing, and appliances.
They Don’t Need Large Storage Space
Compared to motorhomes and trailers, these hybrid campers are not demanding large parking spaces. They can fit well on small driving ways and crowded campsites. Because they are not that big, towing them is not a problem.
Are There Downsides On These Hybrid Campers?
Honestly, I can say that these hybrid campers are not that perfect. While they offer a lot of perks, they also have some quirks that can cause minor inconveniences. Here are some of them:
Imbalances In The Temperature
Hybrid campers are prone to fluctuations in temperatures. The middle of the camper can be warm, but the pop-up beds can become cold, especially if the external temperature is low. During warm days, the main compartment is too hot, and only the beds have a comfortable condition. You can fix this issue by installing fans or heaters, depending on which is applicable.
Condensation
These hybrid campers are also susceptible to condensation build-up. This particular phenomenon occurs when humid air and cold air meet. If the warm air outside gets in contact with the air inside your camper, condensation can take place.
Tips In Towing Hybrid Camper
1. Make sure that the camper and the towing vehicle are set up properly. They should be leveled with one another.
2. Take time in turning and reversing. You don’t have to rush things, especially if you are not used to towing a camper. You can also practice in open parking spaces. Always look at your hitch and be sure that you will not jackknife the camper.
3. Be wary of your speed. Vehicles have prescribed maximum towing speed in their manuals.
4. Clean your camper before and after you use it. The tires, bearings, and hubs should be checked and maintained at all times. You should not let them deteriorate.
5. Do not overload your hybrid camper. Just because it has generous space doesn’t mean that you can put a lot of stuff on it. As much as possible, the camper should not carry a weight that exceeds its GVM.
6. Ensure that your water tank is full before your trip. Doing this will lower the center of gravity of the camper, allowing you enhanced control while you are driving.
7. Do not forget to inspect the tire pressure and wheel nuts before traveling. As much as possible, you should adjust the tire pressure to the expected road conditions.
8. If you are going to drive on off-the-grid terrains and isolated destinations, bring various essentials with you, such as food, water, and extra fuel.
9. Do not drive too fast. Adjust your driving to the conditions of the road and not the other way around.
10. Check and guarantee that all latches of the camper and towing vehicle are secured.
11. Park the camper in front of your home two day before your trip. During that period, you should turn the fridge on.
Tips In Camping With A Hybrid Camper
1. Bring Only The Essentials
You should never overload your hybrid trailer with a lot of items. Sure, it has a lot of space. However, you should remember that it is not as big as your motorhome. Hence, it is essential that you should still stick with the essentials.
2. Organize
If you want to have a successful experience in camping with your hybrid camper, you have to learn how to organize. All of your items should be arranged and grouped according to their use and purpose. For instance, your cooking ware should be present in one place only. They should be separated from your food, clothing, and tools.
Once you are at the campsite, you can take out some of the items inside the camper and place them outside. It would help free up some space. But before doing this, your items should be kept in a container or storage bin. Make sure that you have a separate bag where you can throw your waste.
3. Plan Ahead
It’s never too soon to start planning for your next camping trip. If you want to have a successful trip, you must start planning early. The earlier you start, the better chance you have of getting the information you want, the gear you need, and the space you need. While planning in advance is key, there are a few things you can do the night before that can make a world of difference.
Create a checklist of the things that you need to bring. If possible, you should have studied your destination and the traffic conditions of the route going there. If you are going to a campsite, make sure that you know the area’s regulations.
4. Check The Weather
When you’re traveling with your hybrid camper, knowing the weather forecast is key to making a campsite decision. It should be part of your packing checklist. If the forecast is questionable, you may want to wait to make a decision. Bad weather can make your driving experience difficult. At the same time, it can eliminate the “fun” in your trip.
5. Understand The Boundaries
If you are going to an established campsite for trailers and campers, you have to know the boundaries. Specifically, there are no physical walls or demarcations that limit your movement. However, it is not that ethical to get close to other people’s RVs, especially if you are not acquainted with them. Do not trespass on their area. Furthermore, you shouldn’t enter their campers without their permission.
6. Don’t Create Too Much Noise
Going camping means making a lot of compromises. You’re giving up a lot of the comforts of home: a pillow, a bed, a bathroom, and electricity—not to mention the steady supply of hot water and hot food. But it doesn’t have to be that way. With a little creativity and elbow grease, you can minimize the noise you make and still get the comforts you crave, so you can enjoy your time in the great outdoors.
Camping with your hybrid camper is not an excuse for you to create excess noise. You have to be mindful of your surroundings, especially if you are around other campers. Nobody wants to get disturbed while doing their own stuff.
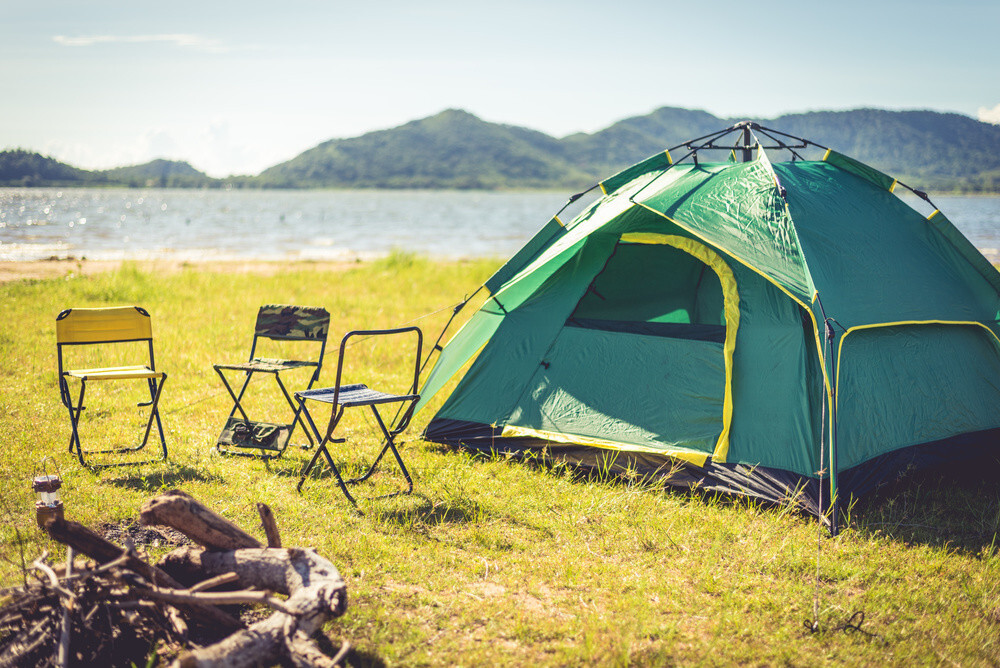
7. Pick The Right Area
Choosing a campsite is tough. Do you go for a spot with a view of the lake or mountains? Or do you find a place protected from wind and rain? In reality, the most important thing to consider is whether you have easy access to a power outlet.
A hybrid camper is a house on wheels, and while you might not need to use your kitchen for cooking dinner, you’re going to need to plug in the refrigerator. Batteries can only last so long before they give out, and smart campers always plan ahead. That means a good campsite not only has to have a power outlet, but it also has to be close enough to the bathroom and showers.
When choosing the ideal campsite, I suggest that you move away from those within cities and towns. There’s a good chance that these in-city trailer parks are full of people. If you want peace and leisure, travel some distance and settle on some secluded camping grounds.
8. Practice Leave-No-Trace Principles
While camping is a time for everyone to have fun, it should also be a time to be responsible for the natural environment. If we all follow the practice leave-no-trace principle, we can make sure we leave the environment in the same or better condition than we found it.
The leave-no-trace principle is a set of guidelines to follow when you are camping to make sure you leave nature as it was before you came. It includes rules about how you should store food (make sure animals can’t get to it), how to clean up after yourself (make sure the area is as clean as it was before you came), and how to dispose of waste (make sure you are not polluting the environment). In addition to following these rules, it is essential to know that leaving no trace doesn’t only apply to the campsite; it also applies to where you hike.
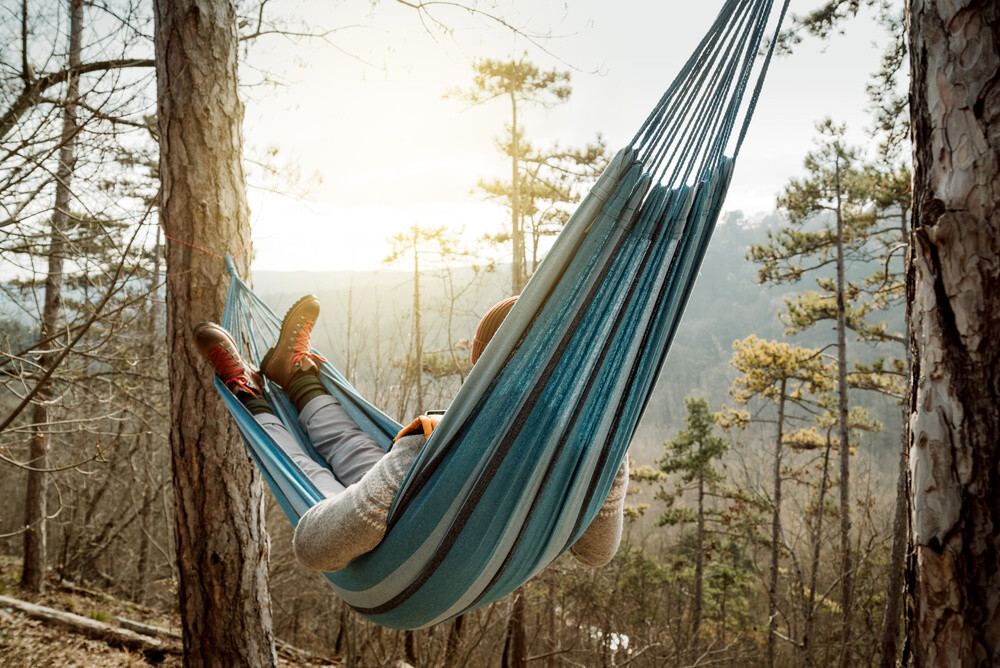
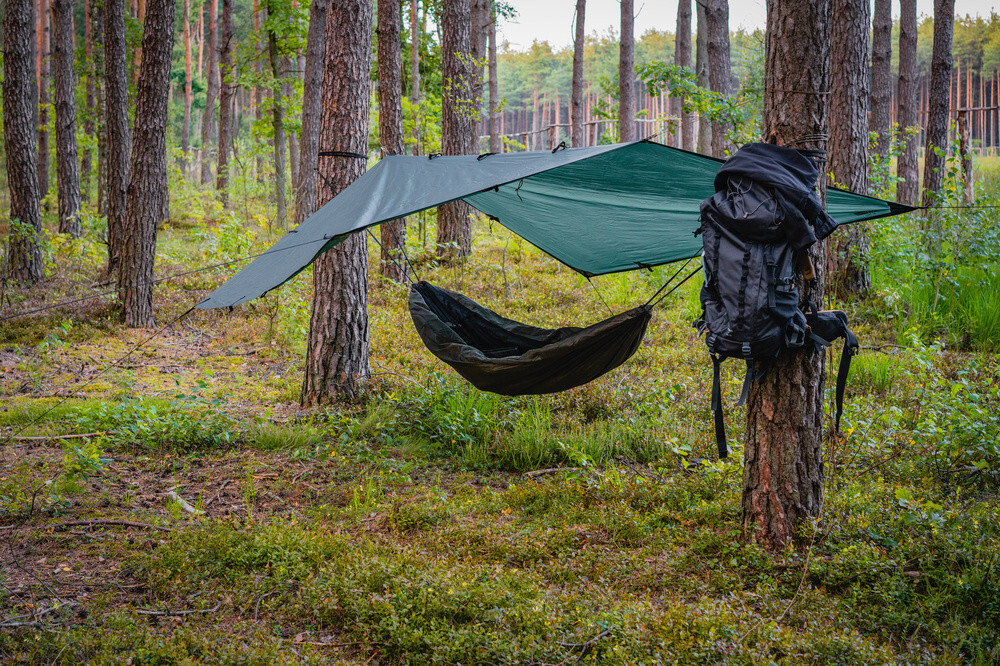
24 Hammock Camping Tips That You Should Know
Hammock camping is a great way to enjoy the outdoors. It’s not just sleeping in a hammock; it’s a fun way to live your life. Many backpackers have discovered that hammock camping is more comfortable than sleeping on the ground. Plus, it’s a great way to get away from bugs. With a hammock, you can enjoy a more relaxing, comfortable going camping experience.
But before you can fully enjoy the trip, you have to make sure that you know the ins and outs of hammock camping. If you are new to this kind of adventure, you might as well read this comprehensive guide.
Here, I have listed some of the most useful resources for successful and comfortable hammock camping. See them now!
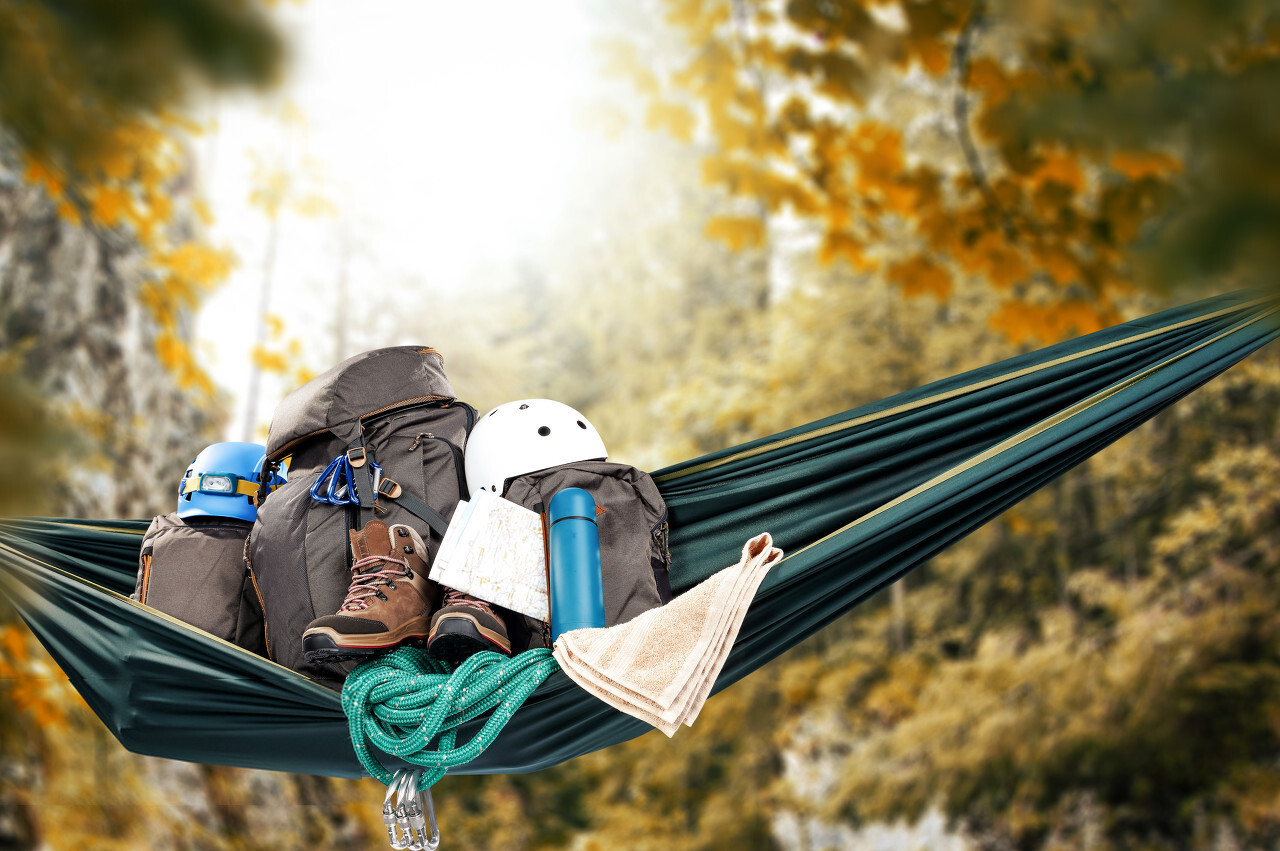
Complete Hammock Camping Checklist
The things that you need for hammock camping may vary based on your preferences. But for starters, the following items are downright essential.
Must-Have Gear
You can never have a fun-filled hammock camping without the following:
Camping hammocks
Hammock suspension systems or straps
Recommended Equipment
These items can make your hammock camping comfortable and secure:
Stakes and guylines
Mosquito nets
Rainfly
Optional Utilities
Your hammock camping can go without these items. But you will have a better experience if they are around!
Sleeping pads
Quilts (top and under)
Guidelines In Choosing The Best Hammock Camping Gear
As long as you have a hammock, you can already do hammock camping. However, you will eventually realize that such a setup is not complete. Hence, we will discuss the importance of choosing the right hammock and other equipment essential to the adventure.
Hammock
A hammock should be rugged and comfortable at the same time. It should be lightweight, too, so that you can transport it easily. You might want to focus on options that are designed for backpacking or camping purposes since they are more durable than their counterparts. The right hammock can serve you in a variety of outdoor applications.
Hammock Sleeping Pads
A hammock sleeping pad is not the same as your standard camping sleeping pads. It is designed to fit the narrow interiors of a hammock. It adds comfort and insulation to your body.
Suspension Straps
You can’t attach your hammock everywhere if you don’t have reliable suspension straps. Most of the hammocks in the market today have suspension systems included on them. However, you can always buy one, especially if you feel that the default strap is not that great. Look for a strap that is durable and adjustable. It should be able to support your weight. They should also be able to protect the trees from unnecessary damages. When choosing a strap, make sure that it is compatible with your hammock.
Rainfly
For many hammock campers, a rainfly is an essential piece of gear. The rainfly is placed over the hammock and provides a weather barrier for the sleeper. This layer of protection prevents rain and dew from dripping on the camper and allows the hammock to dry if it becomes wet. The best rainfly for hammocks should be able to provide full coverage for their users.
Mosquito or Bug Nets
A bug net is a really great addition to your hammock camping gear. It will help you enjoy your time in the woods a lot more. As you may know, bugs can be pretty annoying. Also, they can even be dangerous. That is why it is very important to have a bug net that is high quality. In order for it to be high quality, it must be made with the best materials. Moreover, the bug nets should provide full coverage.
Underquilt
An underquilt, also called a bottom quilt, a quilt, or a no-bottom, is a quilt that wraps around the bottom of a hammock and keeps the bottom sleeper warm. Under quilts are used in hammock camping instead of a ground pad, as they provide much more comfort and insulation.
Top Quilt
The top quilt is what keeps you warm at night, and it’s an essential part of your overall hammock camping experience. You want to make sure that you choose the right top quilt since it can have a significant impact on your comfort level and your experience. It should encompass your body and should provide enough comfort, especially during cold nights.
Essential Accessories
Carabiners
Carabiners are an essential part of any hammock camper’s gear bag, but they are also useful for just about anyone who hikes, climbs, camps or even just spends time outdoors. These handy little devices have a variety of uses, from securing gear to harnesses and packs and clipping together multiple items. In fact, there’s a carabiner out there to suit pretty much any need you have.
Stakes
There are many hammock stakes that are available in the market today, and they come in many different shapes, sizes, materials, and colors. It is imperative that you have a hammock that is well equipped with the best hammock stakes. The stakes that come with the hammock are usually not the best, so you will need to invest in the best hammock stakes to enjoy your hammocking experience.
Paracords
You can utilize paracords for each of your hammock camping trips. They are essential in supporting the entire length of your hammock so that it won’t wobble while being affixed. When choosing a paracord, you have to guarantee that it is tough and has enough length to cater to your needs.
Hammock Camping Tips
1. Get The Right Hammock
Hammocks are so cool. They’re made from a lightweight material that’s designed to be carried easily, and they’re designed to give you a great night’s rest. The problem is, they’re not always designed to be comfortable or a good fit for you. That’s why you need to do your research before making your purchase.
When choosing a hammock, it is crucial that it has a sturdy and durable construction. It should be able to withstand the test of time!
It is a good choice to be picky when it comes to the material used in the crafting of the hammock. Nylon and polyester can be a good start. Also, don’t forget about the maximum capacity of the hammock. You have to guarantee that it can support your weight.
Pick a hammock that works with other hammock equipment such as mosquito nets and rainfly. Doing so will remove a lot of stress in the setting up of the hammock.
2. Try Your Equipment
Before you head out to the woods, you have to try your gear first.
It is a standard procedure for every outdoor enthusiast. Before the big, you have to make sure that your outdoor amenities are working properly. Doing dry-runs will let you see if there are issues with your items. Furthermore, trying your equipment first will allow you to familiarize or master their usage.
If you can, test the quality of your hammock and see if it does provide comfort and stability. Sleep with the hammock in your backyard before you set forth off the grid.
3. Know Where To Place The Hammock
Just because there are a lot of trees in your destination doesn’t mean that you can easily place your hammock anywhere.
You have to be prudent when it comes to the location or placement of the hammock. Doing this will make your outdoor stay safe and convenient.
You should tie your hammock between two trees or any available platforms (with a distance of roughly 10 feet. Make sure that they are sturdy enough to support you and the hammock. I also recommend that you don’t camp under trees with loose branches. If the area is prone to landslides and floods, move away.
It is also ideal to look for a spot where it is naturally cool. You should be shielded from the heat of the sun or strong gusts of winds. For instance, it is nice if you are situated around boulders because they can block the wind.
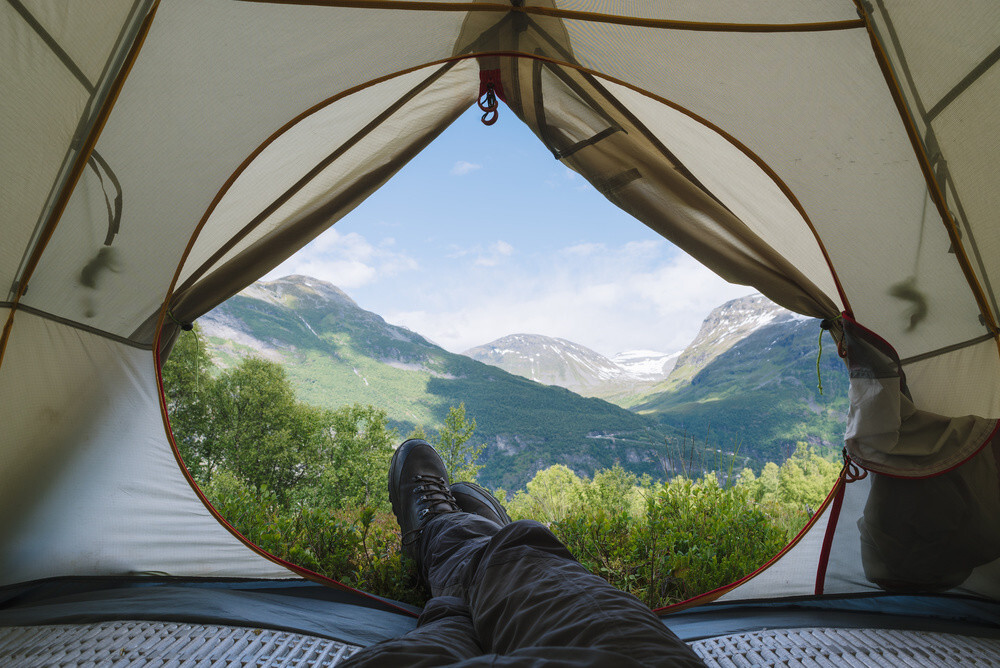
4. Identify The Weather Before You Head Out
When you are camping, you obviously want to go to the place that is best for your camping needs. That means that you should know what the weather is going to be like before you go.
Campers go into the wilderness to enjoy the sights and sounds of nature, so being able to recognize and utilize Mother Nature’s most powerful tool could be the difference between a great trip and a nightmare. Mountain weather changes very quickly and can be the most dangerous of any.
To avoid this predicament, you should be able to identify the weather or climate of your destination. You should understand how changes in weather affect the overall livability of the terrain. If the weather station tells that it will get rainy or cold, you have to prepare the essential gears to combat the precipitation and low temperatures.
5. Install Your Hammock Properly
The proper installation or hanging of a hammock is not a trivial matter. You have to learn the right way on how to do this. By doing so, you are ensuring the stability of the hammock and your overall safety.
One of the things that you need to do is to hang the hammock with a degree of looseness. In this way, the hammock will have a space to adjust to your weight. If the tie is too tight, the hammock might not be able to stretch well.
You can choose the kind of angle for your hammock. Experiment with different positions until you get the most suitable one for you. However, the general rule of the thumb is that it should be your waist-high. In this way, it will be able to sag without touching the ground.
You can refer to this video as your guide for tying your hammocks:
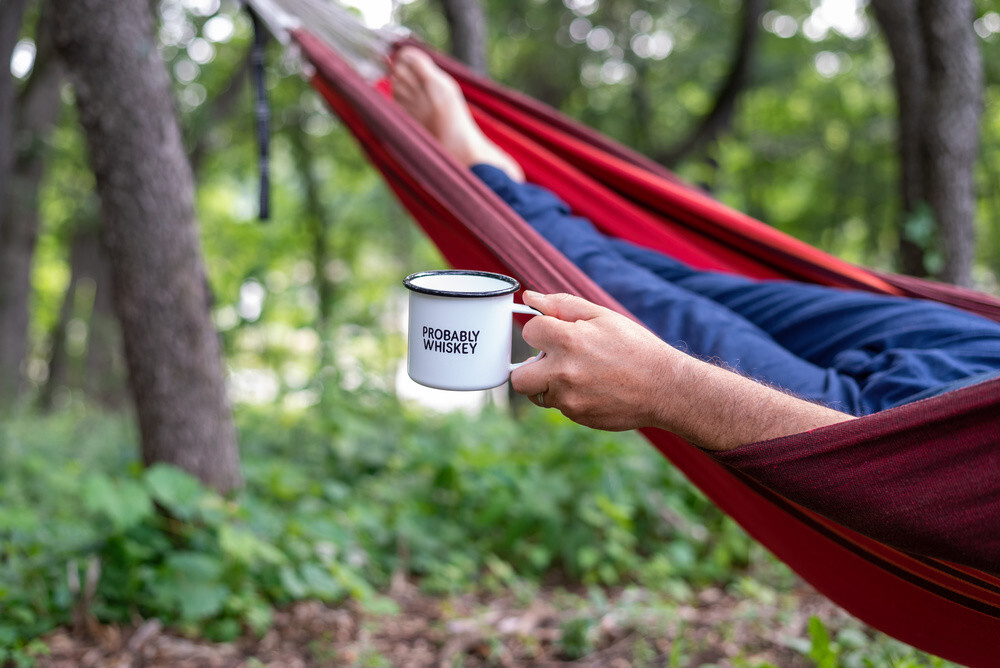
6. Lie Diagonally, Not Straight
You will be surprised how comfortable it is to lie in your hammock diagonally than lying straight. This position will let your head and feet rest conveniently, ensuring that the space of the hammock is expanded to accommodate extra movement.
Lying diagonally will also let your body recline as naturally as possible.
Of course, every decent hammock will let you lie in this position. That’s the very reason why you need to get the best hammock right from the get-go.
7. Hang One End Of The Hammock Higher
I am pretty sure that most of you will find discomfort when being sagged in the middle of the hammock. Others can deal with this, though. However, if you cannot, then you should adjust the position of the hammock.
Specifically, you should place one end of the hammock higher than the other end. Ideally, it should be the foot side or the part where your lower body rests. You can experiment with the most comfortable angle for you. Raising it by 8 to 12 inches higher than the other end should give you extra convenience.
8. Utilize Drip Lines
Even if you have a rainfly, water can sometimes penetrate your territory. For instance, heavy precipitation can cause water to flow along with the suspension system of your hammock, causing the latter to get wet.
Fortunately, you can avoid this predicament by putting a drip line under the rainfly. It will divert the flow of the water away from your hammock.
9. Don’t Place The Hammock Too High
Lying on a hammock is pleasurable and relaxing. However, if you topple over, your camping trip will suddenly turn into a misfortune. To avoid hazardous accidents, make sure that you don’t hang your hammock too high.
Many people think that the best placement of a hammock should be as far away from the ground as possible. However, you should never attempt it. As much as possible, don’t place the hammock more than three feet from the soil.
10. Avoid Dangerous Grounds
Additionally, you should not place your hammock on questionable areas. Don’t ever place it above bodies of water just because it looks cool and savvy. Moreover, you should not hang the hammock above sharp and jagged objects. Don’t ever put yourself in a dangerous situation.
Of course, I need to remind you that you should not do hammock stacking–or the style where people stack their hammocks above each other. It is a dangerous way of placing your hammock. If the person on the top falls over, they will inevitably bump those who are in below. If the fall is high, injuries could take place.
11. Familiarize The Features Of Your Hammock
If you want to fully maximize your hammock camping experience, you have to know your hammock first. You have to identify its features and capabilities; you have to take advantage of them, especially in specific settings or situations.
For instance, some hammocks come with built-in insulations that you can use to combat the low temperatures. Others have extra pockets and shelves where you can store your essential accessories and amenities.
12. Don’t Put Food On Your Hammock
Veteran outdoor enthusiasts know that placing food in a tent can spell disaster. The scent of the food can attract animals and insects. If there are bears and dangerous creatures in your area, you should place your meals away from your camping spot. In this way, you are staying away from danger’s way.
13. Get A Rainfly
It has been mentioned already that a rainfly is an important amenity for hammock camping.
Since you don’t want the elements to ruin your trip, you should be able to protect yourself from them. Heat and rain can easily disrupt your peaceful moments in your hammock. But with a rainfly, you will no longer have to worry about them.
A rainfly has to protect the entirety of your hammock from wind, snow, rain, and sunrays. In fact, they should be able to extend beyond your hammock for better coverage.
14. Get A Bug Net
A bug net is an essential part of any hammock camping. Camping with one ensures that you’ll have a comfortable camping experience. It helps to block out the elements, shielding you from rain, wind, and the sun. It will keep the mosquitos and other biting insects away from you so that you can enjoy your outdoor experience to the fullest.
15. Prefer Wide Tree Straps
As an outdoor enthusiast, I always advocate for the Leave-No-Trace principle. Generally, when we head to the woods, we should never do anything that would compromise the environment and its dwellers.
When tying hammocks, some people opt for cords. While these cords are effective, they can cut and damage trees. Instead of using them, you should look for webbing tree straps. They should be one-inch wide and durable enough to hold you and your hammock. Get a suspension strap that comes with adjustment points to let you configure your setup easily.
16. Use A Sleeping Bag
Sleeping bags are the best way to keep you warm in the wilderness. Fortunately, you can insert yourself in a sleeping bag while you are in your hammock. These bags are much warmer than blankets. They also offer more protection from the rain. The ventilation keeps you cool and wicks the sweat from your body. When you are inside a sleeping bag, you are also protected from insect bites.
17. Have A Sleeping Pad
A sleeping bag is already sufficient. But if you want added insulation, you should get a sleeping pad in your hammock. Sleeping pads come in all shapes and sizes, and they have dozens of different benefits. One of the most obvious benefits is comfort.
Sleeping pads are designed to cushion your body and provide a softer, more comfortable surface on which to lay your body. Another benefit is insulation. The more insulation between you and the ground, the warmer you’ll be. A thick sleeping pad will hold the heat close to your body and keep you warmer than a thin one.
18. Try A Pillow
Carrying a pillow while camping isn’t always fun, but it does have its benefits.
If you’re using a hammock, you’re probably well-versed in the benefits of a good night’s sleep. And that is exactly what you’ll get when you use a camping pillow. Not only will you have a soft, comfortable place to rest your head, but you’ll also be more inclined to catch some shut-eye. The most obvious benefit of using a pillow while camping is comfort. After a long day of hiking, biking, or paddling, you’ll be able to comfortably drift off to sleep without concern for your head and neck.
19. Keep Your Essentials Close
You may not be allowed to pack your food with your hammock, but you can always stash your essentials with you. Get a small sack to store your nighttime amenities. Alternatively, you can invest in a gear sling accessory that you can hang in the side of your hammock (or in your bug net or rainfly).
Always remember that the area covered by the rainfly can serve as your storage area. You can take advantage of this space to store your belongings.
20. Get An Underquilt
An underquilt is a special type of sleeping bag designed for use inside a hammock. It is a synthetic insulating layer that goes underneath the hammock, between the hammock’s bottom and the user’s sleeping pad. It helps keep the user’s sleeping pad cool by having the air space underneath the hammock, as well as providing insulation for the user.
A hammock underquilt/top quilt is a very versatile piece of camping equipment, and it can also be used in your own home during the winter to keep warm on cold nights.
Here’s a video that weighs the pros and cons of underquilts and sleeping pads:
21. Consider A Two-Person Hammock
The benefits of a two-person hammock are endless. For starters, it’s the most comfortable camping experience you can have. The weight is taken off your back, and your legs are able to rest and swing freely. You have a lot of space to move around, as compared to a one-person hammock. While it is true that these two-person units are large and heavy, they still give you the comfort and room that you need.
22. Wear Proper Clothing
Wearing proper clothing while camping is critical to the enjoyment of the experience. There are many factors that should be considered when choosing your camping attire. The most important factor is the weather. Almost all campgrounds have a website where you can check the weather and temperatures of the area for the time of year. You should check the weather forecast of the area and pack for the temperatures that will prevail during your stay.
Check this site for an extensive guide on what to wear when camping.
23. Pack Light
One of the most important things to remember when going on a hammock trip is to pack light. One of the biggest mistakes that you can make is to try to carry around too much weight. Not only will this slow you down, but it will also make your trip far less enjoyable. The fact of the matter is that every extra pound that you pack onto your back will make the trip that much more difficult on you.
So how should you reduce your weight? First, you should bring your essentials only. Second, you should pick gears that are designed for lightweight applications.
Here’s a video that shows how you can pack light on your camping and backpacking adventures:
https://www.youtube.com/watch?v=vc7zwJgok_Q
24. Don’t Forget To Enjoy
Camping with a hammock is perfect for a comfortable night’s sleep! As a hammock camper, you’ll enjoy gentle rocking as you fall asleep and the ability to move the hammock up and down to avoid insects, changing weather, and even the sound of the wind in the trees.
There’s a lot of things to enjoy while in your hammock. There are a lot of fun activities you can do. Of course, don’t forget to practice the leave-no-trace principle while you are having the time of your life!
Tent Care & Maintenance Basics
How to take care of a tent?
As a tent owner, you know how important it is to take care of your tent properly. If you don’t, it can lead to costly issues that are not easily fixed. In fact, doing the wrong thing can even be dangerous.
You should be careful with your tent and follow set procedures when packing and unpacking your tent and getting it repaired as soon as something goes wrong with it. Here are some tips on how to take care of your tent.
How To Take Care Of A Tent?
The tent is the essential piece of gear you own. It is your home away from home. It is the place you go to rest at the end of a long day of hiking, or the place you prepare food, or the spot where you eat your meals. It is the place you go to sleep and get a great night’s rest. It is your shelter and the place you go to feel safe. You need to treat it as such.
Before the big day, you need to practice using your tent. You should check its configurations so that you can gain familiarity with it. Also, check if it is complete with its essential accessories (i.e., guylines and stakes). You would also clean your tent from time to time.
While Setting Up The Tent
Look For A Good Spot To Setup Your Tent
When you go out camping, the first thing you need to do is find a place to put your tent. Once you have done that, you will want to choose a spot that is easy to get to. You will also want to look for an established campsite for your tent. This will prevent the ground from becoming too compacted, and it will also make it easier to walk around when it is time to go. The campsite will also be more comfortable to walk around in.
The ideal camping ground for your tent should be smooth and flat. Moreover, it should be free of any form of vegetation. You should also avoid areas with debris that can damage your tents, such as rocks, twigs, and branches.
Use Footprints
Most tent footprints are waterproof material such as polyethylene sheeting. While they are not necessary for most tents, a footprint can extend the life of your tent floor by protecting it from abrasion and UV damage.
A footprint is designed to defend your tent’s floor from scratches and abrasion. It also ensures that the tent is clean as you pack it. Since footprints don’t generally extend beyond the size of the tent, it doesn’t pose any risk in collecting water and moisture.
Don’t Let Your Tent Have Prolonged Sun Exposure
People who love camping and hiking need to be concerned about ultraviolet rays damage to their tents. These rays can be harmful to your tent. These rays can damage the materials of your tent and make it weaker.
One of the ways that these rays can harm your tent is by discoloring it. In the process of discoloring your tent, the tent can become weak. The damage done will depend on the type of tent and the material that is used in the tent.
Because of this, you should not place your tent in an area where there’s little or no shade. Of course, you should also use a rainfly and hang it over your tent. A rainfly is more resistant to UV heat, so it is an essential amenity for every tent. Specifically, a polyester fly is better than a nylon fly.
Don’t Be Harsh With The Poles
In setting up a tent, make sure that you handle its poles carefully. You should go along with it, not against it. Otherwise, it would snap into pieces, ruining your tent in the process.
Also, keep in mind that poles are somewhat flexible. Hence, it is possible for them to whip back to you or your companion if you stretch them.
While Using The Tent
Just because the tent is already in place doesn’t mean that you can leave it unattended. Proper care and caution are still essential to guarantee that its quality will remain intact.
Don’t Place Your Footgear Inside
You should never place your boots or shoes inside your tent unless there are extraordinary circumstances. Your footwear should be left outside or in the vestibule of the tent. Of all your camping clothing, your boots and shoes get the dirtiest. After all, they are the ones that are directly in contact with soil. They can pick up pebbles and dirt that can ruin your tent.
Use Your Zippers Properly
If you found that the zippers of your tent are stuck, don’t force it. To navigate this problem, hold the zipper and pull it back. Check if there are stuck fabrics in the zipper’s teeth; wiggle them so that the zipper can work properly.
Leave Food And Fragrant Items Outside The Tent
Similar to your footwear, your food and fragrant items should be left outside your tent. They should have a different container. You see, their smell can attract critters, insects, and wild animals in your tent. It doesn’t pose issues to your tent but your well-being.
After Using The Tent
Now that you are leaving, it is time to pack your reliable tent. Here are some methods that can help you ensure that your tent is packed properly.
Shake It
Before anything else, you need to shake the tent so that you can clear out the debris and dirt inside. Of course, if there is trash and rubbish, throw them in designated bins. Always follow the Leave-No-Trace principle when it comes to dealing with your personal wastes.
Push The Poles
To remove a shock-corded pole from the tent, you should push it, not the otherwise. Pulling the pole will strain its elastic cord, which, in turn, could damage it.
Fold The Poles In The Middle
In the process of folding the poles, you should start in the middle. Doing this will help diffuse the tension throughout the cord. Do this method on the rest of the pole’s sections until you fold them completely.
Dry The Tent First
Even in the presence of rainfly and footprints, tents still remain susceptible to condensation. Moisture, for instance, can cause mold growth. Therefore, before you stuff the tent, you have to dry it first. One good way of doing this by draping the tent over a boulder or branch. However, make sure that they don’t have any sharp parts that can scratch or snag the tent’s fabric.
If there’s precipitation in your camping site, you are free to stuff the tent right away. However, after reaching home, you should unload it right away. Hang it on a shaded part of your house, such as the garage.
Roll The Tent
Don’t just push the tent inside its stuff sack. That would strain and stretch the fabrics unnaturally. Instead, the best thing that you can do is to roll it.
Conclusion
Tents are made to last, but this does not mean that you can put them on the shelf and forget about them. You need to take care of your tent and make sure that it will always be there for you in case you need it. Learn how to take care of a tent, and it will do the same to you every time you head outdoors!
If you have other inquiries, feel free to ask in the comment section below.
How To Choose Sun Protection Clothing: A Guide In Choosing The Best UPF Clothes
How to choose sun protection (UPF) clothing?
At first glance, it may seem odd to be talking about proper clothing for an outdoor camping trip. After all, what is most important is that you can get far away from the city and the hustle and bustle of everyday life. You can find wild plants to eat and drink from natural sources like lakes and streams. And there is a whole new world to explore—one that is untouched by the human hand.
However, proper clothing can spell the difference between a fancy outdoor experience from a disastrous one. During summer or any sunny conditions, being equipped with suitable clothing protects you from harmful UV radiation, sunburn, and other ill-effects due to prolonged exposure to heat.
Why Do You Need Sun Protection Clothing?
Keeping safe when you’re out in the sun is more important than ever in this age of skin cancer. The sun plays an important role in our health, but too much exposure can lead to serious health problems. Wearing protective clothing is a great way to avoid the harmful effects of UV exposure.
Sun protection clothing is essential for individuals who are sensitive to the heat of the sun. They are those who have skin that gets burned quickly when exposed to UV rays.
Of course, children also require the protection of these UPF clothing. After all, their skin is more sensitive and thinner than adults. If they don’t get enough sun protection, it can cause problems in the long-run.
Hikers who typically hike at high elevations are more exposed to extreme heat intensity. The same is true for those who are in regions near the equator.
In some cases, the heat of the sun is harmful to those who are taking special medications, such as antihistamines and antibiotics. Hence, it is vital that you check the medicines you take and see if they have adverse effects on your skin.
What Is UPF Rating?
The UPF rating is a standard method of labeling for how much UV protection a clothing item provides. It is a measure of the strength of the sun’s ultraviolet (UV) radiation, and the rating system is standardized by the International Organization for Standardization (ISO). The UPF rating system helps consumers to make informed decisions about the sun protection provided by the clothing they buy.
UPF is a measurement for the ability of the fabric to defend its users from ultraviolet rays.
Checking the UPF rating of a clothing product is quite simple. There are labels that indicate this. The higher the number, the more protection the item can provide to you.
See the table below for reference:
UPF Rating
Categorical Rating
UV Transmission
40, 45, 50, 50+
Excellent
2.5% or less
25, 30, 35
Very Good
4.1% to 2.6%
15, 20
Good
6.7% to 4.2%
In the table, you can see that the numbers indicate the UPF rating of garments. For instance, a 30 UPF rating suggests that the clothing’s fabric enables 1/30th of UV rays to pass through it. Meanwhile, a UPF rating of 50 tells that the garment will only let 1/50th or 2% of the sun’s radiation penetrate.
If you don’t see any of these numbers in particular clothing, that simply means that the latter doesn’t offer any sun protection. If the number is too low (i.e., 5 or 10), the clothing is not an effective means to block UV rays.
How To Choose Sun Protection (UPF) Clothing?
These are the factors that determine if a piece of clothing can give ample protection to you while camping or hiking under the heat of the sun.
Built And Design
Garments that are tightly and densely constructed can reduce the volume of UV radiation that can pass through them. Furthermore, the thicker the fabric, the more resistant it becomes against the harmful heat.
Color
Based on elementary science lectures, dark colors can absorb UV light better than light colors. Hence, at this point, it is essential that you pick clothing clad in colorful and vibrant hues.
Synthetic Applications
There are certain dyes and chemicals that are applied to garments to improve their sun protection. These treatments can improve the UPF rating of outdoor clothing.
Material
One of the most suitable fabrics that can defend you from the heat of the sun is polyester. It easily deflects UV rays. The same is true with nylon. Meanwhile, silk and wool have moderate sun protection capabilities. On the flip side, fabrics like hemp, cotton, and flax have poor UPF ratings.
What Affects The UPF Rating Of Outdoor Clothes?
There are certain things that can reduce the effectiveness of a garment in dealing with harmful UV light. If you are going on a trip, you have to be aware of the following things.
Water and moisture – One should realize that clothing drenched in water can lose a significant amount of its sun protection. However, according to some people, polyester does not get affected by the water element.
Wear and tear – The more worn the clothing’s fabric, the weaker its UPF rating becomes. Sooner or later, it will not become an adequate item of clothing in dealing with UV rays.
Stretch – Also, keep in mind that stretchy fabrics are not effective in dealing with the sun’s heat. Even if it has a good UPF rating, as long as it stretches, you can expect that it will not protect you well against UV light.
Essential Features Of UPF Clothing
How can you spot sun protection clothing right from the get-go even without checking its UPF ratings? The following features can give you a clue.
Comprehensive coverage – Clothes that are designed to protect you from the heat of the sun have extended coverage. This comes in the form of shirt collars, cuffs that cover the hands, and long sleeves. If you are looking for hats, make sure that they have wide brims.
Vents – Even if you want your clothes to offer full protection against the elements, you don’t want to compromise your breathability. For instance, tight and thick fabrics can really make things hot inside. You should look for garments that have vents and other forms of ventilation.
Moisture-wicking fabrics – As I’ve mentioned, water and moisture can reduce the UPF capability of fabrics. Hence, you would really benefit from clothing that has a quick-drying feature. Alternatively, you can bring extra pieces of UPF clothing to ensure that you remain dry all the time.
Tips To Get Extra Sun Protection
Apply sunscreen with a high SPF rating on your body, especially those that are naturally exposed to the heat of the sun.
Use sunglasses that provide ample protection against UV rays
Look for a shaded area if things are too hot
Don’t prolong your exposure, especially during peak hours
Conclusion
The importance of sun protection clothing can never be overstated as it is absolutely vital if you’re going to spend any length of time in the sun. UV is a type of energy radiation that can cause skin cancer, sunburn, and sun damage, so it’s essential to wear specialized clothing to protect yourself.
I hope you find this guide useful. Feel free to ask any related inquiries in the comment section below.
How To Sleep Comfortably In A Tent?
How to sleep comfortably in a tent? Is this feat achievable, despite being away from the coziness of your bedroom?
In every overnight or extensive camping trips, rest is an important aspect. Without adequate repose, even the most trained hiker or backpacker would not sustain the entire adventure. Hence, in the context of outdoor pursuits, sleep has the same equivalence as food. Others even consider sleep as tantamount to survival.
But of course, sleeping soundly in a tent remains a challenge to some people. If you are used to sleeping in your thick and bouncy mattresses, then a tent might not be an ideal place to get a proper doze.
Fortunately, it is something that you can overcome. Explore your sleeping options now!
How To Make Tent Camping Comfortable
What To Sleep On When Camping?
If you sleep in a tent without any supporting amenities, chances are, you will be able to snooze at all. By default, a tent doesn’t have any built-in bedding or mattress that would make lying flat comfortable. Hence, it is always recommended that people should bring essential outdoor sleeping gear.
The following should be prioritized:
Sleeping bags – A camping sleeping bag is essential. More than just somewhere to sleep, a sleeping bag also helps to keep out cold air and shield the camper from bugs, sun, and other annoyances. Sleeping bags can also be classified into the following categories: car camping bags and backpacking bags. The former is generally wider and offers room for movement. However, it has poor heat retention. Meanwhile, backpacking sleeping bag usually follow a mummy-cut design for a tighter fit and better insulation.
Sleeping pads / mats – On a typical camping trip, your sleeping pad is your only protection against the hard ground below. And because it’s one of your only physical connections with the ground, it’s an essential part of your sleeping system. Not only do they keep you comfortable, but they are also an integral part of keeping you warm. Depending on the nature of your activity, you might need to get a closed-cell or lightweight sleeping pad. Of course, sleeping mats and sleeping bags go hand-in-hand with each other! You may want a bigger sleeping pad if you are going to sleep with a friend or family member.
Pillows – Camping pillows are among the most overlooked and underrated of all camping equipment. This is a shame because these simple pieces of equipment can truly enhance your camping experience. Interestingly, you don’t even need to get large pillows. You can just bring compact inflatable or foam pillows on your outdoor trip. Some pillows can be integrated into sleeping bags. Sleeping in a tent with your camping pillows can make your zzz more comfortable!
Earplugs – You might don’t want to sleep while your environment is noisy. While it is true that the outdoors is far from the bustling sounds of the city, it still is the home of crickets and other natural “disturbances.” Wearing earplugs will help you block them. They will not only protect your hearing but also help you get a better night’s sleep, especially if you are camping near busy roads or other loud noises, like waterfalls. Alternatively, you can listen to white noise and other calming music to counter the ambient sound of your camping ground. If your camping buddies are with you, these earplugs can block their snoring.
How To Keep Sleep In A Tent Comfortably?
Preparation is the key to a better sleeping experience outdoors. Before it gets dark, you need to organize your items and prepare the area where you are going to set your tent. By doing these things, you will avoid the hassle of being caught in the darkness. Moreover, they let you spend the rest of the night enjoying and relaxing.
Pick a proper site for your tent – Regardless of whether you’re a seasoned camper or just starting out, choosing a good tent site is one of the most important factors so that you can sleep comfortably. A good tent site provides a flat, dry place to pitch your tent. It should also provide you with ample space and shelter from the elements, and you should find it easily accessible. For a family tent, you have to make sure that your “ground zero” is spacious and leveled. The right tent stake also matters.
Get a light source – The darkness can overwhelm some outdoor goers, making them unable to sleep properly. A camping light might become an ideal solution to this issue. For example, you need a lantern for indoor use. Leftover lanterns should be wrapped and packed properly. You also need to bring flashlights for night time use and other activities.
Establish sleeping habits and routines – Our bodies are regulated by a biological clock. There are some activities and stimuli that can activate or sleepiness, alertness, and other natural states. Make sure that you have proper sleeping habits inside and outside a tent. For instance, if you like to brush your teeth before you sleep, then do it while you are camping. Such an act is familiar to your body. It will signal your system that it is time to sleep!
Store food away and outside your tent – You don’t want your sleep to be pestered by insects. Naturally, they won’t go near you unless you have something that they want. Flies, ants, and other critters are attracted to food. Fortunately, you can always lure them out of the tent by placing your food items outside your sleeping space. If there are bears in your area, it is better that you don’t sleep on any clothing, as the scent of food can stick on them. You should tell your other family members sleeping on other tents to do the same, too.
Don’t sleep with wet clothes – Don’t sleep on sweaty shirts or pants. Take them off and wear new dry ones instead. Comfortable and clean sleeping clothes can spell the difference between sound sleep and a restless night. The ideal sleepwear should be a combination of long underwear, long tops and bottoms, and a pair of clean socks.
Don’t overdress – One should know that overdressing can reduce the efficiency of your sleeping bag to trap heat. Therefore, wearing many layers of clothes is not a practical solution for insulation. Instead, you should only wear drape layers such as jackets. Of course, you have to remember that your clothes should depend on the weather. You don’t dress slightly if you are winter camping! In the same manner, you should only wear light t shirt if the climate is hot.
Pee before you sleep – You don’t want to experience discomforts in your tent by leaving and entering it repetitively. Peeing can make you do these things, and that’s not something that you want to happen, especially if you are about to sleep. Before your bedtime, you have to urinate at least two times. In this way, you can guarantee that your bladder is already empty and it will not disturb your sleep.
Place a water bottle near you – It is prudent that you place a water bottle near you before you sleep. In this way, you no longer have to leave your tent if in case you get thirsty. If you are saving heat inside your tent, keeping it close at all times is a must. Opening the access points of your tent for trivial reasons can make you lose all the trapped heat.
There are numerous ways you can sleep in a tent. In a nutshell, it simply depends on your sleeping preferences.
For instance, if you are born as a side sleeper, then you should sleep sideways in your tent, too. There’s no need to force yourself into an uncomfortable position. You just have to make sure that your tent is roomy enough to support your desired sleeping position.
Regardless of how you sleep, it is essential that you have a camping pillow with you. This item is small, but it can provide comfort and support to your body. If you sleep against your back, then place a pillow in your head or neck region. For side sleepers, they need at least two pillows. One pillow is placed between the knees, and the other one should go in your head or your arms.
Again, having a sleeping bag and sleeping pad matters here. These two amenities provide added protection and support to your body while you are lying in your tent. Besides, you don’t want to lie bare directly on a tent floor, right? Interestingly, there are sleeping bags designed for specific sleeping positions.
If you can, bringing an air mattress can significantly improve your night’s sleep. An air mattress is not just for pools; it can also serve as a comfortable sleeping platform. Moreover, it is a great addition for those who are camping with their family members.
How To Make It More Comfortable?
Drink a warm cup of tea – If it is available, you should have a cup of warm tea before your sleeping time. The act of drinking tea while inside or outside your tent will clear your mind of all thoughts and make you more receptive to sleep. This allows you to fall asleep faster and sleep more peacefully throughout the night. Warm drinks can also improve your body heat.
Rub yourself with essential oils – Essential oils have been used for a lot of purposes over the past several years. People have used essential oils for aromatherapy, to feel relaxed and to sleep better. Before you sleep, pour a drop of your preferred essential oil in your palms and rub them in your temples and wrist. You can even spray some droplets in your pillow.
Meditate – Stop and take a moment to notice the world around you. The birds are singing, the wind rustling through the trees, the smell of pine in the air. Indeed, this outdoor world is fantastic, especially when you take a moment to experience it fully. Since you are in the wild, you have to make sure that you can savor such a delight. Use the natural elements so that you can meditate and sleep nicely. Your mattress topper can become a conducive platform for deep meditation in the wild. A night’s sleep becomes better once your mind is calm and relaxed.
Conclusion
Sleep is a vital element of every successful outdoor adventure. It is the very activity that restores your energy so that you can ascend more summits and trek more miles! Hence, I cannot just emphasize the importance of learning how to sleep comfortably in a tent. Before you go camping, you have to make sure that you can secure a good night sleep.
I hope you learned a lot from this guide. If you have other inquiries, feel free to ask me in the comment section below!