Blog

  • How To Carry A Gun While Hiking: All The Things That You Need To Know

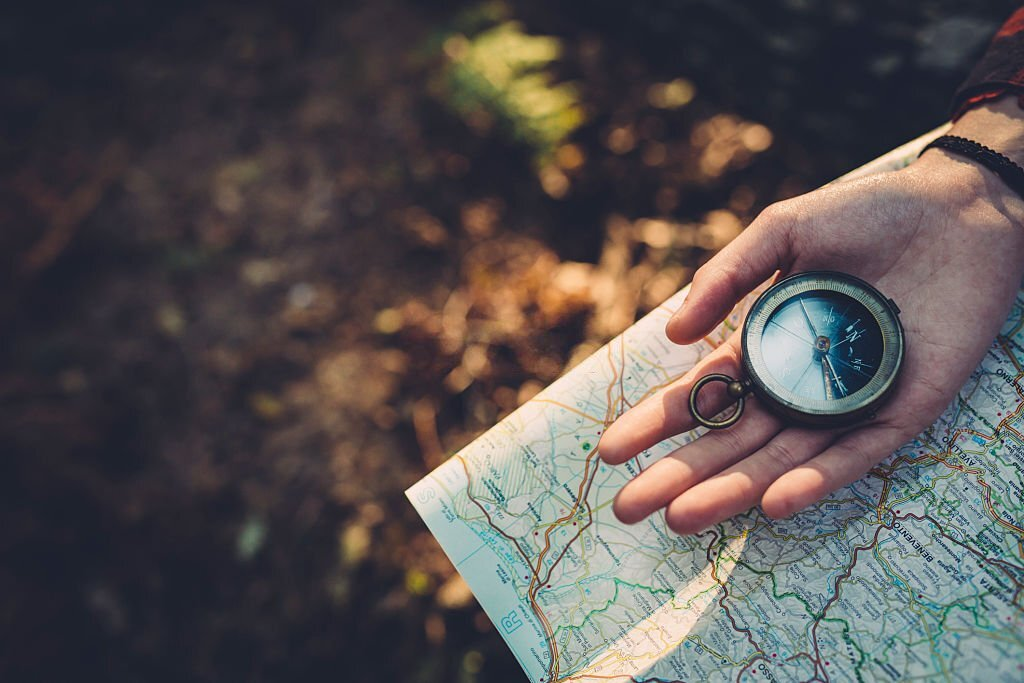
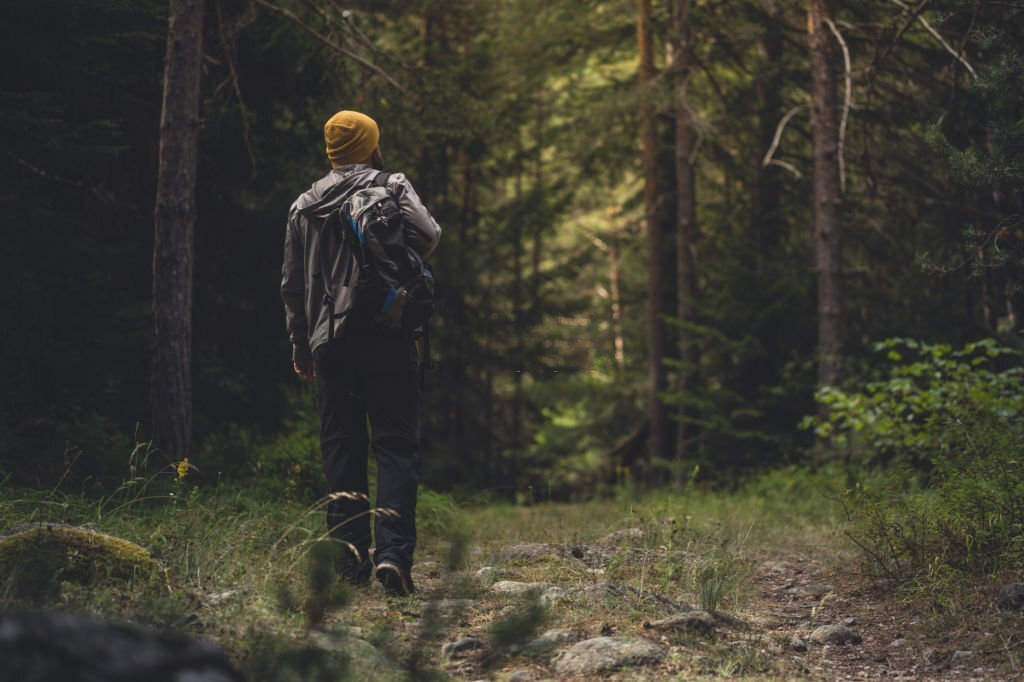
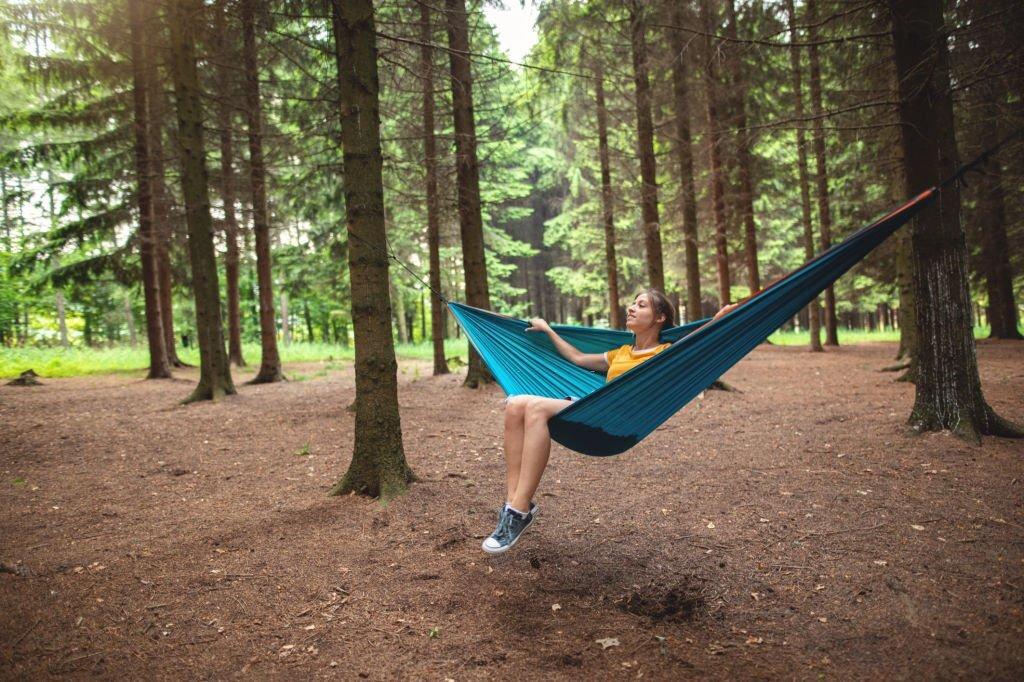
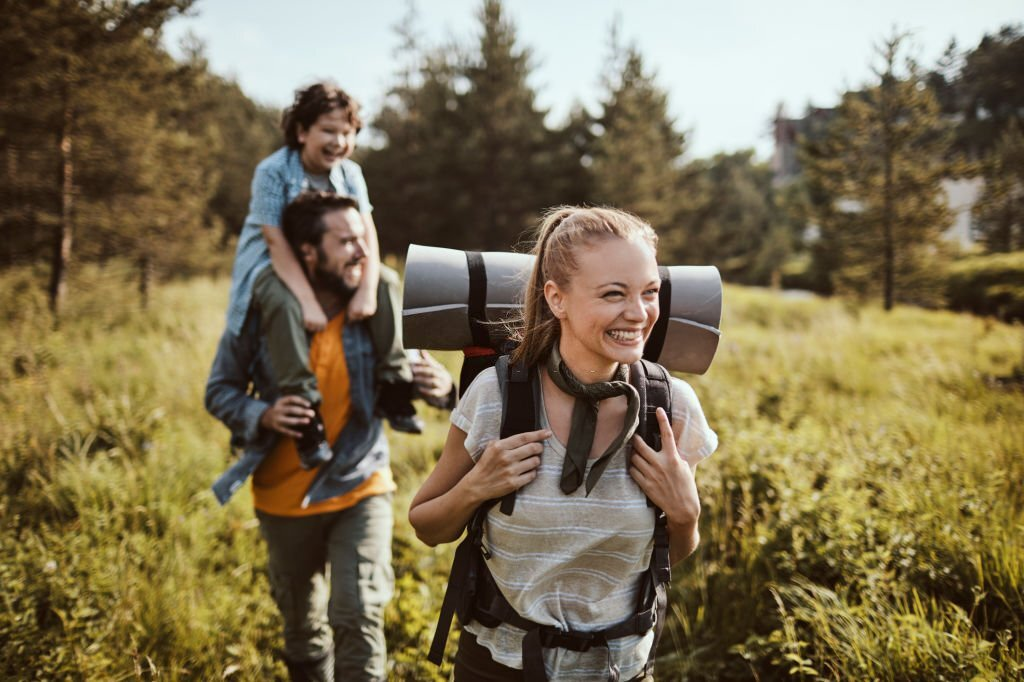
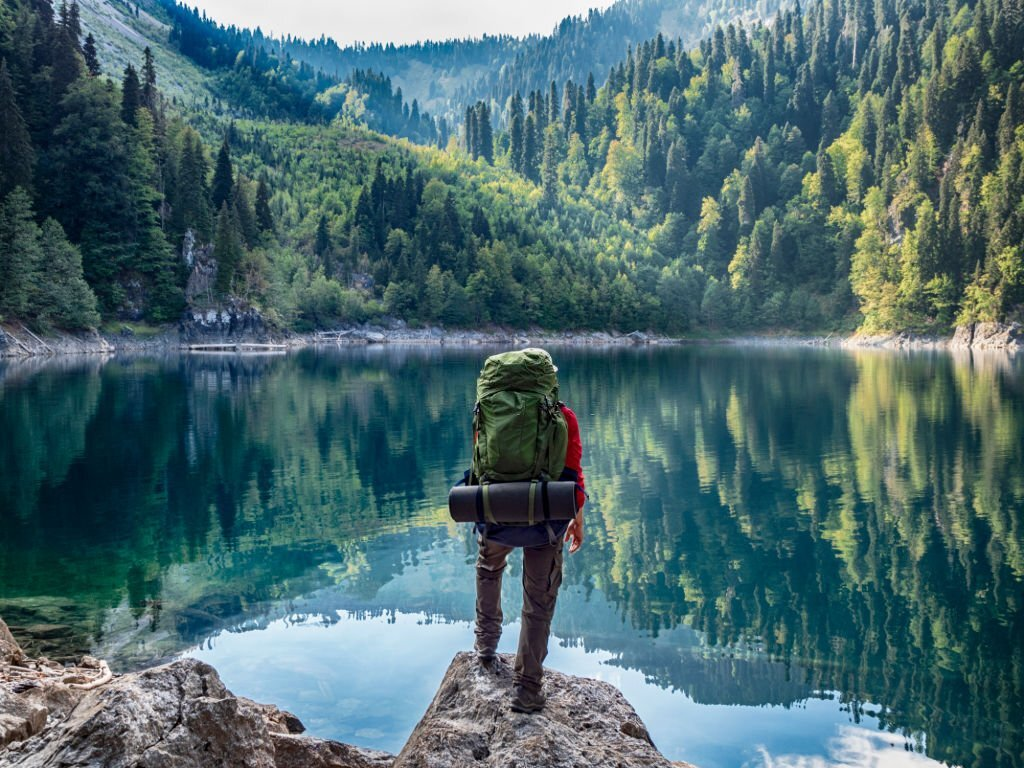
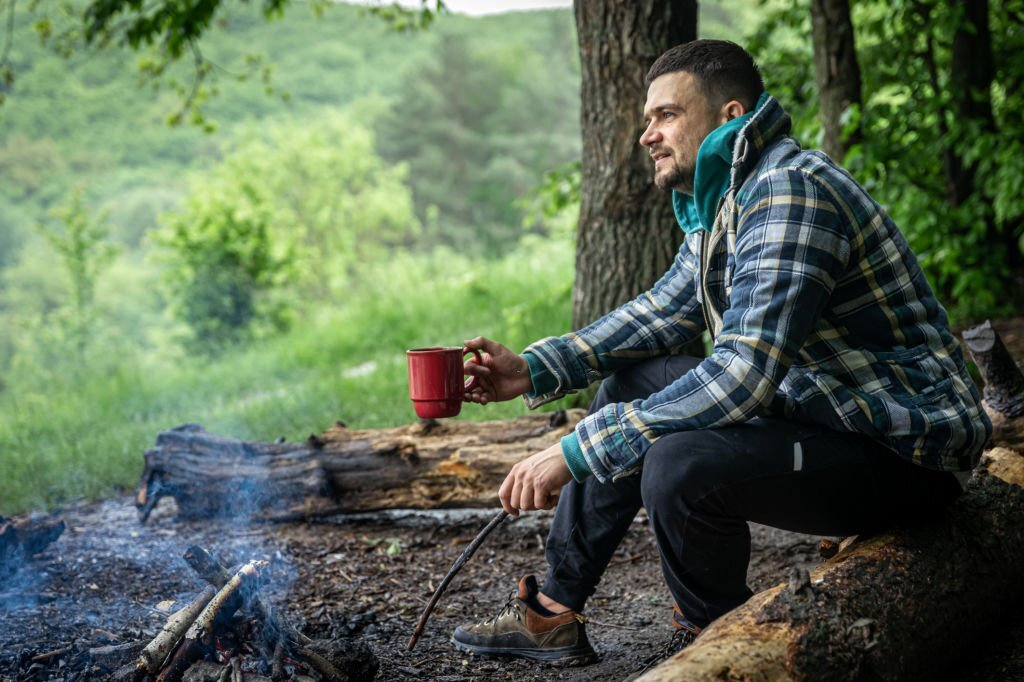
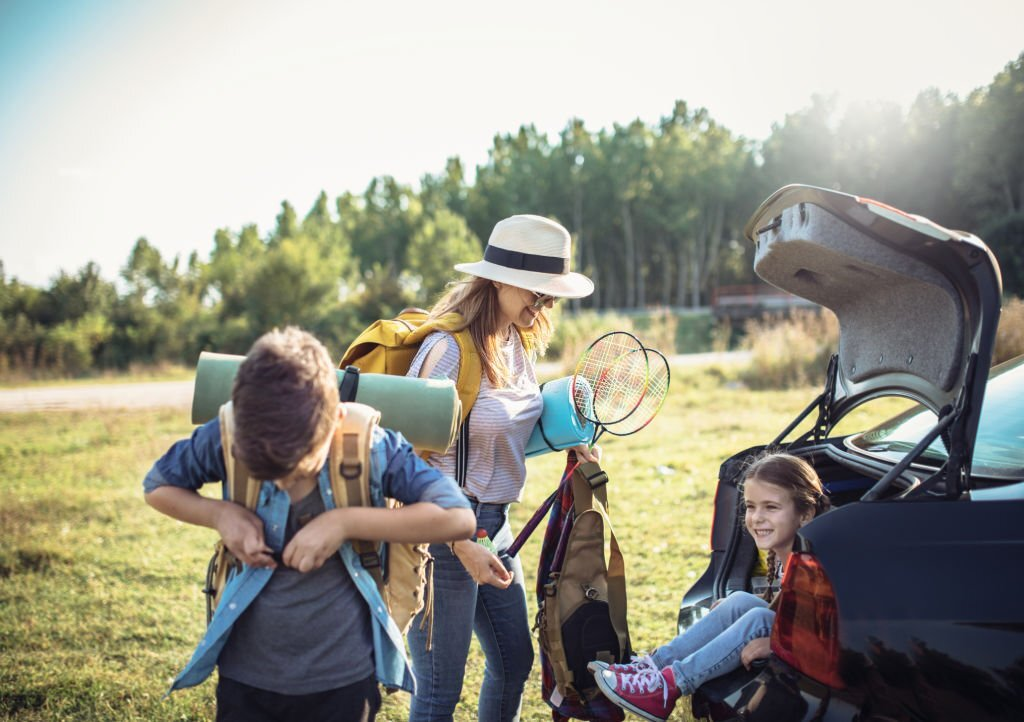
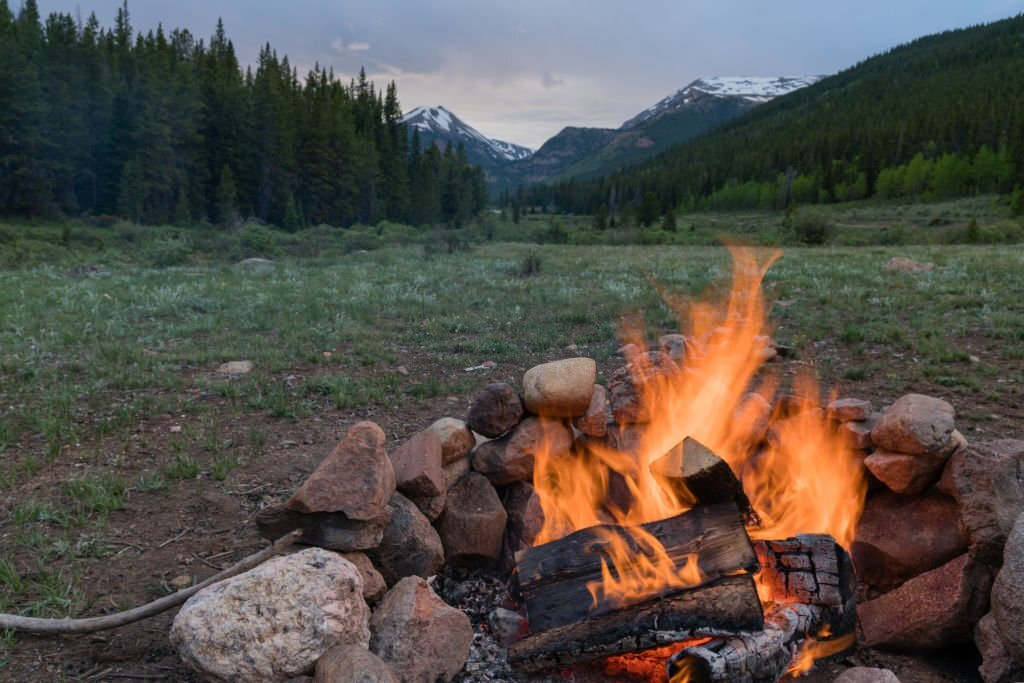
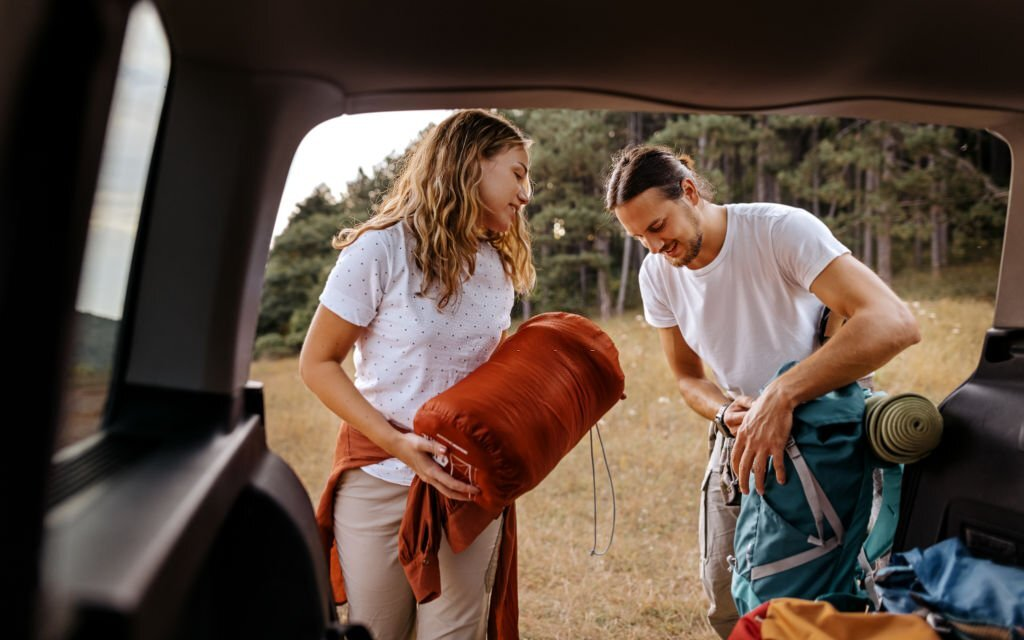
    Hiking is a rewarding activity, regardless of how many times you repeat it. There are a lot of things that you can experience on it. From the views to the challenges, everything is mixed into a mortar-and-pestle of adventure. 

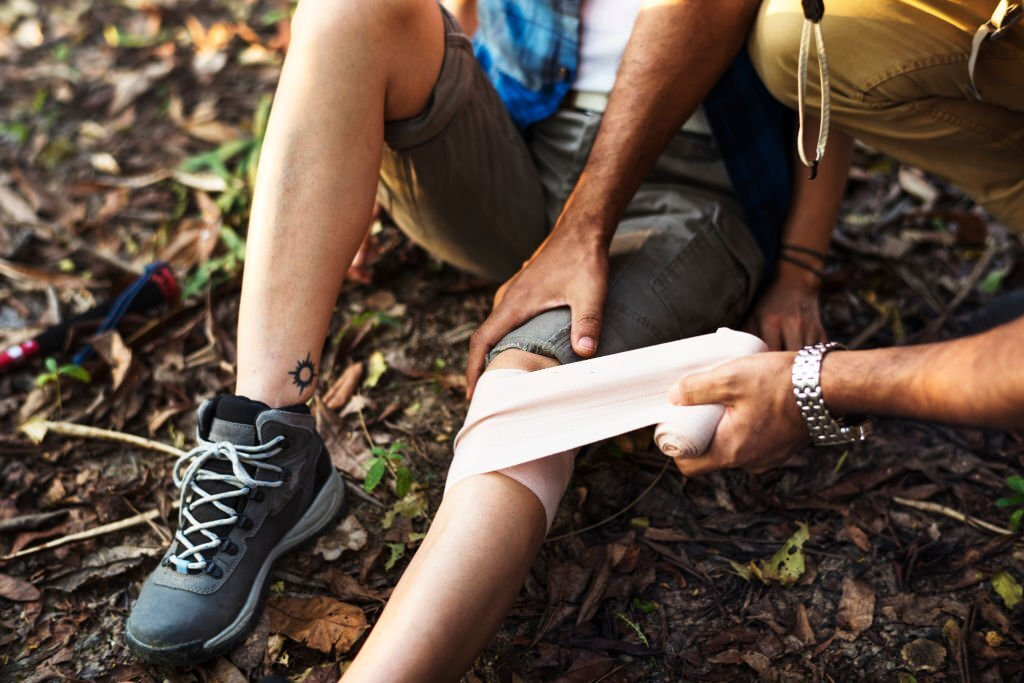
    However, there’s no certainty that hiking or backpacking is safe. Along the way, there’s always the possibility that you’ll encounter threats–whether it is in the form of a four-legged or two-legged creature. In this situation, you would really wish that you were fully protected. 

    Bringing a gun in hiking is an issue that puts many outdoor enthusiasts in a dilemma. Should I bring a gun? And if I will, how should I do it? 

    To determine whether or not you need a firearm in your adventure, you should read this blog. 

    Potential Problems Of Carrying A Firearm While Hiking

    Truth be told, carrying a weapon while hiking can be a challenge. And I am talking about the physical ordeal of carrying one while you are on foot. Of course, for other reasons, there’s a separate discussion for that. 

    Keep in mind that firearms can be bulky and heavy, even concealed carry ones. You’ll definitely feel their weight because they aren’t a part of our bodies. Most of the time, concealed carriers aren’t an issue, especially if you got a holster for them. But if you put them into the context of hiking or backpacking, things could get a little awry. 

    Regardless of the duration of your hike, carrying a gun will require you to do additional preparation. You would need to address matters like which gun should give you much comfort and which type of concealment should work for you (if you intend to conceal the gun). 

    These are the considerations that you need to take into account before you carry a gun on your hiking trip. However, we also need to discuss the next inquiry before we proceed. 

    Is It Legal To Carry A Firearm While Hiking?

    Believe it or not, the worst fear of many hikers isn’t bears or any wildlife: it’s humans. For instance, female hikers tend to believe that they would be powerless if they were to be attacked by another human; they think that they would get overpowered, especially if they are unarmed. 

    But of course, there’s always the legality of this matter. Is it legal to bring a gun while hiking or backpacking?

    Honestly, the answer to this question is quite complex. Americans who own a gun must register it to the corresponding authorities. Hence, if you are a registered gun, then it is probable that carrying it anywhere is legal. 

    However, that’s just the surface of the matter. For instance, in lands that are managed by the U.S. Forest Service (USFS) and the National Park Service (NPS), a person can’t bring a firearm without it being compliant with the state laws where the land is situated. This means that if the state law in your area prohibits the possession of firearms among civilians, then you can’t bring one. 

    It’s evident that laws related to gun possession vary from one state to another. Hence, it is important that you check the park, forest, or land administration for the policies regarding it. In this way, you will avoid apprehension by the police or local rangers. Of course, don’t forget to remain compliant with several US federal laws. Be always on the lawful side of things. 

    We also have to mention state properties. There are certain states that prohibit firearm possession in their protected parks. Examples of these states are New York, Connecticut, and Maryland. If you bring a gun to their parks, you’ll automatically put yourself in the jail line. Ignorance isn’t excused by the law. 

    Be mindful of your trail. It is quite enjoyable to cross borders and explore trails that are outside your destination. That’s the beauty of interconnectedness! However, keep in mind that some zones are no-gun zones. If you hop into these areas, you’ll be seriously in trouble. As much as possible, you should be prudent and stay on your trail to ensure that you’ll not get in conflict with the law. 

    Why Should You Carry A Gun While Hiking?

    Not surprisingly, a lot of hikers and backpackers are not interested in carrying a firearm while outdoors. They tend to feel safe, especially in protected forests and lands. 

    However, there’s always a possibility for things to go upside-down. Sudden threats can emerge in moments that you don’t really expect. And once the danger involves an aggressive human or animal, you would want yourself to be armed. Otherwise, it would be difficult to respond at all. 

    Of course, we aren’t scaring you here. We are just stating that these unwanted encounters can happen while you are outdoors. If you find yourself in these situations, your survival will really be on the line. Having a gun with you should be able to respond properly. After all, your attackers would not give you the chance to get your firearm from your armory or car. 

    Now, how frequently do these threats take place? While the statistics vary from one place to another, it is said that attacks in the middle of the trail or campsite are quite low. That being said, many people find themselves safe while they are in the mode of recreation. 

    But at the same time, this doesn’t discredit the importance of firearms while hiking. So should you carry one while on the move? It depends. If you are going into bear country or in an area where there is aggressive wildlife, you might bring one to scare them off. If you feel that the times are too uncertain and your life is in peril, then you might want to carry a gun. 

    However, in areas that are protected by local rangers and police, you may opt not to carry one instead. If you think that you need to carry a gun every day, then it is not wrong that you should get one while you are hiking, camping, or backpacking. 

    How To Carry A Gun While Hiking?

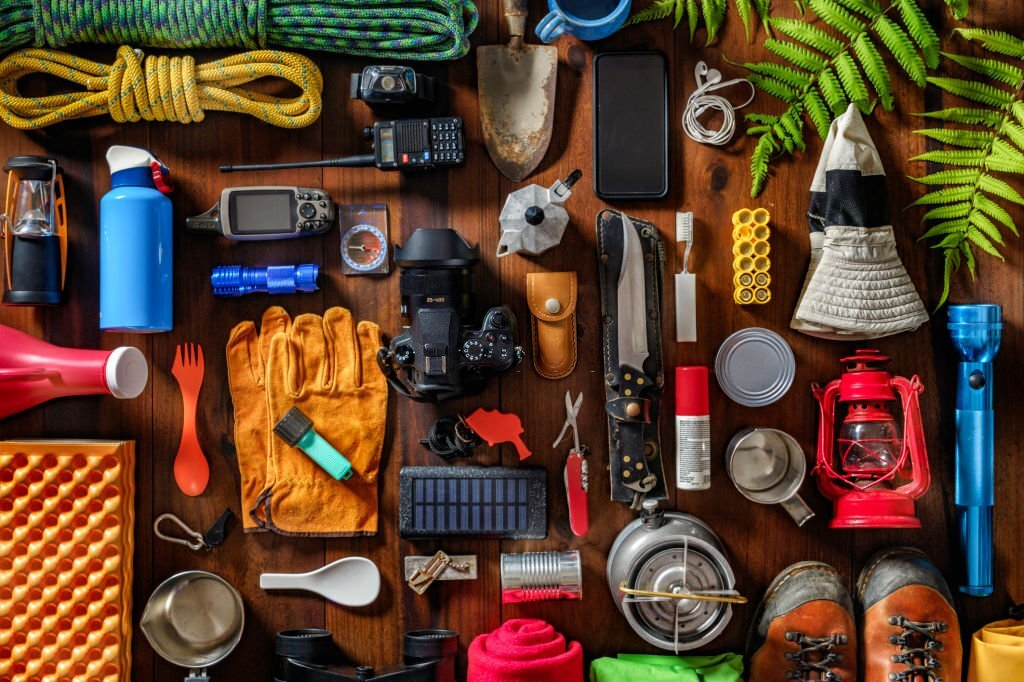
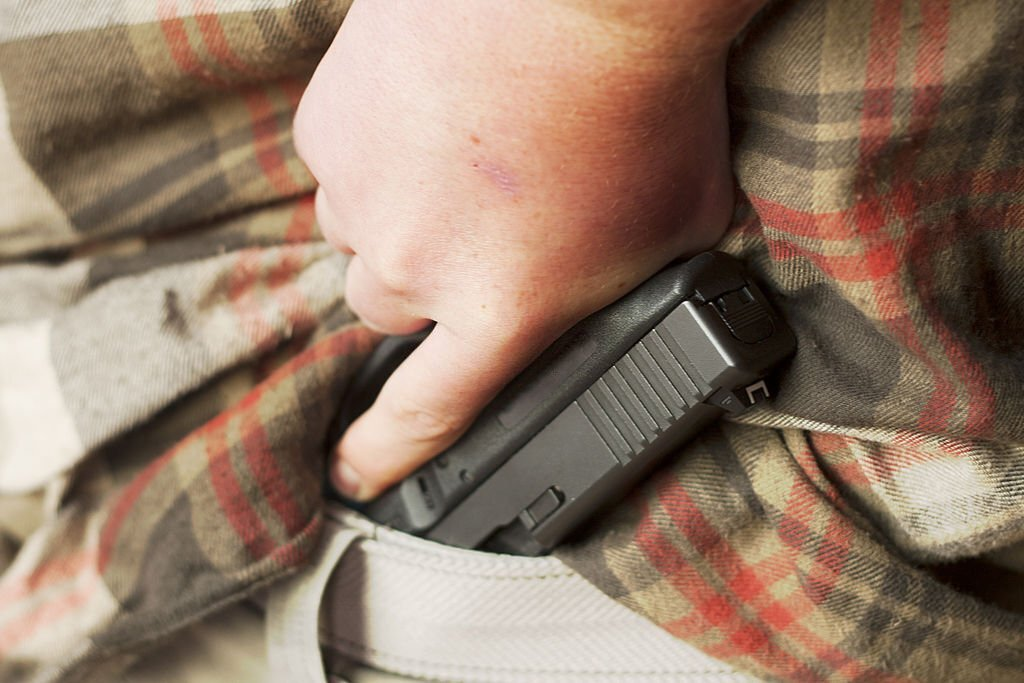
    Now that you have decided to carry a gun on your trip, it is time that you learn how to do this properly. Interestingly, there are numerous ways you can carry a weapon on your trip. You are no longer restricted to those hip holsters. Whether you want a concealed carry or an open one, the market will be able to provide you with several choices. 

    Many of these carry options are intended to fit with your backpacks. So you need to practice how to balance your pack since a weapon means an added weight. 

    Of course, keep in mind that you can’t just decide for yourself whether or not you want an open carry. Local laws may have specific rules when it comes to this matter. Some states allow you to carry your guns openly as long as you have a permit. Others prohibit it entirely. 

    You also need to take into account your preferences. If you are used to bringing concealed-carry weapons, then you should opt for concealed carry. It is much more comfortable, and you no longer need to adjust. Concealed carriers are great because they don’t draw attention. For us, a gun should be hidden in plain sight. 

    Here are some of the carry options you have for these guns:

    • Drop leg holsters – These holsters are attached to the legs. Specifically, they put your pistol against your thigh without blocking the hip belt. The concept is ideal, but many reported that it is quite uncomfortable. You see, these drop holsters tend to move around while you are walking or hiking. If you can’t get a good drop holster, the straps may get too tight or too loose. 
    • Drop holsters – A drop holster is an alternative to the conventional drop leg holsters. This particular holster is affixed just below the belt line. They conveniently fit with battle belts, which, in turn, offer better stability than drop leg holsters. Furthermore, they don’t come with many straps. 
    • Chest holsters – A chest holster is a carry option for hunters and individuals who simply want to be able to respond quickly. As its name implies, this particular holster places your gun within your chest area, ensuring that you can get it immediately when the need arises. There are numerous designs for chest holsters. But make sure that the one you get doesn’t get in the way with the straps of your backpack. 
    • Concealed chest rigs – These chest rigs are quite similar to your regular pouches. They are mounted to your chest and come with a shoulder strap. Unlike chest holsters, these chest rigs are designed to hide your gun. 
    • Garment concealment – You can also find other carrying options that let you hide your gun under your shirt or jacket. They are a nice choice if you really want not to tell other people that you have a gun. 
    • Inside your backpack – People are also encouraged to simply put their guns inside their pack. This is the most conservative choice, especially if you think that you don’t need to defend yourself anytime soon. But then again, putting your gun inside your back limits their accessibility. When the situation suddenly comes, you might not be able to get them right away. 

    Conclusion

    The decision to bring a gun on your hiking trip always depends on the perceived need. At the same time, it requires full compliance with the law and any applicable restrictions. 

    Hiking should be fun and safe. But at the same time, you can’t deny that there are certain threats that may come your way. If ever you’ll get stuck in this situation, better pray that you have something that can help you protect yourself. 

  • Backpacking Safety 101: Essential Tips for an Enjoyable and Secure Trip

    Backpacking is fun. But it is not always a smooth-sailing trip. Learn the essential backpacking safety tips here. 

    A Quick Overview

    Backpacking is one of the modern ways to have fun and break from the modern world. Depending on the location or the nature of your trip, the thrill that backpacking gives can be unforgettable and replaceable. 

    Still, this doesn’t mean that you get all giddy right from the get-go. Similar to other outdoor adventures, backpacking is faced with different challenges that you can deal with if you come prepared. Since you are outdoors, you have to understand that backpacking can expose you to some dangers. And if not prepared, these dangers could actually compromise you. 

    Fortunately, our expert backpackers from RilorWilderness know about the essential backpacking safety routine. From organizing your gears down to learning first aid, they have outlined some of the things that you need to do to keep the trip as incident-free as possible. 


    How To Stay Safe While Backpacking

    Backpacking is a nice thing, especially since it remains stress-free. So for safety purposes, the following tips should help you. 

    Bring The Backpacking Essentials

    Backpacking is an activity that will engage you in unfamiliar terrains, wildlife, and circumstances. So when you are dealing with the unexpected, it would really be better if you could have the ideal tools that can help you deal with the situation. 

    In the grand scheme of things, backpacking should be streamlined when it comes to the weight and bulk of your backpack. It should be a lightweight endeavor. So when it comes to essentials, it should be only the most important ones. These are those things. 

    • Tent – For overnight adventures, a one-person or two-person tent is essential. They should be able to protect you from the elements. 
    • First-aid kit – Obviously, first-aid kits are integral to handling different injuries and illnesses that you could encounter while outdoors. 
    • Sleeping systemsSleeping bags can keep you warm and cozy, even if you don’t have a tent!
    • Headlamp or flashlight – Light sources are important for survival. They can help you navigate through the darkness. In some cases, they could help you call for help. 
    • Fire starters – Suppose that you don’t know how to create fire manually. That’s where fire starters come in. They come in different forms, but they are all helpful in keeping you warm.
    • Water filter – Water is essential for survival. Fortunately, portable water filters exist. And they can help you sanitize running water, you can see. Always remember that you should not pick water from stagnant sources or those that have obvious chemical traces. 
    • KnivesSurvival knives and bushcraft knives are golden tools for survival. They can help you do a lot of tasks, including gathering foliage, hunting food, and making shelters. 
    • Navigation tools – Compasses, GPS devices, and maps are essential to prevent you from being lost. Learn essential navigation skills, including reading topographic maps. 
    • Whistles or mirrors – How to call help if you are in the middle of nowhere? Creating sounds or light flashes can help rescuers find you. 

    Clothing And Proper Layers

    Among the essentials that you shouldn’t forget is proper clothing. Dress accordingly based on the terrain, weather, and temperature. If it is raining or cold, make sure that you have insulated rain gear. Oppositely, wear breathable clothes when the weather is hot. Make sure that you are wearing the correct footwear–whether it is a pair of hiking shoes or water shoes.

    The right clothing can prevent discomfort and injuries. They can negate the possibilities of hypothermia or hyperthermia, which are both dangerous conditions you could encounter. 

    Stay On The Trail

    Staying safe while backpacking is quite synonymous with being less frisky. While backpacking, it is important that you stay on your objectives, as well as make sure that you can reach your destination. 

    Ideally, backpacking trips should be made on designated trails managed by BLM, US National Forest Service, and specific state parks. There, they have pre-established trails that you can trek safely. And if done properly, you can complete the trail within a specific time frame. 

    The key advantage of staying on these trails is that they prevent you from getting lost. If you don’t veer off from the trail, then the chances of you getting lost are close to zero. There’s no one that could prevent you from exploring. But until you are not confident in doing so, then just stay within the proximity of your path. Also, bring the essential navigation tools with you. 

    Learn How To Navigate

    Speaking of, keep in mind that navigation is one of the crucial skills that every outdoor enthusiast should learn. Never shy away from the opportunity to learn how to navigate. 

    The wilderness is not similar to the cities. In your town or residence, there are numerous options for how you can find your destination. You can ask people to ask for directions. Or simply download Waze and other navigation apps to get to where you should head. 

    In the forests or in the mountains, this modern convenience is not present. So getting lost is always a possibility. If you don’t have your navigational tools, such as compasses or satellite GPS, it is easy to wander aimlessly. 

    Before the trip, it is crucial that you have a map of your trail. You can ask the land managers or local authorities for this particular document. They can help you identify landmarks and other important locations where you can rest and pitch your tent. They could also help you identify hazardous areas, such as landslide-prone terrains and flash flood routes. 

    Technically, your chances of being in danger while backpacking is minimal if you are not lost. So go ahead and learn how to use your navigation tools!

    Wildlife-Proofing Your Food

    Backpackers are required to stay nourished so that they can complete their trip. This should require them to bring portable cookware, such as stoves, utensils, and disposable bags. In some cases, they might consider bringing coffee makers. 

    Now, doing these things can actually be of pleasure. In fact, we have a separate checklist of what campers and backpackers should bring for their outdoor kitchens. 

    However, one of the things that you need to learn is that your food should be stored properly before and after you eat them. If necessary, put them in odor-proof containers. If you are traveling in bear country, you should store your food items in a bear canister. Don’t place them inside your tent. Instead, they should be at a distance for your safety. You might also consider hanging your food containers in a tree via ropes. 

    Dealing With Strangers

    When it comes to backpacking, you are not alone. One way or another, you will encounter groups of other backpackers that are traversing the same way as you. 

    There’s etiquette when it comes to dealing with other backpackers and campers. In a nutshell, you should be polite but never too friendly. Just keep a distance and maintain a space so that your privacy (or theirs) won’t be compromised. No one gets comfortable if someone is invading their privacy or me-time. 

    Keep in mind that while assault and crime are not that common in hiking or backpacking trips, they could still take place. Hence, it is important that you are packed with some self-defense tools, such as pepper sprays. In some cases, backpackers prefer to bring concealed-carry weapons to defend themselves from two-legged or four-legged threats. 

    Don’t let others know that you are alone. Tell them that you have a company and that you are just waiting for them. For safety purposes, never reveal the area where you are camping. If you suspect that someone is following you, head back to the trail and report the case to the authorities. Always trust your gut feeling. 

    Learn How To Make Noise

    Interestingly, making a noise on the trail is a good way to stay safe. Specifically, this helps fend off the wildlife from coming your way. You should do this if you are backpacking in bear country. 

    Most of the time, noises alert nearby wildlife of your presence. By nature, these creatures don’t like interacting with people. So if they know that you are around, they will find a way to put distance from you. 

    There are ways you can make sounds. Talking audibly is one (even if you are just talking to yourself). You can even sing, hit rocks, or swing branches so that they can make rustling noises. The sound you make doesn’t have to be constant. You just have to do it from time to time to alert the wildlife around you. 

    Don’t Get Distracted

    I know that it is much fun to go outside with as many entertainment systems as you want. In fact, it is no longer surprising that people these days are into the individualistic culture of wearing headphones or earbuds (whatever you might want to call it). 

    While they are a cool thing to wear in crowded areas, we personally recommend that you don’t wear them while backpacking. As I’ve mentioned, you can never rule out threats from two-legged creatures. And the best way you can protect yourself from them is by being able to avoid them ahead of time. 

    Confrontations should be the last option. If possible, you should run away from potential fights because nobody knows what’s going to happen. And the best way you can avoid your attackers is through situational awareness. Plugging earphones into your head can prevent you from noticing stalkers trailing on you. And it would be too late for you to spot them if you can’t even hear their footsteps from a distance. 

    So if you are backpacking, don’t get distracted. Be alert, and always prepare yourself for a quick U-turn or lift-off. 

    Prepare For The Trip

    Securing the safety of your backpack trip starts before the big day. As much as possible, you need to train your body for the adventure. Depending on the level of technicality of your destination, you need to train physically for it. Do some morning runs and regular strength-training exercises so that you can take on the physical challenge of your trail. 

    Mentally, backpacking can be overwhelming, especially if you are doing it alone or if it’s your first time. It can be exhausting and frightening. Learn to meditate to reduce the stress you are feeling. Mindfulness is an excellent trick to keep your mind sane! Eventually, you will get used to these aspects and treat them as little inconveniences you can get by.


    Final Thoughts

    Although backpacking can be an exciting and adventurous exercise, safety should always come first. You can make sure that your backpacking trip will be safer and more pleasant by heeding the advice and recommendations provided in this article. Always do your homework and prepare ahead of time, carry the necessary equipment and emergency supplies, be mindful of your surroundings, and share your plans with people you can trust. You can reduce the risks and increase the rewards of backpacking by taking these measures.

    Check other checklists and other camping guides that we have prepared for you:

  • Camping or Backpacking Without A Tent

    The idea of camping always involves tents. After all, these tents will serve as your shelter once you are out in the wild. In fact, it is already absurd to think that you can go outdoors without them. 

    But hey, it is really possible to go backpacking minus the tent. It is a good way to streamline the weight of your luggage and ensure that you can move anytime that you want. With tents, you would have to do the process of repeating the process of pitching and disassembling the tent (assuming that you want to transfer places from time to time).

    Here, you will learn the art of backpacking/camping without a tent. We will go through the basics and see if it is for you. 

    Do You Really Need A Tent For Camping Or Backpacking?

    The short answer to this question is no. 

    But allow us to expound on this in detail. Tentless camping has been going on for quite some time already. You’ll be surprised that a lot of people have been doing this adventure. Of course, the thought of camping without any tent sounds scary. But it is always a plausible pursuit, especially if you are prepared to do it. 

    Surely enough, tents are often listed as primary requirements for modern backpacking and camping. But at the same time, there are numerous ways you can camp without bringing one. 

    Keep in mind, however, that you still need to bring some insect or rain protection in this pursuit. Hence, hammocks with tarps, bug shelters, or waterproof bivvies should serve as great alternatives.

    For instance, laying inside a hammock should be comfortable enough most of the time. If the climate is fine, you’ll experience the fresh breeze and the coolness of the air around you. 

    Is It Safe To Camp Without A Tent? 

    Technically speaking, it should be safe to camp without a tent, especially if you have fully mapped the area where you want to settle.

    Tents provide the defense that you need against several threats that are commonly present in an outdoor environment. Specifically, there are two things that you should be wary about here: 

    • Weather 
    • Wildlife

    Weather – Tents are purchased in anticipation that the outside world will be unruly. And in most cases, unexpected things do happen. The weather always remains a volatile element when spending time outdoors. From heavy rain to flooding, these things are always within the realms of possibility. Even the slight changes in temperature can already throw you off. 

    Wildlife – We should always remember that the outdoors isn’t our territory. It is the haven of our animal friends. Hence, don’t consider them as intruders to our campsite; instead, we are the ones who are sharing spaces with them. Hence, you should exercise due diligence in ensuring that you don’t disturb their homes and sanctuaries. At the same time, you need to find protection so that if they are around, you’ll never be harmed by them. 

    Both of these threats can be solved through the use of tents. As long as you are sheltered, you will never have to worry about the external factors that could affect the quality of your backpacking experience. 

    But then again, fully-prepared backpackers and campers know that tents aren’t necessary for them to navigate to these odds. For instance, hammocks with tents or bug nets can effectively protect you from critter bites. Meanwhile, lightweight bivvies are sufficient enough to keep you dry during drizzles. But during heavy downpours, you might want to find a spot where no rain can reach you. 

    This is where the importance of planning comes in. By being strategic in your adventure, you can already plan out your activities and campsite ahead of time. You’ll know what to do when things get sour, effectively keeping yourself protected and comfortable. 

    Is It Worth Spending Money On A Tent?

    Of course! If you are an outdoor enthusiast, having a tent is a must! These tents are essential amenities in any backpacking and camping pursuit. In fact, they are always on the top of every outdoor checklist, defining their relevance in these favorite pastimes of ours. 

    In fact, despite the new waves and trends in outdoor camping, tents remain to be in the picture. Of course, that’s not surprising anymore, given the fact that people will always require temporary shelters once they leave the urban jungle. 

    The reason why some people want to try tent-less is for the thrill and experience. Just imagine being able to head out with almost nothing to protect you. That’s one way to commune with the natural world around you. At the same time, having no tent means reduced weight. So if you wish to reduce your bulk in your next adventure, you might want to consider going tent-less. 

    In actuality, the real question here is whether or not you need to spend on expensive tents. The answer to this question depends on how you intend to use the tents. For instance, for three- to four-season adventures, you might be required to purchase more expensive tents. 

    More expensive tents are desirable in extended backpacking pursuits because they are light and durable. The technology used on them ensures that they can help their users get far without being too strained by their bulkiness. At the same time, high-end tents are rugged. They can withstand punishments and can be brought on terrains with harsh conditions. 

    Between these tents and having no tents, you might want to consider the former, especially if you are sure that the conditions at your destination aren’t that friendly. You don’t need to go tent-less in challenging terrains. Being equipped remains a top priority for every backpacker.

    What Are Alternatives For Tents?

    If you are looking for alternatives, you should check the following options below:

    Hammocks  

    If the weather isn’t that bad, then you should bring a hammock with you. Hammocks are tailored from different fabrics and are constructed in different ways. Just make sure that the hammock you pick is durable and large enough for your needs. It should also come with simple yet secured attachments so that you can hang them tightly on trees.  

    If you are planning to sleep overnight, you should get those hammocks that include a mesh on their construction. In this way, you will never be bugged by bugs and critters. If there’s enough space, you can even bring blankets and pillows. 

    Cot

    A cot is an excellent alternative for those who hate the idea of sleeping on an elevated platform. It is similar to a portable bed that you can fold and bring with you wherever you go. 

    When choosing a cot, make sure that it has a sturdy base so that it won’t collapse under your weight. Those units that have a metal base are great. Aluminum ones are lighter than steel, but the latter is more durable than the former. At the same time, get a cot that can fit you in. It should be spacious enough for you to move around freely. 

    Tarp

    It is not a secret that tarps are the simplest alternative for tents. They are also very accessible; you can buy them in your nearby stores and favorite online retailers. Many of these tarps are used as hammocks and tents. However, it is notable that these tents are more durable than their counterparts. They are waterproof and provide decent resistance against the wind. 

    If you are anticipating rain, snow, or extreme heat, you should choose a tarp instead of a hammock or cot. It is capable of shielding you against the elements, even in the absence of a tent. Pitching a tent may take some time, and you would need the following accessories: polls, ropes, or stakes. 

    Bivy Sack

    Technically speaking, bivy sacks aren’t tents. But at the same time, you can say that they are a crossover between a tent or sleeping bag. A bivy sack has a headcover that has been elevated for added wiggle room. The head cover protects you from the heat of the sun or from insect bites. 

    Bivy sacks are often used by hikers because they provide a degree of insulation. However, keep in mind that they aren’t really waterproof. If you are expecting watery weather, you might want to bring a tarp with you. 

    Since bivy sacks are placed on the ground, you should insert a camping pad in between. In this way, you can lay more comfortably. 

    Tips for Camping Without a Tent

    Pick A Warm Weather

    If it is your first time camping without a tent, it is always a bright move to choose a day where the weather is fine. It’s not recommended to camp tent-less in the rain, even if you want to experience one. Trust us. It gets uncomfortable over time. 

    Get A Natural Shelter

    If possible, you should scout your campground and look for a natural shelter. Even if it is not raining, there’s a possibility that it will get windy and chilly during the night. Having a place where you can be protected from the wind is quite beneficial. 

    Don’t Get Close To Water

    It’s not recommended that you camp near a body of water, such as rivers and lakes. Aside from the high possibility of bug attack, numerous wildlife would also come to drink water. If you are in a bear country, this is bad news. 

    Prefer Established Parks

    If you decide to camp without a tent, make sure that you do it in established parks. These are considered safe spaces; they are well-maintained and monitored. Furthermore, park guards and local rangers ensure that there aren’t dangerous wildlife nearby. 

    Be Wary About Poisonous Plants

    At the same time, you have to probe your surroundings. Get to know the local species of plants and see whether or not they are poisonous. Examples of the poisonous plants that you need to watch out for are poison ivy, poison oak, and poison sumac. We also suggest that you avoid picking or eating plants with three leaves. 

    Bring A Bug Spray

    It’s likely that you’ll get bugged by insects if you aren’t inside a shelter. Because of this, it is imperative that you keep yourself protected against them through the use of bug sprays. Alternatively, you can also set up a bug net to prevent mosquitoes and other critters from disturbing your peaceful endeavor. 

    Conclusion

    Camping without a tent is always possible. It just requires extra preparation and planning to ensure your comfort and safety along the way. Having tent alternatives will help you adjust to a tent-less setting, so it would really be great if you bring one with you. 

    And of course, don’t forget to have fun. Enjoy the experience of being one with Mother Nature! 

  • 10 Tips On How To Stay Cool In Summer Backpacking And Camping

    Summertime is always the best time for camping and backpacking. The sunny day with little to no chance of rain signals that you need to gather your camping checklist and get yourself ready. The outdoors will always be a pleasant playground during this period, as there are a lot of things that you can do–from swimming to fresh lakes and rivers down to an all-out outdoor cookout. 

    Surely enough, these activities sound cool and elevating. But don’t rush yet. You have to guarantee first that you can deal with one of the biggest threats of summer camping and backpacking: the heat of the sun. 

    Follow the tips we mentioned here so that you can stay cool while you are in the middle of your outdoor adventure. 

    Dangers Of Overheating / Heat Exhaustion

    You should never ignore your body temperature while doing outdoor activities. During summer or any hot days, you need to be wary about heat exhaustion. The latter is a condition that usually occurs in situations where the external temperature is high. 

    It is often characterized by varying symptoms, ranging from rapid heart rate to heavy seating. Interestingly, it belongs to the three known heat-related complications. 

    The first one is heat cramps, which are considered the mildest. The other one is heatstroke, which is the most dangerous and severe, as it is life-threatening. 

    Heat exhaustion has a plethora of causes, which may include the following: 

    • High external temperatures
    • High humidity
    • Rigid physical activities

    If you cannot address heat exhaustion, there’s always a risk that it will lead to heatstroke. If the latter is untreated, it can cause a person to die. Fortunately, heat exhaustion is something that you can prevent entirely. What you need to do here is to be prompt in your measures to keep your body temperature cool and regulated. 

    At the same time, it is essential that you are watchful for the symptoms of heat exhaustion, which are listed below.

    Symptoms Of Heat Exhaustion

    One of the notable aspects of heat exhaustion is that it can either happen immediately or develop gradually. It’s quite difficult to predict when it will happen, but it is always in the realm of possibilities, especially if you are camping or doing outdoor activities. The more you utilize your body under the heat of the sun, the more you are at risk of developing heat exhaustion.

    Fortunately, there are tell-tale signs that signal that a person is experiencing heat exhaustion. Here are some of them:

    • Skin is highly moist
    • Dizziness and faintness
    • Fatigue
    • Weak but rapid heart rate
    • Heavy sweating
    • Headache
    • Nausea
    • Muscle cramps

    When these symptoms are present, it is essential that you will be able to provide the necessary relief to ensure that the situation will not worsen. Of course, it is also essential that you implement preventive measures to prevent its occurrence in the first place. 

    When Should You See A Doctor? 

    If you think that you are experiencing symptoms of heat exhaustion, you need to do the following: 

    • Halt all your activities and take a rest
    • Move to somewhere that is cool and breezy
    • Hydrate yourself with water and sports drinks 

    Once you deem that the symptoms are worsening,  you need to get medical treatment right away. You should do this if the symptoms aren’t improving after an hour. Seek the help of a doctor if your companion is showing signs of heat exhaustion and is not able to drink water. You should do the same if they are losing consciousness or being delirious. 

    Immediate cooling is necessary if the body temperature reaches 40 degrees Celsius (104 Fahrenheit) or higher. 

    Is It Safe To Camp During Summer?

    Generally, summer camping or backpacking is pretty much harmless. These outdoor activities are recommended to be done during sunny conditions, as it is the most conducive for doing various outdoor activities. 

    But of course, necessary precautions should be taken into account so that you will not end up on the bad side of things. For instance, you need to learn about the heat index of the area where you are heading. If the report says that it is too hot, then you might consider postponing your activities. 

    If you decide to head out, make sure that you know the necessary methods to cool yourself off. In this way, you can continue your activities without having to risk yourself with heat exhaustion and its aggravating symptoms.

    Tips On How To Stay Cool In Summer Backpacking And Camping

    Your body has its own internal temperature. But this is not just your body heat. The heat in your surroundings also contributes to the core temperature of your body. Your body has to regulate its own temperature in correspondence to external factors so that it can retain the ideal temperature of 37 degrees Celsius (98.6 Fahrenheit). 

    Heat exhaustion happens typically in hot weather conditions. However, our body can counteract it through sweating. Once the sweat evaporates, your body starts to cool off. This effect reduces when you exert too much effort in hot weather.  

    Fortunately, there are several ways you can remain cool during a summer camping or backpacking trip. 

    Disassemble Your Tent

    Your tent works as a greenhouse when the weather is too hot. It effectively absorbs the rays from the sun, making it storage for heat. When you enter a tent during hot weather, it feels like you are entering a sauna. 

    Furthermore, it is important to remember that no tent fabric works well when exposed to direct heat. It doesn’t matter if your tent is made from polyester and nylon; they would eventually trap heat inside. 

    Hence, it is essential that you disassemble your tent while it is hot. Aside from preventing heat exhaustion, it also extends the lifespan of your tent. You should pitch back your tent once the temperature starts to subside.

    Pitch The Tent Under A Shade

    As much as possible, you should assemble your tent in a shaded area. Let the natural world around you help you absorb the heat of the sun. For instance, rocky formations and trees are an effective defense against sunlight.  

    Of course, it is essential that you know where the sun will pass during the day. In this way, you will be able to maximize the shade. Look for towering shades, as they can give you optimal protection once the sun is overhead. If there are trees around you, then you shouldn’t have any problem. 

    Utilize A Reflective Sunshade

    One of the best things that you can do to cool yourself during a camping or backpacking activity is using a reflective sunshade. These sunshades will reflect the heat of the sun, allowing your tent to be cooler even if it is exposed to sunlight. 

    If you have the opportunity to bring one, then do so. It will help you stay inside your tent even during the day. Hence, it removes the need to disassemble your tent. 

    A sunshade is the most effective when you erect it directly over your tent. There should also be a gap between the tent and the sunshade so that you won’t hinder the ventilation in your tent. It contributes to the natural cooling of your tent.

    Remove Your Tent’s Rainfly 

    A rainfly functions by protecting your tent from water. It can also prevent the internal heat of the tent from escaping, which is beneficial during rainy or cold weather conditions.  

    However, this effect is counterintuitive during summer. In hot seasons, you don’t want the heat to be trapped inside the tent. Hence, you should consider ditching it in your tent on the trip. Of course, if you expect a sudden change in the atmospheric condition, then bringing one shouldn’t be a bad idea. 

    Get The Appropriate Tent

    Not all tents have the same quality and construction. Some are designed to handle the hot weather better than their counterparts. 

    One of the best options that you have here is mesh tents. The mesh provides additional protection against insects while ensuring that the air is able to pass through the tent. It optimizes the internal cooling of your tent while ensuring that you won’t get bitten by bugs. 

    Summer backpacking and camping would benefit from these tents. They ensure that you experience sufficient ventilation during hot weather. 

    Wet A Towel And Put It In Your Neck Or Forehead

    If the outside world is downright hot, you might want to have a wet towel on the back of your neck. In this way, your body can regulate heat better. If the night is also hot, then you should also do the same, but this time, put the damp towel on your forehead.  

    Water has a high specific heat capacity. Because of this, it can efficiently absorb your excess body heat. It is the reason why damp towels are placed on the forehead of those individuals who are experiencing severe fever. 

    If you are planning to go on a hike, have a bandana soaked with cold water and tie it in your neck. The same cooling effect if you wet your hands. 

    Remain Hydrated

    When it comes to summer backpacking and camping, hydration is a crucial aspect that you shouldn’t ignore. It is the one that could keep you cool throughout your adventure. As we have mentioned earlier, water features a high specific heat. This means that it can absorb lots of heat. This is the reason why water works well as an alternative coolant for car radiators. 

    Keep in mind that approximately 60 percent of your body is water. So keeping yourself hydrated all the time will protect you against overheating. 

    Meanwhile, dehydration is a risky condition. The hot weather can amplify and hasten its effects. Hence, if you are camping or backpacking, make sure that you drink roughly 65 ounces of water or higher per day. Once you are feeling thirsty, you need to drink water right away. 

    In fact, it is recommended that you drink at least glasses of water before you leave your home. In this way, your body has enough fuel to reach your destination without getting dehydrated. 

    Ensure That Food Remain Cool

    You can enjoy pre-made food if they are cold. Hence, it is essential that you bring coolers with you, ensuring that your snacks and treats remain cool and fresh. 

    Of course, the heat can also cause your perishable food to be spoiled quickly. Proper food storage is always an essential factor in ensuring that your camping and backpacking trip remains safe and enjoyable. 

    Don’t use your coolers as your fan. If you keep on opening them to cool yourself, they would also lose the coldness they are storing, prompting faster food spoilage. 

    Choose Your Clothing Wisely

    If you are expecting hot weather during your trip, make sure that your clothes are loose and light. In this way, they can provide sufficient ventilation around your body. Choose synthetic clothing, especially those that have moisture-wicking properties, so that your sweat evaporates efficiently. 

    Never wear cotton clothes because they don’t do well in hot conditions. They retain heat, and they don’t wick off moisture. In short, they can make your adventure a little too hot and uncomfortable. 

    Also, don’t forget that light colors are better than dark-colored clothes when it comes to summer outdoor adventures. The radiation from the sun sticks well to dark colors. As a result, they would store heat significantly. The brighter your color of clothing is, the more efficient it is in reflecting heat. 

    Apply Skin Protection

    When it comes to summer camping, there’s nothing more detestable than experiencing the effects of the heat of the sun on your skin. But of course, it is not just about the darkening of the skin; it is also about the invisible effects of the ultraviolet rays on your skin. 

    The UV rays don’t make things extra hot. It also has underlying effects, some of which are pretty much severe. These UV rays may cause premature aging of your skin. Prolonged exposure can amplify your risk of developing skin cancer. 

    It is important to apply effective sunscreen to protect yourself against UV ray damage. At the same time, wearing sun protection amenities, such as sunglasses and a hat can reduce the heat you are experiencing. 

  • How To Camp Stress-Free: A Guide To Chilling Out In The Wilderness

    Camping has been touted as relaxing leisure for a very long time; however, this doesn’t mean that it is free of stress. Do you want to camp without stress? Then we got you covered.

    A Quick Overview

    We at RilorWilderness believe that camping is an excellent way to disconnect you from your mundane life. From the hustle and bustle of the urban space, isn’t it nice to slip away temporarily so that you can bask in fresh air while being surrounded by majestic scenery? 

    There are a lot of good things that you can experience from camping. And packing right and preparing thoroughly can help you achieve such wonders. However, camping also has its own share of unexpected challenges. Some of these issues are minor, while others can be serious and life-threatening. While these things can occur inevitably, the majority of them are actually preventable. 

    In this particular post, our experts will share some tested-and-tried tips on how to camp stress-free. From the essential checklists down to finding the ideal campsite, we will guide you entirely. Read on. 


    How To Camp Stress-Free

    On the surface, camping is fun. Of course, that should be the way. But the fun only comes after you had prepared and sorted out the trip even before it took place. There are specific things that you need to do to avoid nuisances while camping. Here are some of them.

    Plan Ahead And Create A Checklist Of Your Essentials

    Planning is an essential aspect of camping. Regardless of the distance and duration, campers should be able to plan their trip ahead of schedule. 

    You see, the majority of inconveniences are a result of poor or lack of planning. For example, you didn’t anticipate the weather at the campsite, and it was too late for you to realize that rain jackets and insulating tents are essential. 

    Or, you could not have anticipated the amount of food that you should bring. You didn’t account for the number of people on the trip, your appetite, and even the cookware and utensils that you should have. Don’t go to a campsite without knowing whether or not you need a camping stove or gas grills

    Essentially, the more you can plan, the more you can anticipate potential problems. It also lets you prepare for SHTF situations should they arise. As always, you would need to identify the nature of your trip, its duration, and its location. Furthermore, don’t forget that you have to address matters like campsite rules, registration fees, length of travel, and the types of tents that you should bring. 

    Of course, don’t forget about your essentials. If you are camping with your family, this family camping checklist should help you out. 

    Setting The Proximity Of Your Campsite

    Camping is all about having fun. And part of the fun-seeking pursuit is exploring new places and destinations. So cool! You want to camp somewhere that you haven’t visited before. But before you prepare your gear, ask yourself if that location would be convenient for you. 

    Well, only you can know this answer. Our staff and experts have visited different trails and campsites in the United States and Canada. Throughout their adventure, many of them said that the distance had an impact on the overall quality of their trip. 

    For example, one of our staff had to go backcountry camping in Colorado last 2019. Overall, the trip was memorable. But according to him, it was really exhausting because of the trails that they had to trail. By the time they reach their destination, all of them are already spent. They have to eat more and drink more fluid, which causes their supplies to deplete fast. 

    By the way, these individuals are seasoned outdoor enthusiasts, so imagine the toll if the same adventure is done by newbies. 

    We highly recommend that you camp in areas that are close to your home. Alternatively, you suggest that you camp in highly accessible areas. In this way, the distance wouldn’t cause stress and exhaustion on your trip. A 15-minute drive is better than a day-long stay on the road. Just keep that in mind. 

    Furthermore, camping close means that you can respond to emergencies should they arise. You would be able to rush to the nearest hospitals and police stations if it’s necessary. 

    Choose A Suitable Campsite With Adequate Amenities

    Now that you have limited your reach, it is time to choose the ideal campsite. There’s a good chance you have at least five choices for a campsite, especially if you reside in states known for their vast forests and state-managed lands. 

    But keep in mind that not all campsites are equal. Some of them are designed to be family-oriented. This means that they have all the essential amenities that would help campers experience a certain degree of comfort. Others are more akin to dispersed camping, where there are virtually no amenities that you can utilize.

    Between these options, you should prioritize those areas that can provide you with essential facilities, such as bathrooms and washing areas. You don’t need these campsites to be ultra-complete, though. Your stay there will be comfortable as long as they are safe and adequate. 

    Of course, remember that these campsites don’t provide storage solutions for your food and beverages. Hence, it is essential that you bring coolers for your trip. You have multiple options for coolers, by the way. Choose which one is viable for your camping adventure based on the duration and quantity of your food. Don’t forget to bring odor-proof containers, as well. 

    Ensure That Your Vehicle Is In Good Condition

    It is most likely that you are going to ride with your car, truck, or RV on your camping trip. Because of this, you would also need to maintain their health, ensuring that you can drive it smoothly and safely. 

    Believe it or not, many of our seasoned campers here in RilorWilderness experienced sustaining flat tires upon driving to their camping destination. And it is a form of inconvenience, believe it or not, especially if you are in a rush not to run out of parking space in the campground. 

    Of course, flat tires are just a surface issue. There are many other things that your vehicle could encounter if you didn’t check it before your trip. From failing engines to overheating, these things could potentially occur. So what should you do? Well, aside from regularly maintaining your vehicle, you should also have the necessary equipment to conduct repairs and troubleshooting. 

    Here are the things that we suggest you bring. 

    Keep The Trip Short

    Your campground might be an eye candy or something that offers you a sense of calm and relaxation. But sadly, such a degree of peace is not an excuse for you to prolong your camping trip. 

    Ideally, camping trips should only last for two to three days. You can plan a weeklong trip, but trust me, that would require more extensive planning, preparation, and packing. Sure. This particular excursion is doable. But don’t expect that it will be smooth all throughout. 

    The longer you stay outdoors, the more inconveniences you will experience. From dirty clothes to your stinky skin, these matters will eventually arise the more time you spend at the campsite. 

    The best thing about camping is that it doesn’t require you to stay long in the wilderness for you to enjoy it. Even a single-day trip becomes memorable if you plan it right. And if you have chosen a campsite near your residence, you will be able to go home immediately without experiencing too much exhaustion. 

    Don’t Overpack

    I know that this advice seems ironic. Camping requires preparations, right? Yes, that’s true. However, it is not synonymous with overpacking. In fact, the more you prepare, the more you will be able to identify which equipment or gear is essential. 

    For example, if you are just going on an overnight camping trip, there’s no need for you to bring lots of food. At the same time, you don’t need to bring multiple clothes and layers. You can trip your pack to the fundamentals–or those items that you only actually need. 

    Surely enough, there’s no strict rule when it comes to the weight and bulk of your camping gear. After all, general camping isn’t similar to backpacking, which is considered to have a prioritization over streamlining weight. But at the same time, this is not permission that you can bring all the items that come to your mind. 

    Plan for everything. Next, narrow your essentials and take into account the quantity that would suffice for the duration of your trip. For example, you shouldn’t bring lots of utensils if you are just camping with your partner. A two-person sleeping bag can work for two people so that they don’t have to bring individual sleeping bags. 

    I know that you get the idea here. Don’t overpack, and only carry what you actually need. By doing this, you would minimize the need for excessive organization and storage. You would be able to pack your backpack properly. As a result, that would relieve potential stresses, too.

    Be Prepared For Emergencies

    When planning a camping trip, it is important to always be prepared for emergencies. And no, we are not scaring you at all. Everything can be possible once you are outdoors. Even the most prepared campers can’t escape accidents–whether it is manmade or natural. 

    Once the SHTF takes place, you have no other option but to adopt. That’s how you survive and overcome potential stresses. Here, you need the essential kits for dealing with outdoor emergencies. They are the following:

    Additionally, it is important to be aware of the location and contact information of nearby emergency services. Learn basic first aid, too. By being prepared, one can enjoy their camping trip with peace of mind knowing that they are ready for any situation that may arise.

    Adjust Your Mood And Mindset

    Most of the time, the stresses that you encounter while you encounter could deliberately ruin your mood. It could sour the trip and would affect the enthusiasm of your fellow campers. 

    Of course, this reaction is just normal. Frustration, anxiety, and disappointment are the results of encounters that you didn’t expect. But as campers and outdoor enthusiasts, we need to have a stronger mental fortitude. Part of the journey is accepting the fact that some things just don’t go in your way. 

    So instead of getting angry and losing your cool, you should just reset. Learn breathing exercises. In fact, there are camping exercises that you can do that could relieve your stress. The thing is, you are the only one that can control how you react. Some uncontrollable things can take place, but the way you react to them is within your jurisdiction. So keep it cool, and maintain a relaxed mind all the time. 


    Final Thoughts

    Learning how to camp stress-free is quite essential. After all, we have to remember that camping is meant to be a source of fun and leisure; it should not be a source of stress and frustration. 

    By practicing the tips that we outlined here, you will be able to fully enjoy your next camping trip. Plan ahead and prepare all the essentials for your adventure!

  • How To Solo Camp For The First Time (Plus A Solo Camping Checklist)

    When it comes to solo camping, it is essential that you are well-equipped and prepared. This post will teach you how to gear up for your next solo trip outdoors.

    A Quick Overview

    Camping is about having fun and enjoying whatever the outdoors offer to you. Of course, this also means that camping, as an activity, is one of the most pleasurable leisure you can ever immerse yourself into. 

    Solo camping is no longer a new thing. But it is always introduced as a refreshing take to the usual family or group camping. It is a worthy adventure to experience, as it can lead to self-fulfillment and appreciation. Solo camping is also adjacent to other types of camping, such as dispersed camping

    But keep in mind that being alone in the wild is definitely a daunting experience, especially if you haven’t tried it yet. That’s why solo camping requires a degree of preparation and safety awareness. Having the right tools, gear, and skills would enable you to conquer the wild alone and potential emergencies that could come your way. 

    Here are some of the ideal ways to camp alone safely and comfortably. 


    Is Camping Solo Safe? 

    The short answer is yes.  

    Camping and hiking solo is seemingly overwhelming. But with the right preparations, anyone can succeed in them. Our personal experiences tell us that it can be done safely. From time to time, we go alone on our expeditions and experience the beautiful solitude of the outdoors. 

    Of course, there’s a restriction to what safety means. For example, we don’t just camp on uncharted terrains. As much as possible, we only camp on established campgrounds or BLM lands that have established paths or camping spots. We just don’t venture into areas that are too sketchy or too dangerous for pitching a tent. 

    We also train in how to assess our surroundings. We check the weather beforehand, study the existing wildlife, and even the terrain. Furthermore, it is also essential to learn how to engage with strangers, as well as who to trust and who’s not. Practice proper camping etiquette but learn how to put boundaries. 

    Solo camping is safe if you know these things. Plus, I have listed some of the essentials that you should bring if you are camping alone. With these things laid out, check out our guide on how to camp solo safely and comfortably. 


    Tips For Camping Alone Safely And Comfortably For First-Timers

    Camping solo is easier said than done. Believe it or not. Our first time doing this expedition has been met with several inconveniences (i.e., inability to sleep comfortably, not having enough fuel on our stoves, etc.). 

    The key to the success of the trip is actually getting used to it. Practice makes perfect, as they say. So the more you camp solo, the more you can organize your gear, identify the essentials in your checklist, and find the means to stay stress-free on the trip. 

    Tip 1: Train Yourself To Camp Solo

    One of the things that we can advise interested solo campers is that they should train themselves for the adventure. This is something that you have to embrace for you to understand the actual nuances of this trip. 

    As I mentioned, practice makes perfect. So the more you train, the more you can get the hang of it. When training for solo camping, we recommend that you pick somewhere that is not too far from your home. Don’t go in a rolling wilderness; otherwise, you will get daunted. 

    Instead, go for well-established camping spots. Or those spots where you have camped before with your family and friends. Familiarity with an area is essential when it comes to solo camping. Keep in mind that you don’t want to get lost while being alone. It could put you in lots of danger, especially if you don’t have the means to get help. 

    After you get the hang of camping alone, you can gradually scale the complexity of your camping environment. For example, if you want to learn how to build a shelter, it is essential that you bring bushcraft knives or axes, as well as other important tools. 

    Even learning the basic first aid skills matters here. 

    Tip 2: Be Well-Informed About The Weather

    One of the pesky aspects of camping outdoors (whether it is solo or group) is the idea that you can get caught up by sudden rain or turbulent winds. Things could get worse if you have picked a high-altitude area where flash floods and heavy snowing can be a normal occurrence. 

    Fortunately, there are several weather services that provide almost accurate forecasts. You should check the date of your trip and see what kind of weather you will anticipate during that day. 

    If the weather is bad, then you should consider moving the date of your trip. But if you want to experience some downpours and gusts, then you should pack the necessary equipment, such as proper clothing and layers, shelter and sleeping system, and even amenities that would help you create a warm cup of coffee. 

    Keep in mind that some areas are prone to sudden weather changes. Hence, you should check the patterns so that you would know whether or not a storm could happen even before the expected date. So being prepared for your trip could actually save you from being wet and frigid. 

    Tip 3: Conduct Some Safety Plan

    Before you head out on the trip, there are some basic safety precautions that you have to adhere to and implement. Essentially, you need to plan how others could locate and rescue you if things go south. Here are some things that you need to do. 

    • Have someone you trust (a close friend or reliable family member) know about your trip. Tell them where you are going and the duration of your trip. They should know the date of your return. 
    • Also, notify these individuals whether or not you are going to get a reception at your destination. 
    • Try establishing a code or specific word that lets the other party know that you are in trouble. Once you text this word to them, they will immediately know that you are in a sticky situation. 
    • Give them the host details of the campsite, if it is available.

    Tip 4: Never Tell Others That You Are Camping Alone

    In this age where clicks and likes matter, it is easy to get tempted to advertise what you are doing. Feeding your ego is sometimes necessary for a confidence boost. But it should never be done when you are camping alone. 

    When you tell others that you are alone, you are also telling them that you are vulnerable. As long as you are alone, you are an easy target for predators–especially the two-legged ones. Regardless if you have training in self-defense or martial arts, you can still be overwhelmed by surprise attacks. 

    As much as possible, you need to be secretive about your solo trips. You can post pictures, but make sure that it is after your jaunt. 

    When solo camping and you meet other campers, always tell them that you have company. Tell them that your group went ahead or you are waiting for your friend to arrive. Either way, these excuses will prevent you from becoming a victim. If some people make you feel threatened or uncomfortable, don’t hesitate to put your distance from them. 

    But what if they guessed that you were alone? 

    Then that’s the time that you need to act quickly. Pack your tent and get back to your car. If you are uncomfortable sleeping inside your vehicle, drive somewhere where it is safe. Don’t hesitate to call the authorities. Always trust your instinct and play it safe. 

    Tip 5: Learn The Basic Camping Skills

    You can’t camp alone if you don’t have the skills that could help you survive outdoors. Since you don’t have someone with you, all the errands and field tasks will fall on your shoulders. So learning the basics is essential, and it could make your trip extra comfortable. 

    Here are the skills that you need to learn.

    • Setting up your camping area
    • Pitching a tent
    • Navigation (learning how to use the map or compass)
    • Building a fire (remember to follow the Leave No Trace principles)
    • Gathering clean water and food
    • Proper food storage (to prevent spoilage, contamination, and attracting wild animals)
    • Basic first aid

    These are the ideal skills that you need to learn before you decide to go on a solo camping trip. There are some other technical skills, such as bushcraft, but they deserve another tutorial. 

    Tip 6: Equip Yourself With Proper Defense

    Learning how to defend yourself is essential. Keep in mind that being prepared will help you respond to any tough calls. 

    At the same time, there are some things that could help you protect yourself from threats. Here are some of them. 

    • Survival knives – I don’t need to elaborate on it here. A knife is a utility tool. But it is an excellent weapon for personal defense, considering that you are not armed with a gun. 
    • Axe – An axe is also a great alternative to knives. If you happen to bring one, make sure that you know how to wield it properly!
    • Pepper sprays – Pepper sprays are cool to have. They are easy to use and non-lethal, which is great for those who are afraid to inflict serious damage on their attackers. 
    • Blinding lights – Survival flashlights with strobe function can distract attackers, allowing you to either fight back or run. 

    Of course, this is where the proximity of your location comes in. If you are near your home or somewhere where there are emergency services, you would be able to call help right away. 

    Tip 7: Learn To Control And Ease Your Mind

    One of the toughest things that you need to conquer when solo camping is yourself–specifically, your mind and the things that run into it. As I mentioned, it is easy to get overwhelmed once you are alone in the wild. Even the most seasoned campers can still feel nervous while they are making solo trips. 

    Over time, you will be able to learn how to control yourself. You would be able to find peace and shelter in the outdoors. And to some degree, you would become comfortable moving even if it is dark. 

    Well, we can’t really tell when is the exact time you will conquer your fears and anxieties while solo camping. All we can assure you is that time will eventually come. As long as you spend a healthy time outdoors alone, all your worries will settle in. 

    Don’t forget that you can de-stress yourself by doing some light stretches and exercises. You can talk to yourself for a confidence boost, especially if there’s no one around you. 

    Tip 8: Don’t Overpack 

    Believe it or not, you can camp solo without bringing your entire house with you. 

    Kidding aside, solo camping doesn’t require you to bring as much stuff as you can think of. Always learn to trim your baggage, select what is necessary and separate them from the wants. 

    Try to size up your requirements depending on the duration of your trip. Pack extra pieces of clothes and undergarments if your trip takes more than two days. It would also be wise to reduce the footprint of your tent; a one-person tent could probably fit you and your back. If not, then go for those lightweight, two-person tents. 


    Solo Camping Checklist

    Here’s a checklist that you can copy so that you can camp alone comfortably and safely:

    The Essentials:

    Clothing Essentials

    Safety Essentials

  • A Complete Camping Kitchen Checklist (Plus Other Camp Food And Cooking Tips)

    Food is essential for the success of your camping trip. And in this post, we will reveal all the camping kitchen essentials that you might actually need in your next adventure. Read on!

    A Quick Overview

    Camping is not just about enjoying the scenery. Part of the fun is being able to relish sumptuous meals outdoors. In fact, cooking at the campsite is one of the things that many campers want to look forward to. If done correctly, cooking while camping adds to the overall flavor of the trip. 

    But we all know that this task is not that straightforward. It could only get easier if you bring pre-made food to the campsite and just eat them whenever you want to. However, many campers don’t want the easy way. And, of course, we recommend that you try to cook every time you camp–regardless of the duration. As mentioned, it adds to the experience. 

    Similar to other aspects of camping and outdoor adventures, preparation is the key to a successful camping cookout. Having the kitchen essentials, as well as tested-and-tried recipes, will let you enjoy different delicacies at the campsite. At the same time, proper food preparation and storage techniques will ensure that your meals remain edible, tasty, and spoil-free.


    Camping Kitchen Checklist

    Before we go to the nitty-gritty of food storage and preparation for camping, we will first give you what you are after here: a comprehensive checklist of the camping kitchen, which includes cookware, utensils, and other similar amenities. 

    Food Preparation 

    • Stove and fuel
    • Firestarter, lighter, and other ignition systems
    • Frying pans 
    • Cooking pots 
    • Spatula, tongs, and other cooking utensils
    • Can openers and bottle openers
    • Cooking knife (you could use a survival knife or bushcraft knife if a standard kitchen knife isn’t available)
    • Cutting board
    • Griddles
    • Pot holders
    • Food thermometer

    Optional Campsite Cooking Amenities

    Eating Utensils

    • Bowls and plates (one per each camper)
    • Cups and mugs (one per each camper)
    • Spoons, forks, and knives
    • Water bottles
    • Napkin and tablecloth (optional)

    Food Storage

    Cleaning

    • Portable washing bins and sinks
    • Water jugs  
    • Soap and dishwashers (preferably biodegradable)
    • Clean towels
    • Paper towels
    • Recycling bags or disposable bags 
    • Sponge and scrubbers

    Basics For Food Handling And Storage

    Now, there are specific ways you should store and handle your food while camping. Compared to your home’s kitchen, the outdoor kitchen is exposed to various elements. For instance, if you expose your ingredients to air or dirt, spoiling could take place. But that’s not the worst-case scenario. It might also lead to food poisoning, which is potentially lethal if not treated properly

    So as a camper, you wouldn’t want any of these things to happen to you. At the very least, you should learn basic food handling and storage whenever you are camping. Here are some of the things that you should do. 

    General Storage Practices

    You need to keep your food in secure containers if you aren’t going to cook or eat them. Aside from keeping out the dirt, it also prevents animals from smelling the scent, causing them to get attracted to your campsite. If you are in bear country, the one you could attract might be a lethal creature. 

    • Aside from that, don’t leave any food items and other items with scents inside your tent. Keep them outside, in a spot that is distant from your tent. 
    • But at the same time, they don’t leave them open and unattended. Even in broad daylight, animals like squirrels can steal the food that you have just-chopped. 
    • Speaking of, make sure that your food and ingredients are stored in secure coolers during the morning, especially if you are planning to leave your campsite for some walks or hikes. 
    • At night, any food should be placed in a bear container or any container that can’t easily be pried open. If your car or RV is near you, they could also serve as perfect storage options for your food. If you are planning to leave your containers in the open, we recommend that you lock them. Alternatively, you can hang them on trees or place them in secure bear canisters. 

    General Food Handling Guidelines

    It’s not a secret that food poisoning, diarrhea, and food-related intestinal problems suck. And believe it or not, you could easily get any of these inconveniences if you don’t properly handle your food while camping. 

    There are several risk factors that you have to take into account here. 

    • First is the possible or likely transmission of pathogens to your mouth via your hands. For example, if you have left the bathroom without washing your hands, this could really happen. 
    • Not securing your cooler enough. Food can still get spoiled in the cooler if it is not closed properly or if the ice runs out. 
    • Poor handling of raw ingredients, such as meat. Bacteria and pathogens can easily attach themselves to these food items. 

    To avoid these problems, you should do the following things. 

    • Wash your hands properly before you handle any food. Use soap or alcohol to sanitize your hands, especially if you just come from the bathroom. When washing your hands, make sure that it is away from any freshwater bodies or sources.  
    • Only dry your hands using a separate towel. Don’t use the towel that you use for wiping dishes and plates. 
    • If there are no soaps, use sanitizing wipes and hand sanitizers instead. 

    Proper Cooler Usage

    As mentioned, having coolers doesn’t guarantee that your raw goods won’t spoil. Ingredients such as meat and eggs should be stored at least 40 degrees Fahrenheit to prevent them from spoiling. 

    • We highly suggest that you pre-chill the cooler you are using with ice blocks for at least one hour before you put any ingredients inside it. 
    • There’s also a technique of filling polycarbonate water bottles with liquids, such as water. Freeze them and put them on top of the cooler. That would extend the coolness inside the container. 
    • When storing meat and perishable, we suggest that you put them in double bags. Otherwise, they would leak and contaminate other ingredients inside the cooler. 
    • Organize the food placement, as well. The food items that you are going to eat first should be placed on top. Meanwhile, frozen raw meat should be on the bottom layer. It is where the temperature is the lowest. 
    • It would also be great if you could use a food thermometer to check the temperature of the food. 

    Proper Handling Of Raw Meat

    There are a lot of camping delicacies involving meat! That’s why they are always a good addition to your cooler. Of course, there are the most sensitive among all the perishable ingredients that you can bring to the camp. Hence, it is essential that you can handle this particular food item properly. 

    • Choose fresh meat. Don’t bring something that has been stored in your freezer for several days already. 
    • Prepare the meat in advance. If possible, cut or slice them in your home. After that, free the meat. You can do the same with other perishable ingredients, such as veggies. 
    • If you are going to prepare the meat at the campsite, make sure that you wash all your utensils first. After preparing the meat, you should also wash all the tools you used with soap and water. Do this before your hands touch other objects. 
    • We recommend that you don’t cut other ingredients on surfaces where there are meat residues. 

    Other Essential Camping Kitchen Tips

    • Downsize your utensils and cookware – While we listed a comprehensive checklist, not all of those items will serve you on every camping trip you have. Select which one you are going to use based on the recipe, number of people, and duration of your stay. 
    • Test your equipment – It is also essential that you test your camping stove to see if it is working; all the equipment that you are going to use in the cookout should be tested before the trip. 
    • Bring extra fuels – Who knows? You might cook more than what you have planned. 
    • Cover the food while cooking – It is essential that your cooking pans and pots have covers. In this way, dirt and dust will not be accidentally mixed into whatever you are preparing. 
    • Wash your hands – Don’t forget to clean your hands before and after you eat, especially if you are the one who is preparing the food for your group. Keep in mind that cleaning your hands can prevent a multitude of foodborne diseases

    Check other checklists and other camping guides that we have prepared for you:

  • Maximizing Space: The Ultimate Guide to Organizing Your Camping Gear

    Learning how to organize your camping gear will let you optimize any available storage space. But the task seems tricky, isn’t it? Well, we have a few practical yet simple tips on how you should sort your equipment. 

    A Quick Overview

    Camping is an awesome pursuit that you should experience at least once in your life. But just like any outdoor adventure, camping still requires some careful planning and preparation. From getting the essential camping checklist down to testing your camping gear, all of these things can improve your overall experience outdoors. 

    However, one of the aspects that you shouldn’t overlook is the proper organization of your camping gear. If done properly, you would be able to stack your gear sufficiently in your backpack, allowing you to access the most important stuff immediately while ensuring that the rest of the items are properly stuffed. 

    The best practice starts at home. Don’t organize the day before the trip. You should practice it weeks prior and continue doing so until such time you can perfect the routine.


    How To Organize Your Camping Gear

    These are the strategic and practical ways of organizing your camping items:

    Designate A Storage Space For All Camping Equipment

    Item organization takes place if there’s sufficient storage space. Storage solutions are crucial to guarantee that you can optimize the placement of your equipment. 

    We are not saying that you need to carry extra bulky bags and containers on your trip. But you have to guarantee that there’s enough space for everything that you want to bring for the trip.  

    Hence, it is also crucial that you identify first all the things that you are going to haul. If you are alone, that means that you only have to bring the items that you actually need. But don’t forget to consider bringing spare clothes and undergarments. 

    If you are camping with your friends and families, you need to expand your checklist. And that means expanding the storage space required for all your camping gear and amenities. 

    Establish a Maintenance Routine for Cleaning and Inspecting Camping Gear

    It is not just enough that you know how to stuff and organize your camping equipment. In fact, don’t just put them first on your backpacks and vehicle’s compartment. Instead, you should inspect them to see if they are dirty and funky. 

    You see, if you mix the clean and grimy gear together, there’s a good chance that the smell and dirt would spread. And that’s not actually a good thing, especially if we are talking about clothes, cooking utensils, and personal hygiene products. 

    Just because you are camping doesn’t mean that you have an excuse to live and act like a caveman. And besides, expect that you will not be alone on the trip. If someone passes you and you smell bad, that’s definitely a thumbs down for you. 

    Of course, this also means that you have to repair any damaged items. Check your tents for torn fabrics or broken poles. You don’t want to see these damages on your gear only upon the time you are about to use them. 

    Eventually, item organization also requires that your camping amenities are clean and in good condition.

    Categorize Your Camping Gear

    Now that we have the preparations sorted out, it is time that you gather all your gear to categorize them. 

    Honestly, there are numerous ways you can categorize your camping equipment. But to simplify this process, just two categories: core equipment and activity-specific equipment. Once you can classify all the amenities, you will be able to sort your camping gear.

    Here’s an example:

    Core Camping Equipment

    Activity-Specific Equipment

    • Specialized footwear (running shoes, hiking shoes, water shoes)
    • Climbing equipment
    • Snowsports equipment 
    • Biking equipment 

    Optimize And Minimize

    The next part of organizing is streamlining your baggage. Sure. You may have the option to bring as much camping gear as possible, especially if you have your vehicle or RV with you. But at the same time, this doesn’t mean that many are better when it comes to camping. 

    On the flip side, you should realize that backpacking isn’t the same as camping. The primary principle of backpacking is to be as lightweight as possible. On the other hand, camping isn’t that restrictive when it comes to the number of amenities and equipment that you have to bring. 

    But then again, ask yourself this question: do you really need to bring your entire house with you?

    Specifically, you have to streamline the items that you are going to include in your luggage. Do you need to bring two cooking stoves instead of one? Does having multiple flashlights make sense? 

    General Storage Tips 

    Here are some of the suggestions that we can offer to ensure that your items are properly organized and segregated:

    • Have a separate space or storage for your emergency tools and first aid kits. These items are crucial, so you should be able to access them whenever needed. 
    • Have a separate space or storage for items that generate smell, such as insect repellent and fire starters. Specifically, they should be stored in odor-proof containers. 
    • If you are bringing electronics, also allocate some space for batteries and power banks. 
    • Don’t forget to carry multiple bags, such as ziplock bags, disposable bags, and grocery bags. They can be useful for tidying up wet clothes, trash, and other disposables. 
    • Try multipurpose items. For example, your cooler can become a makeshift table or chair. 

    Camping Clothing Storage And Organization Tips

    When it comes to your clothing, there are several things that you can do to optimize its storage: 

    • Each member of your group should have a duffle bag for their clothing. Don’t mix clothes with other people.
    • The duffle bags should have markers or labels so that everyone can identify which bag is theirs.
    • Organize the interior by using smaller bags. For instance, have a small bag for your undergarments and another one for your sleeping wear. 
    • If you are camping during cold weather, compression sacks are extremely important. After all, they can help reduce the size of jackets and cold-weather gear.
    • Have separate bags for your dirty clothes.

    Storage Ideas For Toiletries And Personal Products

    Your toiletries have to be prioritized, as well. Evidently, they should be segregated appropriately to ensure that they don’t mix up with your other belongings. 

    • Each individual in your group should have their own toiletry bag where they can store their personal amenities. Don’t mix your hygiene items with your kids or vice-versa. You don’t want to accidentally use the toothbrush on your children, right?
    • Have an additional toiletry bag for items that you don’t frequently use, such as shaving razors and feminine products. You don’t have to include them in the items that you commonly use.
    • Toilet papers should have a separate space, too, so that they won’t get wet or mashed.
    • Use quick-drying towels instead of ordinary ones.

    Final Thoughts

    Overall, camping with organized gear and storage can get you a long way. It makes your trip more convenient and mess-free. At the same time, they let you know which items are essential and which are not. Being mindful of the things that you bring to the campsite will also help reduce your footprint, allowing you to fully implement the Leave-No-Trace principles

  • How To Repair Tents: From Holes To Sticky Zippers

    Learning how to repair tents is crucial to ensure that you can keep your shelters intact and in good condition. With the right skills and tools, you will be able to maintain the structure and livability of your tents. 

    A Quick Overview

    The majority of the camping tents are designed to withstand constant use and abuse, especially if we are talking about expensive and branded tents. But of course, these tents aren’t fully impervious to damage. Constant exposure to the elements can reduce their overall rigidity over time. 

    An example of this would be the reduction of the durable water repellent (DWR) or water-resistant treatments on the tents because of prolonged exposure to rain and heat. Another example would be the wear-and-tear sustained by these tents because of the repeated packing, unpacking, assembly, and disassembly. And, of course, accidents happen, as well. Sharp branches can rip the fabrics of these things. 

    Essentially, repairing tents is a crucial skill that every outdoor enthusiast should learn. It is needed to ensure that your tent remains in good condition before, during, and after you use your shelter. It also saves you money from buying new tents every time your existing ones get damaged.

    We listed some helpful tutorials below for DIY tent repairs. Check them out. 


    How To Repair Tents: Patching Holes 

    One of the first repair skills that you need to learn is patching holes in your tents. Of course, your tent can be punctured by stones and sharp sticks and branches. These are common perpetrators when it comes to putting holes in anyone’s tent. Some of the holes are small enough to be covered by patches. In comparison, others are big enough that they require professional sewing or repair services. 

    If there’s a considerably small hole in your tent’s wall, rainfly and tarps, and mesh, you will be able to cover it as long as you have a tent repair kit. You can do this procedure while you are still at your home or while you are at your campsite. 

    Tools you need:

    • Repair tape
    • Scissors
    • Rags
    • Rubbing alcohol
    • Mesh patch (if it is needed)

    Steps

    1. First, you need to clean the fabric first. Dirty fabrics are difficult to repair because of the lingering mud or dirt that could get in the way. Start on the exterior of the tent and work around the damaged area. Use rubbing alcohol here, and let the fabric dry before proceeding. 
    1. Get the repair tape and cut it so that it can become rounded. It should be big enough to cover the hole and its surrounding areas of the torn part. 
    1. Next, place the damaged fabric on a flat, solid surface. After that, patch the tape to the hole. In doing so, make sure that you remove the back portion of the patch so that you will be able to apply it properly. 
    1. If necessary, place an interior patch, as well. We recommend that you do this if the damage took place in areas where there’s a lot of tension, such as those near the poles. 
    1. Don’t use the tent immediately after patching. Let the repair tape cure for a day to ensure that it won’t peel off. 

    How To Repair Tents: Patching Holes In The Tent’s Mesh

    The mesh of tents can be fragile sometimes. So they are susceptible to snagging or getting ripped. In fact, it is a normal occurrence for some to see tears on the mesh panels. 

    Fortunately, repairing this damage isn’t a difficult task. If the mesh has been snagged, you can tweak the netting’s strands so that you can close them together. If you deem that the damage requires repair, then a mesh patch can help you on this one. 

    Tools you need:

    • Mesh patch
    • Repair tape
    • Scissors

    Steps

    1. The first thing that you need to do is to place the damaged area on a flat surface so that you can repair it seamlessly. 
    1. Next, prepare the mesh patch. Here, you need to ensure that the patch is centered on the hole. Once you have centered the patch, take out the backing of the repair tape of the said mesh patch. 
    1. When applying the patch, make sure that it is properly aligned. In this way, you won’t see loose strands. They can eventually be torn again if not properly covered. 
    1. Similar to patching holes in tent fabrics, patching mesh holes requires curing. Specifically, it should take at least a day before the patch can be cured. Only after this period can you safely use the tent. 

    If you don’t have a mesh patch with you, then you can opt for a solid tent patch instead. This is a standard inclusion to repair kits. However, this particular repair method will not yield clean results. So only do this if you don’t have any other choice. Otherwise, go with the standard procedure. 

    Repairs on the field could also be considered a medal of honor. They serve as proof that you have done them all! 


    How To Repair Tents: Fixing Broken Poles

    Modern poles are built to be durable, especially if we are talking about the poles used in backpacking tents and 4-season tents. However, this doesn’t mean that these poles are invulnerable. Eventually, the elements can get them (i.e., strong winds). Or, if not, someone in your group could accidentally step on these poles and split them in half. 

    Damaged poles should be replaced or fixed. You can do this easily if you still haven’t moved out of your home. But things are different if you are in the field already. 

    Camping preparations are necessary if you are expecting broken poles during your trip. When repairing tents, what you need to have are pole repair sleeves. But they are also called splints, which are tiny tubes that typically come with the tent package. If there’s none present in your tent, then you should buy one. 

    We recommend that you get a pole repair sleeve that has a larger diameter than the existing pole of your tent. In this way, the poles will not move excessively. To use these repair sleeves, do the following. 

    1. First, you need to line all the broken poles. If the pole isn’t broken but just bent, straighten it gently. 
    1. Next, you can slide the sleeve already. Specifically, push the sleeve over damaged poles until such time the sleeve is in the middle of the affected area. 
    1. If there are bents, hammer them gently using a rock. In this way, the sleeve can be slid gently. 
    1. After the sleeve is in place, tape it. You should wrap both ends of the sleeve with the use of duct tape or any available tape. 

    Another method that you can try is by using a tent stake as a splint. It would be a great alternative if you forgot to bring the pole repair sleeve. The splint will not be clean, but it is acceptable enough as a temporary fix. 

    1. Similar to the first procedure, you simply need to align all the damaged parts of the poles. Straighten the bent of the pole if the latter isn’t broken. 
    1. Next, align the tent to the damaged pole, and tape both ends with duct tape or any available tape. Do the wrapping multiple times so that the splint is solid enough to hold the pole altogether. 

    How To Repair Tents: Making A Stubborn Zipper Work Again

    Stubborn zippers are among the most common problems when it comes to tents. And when it comes to this, it is not a good idea to force a jammed zipper to move up or down. After all, there’s a good possibility that doing so could cause more damage than good. 

    One important thing that you need to do is to inspect the zipper. Probe if the problem isn’t caused by fabrics being bitten by the zipper. 

    So what should you do if the zipper becomes stuck? Here are some of the recommended fixes: 

    • Cleaning the zipper is a good solution. You need to do this if you deem that there is debris or dust that gets stuck into the zipper. You should do this procedure while you are still home. Here, you would need some simple brushing using a brush with soft bristles. 
    • If you are in the field and you discover that your tent’s zippers are, get an unscented candle. This is a temporary but viable fix to get the zippers running again. Rubbing the candle throughout the length of the zipper teeth could smooth things out. 
    • Lubricating the zipper is still the best way to ensure that your tent’s zippers work smoothly. Before your trip, apply a compatible lubricant to the zipper. Doing this would keep the zippers snag-free. 

    How To Repair Tents: Sealing The Seams

    The seams are among the most susceptible parts of tents. Unless they have been constructed with optimal durability and ruggedness, they are prone to tears and leaks. That’s why many backpacking tents today have sealed or taped seams to minimize potential damages. 

    Of course, regular maintenance is a must to prevent the seams from being ripped or torn while you are camping. You need to periodically check the seams, especially if you are regularly using your tent. 

    The immediate signs of damaged seams are water leaks, loose stitches, and obvious torn parts. Similar to the other issues here, there’s a fix to this specific problem. 

    Tools you need: 

    • Rubbing alcohol
    • Seam sealer
    • Clean rag

    Keep in mind that fabrics with silicone treatment or coating require a special sealer. On the other hand, most tents have polyurethane-coated fabrics. So if you are not sure about this information, check the product manual of your tent. 

    Steps

    1. The first thing that you need to do is lay the tent flat so that you can work on its seams easily. You should place the tent somewhere that is dry and properly illuminated. Most of the time, the seams are located on the interior portion of the tent. Hence, there’s also a need to keep the rainfly in an upside-down position. 
    1. Once your work setup is ready, inspect all the seams of the tent. Specifically, look for the parts where there are worn seam tapes or the seam sealer. If you think that the existing tapes and sealers are already worn, you should just apply a new layer of sealer along the entire seams of the tent.
    1. Meanwhile, you should take out any loose tapes by peeling them. But don’t remove the intact tapes. Just leave them be. 
    1. Before applying the seam sealer, clean the seams first. You don’t need special cleaning solutions here, though. Just pour the alcohol into a clean rag and rub it to the seams. Once done cleaning, let the fabrics dry for a couple of minutes. 
    1. Now, you are ready to apply the sealer to the tent’s seams. When applying the sealer, use a brush. In this way, you can spread the sealer evenly throughout the affected seams. Let the sealer dry for a day. 

    Keep in mind that condensation could take place inside your tent. And that could affect the newly-sealed seams. Providing sufficient ventilation to the tent can prevent this from happening. 

    Meanwhile, old tents can still leak because of their worn waterproofing. Once this occurs, you simply have to apply a new waterproof treatment to the fabrics. Re-applying the durable water repellent to the tent could further improve its overall resistance to the elements. These DWR treatments also help in boosting the tent’s defense against UV rays. 


    Final Thoughts

    Learning how to repair tents is essential for every outdoor enthusiast. It ensures that your shelter is in good condition, whether you are away or within your campsite. 

    With a few basic tools and some practice, you can easily fix small holes, tears, or broken zippers on your tent. Not only will this extend the life of your tent, but it will also give you peace of mind knowing that you can handle unexpected situations while camping.

  • Planning Ahead: A Comprehensive Camping Checklist for Families

    Camping is a fun leisure that all families and households should experience. But you and your brood head to the outdoors, make sure that you have a comprehensive camping checklist for families first. 

    A Quick Overview

    Camping with your family has many benefits. At the very least, it separates your kids from their devices and electronics, which could be potentially harmful to them. Camping is also a good form of exercise. Have you been stuck in the office for too long already? Go out and play!

    You and your spouse could also benefit from it. In our personal experiences, camping is a good form of bonding and socialization. It separates you from all the unnecessary thoughts, allowing you to focus on the people around you. 

    But camping solo and camping with your family are two different things. We are not here to discourage you, but unprepared family camping trips could be messy and disastrous. Oppositely, fully prepared groups would be able to do this activity conveniently and safely. 

    Fortunately, planning is not difficult when it comes to camping. In fact, those two things just go hand-in-hand. Read on how you can plan your trip with this family camping checklist!


    Tips For Camping With Your Family

    Before you get the checklist, allow us to share some practical information on how to camp with your family. We know that this topic has been brought up many times already. However, we thought that bringing it up again would give you a refresher course on what you should do before, during, and after the trip. 

    In a nutshell, you would need to consider the needs of your family, as well as their experience level. Bringing the necessary and situational amenities could also help you maintain the convenience and safety of your members. 

    Do A Test-Run

    One way of introducing camping to your family is through backyard camping. As its name suggests, backyard camping simply means setting up a tent in your yard. This is a good way to teach them how to pitch tents and other belongings. Have your kids sleep in the tents overnight and ask them if they found it. If you can do this correctly, then your family will be able to experience genuine camping. 

    At the same time, these test runs also let you know if there are damaged or incomplete items on your checklist. It is an opportunity to test the usability of your tents and other camping amenities. 

    Food Preparation

    Camping is a golden opportunity for you to test out multiple camping recipes. But at the same time, it is also a way of testing what works for your trip. When meal planning for a camping trip, make sure that you consider the length of your trip. In this way, you will be able to estimate how many meals you should prepare. Don’t forget to include the in-between snacks, as well. 

    The more you are in your group, the more ingredients you will need to bring. So this would mean that you have to have to carry a larger cooler or food storage system. Don’t forget to bring the appropriate utensils, cookware, and disposable bags. Practice proper food storage to avoid food spoilage and food poisoning

    When meal planning, go pick the simple, easy-to-prepare food. In this way, you would be able to create meals faster without too much waste. Furthermore, with simple menus, you can let your kids help you cook. That’s a good bonding experience. 

    Of course don’t forget water. You can’t survive the trip without packing enough water. In some cases, the campsite can offer water sources. But if your destination doesn’t have available potable water sources, then you should bring multiple gallons. 

    Try Borrowing Camping Gear

    Well, you think that it is an off-shoot, but allow us to explain a bit. 

    Family camping is a different story from one household to another. Some are small families, while others have four or more people. Now, unless you have a spacious 6-person or 8-person tent, you wouldn’t expect that your existing tent could house your entire group. 

    At this point, you should consider borrowing tents from your friends or other relatives. If you don’t want to spend more for the trip, then borrowing camping items can be a good solution for that. Of course, this also means that you have to be responsible for taking care of their gear. Return their item in good, hygienic quality. 

    Identify The Nature Of Your Camping Trip

    Next, you need to plan what kind of camping you are going to do. Are you interested in a traditional camping style where you have to pitch a tent at an established campsite? Do you want to be more explorative and try dispersed camping

    How about RV camping or glamping? Are these within your preferences? Regardless of your preferences, it is essential that you can plan for them appropriately. Each of these camping styles has its own unique preparations. So always take your time to plan for them. Gather the essential amenities so that your adventure is hassle-free. 

    Ensure Their Safety

    As the camping organizer, it is up to you to ensure the safety of your members, especially if there are kids present. Camping safety has many levels, such as selecting the ideal camping ground and preparing for survival and emergencies. 

    As such, it is important for every camper to learn basic first aid and outdoor survival skills. Even if you are just a casual camper, that doesn’t exempt you from learning how to use your first aid kit, right? And the actual need increases due to the fact that you will be camping with your children.

    You also need to teach your kids the dos and don’ts of camping. Tell them the rules of the campground. Prevent them from going away from designated trails. Instruct them that they should not feed or approach wildlife. And for everyone’s safety, tell them not to play with fire. 


    Checklist For Family Camping

    Now that we have covered the essential parts, it is time that you get our tested-and-tried camping checklist. Below are the items and amenities needed to make a successful camping trip with your family. Always remember that you can modify this list depending on your needs, number, and other preferences. 

    Shelter And Campsite Essentials

    • Tents, stakes, poles
    • Footprint for the tent
    • Canopy or tarp (optional if your tents have canopies or tarps already)
    • Sleeping bag (one for each member; two-person sleeping bags could also work)
    • Sleeping pad (two-person sleeping pads exist, as well)
    • Mattresses
    • Pillows
    • Blankets (optional when you have sleeping bags or if you are sleeping inside the tent)
    • Cribs (if you are bringing your toddlers or infants)
    • Dust brush (to keep the entry points of your tent clean)
    • Tent repair kit
    • Lighting (camping flashlight, headlamps, or lanterns)
    • Chairs
    • Mosquito net or bug net
    • Hammocks and cots
    • Ropes

    Clothing

    • Clothes for daytime (bring extras if possible)
    • Clothes for nighttime (bring extras if possible)
    • Cold-weather layers (jackets, sweaters, gloves, and hats)
    • Rainwear
    • Swimsuits
    • Footwear (walking or hiking shoes, water shoes, or slippers)
    • Diapers (for your babies)
    • Towels
    • Sunglasses

    Hygiene And Personal Items

    • Personal hygiene items
    • Medications
    • First-aid kit
    • Toiletries
    • Toothbrush and toothpaste
    • Soap and hand sanitizers
    • Baby wipes
    • Disposable bags
    • Sunscreen
    • Insect repellents

    Food And Cookware

    • Camp stove
    • Stove fuel
    • Plates, utensils, and cups (for each member; no sharing of utensils!)
    • Pans, pots, and other cooking utensils
    • Water bottles
    • Cooler (should be big enough to last your trip)
    • Meal ingredients and non-perishable food
    • Water and other forms of replenishment
    • Baby food (if you are bringing your infants or toddlers)
    • Disposable bags
    • Paper towels
    • Dishwashing liquid or detergent
    • Knife or multi-tools

    Other Camping Essentials

    • Maps, compasses, and navigation tools
    • Reservation tickets or confirmations
    • Emergency numbers and hotlines
    • Radios and smartphones
    • Power banks
    • Power stations or generators

    Final Thoughts

    Preparing for a family camping trip is essential. It ensures the convenience of your adventure, as well as the safety of your members. When planning, make sure that you can cover all the needs and requirements of all the participants. At the same time, it would be best if you teach them camping etiquette as well as the leave-no-trace principles. These are essential practices that would make them love camping even more. 

  • What Is Dispersed Camping: What You Need To Know

    What is dispersed camping, and why should you care about it? Is it something that you should practice or try any time soon?

    A Quick Overview

    In a nutshell, camping is an excellent leisure activity. If you want to take a break from your mundane everyday life, then heading outdoors is the way to go. Many households in the United States are into this activity. 

    Keep in mind that not all camping is designed to be the same. For instance, dispersed camping is a practice that pushes campers to head out to a more remote and secluded location. This is directly opposite to traditional camping, where people are supposed to go to established or developed campsites. 

    Before you engage yourself in dispersed camping, there are specific things that you need to learn and understand about this outdoor activity. After all, it requires more preparation and planning. At the same time, you should also heed certain regulations. 


    What Is Dispersed Camping

    The best way to define dispersed camping is to dispel various misconceptions about it. 

    Dispersed camping is not informal camping, contrary to popular belief. It is not similar to squatting or illegally trespassing in private or protected areas to bug out. 

    Furthermore, dispersed camping is not camping without bringing anything. That’s not the actual purpose of this endeavor. Doing such is reckless, especially if you are going in a backcountry. By all means, this is not camping without a tent. 

    At the same time, dispersed camping doesn’t require people to have reservations or a camp host. But this doesn’t mean that you will not be seeing or encountering other people. 

    The core of dispersed camping is to camp or settle in an area outside a designated camping site. Basically, it is a means of camping without paying fees. So parking your RV somewhere safe is a type of dispersed camping. Searching for a flat area in the forest or valley is another form of dispersed camping.


    Areas Suitable for Dispersed Camping

    As we have mentioned earlier, dispersed camping is not permission for you to trespass or invade some other’s privacy. While there’s no real need for you to subscribe to established campsites, you need to seek permission from agencies or entities that own the land where you want to camp. 

    For example, national park authorities want to ensure that natural resources are being preserved. So that also means that they are quite strict when it comes to people who want to sleep overnight with their sleeping cots or sleeping bags. 

    In some cases, some entities prohibit individuals or groups from pitching tents in areas within the 100-foot periphery of waterways or establishing campsites. 

    So when can you do dispersed parking? 

    In the United States, areas that are managed by the Bureau of Land Management allow dispersed camping. The same thing is true with lands managed by the U.S. Forest Service. But it is restricted to settle in areas that are designated as “closed.” 

    To be on the safe side, you should contact the land managers or owners first before you head out. And in most cases, this means that you will be required to secure a permit first. These permits may have a cost, too, but they are not that thoroughly expensive. For instance, the National Park necessitates people to secure a backcountry camping permit. The price for these permits varies from one area to another, but it doesn’t go over $20. 

    Don’t ignore these permits. If you are caught camping in managed areas without a permit, you will receive a hefty penalty.  


    What’s The Ideal Spot For Dispersed Camping

    Once you have secured the necessary permits, you can already start preparing for the trip. But within the location, where are the ideal spots where you can camp? 

    Dispersed camping on forests and agency-managed lands can be a little tricky. It is not the same for all. Based on our experience, dispersed camping means that we have to follow an existing path or service road. While we are traversing the path, we look at all sides until we see a broad area where we can set our tents. 

    Whether you like it or not, most of these areas are pretty remote. Access to the internet or cellular services would be close to impossible. The only form of communication that works in these places is two-way or CB radios. 

    If you are lucky, you will be able to find spots that are almost “established.” They don’t have facilities like those you can find in campsites. However, they are pretty decent enough to remove the need for cleaning or clearing the area. 


    How Long Can You Stay In An Area For Dispersed Camping

    The duration varies from one place to another. Some areas allow people to stay and camp for up to seven days. After that, land managers will require them to leave. 

    Securing your permits is one way of knowing how long your trip will be. It is alright if you shorten the duration, but it is prohibited to overstay. Again, violation of the permits could result in penalties. 

    For you to be able to maximize your time off the grid, make sure that you arrive early. Don’t go to the location in the later part of the day (or the day after your original arrival date). Being punctual saves you from panic and hassle. You don’t have to cram, as well, which saves you time and energy. 

    Planning is an integral part of any camping trip. And one of the things that you need to identify is the duration of your jaunt. 


    Necessary Items To Bring When Dispersed Camping

    Dispersed camping is cumbersome if you are not going to prepare for it. One of the things that you need to remember is that this trip will require you to go somewhere remote and distant. Don’t expect that you will see facilities and amenities in the area where you are going to camp. 

    Because of this fact, there are a couple of things that you need to bring for the trip. Here are some of them. 

    • Tents – Identify how many of you are going on the trip. Furthermore, know the terrain and weather conditions. Make sure that the tent you bring can protect you against the elements. 
    • Navigation tools – These things are quite essential at this point. You need to secure the map of the area. Compasses and GPS devices are also useful in case you will get lost. 
    • Food and water – Pack enough food and water for your trip. Plan your meals ahead of time. Secure the necessary cookware, too, such as stoves, coffee makers, etc. For water, one person should have at least a gallon per day. But if your reservoir runs out, you better pray that you have a portable filtration system. 
    • Insect repellent – Bug nets and insect repellents will keep the critters away. They could also save you from dangerous mosquito bites. 
    • Bear-proof storage containers – If you are heading to bear country, you have to store your food in bear canisters and odor-proof bags. It’s also not a bad idea if you bring bear spray. In some cases, you might want to legally carry a firearm for added defense. 

    Read on to learn more about how to hike in bear country

    • Containers or trash bags – Always remember the Leave No Trace principles whenever you are doing dispersed camping. No one is going to clean after your leftovers and garbage. Most of the areas you will visit don’t have trash cans, so it is your duty to clean up your mess. 
    • Sleeping amenitiesSleeping bags and sleeping pads are essential to have a comfortable sleep in the wild. Camping cots and pillows could add extra comfort to your zzz. 
    • Safety tools – Always put your safety as a top priority whenever camping on non-established camping grounds. We are pretty sure that you have heard or read scary tales of unusual or harrowing encounters of people while camping. Those things could happen to you, as well. Don’t rule out those possibilities. Prepare for the worse. Bring knives, emergency kits, first-aid kits, flashlights, and whistles. These things can help you survive. 

    Read on to learn more about surviving camping emergencies


    Final Thoughts

    Overall, dispersed camping is the least conventional way of exploring the outdoors. But by all means, it is a fun and refreshing way to experience camping and backpacking in general. 

    But before you head out, make sure that you heed the things we listed here. Always secure a permit, prepare for the trip, and pack all the essentials. After all, there are minimal resources out there that resemble convenience. So it is really up to you to pack all the items that you need for the trip. 

    And, of course, it is not a bad idea to practice camping safety. Always be aware of your surroundings, and make sure that you have back-up plans when SHTF takes place. 

  • 10 Tips on Camping Etiquette: 10 Rules On How To Be A Better Camper

    There’s a good chance that you enjoy camping. But are you a camper that other campers would love to have around? If you are still unsure about that, then maybe it’s time to learn the essential camping etiquette. 

    A Quick Overview

    Camping is a desirable leisure for anyone. In fact, it is a preferred activity by families or wandering spirits. In the United States, roughly 100 million households are already in this activity. And if you are not a part of this number, then we suggest that you should give camping or backpacking a try. 

    However, we are quite aware that not all of these people know the fundamental etiquette of camping. If you are a beginner, not knowing these things are forgivable. But if you have been camping for quite some time, and you are still a rowdy being, then you should reform your ways already. 

    Well, we even encourage camping newbies to learn camping etiquette. These rules do not only benefit yourself but other campers, as well. At the same time, prudent and conscious campers help protect the environment. So before you head out to your next (or first) backcountry adventure, sit and try to comprehend and practice the following tips. 


    Camping Etiquettes: Do’s And Don’ts

    These ten rules will certainly give you a better insight on what to do while on the campsite!

    Rule No. 1
    Respect The Camping Grounds And Amenities

    There are a lot of reasons why you need to respect the camping grounds. The most important among these reasons is actually for your own good. If you are a rule-breaker, then the camp manager or ranger has all the right to kick you out. 

    That’s the end of the story. If you try to disturb or violate the amenities within the campsite, there’s a 100 percent chance that you will be driven out. And as a camper, you don’t want to happen. 

    Let’s assume responsibility for the things we do. Don’t do stuff unwittingly and make excuses like, “oh, I don’t know about that.” Before visiting the campsite, there are already rules in place. So take your time to read those and practice them accordingly. 

    These rules vary from one campsite to another. Some campsites allow pets, while others will tell you that there you are only allowed to pitch tents in designated spots. Follow these things religiously to ensure that you won’t get any complaints. 

    If you follow these rules, you will be able to enjoy the full amenities of the campsite. Of course, other campers would like you, as well, for being a courteous fellow. 

    Always remember that you are not the only person who is using the area. So do your best to be organized and cautious in your actions. In this way, you can have a memorable time outdoors. 

    Rule No. 2
    Be Cautious Of Personal Spaces

    Do you like other people going inside your home without permission? That’s an intrusion, right? And in many cases, such an act is dealt with force and threat. 

    Now, we are not promoting violence here. Instead, we are just trying to emphasize that bothering others’ personal spaces is not a good thing to do. Though humans love social connection, we don’t want our privacy to get ruined, as well. 

    And believe it or not, respecting personal spaces is an important camping etiquette. Always remember that most of the time, you will be with strangers when camping. And that’s alright. It is an opportunity to meet new people. But this is not an excuse to be overzealous, especially if you are not invited. 

    If nobody is inviting you, then just stay within your perimeter. Just mind your own business, and just enjoy whatever nature has to offer. 

    Also, don’t be a creep. Don’t stalk other people or approach them in a manner that could trigger them to stay away from you. Just be well-natured, and greet others politely. 

    This rule also applies to your pets. If you are bringing your dogs or cats with you, make sure that they are on a leash. Guard them at all times so that they won’t disturb other tents and RVs. 

    Rule No. 3
    Be Mindful of Noise Levels and Your Impact on Other Campers

    Many people go camping to escape the noise and erratic lifestyle of the urban jungle. For a lot of us, the outdoors provides solitude and much-needed relief from stress and pressure. 

    Noise isn’t really welcomed at any campsite. In fact, there are strict rules imposed on this particular matter, especially if it gets dark already. The thing is, the outdoors is more enjoyable if it is quieter. You will be able to hear the breeze of the wind and the chants of the critters. 

    Of course, the silence would also help you be aware of your surroundings. Sometimes, the noise you hear is a warning sign of unwanted occurrences. For example, if you hear the sound of gushing water even if there’s no river around, then there’s a possibility that you are about to be hit by a flash flood. 

    Well, that seems far-fetched, right? But it could really happen. SHTF is just a term until it really happens. 

    But let’s tone down things. Noise is moderated in campsites because it disturbs other campers and wildlife. Noise can cause agitation and irritation. So if you don’t want other campers shouting (or throwing things) at you, then it is better to minimize your voice, shut your radio, and just settle in silence. 

    Rule No. 4
    Minimize Your Lighting

    Noise is a disturbance. So are lights. 

    Well, there aren’t that many regulations when it comes to the use of lamps and campfires in a campsite. But at the very least, don’t overdo it. Excessive lighting could cause unwanted glaring. 

    People are about to sleep, and you suddenly turn on your lights brightly. That’s a perfect recipe for being kicked from the campsite. Try to minimize the lights so as to not bother others. 

    You can also limit the hours you use your light sources. This doesn’t only keep others calm, but it also helps save batteries on your electric lamps and bulbs. Keep in mind that these lights can attract critters and insects, as well. So if you don’t want to stay awake due to bug bites, you better switch off the illumination. You might want to use a headlamp for more controlled lighting. 

    Also, just have insect repellents prepared. 

    Rule No. 5
    Time To Control Your Kids

    We know that you like to give your kids a taste of the outdoors. For us, that’s a wonderful gift you can give to them. It doesn’t only benefit their physical well-being, but it is also good for their mind and soul. It is a much-needed break from their gadgets, too!

    However, having your kids on a campsite means that you have some added responsibilities, as well. 

    It’s important that you can talk to your kids about the rules of backpacking and camping. Rehearse them about it. In this way, they will not cause any trouble for you or other campers. 

    Also, make sure that you teach your kids how to dispose of their own waste and trash. Let them explore, but always remind them to stay on the designated trails. Of course, it would be best if you could join them in their discoveries. 

    During the morning, you can do a lot of campsite games and activities. You can play sports or board games. You can even have a sumptuous campsite picnic! But during the night, the noise and fun should tone down. Don’t let them disturb your neighbors. Refer to the third rule, just in case you want additional explanations. 

    Rule No. 6
    Know Where To Pitch 

    At the campsite, there are designated areas where you pitch your tent. These are already pre-arranged sites so that you don’t have to wander around and search for a place to set your tent. 

    Well, some campsites don’t have designated areas for tents. But if the campground does have them, then use them. It is inappropriate that you pitch your shelter wherever you want it. It is uncourteous, and it can potentially damage the environment. 

    Besides, it is advantageous on your part if you pitch your tent in those assigned spots. They conserve your energy from the aimless pursuit of finding the perfect place to pitch your tent.

    If there’s no designated area for your tents, it is free for all. But in doing so, make sure that you are prudent in your choices. For example, we recommend that you don’t place your tent near bodies of water, such as rivers, streams, and lakes. Try to veer off from them–at least 200 feet apart. 

    Also, don’t place your tent in areas at risk of landslides, flash floods, and avalanches. Stay away from those areas. 

    Rule No. 7
    Being Tidy Gives You An Extra Mile

    For some people, camping is an opportunity to get rowdy. Well, that’s acceptable if you know what you are doing. 

    What’s unacceptable is the act of not cleaning up your mess. Just because you are in the outdoors doesn’t mean that you are free of basic decency. We know that the campsite can get dusty and dirty. But it is just natural. What’s not natural is when you throw rubbish and garbage anywhere. 

    Don’t be that guy who just leaves his mess after he packs his tents and gear. As outdoor enthusiasts, we believe that what we do in the wild reflects our personality. 

    Oh. That’s not gaslighting. We are just saying that if you don’t pick up your garbage and dispose of it, there’s a good chance that you are a messy person yourself.

    Respect the nature around you. Abide with the campsite rules when it comes to where you should dispose of your leftovers and used items. If there are no trash bins in the campsite, make sure that you have disposal bags for your dirt. At the same time, be kind to other campers, as well. By leaving your area spot-free, others would enjoy the scenery better. 

    Of course, no one is paid to look after your trash. So do this by yourself! And if you need more guidance, just check this post about Leave no Trace.

    Rule No. 8
    Be Mindful Of The Wildlife

    The campsite is actually your temporary shelter while you are in the wild. It is here where you can experience a lot of good things that you can’t stumble upon while you are in cities. From the towering trees to the lush forests, down to the pristine rivers, these majestic encounters could leave you stunned. 

    However, always remember that the outdoors are just your temporary abode. On the other hand, other creatures see these places as their permanent homes. We should never be obtrusive intruders. We should respect the wildlife around us and keep it the way we found it. 

    As humans, we have a history of being pervasive invaders. We tend to destroy what we find. We hope that we stop such habits and, instead, find a balance with the world that we dwell in. 

    Always remember that we are not the only inhabitants of this world. One way or another, we share the environment with other beings. Sure. We are at the top of the food chain. But that doesn’t mean that we should trample the homes of animals and wildlife

    While at the campsite, just observe these beings from afar. A pair of binoculars would be a nice thing to have. While some of these creatures seem tame, let’s stop ourselves from feeding them. Otherwise, they would grow dependent on human help, which, in turn, disrupts their survival instincts and ability to hunt food for themselves. 

    Rule No. 9
    Can You Use Generators?

    Well, the answer to this question depends on where you are going to camp. Many national parks don’t allow the use of portable generators. Aside from the noise they create, they tend to release emissions–especially if you are using gas-powered units. 

    The best thing that you can do here is to ensure that you have checked all the rules at the campsite. If they prohibit the use of these power stations, then just don’t bring them. 

    Instead, try bringing extra batteries for your essential amenities. Pack some batteries for your flashlights, radios, and other emergency equipment. If you have your phone with you, don’t forget to get a power bank. 

    The longer the trip will be, the more you need to plan on how to power your equipment. 

    In some campsites, portable generators are allowed as long as you use them for specific periods. Most of the time, you will never be allowed to use these generators during the night! 

    Rule No. 10
    Lend A Hand

    Now, you may think that being respectful to other campers means that you should not lend them a hand. Sure, we have told you that you should mind your own business. But what if they ask for you? Will you turn them down? Is that the appropriate response? 

    One of the things that we learned throughout the years of experience in the outdoors is that being helpful to other campers has huge returns. It may not be in the form of favors, but their simple thanks and smiles can add to the overall beauty of the adventure. 

    If someone doesn’t know how to pitch their tents, lend them a hand. If someone left their stove fuel, lend them yours–if you have an extra. 

    But of course, there’s a limit as to what you should offer. Always establish your private space. If the request is too much, respectfully turn them down. 

    This one is an unpopular opinion, but try to analyze the people you interact with. You will never know if someone is a threat or not until they become one. If the person is a little bit sketchy, try to be defensive and report that person to the local authorities. 


    Final Thoughts 

    As we go out to explore the wild, make sure that we prepare ourselves, as well. If you are a first-time camper, ensure that your things are prepared and ready to go. The essentials should function properly. 

    At the same time, don’t forget to follow the camping etiquettes we listed above. They are the guidelines that will elevate your overall camping experience. Be mindful of your surroundings and the people around you. Doing these things will make you a better camper than you used to be! By the way, if you are into hiking, there are also sets of hiking etiquette that you need to abide!