Blog

  • How To Build A Campfire Safely

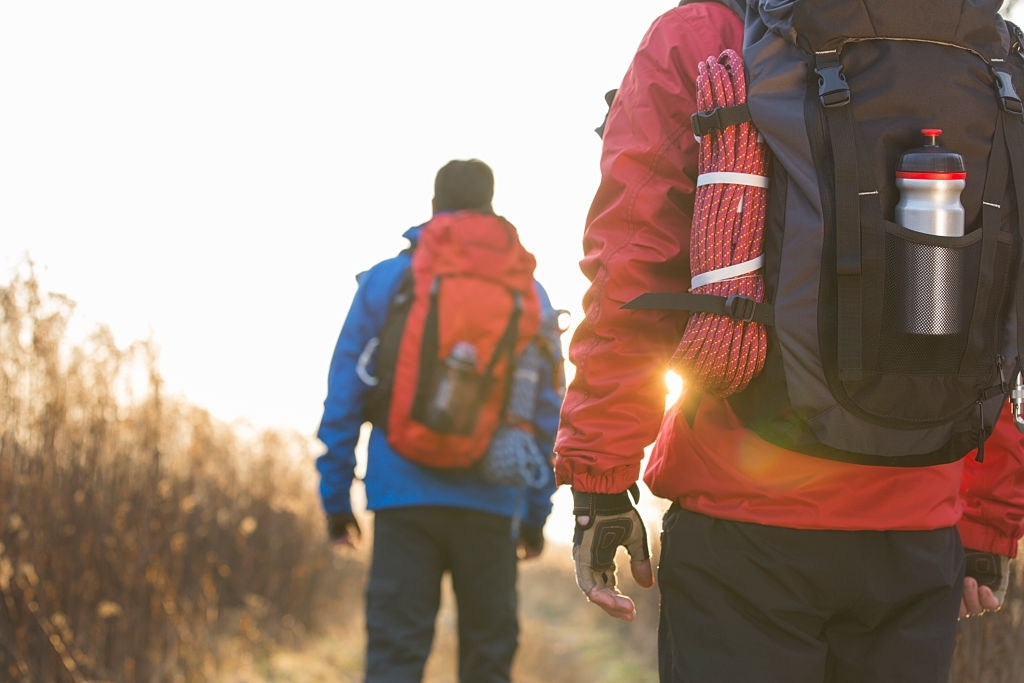
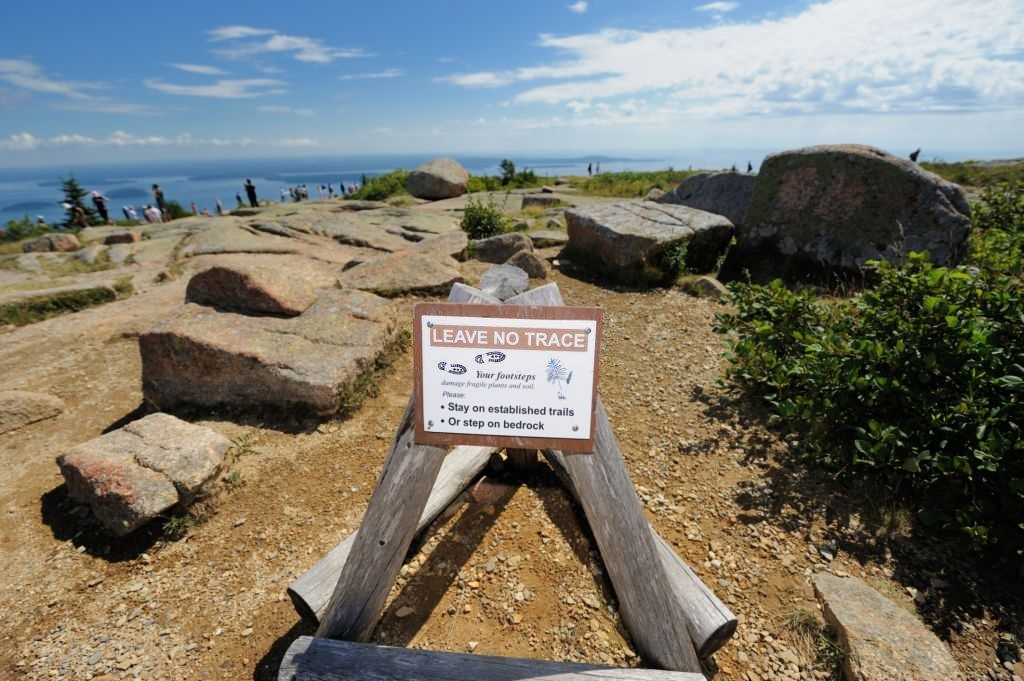
    Learning how to build a campfire safely is essential. Hikers, campers, and backpackers have to understand that you simply don’t build a campfire whimsically. Always keep in mind that the Leave No Trace principle indicates that these fires should be built as safely and traceless as possible. 

    Here are some of the things that you need to do to build a campfire and the necessary precautions to prevent accidents and unwarranted damages to the environment. 

    Where To Build A Campfire

    As I’ve mentioned, you can’t just build campfires in any area that you want. Aside from being unethical, doing so can pose dangers to the wildlife around you. 

    In Established Campsites

    If you are in an established campground, things should be easier. There are designated areas where you can build a fire. Fireplaces, fire rings, and grills are some of the ideal spots where you can create a fire for you and your crowd to enjoy. 

    A fire ring, for instance, effectively reduces the impact of fire on the environment. It also prevents it from spreading. 

    But of course, always remember to ask the administrators of the campground if building a fire is allowed. There are particular seasons (such as the summer) where these campfires are downright prohibited–even in established campsites. 

    When it comes to campgrounds that aren’t that developed, you still need to get in contact with the respective agencies that manage them–such as the Bureau of Land Management or the U.S. Forest Service. They will allow fires, but you need to secure a permit first. 

    Of course, being prudent is essential here. If you see that the area has a lot of branches and bushes, you should contain your campfire. Alternatively, you simply have to abort the idea. Furthermore, embers can easily cause wildfires, especially when there’s a dry spell. 

    In Backcountry And Non-Established Campgrounds

    Most of the time, fires are permitted in backcountry regions. But then again, it is not permissible for you to be careless in building one. If there is a fire ring available, build your campfire there. Don’t create a new one unless there’s an emergency. You can also detach or move the fire ring if the circumstance allows it. 

    Of course, don’t forget to clean the fire ring after using it. Be courteous to other users. 

    When building a campfire, it is essential that you clear all combustible materials from the fire pit. In an ideal setting, your campfire’s base should be gravel, sand, or soil that you can find along streambeds. Always remember that extreme heat can ruin fertile soil. Hence, you need to choose an area where you can minimize this type of damage. 

    If there’s no fire ring present, you might want to build a mound fire. Create a circular platform and fill it with mineral soil (up to five to seven inches in height). Use this platform as the base for the campfire. If you can, build the mound on top of a flat rock so that it won’t get in contact with the soil.

    What To Use In Building A Campfire

    Essentially, you cannot build a campfire without the necessary flammable materials. For starters, these are the things that can help you achieve this:

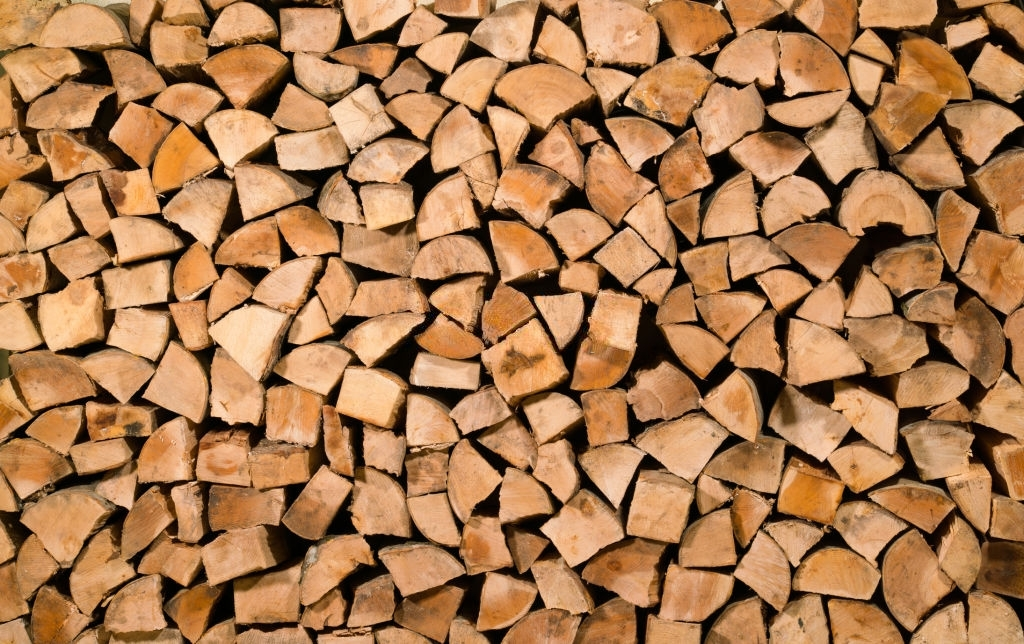
    • Firewood – A firewood will help you prolong the life of a campfire. If you want it to run overnight, you should gather as much firewood as necessary. 
    • Kindling wood – These are small pieces of sticks that can hasten the building for fire. 
    • Tinder – Your fire begins with dry leaves and twigs lying around your area. 

    In Established Campsites

    If you are in a campground, you should only utilize the firewood offered by the site. There are stores that sell firewood; hence, you should buy them instead of acquiring the wood manually. 

    Of course, it is a wrong idea to bring your own firewood–although it sounds logical and practical. In fact, campgrounds will prohibit anyone from bringing their own firewood. The reason for this is quite simple. They don’t want people to bring unsuspecting insects along with the firewood. These foreign insects can affect the wildlife in the area. 

    In Backcountry And Non-Established Campgrounds

    As long as you are in the backcountry, you have no other choice but to get these pieces of firewood by yourself. However, it is not an excuse for you to cut trees and split branches from both living and dead trees. Doing this is not ethical and can pose harm to the environment. Many wildlife are using these dead branches for their food and survival. 

    Hence, you have no other option but to get those pieces of wood that have been downed already. Furthermore, you should get those that aren’t bigger than your wrist. 

    Surely enough, you would think that these large pieces of wood are better for sustaining your campfire. It might be the case, but you should always remember the environmental damage that they could cause. After all, these burly chunks don’t burn completely. Hence, they don’t turn into ash and will just become unwanted residues. 

    Using them simply violates the essence of the Leave No Trace principles. 

    How To Build A Campfire Safely And Properly?

    There are multiple ways on how to build a campfire.  

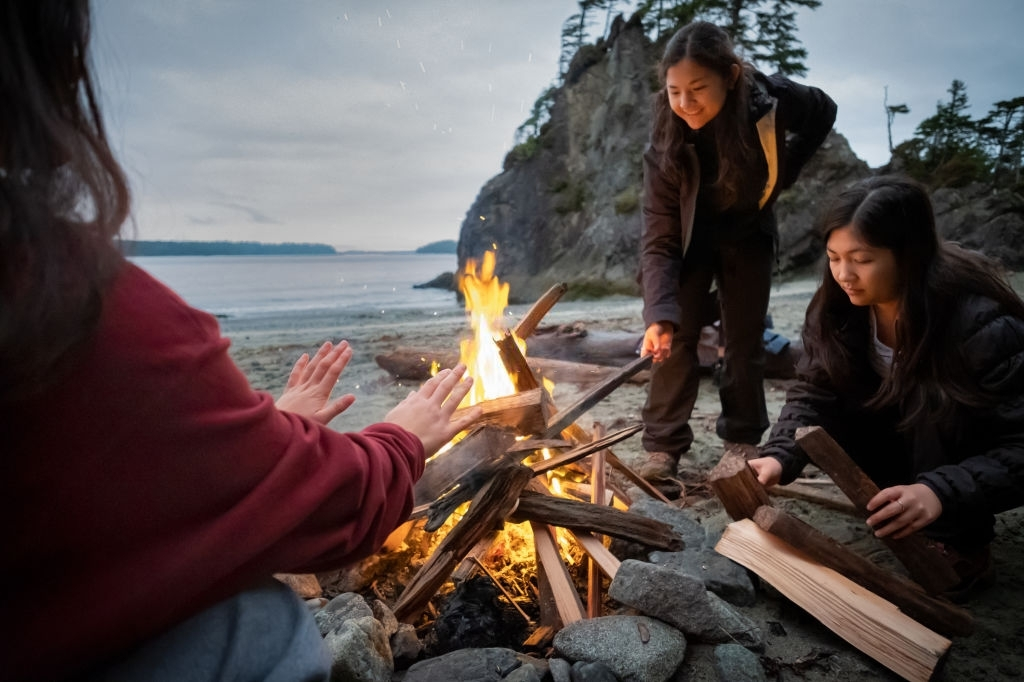
    The most common one is the cone. You can do this by creating a cone made from various kindling materials and tinder that are placed in the middle of the fire ring. Once they are already burning, you can add your firewood already.  

    You can also try the log cabin campfire. Here, you need to place two pieces of firewood in a parallel position. There should be sufficient space between them, as they will serve as the base of your campfire. 

    Next, pile two slightly smaller pieces of wood on top of the base. But this time, they should be placed perpendicular to the base, making a square shape. Inside the square, put lots of tinder. You can still add more firewood, but they should be smaller than the ones they are sitting upon. The top layer should be a pile of tinder and kindling materials so that fire can be created easily. 

    Igniting The Campfire

    In this process, you would need a lighter or match to light up your campfire. Make sure that the one you brought can quickly ignite. Also, it is essential that you have waterproof fire starters or matches so that they can operate in any condition. 

    After the tinder ignites, blow the base gently to have sufficient oxygen to keep the fire running. Once there’s a fire already, place embers in the center so that they can burn the firewood. Maintain the flame so that the wood would become ashes. In this way, cleaning them would be a lot easier. 

    Extinguishing And Cleaning The Campfires

    For some people, making a campfire is easy. But it is a different story when it comes to cleaning its remnants. As much as possible, you wouldn’t want your campfire to leave a mess and cause potential wildfires. 

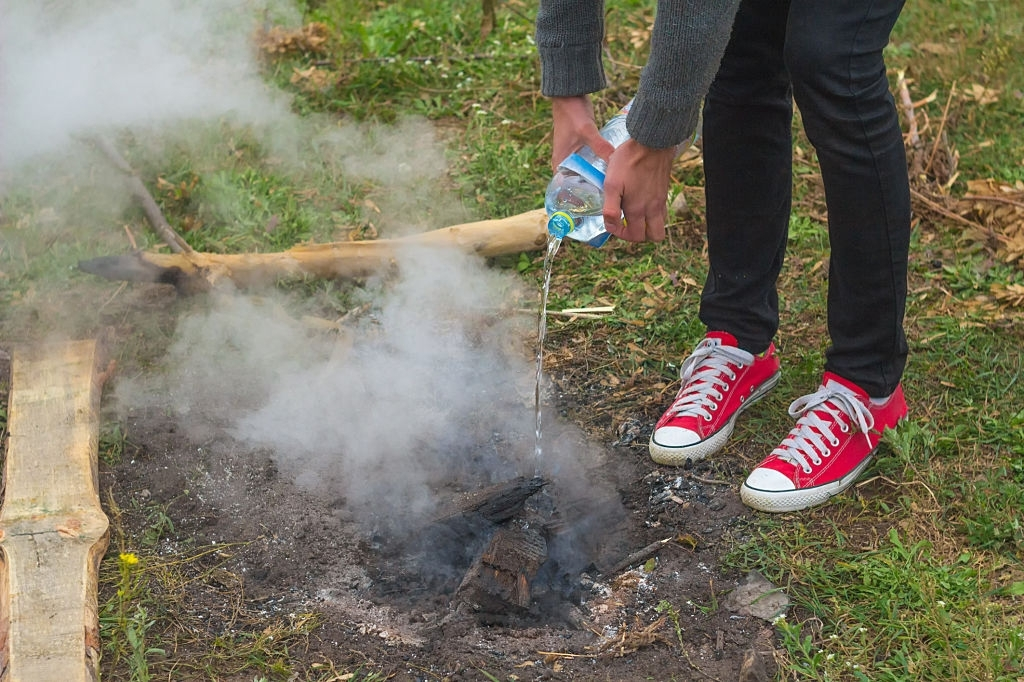
    Fire doesn’t die down easily, especially if the temperature is ideal for keeping them burning. Hence, you should follow the standard procedures in extinguishing them. In most cases, it can be done by pouring water into the fire and stirring its ashes repeatedly. Before you leave your campsite, the ashes should be cool already. Make sure that all embers are extinguished before you head off. 

    But how about using sand or soil in extinguishing a campfire? Isn’t it more efficient than pouring water?

    Well, that’s not really the case. In fact, doing this method is quite troublesome. When you dump the sand on the campfire, you are insulating live coils. They can still ignite, which can result in unwanted wildfires. 

    It is also necessary that you clean your campfire before departing. And clean-ups are a lot easier if you don’t burn unnecessary materials in the fire–such as plastics. If you burn them, make sure that you still collect their residues and put them in a trash bag. Carry them on your way home. 

    If there are charcoal remaining, take them, too. After that, find a clear area where you can crush them so that they can become dust. 

    Additional Safety Tips In Building A Campfire

    • Be attentive to the wind – A strong gust of wind can spread the fire around your area. To prevent this from happening, you should establish your campfire in areas clear of flammable materials–including your tent and clothes! The clearance should be around 15 feet. 
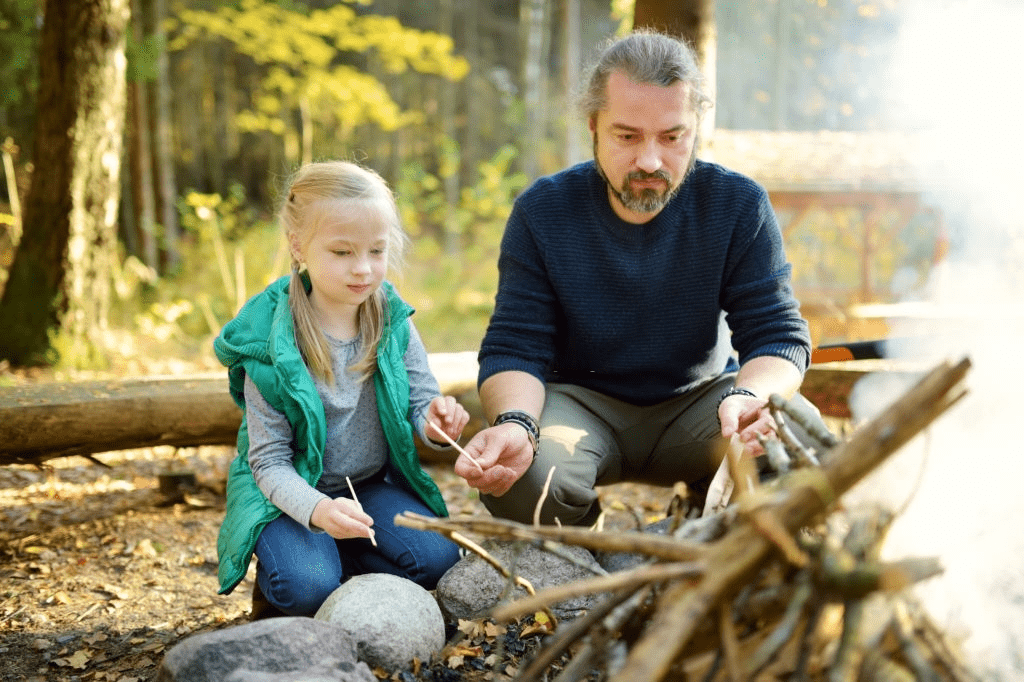
    • Guard your kids and pets – Fire can cause injuries, especially to your children and pets. You should teach them not to get close to the fire. Furthermore, you should always be under supervision so that no accidents can take place. 
  • 9 Common Hiking Mistakes & How To Avoid Them

    Hiking has always been a fun sport and outdoor activity. Since the world is gradually returning from its regular functions after being shut by the COVID-19 pandemic, people are starting to go outside again. Of course, one of the things that they longed to do was hike and go to various backcountry expeditions. 

    On the surface, hiking and other outdoor adventures seem to be erratic. First-timers would often think that they only need to dress properly for the occasion and that they can simply do whatever they want on the route. However, little did they know that a small mistake in the trail could result in a disaster. 

    Hence, if you are into hiking or someone who wants to try it for the first time, it is essential that you know all the common hiking mistakes and the ways to avoid them. 

    Not Learning How To Use A Map

    These days, traditional maps have been replaced by mobile maps, which you can download on your smartphone. Of course, these maps are pretty convenient and accurate. However, when it comes to off-grid applications, they might be useless. After all, they rely on internet connections, which are virtually absent in an outdoor setting. 

    Learning how to use a map can get you a long way if ever you are hiking. Again, it is not just enough to bring a map; you need to know how to read it. Furthermore, keep in mind that there are different types of maps. Topo maps are not the same as road maps. A topo map is particularly useful in discerning the layout of a specific terrain or destination. It is a perfect tool for hiking as it lets you see various trail systems in your area. 

    You can enroll in navigational courses to fully learn how to use these maps. It is an investment that every hiker should make. 

    Forgetting First Aid

    Aside from your other gear and clothing, you should also put importance on your safety whenever you are planning to hike. In this case, having a first-aid kit is a must. 

    Hikers should be able to optimize and organize their first-aid kit. It should be tailored to accommodate the possible injuries and harms that they could encounter in the terrain they are heading to. Moreover, give a thought to the duration of the trip. You should downsize or upsize the kit depending on the length of your hike. It will also be a good idea if you consider the size of your group. Are you hiking alone or together with a group?

    But always remember that these first aid kits aren’t that useful if you don’t use them. Again, it is essential that you learn how to use them. Try enrolling in first aid basic courses. They should be able to teach you the much-needed fundamentals. 

    Wearing Clothes Made From Cotton

    I know cotton can be extra cozy and comfortable. But during trips where heat and sweat are just around the corner, cotton is not advisable to be worn. In fact, there’s a saying that goes like this: cotton kills. While it sounds exaggerated, it has some basis. 

    You see, when you hike, all of your body parts are put into action. Of course, your physical exertion would cause you to sweat. If you are wearing clothing made from cotton, your perspiration will absorb the fabric’s air pockets. As a result, it doesn’t get dry all the time, and your skin is exposed to wet conditions. 

    If the temperature is low, the wet cotton will make things extra chilly. It is not only uncomfortable, but it can also cause perilous conditions such as hypothermia. 

    Dealing with the problem is pretty easy, though. Just don’t wear any cotton layer. Instead, look for those clothes that have moisture-wicking properties. Polyester, nylon, and similar materials are definitely your top choices here!

    Choosing The Wrong Gear

    When it comes to hiking, the quality and appropriateness of your gear matter. It is not something that you should discard, as it might compromise your trip’s overall comfort and safety. 

    Every time you choose hiking gear, always ensure the item’s durability and robustness. After all, you are going to expose it against the elements. If it has a flimsy construction, it won’t hold for too long. Furthermore, it should have other ergonomics such as streamlined weight, versatility, and user-friendliness. 

    If possible, look for gear that can be packed easily. It should not be burly and quirky so that you will be able to carry and use the item conveniently. Don’t go for oversized equipment, especially if you don’t need the extra size. As much as possible, hike with the most minimal weight possible. That would make your trip more comfortable. 

    Also, don’t forget to take into account the weather. The things that you wear and haul should be able to complement the atmospheric conditions. For instance, if you are expecting some precipitation, water-resistant or waterproof clothing is a must. 

    Not Breaking The Boots

    One of the essential pieces of hiking equipment that you should invest in is a pair of hiking boots. Always keep in mind that your feet will be put into the grind in a hike, especially if you are dealing with treacherous terrains. Hiking boots are rugged and can provide extra comfort and protection. Depending on the quality of the boot, it may even defend you from snake bites!

    But of course, little work has to be done first before you can fully experience the full performance of these hiking boots. For instance, leather boots have to be broken first before you put them into action. That’s pretty similar to leather baseball gloves. If they are brand-new or fresh from the factory, these leather materials tend to be stiff. 

    That’s bad news for your feet. Stiff footwear would result in potential injuries while you are hiking. Blisters and hot spots are among the common repercussions of wearing footwear that isn’t fully broken. 

    To prevent this from happening, you can treat the leather boots with oils and conditioners that could make them soft. Alternatively, you could use the boot in your daily activities weeks before the big day. By doing this, you will be able to gradually stretch the leather’s fibers. 

    Not Bringing Sufficient Nourishments

    Hiking is a taxing activity to the body. That’s why it requires a certain degree of physical training. You can’t just wake up one day and decide to hike–even without doing any prior preparation. 

    But of course, even the most physically active hikers can’t survive a hike without having a consistent supply of food and water. It is natural to get hungry throughout the expedition. It is your body telling you that it has exhausted its energy reserves; hence, it requires sufficient nourishment. 

    Protein, beneficial fats, calories, and carbs are among the essential nutrients that you should pack in your trip. Don’t forget to bring trail mix, nuts, and sandwiches in your pack. Furthermore, you should bring enough water on your journey. You should never risk dehydration. If possible, bring water filters so that you can refill your water bottles with nearby water sources. 

    Ignoring The Weather

    As a hiker, you should be able to read and observe the changes in the local weather patterns. Because of the problems caused by climate change, our weather today is becoming erratic. In the morning, it is sunny. Suddenly, it becomes dark and gloomy in the afternoon. Hence, you should remain cautious at all times and never ignore these unexpected transitions in the weather. 

    If you think that a storm is heading your way, take a detour and look for a safe spot to shelter. Never go to exposed ridges and peaks since you are prone to get hit by lightning. Always remember that flashes of lightning often strike on isolated objects and areas in tall summits. 

    Of course, you shouldn’t just cancel your trip because it suddenly rained. However, it is necessary that you take the right precautions to avoid dangerous elements such as flooding and strong winds. 

    Checking the weather forecasts can give you an idea of what to expect during the trip. These forecasts change regularly, so you must keep updated with them. 

    Starting Late

    It is beneficial to hike early and on time. Timeliness is a prudent value, after all, even while you are hiking. It is not only applicable to your school or work. Even to outdoor leisure adventures, being punctual puts you in a better position. 

    Of course, a lot of people tend to hike during the afternoon or before dusk to avoid the scorching heat of the sun. Well, it is pretty reasonable, but doing so requires preparation. You wouldn’t want to find yourself hiking in low-visibility conditions without sufficient preparation. That’s inconvenient and pretty dangerous. 

    Furthermore, the weather can change in the latter part of the day–as I’ve mentioned earlier. Hence, you can always expect that storms might brew without any notice. And that’s pretty dangerous! 

    Also, there’s a golden rule that states that you should arrive at your destination or a safe resting spot by lunch. Well, you can only achieve this if you start embarking on the trail early. 

    Not Following The Leave No Trace Principles

    Some of the mistakes here are forgivable. However, this one isn’t. 

    You see, there should be no reason why a hiker would litter and destroy the environment of the trail they are treading. It is downright nasty and preposterous. After all, we are just visitors to these areas, and we should respect their sanctity and the wildlife that dwell in them. 

    In fact, hikers should never hike if they don’t have a full understanding of Leave No Trace. It is a set of established guidelines acknowledged worldwide that help outdoor goers preserve the beauty of Mother Nature. It teaches them basic etiquette such as picking your trash, finding the right place to poop and even choosing the ideal campsite. 

    Don’t ever think that picking litter is a cumbersome task. Always remember that what you packed on your trip should be packed back home. Nothing should be left behind. 

  • How To Avoid Flash Floods While Camping?

    Flash floods can happen without prior notice. Even during sunny days, the chances of experiencing floods while camping is never zero. After all, the weather today is pretty erratic and turbulent. You’ll never know what’s coming until a tempest starts slamming your tent and campground. 

    The most alarming thing about these flash floods is that they can happen in places where you least expect them. For instance, an arid area can be covered by tall and freaky inundations in just a matter of minutes. Hence, whenever you are camping or backpacking, you should never exclude this predicament from the realms of possibilities. 

    Below are some life-saving tips that can save you from the threats of flash floods. 

    Choose Your Location Carefully

    One of the best ways to avoid flash floods is to ensure that you camp in a safe location. By doing this, you would be able to bypass various disasters during your stay in the wild.  

    It would be best if you proceed to an established campsite. There, you can guarantee that you are not easily vulnerable to sudden threats. But if you are planning to camp somewhere else, you have to look for certain indicators like erosion and washouts. They are a sign that an area is a place where water passes through.  If you can see these indicators, move somewhere else. 

    Also, keep in mind that dry stream beds are dangerous campgrounds. You should never settle on them, even though they are appealing. Many think that these dry stream beds are ideal camping sites because they are free from debris and trees. But of course, there’s a reason why these obstructions are not found in the area. Heavy downpours can cause flooding to these areas without you getting notified by anything. 

    Furthermore, you should avoid camping in areas where there are traces of water carvings and channels.

    Just because an area is appealing to the eyes doesn’t mean that it is the best place to set your tent. Always look for the tell-tale signs of flooding first before you finally settle. And as I mentioned, it is better that you pick an established campsite since it has a tested-and-tried record of not being susceptible to flooding.

    Be Discerning About The Weather

    As a camper, it is your responsibility to understand the weather patterns of your camping area. Similar to other dangers and hazards in the outdoor world, the best way to deal with flash floods is by avoiding them entirely. 

    Every time you study the weather, you will be able to somehow “read” or predict the possibilities of encountering rain or storm. But at the same time, this doesn’t mean that the weather can be read accurately. There are still flaws in the forecasts, but the little details can actually help you avoid certain disasters. 

    For instance, understanding what type of clouds typically bring bad weather can help you veer away from potential floods and landslides. Even if the weather is sunny and bright, as long as you see these suspicious signs, you may need to prepare a lot.  

    Furthermore, understanding the weather may also mean that you have a good grasp of the topography of your destination. As I’ve mentioned earlier, establishing a camp away from flood-prone areas is a must-do. Furthermore, it is also essential that you stay away from flood lines that the water has previously excavated. There’s a big chance that flood water will come gushing on them once the rain starts falling. 

    Determine The Distance And Extent Of Drainage Areas

    If you are camping near a body of water (i.e., river), it is essential that you can gauge the extent or reach of its drainage area. Doing this would allow you to check which spots are considerably safe whenever floods take place. It would also help you assess if your area were in peril if the water started rampaging. 

    Of course, this is where established campgrounds shine the best. You see, these areas have readily available information regarding their topography. As long as the data is updated, you will no longer have to do the legwork of estimating the drainage. However, if this information is not present, then you have no other choice but to survey your area. 

    You can do this by surveying the land slope. Again, always be attentive for any signs of past water channels and carvings. You should also look for debris and rocks that have accumulated in various spots. Furthermore, you should check for the presence of nearby uplands, mountains, and hills. The existence of these land formations is an indication that unexpected flows caused by storms are within the realms of possibilities.

    Essentially, what you got here are “feedings.”

    The “feeding” is included in the drainage of a water body. Hence, it is crucial that you know the size of the water body that “feeds” the drainage. For example, if there are large rivers that are feeding the drainage, it is expected that you are at risk. Meanwhile, if you are camping on small rivers, the water feed is just manageable. But this doesn’t mean that you are free from danger. 

    Be Alert At All Times

    Prudence and attentiveness can help you survive amidst natural disasters. People who react faster once they see that the water levels are gradually rising are those that can easily get out of danger. It’s a wise decision that you should follow, too.

    Others think that slight increases and inundations are ignorable; hence, they prefer to remain in their campsite. For some, they seek thrill, and because of that, they remain in harm’s way. Well, these things are quick ways to put yourself in deleterious positions. 

    Surely enough, staying awake the whole night to guard against these sudden changes in the weather and water bodies might be absurd. However, if you are camping within a danger zone, you should consider doing so. Once the rain starts dropping, you need to heighten your senses already.

    Find Escape Routes

    Planning is always a crucial aspect of camping and other outdoor activities. When you plan correctly and sufficiently, you will be able to take into account every possible distress that could happen. 

    If you are in a flood-prone area, it is essential that you scout your campsite to see if there are potential escape routes that you can take. Always keep in mind that the ideal escape route should have a solid and stable foundation. Weak and muddy grounds are easily disrupted by floodwater. 

    Once you can find an escape route, you should clear the debris and obstructions on it. It should remain passable and accessible at all costs. You would want to trip out of nowhere because of some stray branches. If you are camping with a group, you should inform them about the escape route, too. You should also identify various meeting spots so that nobody would get lost in the process. 

    Furthermore, you have to remind them that their survival is the topmost priority. Hence, it is incorrect that they would delay their escape because they want to save their belongings.  

    You are also not allowed to pass through moving water. There’s a chance that the current is strong or that its depth is too dangerous for you to cross.

  • How To Hike At Night?

    How to hike at night? 

    You see, many people find night hiking counterintuitive, given that it can put your comfort and safety into compromise. But for many hikers and outdoor goers, night hiking provides the extra thrill they need. It lets them explore the wild scenery embedded in the dark. 

    So before I discuss anything else, allow me to showcase some of the perks of why you should hike in the dark. 

    Benefits Of Hiking At Night

    Once it is already dark, you know that it is time for you to prowl and move around. There’s a lot to see and expect here, especially the only active wildlife during the night. Furthermore, without the sun overbearing on the top, you’ll have a cozy time exploring. You don’t have to worry about sunburns anymore.

    Here are some other benefits that you can get if you hike at night:

    • It helps you appreciate your environment – When you’re out there with no light source, you will be able to notice more details about nature. The darkness allows you to observe things like plants’ growth patterns or animal behavior. This way, you can learn how these creatures live their lives.
    • It is cool and breezy – When you’re out there without any light source, you won’t feel so exposed. Your eyesight will improve because you won’t squint from the bright sunlight. Plus, when you walk along trails, you’ll enjoy the breeze blowing through your hair.
    • It is relaxing – Hiking at night can be pretty relaxing. With nothing but the stars above you, you may just want to roam around and take a breather. If you do this, all the stresses and anxieties within you could dissipate. Surely enough, that’s a mental relief that you shouldn’t miss out on. 

    Importance Of Proper Lighting For Night Hiking

    For first-timers, it is pretty natural to think that having a brighter light source is better. But you see, that’s not actually the case. 

    The high-lumen flashlights and headlamps are essential in activities where illumination is crucial, such as emergencies and search-and-rescue. Keep in mind that too much white light can damage your night vision. 

    Interestingly, hikers who want to try exploring their surroundings in the dark should never rely too much on their light sources. Instead, they should train their eyes to rely on the light generated by the moon–if the skies are clear. Doing this repeatedly for extended periods would enable your eyes to get used to the low-light conditions, which, in turn, would enhance your vision during the night. 

    Here are some of my recommendations on how you can “train” your night vision:.

    • Don’t look directly at your lamp or flashlight – Your night vision can get thwarted if you stare at a light source, even for a short amount of time. It would ruin your progress, and you would need to adjust your eyes again.
    • Optimize your peripheral vision – While looking straight ahead, focus on objects near your feet. That way, you’d be able to spot potential dangers while still maintaining eye contact with what lies beyond.
    • Give time for your vision to adjust in the dark – Once you’ve been hiking for a while, your eyes will become accustomed to the dim lighting. However, until then, make sure that you give yourself ample time before attempting anything else.

    How To Use Flashlights And Headlamps Properly On A Night Hike

    Of course, there are instances where you need to use your light sources. For instance, if you want to look for gear inside your pack or scan areas that are too dim to see.

    However, this doesn’t mean you have to compromise all your effort to adjust your night vision. Hence, you should do the following whenever you need to use your light sources. 

    • Opt for a red light – If you buy a flashlight or headlamp, make sure that they have a red light mode. This feature allows you to gain vision in the dark without eyes being affected. You see, your eyes are not as sensitive to red light as compared to white light. Hence, they are suitable for hikers who want to train their eyes in low-light settings.
    • Take advantage of multiple brightness settings – Most modern lights come equipped with several brightness levels. Make sure that you know how each setting works so that you don’t waste any energy when using them. Furthermore, they would be able to illuminate your way even without distracting your vision. 
    • Turn them off if you are not using them – When you’re done using your light sources, switch them off immediately. Otherwise, you’ll end up wasting battery life.
    • Don’t shine your flashlight or lamp on other people – Shining it towards others could cause discomfort to those around you. In addition, it might also distract them from their own tasks. So, keep it away from everyone’s sight.

    Do’s When Hiking At Night

    Be familiar with your equipment and gear – Before heading into the wilderness, ensure that you understand everything about your backpack, tent, sleeping bag, and other utilities. The more you know about these items, the better prepared you’ll be for your night hike. You should bring your food and nourishments, as well. 

    • Tell others about your plan – Night hiking can become dangerous. Hence, before you do this, make sure that you have informed someone about plans. Notify them about your destination, the schedule of your trip, and your expected return date. However, keep in mind that you should tell people that you trust. Never relay your plans to strangers–or even colleagues. At the same time, never post it on social media, especially if you are going to hike alone. 
    • Bring adequate light sources – As mentioned earlier, most night hiking requires some form of illumination. Therefore, you must bring the right light sources, such as flashlights and headlamps. Again, let me emphasize that they should have the following features: red light and multiple brightness adjustment. Also, make sure that you carry extra batteries.
    • Take your time during the hike – When night hiking, it is quite wrong that you stay out for only a short period. You will never be able to enjoy the nocturnal scenery that way. Furthermore, it would prevent your eyes from developing the ideal night vision. Instead, take your time and explore every nook and cranny of the trail. It will help you get an idea of what lies ahead.
    • Avoid unnecessary risks – While exploring at night, avoid taking unnecessary risks. For instance, don’t climb over fallen trees or cliffs. Doing so may lead to injury and death. Besides, there are many animals roaming around at night. Thus, always try to remain calm and alert.
    • Hike when the moon is visible – During the full moon phase, the sky becomes brighter than usual. That means that you’d be able to spot things easier. Moreover, you won’t need to rely on artificial lighting anymore. On top of that, you wouldn’t feel like you were walking through a tunnel because of its bright glow.
    • Use proper safety measures – Always use caution while hiking at night. Don’t forget to wear reflective clothing and footwear. And lastly, make sure that you follow all rules regarding safe practices. Check the weather and ensure that you aren’t treading on areas where there are dangerous areas (such as cliffs and ridges). 

    Don’ts Of Hiking At Night

    • Don’t go alone – To try to act brave by night-hiking alone. This isn’t advisable since you’re not aware of any dangers lurking nearby. Plus, you lack experience in doing so. If anything goes wrong, you’ll find yourself stranded without anyone to rescue you.
    • Never walk off trails – If you hike at night, make sure that you only stay at your designated trail. Never veer away from it. Otherwise, you might end up getting lost. In addition, you could stumble upon something unexpected along the way.
    • Do not attempt to cross streams – Crossing rivers at night is extremely risky. First, you risk drowning due to poor visibility. Second, you run the risk of being attacked by wild animals who are wandering nearby to drink water. 
    • Do not venture too far – Most hikers who choose to hike at night usually want to see more of their surroundings. But remember that you shouldn’t stray too far from your path. The reason behind this is simple; you cannot easily navigate back home after straying too far.
    • Never disturb any wildlife – Wildlife can become very aggressive if disturbed at night. They tend to attack humans with little provocation. So, do everything possible to keep them happy. Avoid disturbing them whenever possible.

    In Summary

    Night hikes offer great opportunities to view nature’s beauty. However, before embarking on one, you must first consider several factors. These include the type of terrain you intend to traverse, how long you plan to spend outdoors, and whether you’ve done similar activities before. Also, you should know about the best times to visit certain places. 

    Lastly, you have to decide which route suits you best. After considering these points, you’ll surely come across some interesting experiences!

  • 7 Awesome Benefits Of Hiking For Children

    Many of you inquired about the benefits of hiking for children. After all, for parents, the thought of taking their kids on a hiking trip puts them into a dilemma. 

    But in a nutshell, there are a lot of reasons as to why children should explore the outdoors regularly. Parents and guardians should encourage their young ones to leave the comforts of their sofas and beds to venture into the wilderness. Numerous studies have already suggested that too much time indoors can cause different emotional and social problems among kids.

    At the same time, hiking and other outdoor pursuits are great alternative sources of entertainment. They can easily supersede the quality of enjoyment that these kids get from their smartphones and computers. 

    While it is true that hiking requires preparation and training, it is worth the hassle. Sooner or later, your children will develop the necessary appreciation for this adventure, as well as the benefits that it brings to the body, mind, and the world as a whole. 

    Benefits Of Hiking For Children

    It Helps Develop Their Courage And Self-Esteem

    As your kids are growing, it is quite natural that they experience feelings of anxiety, hesitation, and fear. When they are dealing with the unknown, they are prone to get scared or afraid. 

    You have to nurture your children so that they can grow from this phase. The older they get, the more self-confidence they should gain. They should be brave enough to tackle all the challenges life brings them. 

    Hiking is an excellent way to inculcate these things in them. Every adventure is different from one another. During the trip, they will encounter new experiences and trials that could test their grit. Letting them leave their comfort zones is a sure-fire method of making them tenacious and eager to overcome challenges. The simple feat of completing a particular trail will boost their self-esteem!

    Hiking Develops Their Mental Faculties

    Another benefit of hiking goes to your cognitive abilities. For children, that’s a big deal already. Many think that hiking is just for the body. Well, that’s not actually wrong. However, if you think about it, this particular adventure brings more than making your body fit and strong. 

    Your little ones can grow sharper (in their brains) every time they hike. Keep in mind that every trail is different. You’ll encounter varying scenery, wildlife, and obstacles. These heavenly encounters would enhance the thinking capacity of their children to assess their environment. They would be able to perceive situations in a way that would benefit them. Furthermore, it strengthens the memory, as hiking requires you to memorize important skills and practices for the trip to be fun and safe. 

    Furthermore, there is empirical evidence that suggests clean air can improve people’s cognitive skills. Basically, breathing polluted air can deteriorate your mental functions. So if you don’t want your kids to get dull in the head, then the fresh air in the wild can prevent it from happening!

    It Is A Form Of Exercise

    Many children these days are living a sedentary lifestyle. They simply stay inside their homes, lie on their couch, and play with their phones for many hours. Of course, letting this persist will not do them any good in the long run. It will make them susceptible to various diseases such as diabetes and high blood. Furthermore, it is no secret that not doing anything can make your body either pale or obese. 

    So while they are still young, you have to let them grind their bones and muscles in the nearest trails in your area. Emphasize to your children that hiking can make them healthier and fitter. Your kids might not understand the importance of being physically fit while they are still young. But once they grow older, they will be so conscious about it. 

    In fact, many people appreciate the physical benefits that they get from the backcountry rather than in the gym. Of course, exercising in the gym is not a bad thing. However, what’s the use of treadmills if you can hike exceptionally beautiful terrains for hours. Teach this wisdom to your children. Let them experience the wonders that hiking can do to their bodies!

    Hiking Can Be Educational

    Education can take place in different environments, such as schools. When the COVID-19 pandemic struck, learning was imported to the virtual platform. But since the effects of the pandemic are gradually dissipating, things are getting back to normal. You are free to send your children to their schools as long as safety protocols are being followed and observed. 

    But at the same time, there’s another environment where your children can learn different skills and knowledge. And that place is the majestic outdoors. 

    Here, there are no teachers, except you (as parents) and Mother Nature herself. You won’t encounter any blackboards, only endless canvasses of mountains and skies. While you are with your kids, there are multiple opportunities where you can teach them about navigation, biology, and geology. In fact, if you are trailing in a national park or historical trail, teaching bits of history is possible! Moreover, the outdoors serve as an excellent venue for you to teach life skills and values. 

    Of course, you can’t teach something that you don’t know. Therefore, parents should do some research and study before they head on a trip!

    And the best thing about the outdoors is that it is never boring. You can always pique the interest of your young ones and absorb everything that you teach them. 

    Hiking Teaches The “Leave No Trace” Principles

    The Leave No Trace principles are very important when we go out into nature. These principles help us preserve our natural surroundings by minimizing human impact. This includes leaving nothing behind but footprints, which helps prevent soil erosion and water pollution. Also, we must avoid disturbing wildlife habitats and plants. We also need to minimize campfire smoke and trash left around campsites. 

    When we follow all these rules, we leave a positive impression on others who visit those places later. So, encourage your children to practice the Leave No Trace principles whenever they go outside. They’ll love doing it because it makes them feel good inside too.

    Hiking Lets Your Children Unplug To The Digital World

    We live in a digital world today. It has become part of our daily lives. From work to school, shopping to socializing, we spend most of our days online. As much as technology has made our lives easier, it has also created problems like addiction and loneliness. 

    If you want your child to unplug themselves from the digital world, then hiking is one way to achieve that goal. There will be times when your children have to walk miles without seeing anyone else. That means they’re going to be alone. Alone time is essential for teenagers’ development. It allows them to think deeply about various issues and make decisions based on facts instead of emotions. 

    So, let your children enjoy the solitude while they hike through the woods. After all, it’s just a short break away from the busyness of everyday life.

    It Improves Their Mental Health

    One more benefit of hiking is its ability to improve mental health. When people get stressed out, their bodies release cortisol. Cortisol levels increase during stressful situations such as exams, studies, and even arguments between family members.

    However, when we exercise regularly, our body releases endorphins, which reduce stress hormones. Endorphins are naturally produced chemicals found in the brain. They give us feelings of happiness and well-being. Therefore, hiking improves not only physical fitness but also enhances emotional wellbeing. If you want your children to stay healthy mentally, then take them hiking often.

    Hiking has positive long-term effects on the mental health of children. It makes them more resilient and resistant against stresses and anxieties. 

    In Summary

    As mentioned earlier, hiking has numerous health benefits not only to children but to adults as well. It improves cardiovascular fitness, strengthens bones, increases lung capacity, and even reduces stress levels. All these factors contribute to making hikers more resilient against diseases like cancer and heart disease. 

    Moreover, hiking teaches valuable lessons to your children. Not just about survival skills, but also about respect towards other living beings. As a parent, you have the responsibility to instill these virtues in your children so that they will grow up to be responsible citizens of tomorrow. 

    So, let’s start planning our next adventure together!

  • How To Choose Camping Lanterns

    How to choose camping lanterns?

    In the past, the most reliable way of illuminating a campground was through the use of gas-powered lanterns. They have a bulky body and feature glass windows so that the fire inside them can shine through. Even if they can be quirky to use, these old-style lanterns are efficient in generating warm and bright light. 

    These gas-powered lanterns aren’t exactly out in the market. However, there are more intuitive options for these traditional lanterns. These days, you can see lanterns that use LED lighting for better reliability and versatility. LED lanterns are known for their brightness, lightness, and adjustability. Hence, they are suitable for various backcountry applications. 

    If you are planning to get a lantern for your next trip, this guide will certainly help you. 

    How To Choose Camping Lanterns

    In choosing a camping or backpacking lantern, the following considerations should be taken into account:

    Type Of Lanterns

    Gas-Powered Lanterns 

    This type of lantern is n’t really concerned with its weight and bulk. If you want more illumination, then a gas-powered lantern is also an ideal option.

    There are two types of gas-powered lanterns: propane and liquid fuel. A propane lantern is not as bright as compared to liquid fuel lanterns. But at the same time, it isn’t heavy in weight and cost.

    Meanwhile, liquid fuel lanterns use the same fuel utilized by cooking stoves. Moreover, their canisters were pretty similar to the ones used in most backpacking stoves. If you want to attain the maximum brightness, then a liquid fuel lantern is the best option for you. However, keep in mind that they are heavy and costly. In fact, the brightness of a liquid fuel lantern is enough to cover your entire campground. Furthermore, some units have an adjustment feature that lets you dial down their brightness.

    Always remember that gas-powered lanterns aren’t designed for closed spaces. You should only use them in ventilated or open areas. Since they generate more heat, you should be careful when it comes to using them. Don’t put them too close to highly flammable items. 

    Overall, as long as you need the best light output possible, these gas-powered lanterns are the ideal choice. 

    Electric Lanterns

    As their name suggests, electric lanterns utilize electricity in their operation. Specifically, power is needed to illuminate the LED bulbs that are integrated into them. Most electric lanterns differ in their power source, weight, and overall size. You see, these lanterns either use rechargeable batteries, alkaline batteries, or external power sources. 

    Modern electric lanterns feature efficient power utilization. What this means is that they aren’t that power-hungry. Some models can even run for 24 hours straight. Interestingly, I’ve also seen other electric lanterns that can run on other power sources such as hand cranks and solar panels.

    The light output of electric lanterns is still decent. Hence, you can still use them on most camping and backpacking adventures. Furthermore, I have to indicate that they are durable and don’t generate any sound or fumes. And the mere fact that they are safe around flammable materials indicates that they will not worry about any fire hazard. 

    Assessing The Performance Of Camping Lanterns

    Here are some of the factors that you should take into account when assessing the quality of a lantern. These specifications can determine if a particular lantern is suitable for you or not. 

    Light Output

    You must first assess how much light each model produces. This factor depends on several things, including the number of LEDs used in the unit. For instance, there’s no point in buying a lantern that produces less than 100 lumens. On the contrary, you’ll end up wasting money since you won’t get adequate lighting during nighttime activities. At the same time, don’t go overboard with purchasing high-end lanterns. Remember that you’re going to carry all those gadgets along with you. So, make sure that you buy one that has sufficient battery life. 

    Duration Or Runtime

    Another important aspect to consider is the duration or runtime of the lantern. How many hours do you expect to use the lantern? Do you plan to leave it unattended overnight? Is it meant to serve as a backup system? All these questions depend on what type of usage you intend to give to the lantern. 

    Battery Life

    If you are going for electric lanterns, battery life is another important specification to consider. It determines how many times you can charge the lantern before its lights start dimming. As mentioned earlier, modern lanterns come equipped with lithium-ion cells. They last longer compared to traditional alkaline batteries. Therefore, you shouldn’t expect to spend lots of money just so you can enjoy extended battery life.

    Water Resistance

    This is an essential characteristic of every outdoor gadget. If your lantern gets wet, then the chances are that it might malfunction. In addition, water may cause corrosion which leads to electrical shorts. Thus, you need to ensure that your lantern is resistant to moisture. Fortunately, most manufacturers include waterproof features in their products. However, if yours isn’t included, then you can always add a silicone cover to protect it from rainwater. 

    Weight & Size

    Lastly, weight and size are two more considerations that you should keep in mind while choosing a camping lantern. You want something lightweight but sturdy enough to withstand rough conditions. Also, you don’t want to lug too heavy equipment around, especially if you’re planning to hike long distances. 

    In Summary

    Camping lanterns are useful tools that help us navigate at night without having to rely on our cell phones. Most importantly, they provide safety by preventing us from stumbling upon obstacles like trees and rocks.

    But, we have to be careful about selecting the right ones because different models vary greatly in terms of performance. We’ve discussed various aspects that you should look out for when shopping for a camping lantern. Hopefully, this article will assist you in making better choices.

  • 7 Solo Camping Tips For Women

    Before anything else, I want to emphasize that solo camping is an adventure that every woman should try once in their life. Moreover, it is a safe thing to do, especially if you know the drill already. 

    Solo camping for women is quite empowering. It gives them the confidence that they need; it lets them feel that they can do anything. Furthermore, solo camping could be the breather they need. It relieves stress, anxiety, and other emotional burdens. 

    But before a woman heads toward the wilderness on her own, it is essential that she can practice the essential regimens for solo camping.

    Solo Camping Tips For Women

    Picking Your First Destination

    There’s a good chance that a lot of you here are about to try solo camping for the first time. If that’s the case, you should realize that the backcountry is something you shouldn’t take lightly. Even experienced solo campers have to prepare for every trip they make. 

    Because of these odds, you need to pick a destination that isn’t that difficult for you. You have to consider that it is the first time for you to embark on this endeavor. Hence, these reservations are necessary. In the long run, they will help you get used to the pursuit. 

    Whenever you are searching for a campsite, prefer those that feature accessibility to amenities such as emergency services. Don’t go too far; there should be local camping grounds where you are comfortable. In fact, you should get maps and other information about the area so that you’ll know what to do once you get there.

    Pick a campsite where there is a crowd–even if it is minimal. Here, national parks are a great choice. They are much more favorable than going to an area where you are extremely isolated. That’s something that you shouldn’t do, especially if it is your first time. Also, keep in mind that some campsites require reservations.

    Pay Attention To The Weather

    Weather forecasts are widely available today. So there should be no excuse for you to be caught off guard. You wouldn’t want your big day to be ruined by sudden rain and storms. 

    Furthermore, weather inclement can pose a danger to campers and outdoor goers. Floods and landslides may occur without prior notice. Therefore, you should prefer to camp when the weather is fine and sunny. There’s no merit in challenging Mother Nature, especially if you aren’t trained enough to deal with the harsh elements.

    Of course, the right camping site can protect you from dire circumstances. Many established campgrounds aren’t prone to natural disasters. Hence, it is recommended that you go to them over other areas where your safety is always in peril. 

    If possible, you should already monitor the weather patterns a week before you go camping. In this way, you will be able to estimate if an impending rain or storm can disrupt your trip. 

    Inform Important People About Your Trip

    Camping alone will put you in a position where you have to rely on yourself. That’s a given. But this doesn’t really mean that no people should know about your adventure. In fact, it is the opposite. 

    You have to inform your close friends and family members that you are going on a solo camping trip. In this way, somebody knows about your whereabouts. If you didn’t come back on the date that you have mentioned, then these individuals can call rescue services to look for you.

    Specifically, you should relay them the following crucial information:

    • The time and duration of your trip
    • The location of your campsite
    • Contact information of your campsite (if it is available)

    By the way, I highly recommend that you establish a means of contact between you and the outside world. If there are no cellular services, you might want to try using satellite phones. Radios can also let you call for help. In this particular context, you might want to establish some sort of code or keyword that would let your family and friends know that you are in a tight situation. 

    4. Never Flaunt That You’re Alone

    I know that social media is a thing these days. People update their Instagram or Facebook profiles from time to time. However, you should be cautious when sharing your current location and status–especially if you are alone. 

    You’ll never know what other people are thinking. We can’t really say that everyone that is on your list has good intentions. You can’t simply put your guard down because unprecedented incidents might occur. We aren’t strangers to these stories before. So it is important you only share your trip with those that you trust. 

    Also, keep in mind that you should never share too many details with your fellow campers. Don’t make it too obvious that you are alone. Moreover, don’t ever tell strangers where you are camping or where you have pitched your tent. In this situation, it is okay if you lie and don’t say anything. You can also drop phrases like your “friend or partner is waiting” to prevent things from dragging too long. 

    So what should you do if you feel that you are in an awkward or risky situation?

    If you ever get stuck in this predicament, you should do your best to leave where you are camping. Take your essentials and depart as soon as possible. You may also want to sleep inside your vehicle if you don’t feel like leaving yet. 

    Should you bring self-defense items? Absolutely. That’s never the wrong thing to do. You have to be prepared in a fight-or-flight situation. 

    5. Be Physically Fit

    Outdoor adventures tend to be physically exhausting. It is not something that you should be surprised about. Things can get even more tiring if you are just camping alone. After all, you are the only one who will do the errands on your campsite. Aside from the hike and walk, you might also have to chop wood, clear bushes, and pitch your tent. You should also need to cook your food, fetch and filter water, and ensure that your gear is properly stashed. 

    Doing these things by yourself can tax your body, especially if you are not prepared for them. Hence, it is essential that you train and practice before the big day. 

    Exercises such as walking and jogging can help you build your stamina. They can prepare you to traverse your destination on foot. If your campsite requires you to hike, then you should practice hiking, too. There should be local hiking routes in your area where you can practice. If there’s none, find the nearest place where there are easy hiking trails you can try. 

    Never ignore the physical aspect of camping alone. The more fit your body is, the easier it is for you to endure the ordeals of your adventure. At the same time, it prevents you from being susceptible to injuries. 

    6. Practice, Practice, and Practice

    Solo camping isn’t a trivial activity. Hence, you should always be mindful of the things that you do while on the trip. As much as possible, you need to have a mastery of the fundamental outdoor skills such as navigation and finding supplies (such as water and food) in case of emergency. 

    I never really recommend a person to try solo camping if they don’t know the following things:

    • Pitching a tent 
    • First-aid and survival
    • Cooking food
    • Building a campfire
    • Identifying plants and animals
    • Filtering water
    • Using your tools
    • Navigation (such as reading maps and using compasses)

    Fortunately, solo camping can wait. In the meantime, you need to practice the things that I’ve mentioned above. Trust me. Mastery of these skills will help you camp safely and comfortably. 

    If you think that you can’t do it by yourself, I suggest that you take classes related to them. Since we are dealing with the pandemic at the time of writing, enrolling in online training sessions should be your best bet. Of course, it would really be great if someone who knows these skills by heart could teach you. 

    7. Be Mentally Prepared

    Aside from your body, you should also hone your mind for the trip. Unlike camping in groups, solo camping requires you to handle the effects of acclimatizing to a new environment on your own. You won’t have any companion whom you can relay your worries to if you hear howls or screeches of wild animals. The feeling of being alone can be liberating and scary at the same time. Hence, you need to strike the perfect balance between these two so that you’ll never get too overconfident or anxious. 

    So how can a woman prepare herself against the possible mental challenges she can occur on a solo camping trip?

    Well, there are no tried-and-proven means of fortifying your mental faculties. You may try meditation or mental exercises such as mindfulness. But simple acts of resting properly, sleeping well, and preparing enough should give your mind the peace and security that it needs to keep going. 

    Furthermore, it would be best if you didn’t stop after your first trip. Repeat the adventure and find a new and more challenging destination. Doing this would remove your fear and hesitation. 

    In Summary

    Once you can master these tips, camping alone as a woman wouldn’t be a difficult pursuit for you. In fact, you’ll look forward to it. After all, solitude can really help women relieve their stress and organize their thoughts. It is an empowering experience, and it should be tried even once!

    That’s it for now. If you have inquiries, feel free to ask me in the comment section below.

  • 9 Hiking Tips For Seniors

    Most older adults are all about living their remaining years to the fullest. Proof of this is the fact that many of them are searching for essential hiking tips for seniors. But why?

    You see, hiking is a fun, physically stimulating adventure. Hence, it’s no surprise that a lot of people are into it. It is a popular activity throughout the United States, with millions of people exploring various trails and thru-hike routes. 

    However, one common misconception that I want to dispel here is the idea that hiking is only for the young and vigorous. The thing is, hiking doesn’t have to involve dangerous terrains and challenging weather conditions. A short trail that has gradual ascents can already be considered a hike. Hence, this activity should also be suitable for seniors and older adults. 

    Here, I will discuss some of the benefits of hiking for seniors and what they should do to ensure that this outdoor trip is safe and worthwhile. 

    Benefits Of Hiking For Seniors

    Hiking is a form of exercise. Therefore, it is not surprising that it yields numerous benefits to the mind and body of aging adults. Here are some of the specific perks that seniors can get by just becoming casual hikers. 

    • Enhanced cardiovascular health – This is because hiking involves walking on uneven terrain, which requires your heart rate to increase to maintain balance. As such, you will burn more calories than if you were sitting at home doing nothing. In addition, you’ll need to use muscles other than those used when seated or lying down. Thus, hiking helps improve blood circulation and oxygenation levels in the brain. 
    • Improved bone density – When you’re out there hiking, you’re constantly moving around. That means that you’re using different muscle groups from time to time. And since these areas don’t receive enough stimulation while being stationary, bones become weak. However, regular hikes help strengthen bones and prevent osteoporosis. 
    • Increased mental clarity – You may think that hiking isn’t really an intellectual pursuit. Well, it actually improves cognitive skills like memory retention and problem-solving abilities. These attributes make hiking great for senior citizens who often suffer from dementia or Alzheimer’s disease. 
    • Improved muscle strength – Since hiking is a physical activity, it builds up stamina and endurance. So, even though you might feel tired after completing a long trek, you won’t experience any fatigue afterward. Moreover, hiking strengthens leg muscles and increases flexibility. 
    • Reduced risk of falls – If you’ve ever been hiking before, then you know how much effort it takes to keep yourself balanced. Because of this, you tend to walk slower and take shorter steps. But what happens if you suddenly lose your footing? Then you could fall over backward and injure yourself badly. Fortunately, hiking reduces the chances of falling due to its slow pace and steady inclines. 
    • Increased social interaction – While hiking, you meet new friends along the way. Some of them may share similar interests as yours. Others may simply enjoy spending their free time outdoors. Either way, you’ll find plenty of opportunities to interact socially. 

    Hiking Tips For Seniors

    Consult Your Doctor

    Before embarking on a hiking adventure with your loved ones, consult your doctor first so he/she can give you all the necessary medical clearance. It would be best if you ask him/her about any medications that you are currently taking. Also, let your physician know whether you have any existing injuries or illnesses. He/She will advise you accordingly. You should never ignore your doctor’s recommendation; otherwise, you’ll experience difficulties or problems before or during the hike.

    Prepare Yourself Properly

    When preparing for a hike, ensure that you bring everything needed. Make sure that you pack comfortable clothes and sturdy shoes. Bring water bottles filled with fresh drinking water. Don’t forget to carry snacks and energy bars too. Lastly, wear sunscreen lotion and insect repellent spray. The last thing you want is to get sunburned or bitten by insects while enjoying nature. 

    Of course, part of the preparation is honing your body. You don’t go on a hike without any form of training. Weeks or days before the hike, make sure that you start jogging or walking. These exercises can build your endurance. You can also do other routines as long as they are permitted by your physician. 

    Pick A Trail That You Are Comfortable With

    If you’re not familiar with trails in general, then you need to learn more about different types of hikes. There are short walks, moderate treks, strenuous climbs, and challenging ascents. Each trail has its own set of rules and regulations. Therefore, choose one that suits your fitness level. This means that you shouldn’t attempt something that requires high levels of exertion unless you are physically prepared for such activities. 

    You should always pay attention to your body. You have to admit that it has been past its prime. It’s time that you settle for simpler and safer hikes. Don’t worry, though. There are still lots of beautiful scenery that you can witness and experience without the need to tax your body. 

    Be Updated On The Weather Forecasts

    The weather plays an important role when planning a hike. In fact, there are times where bad weather conditions can turn into dangerous situations. So, it pays off to stay updated regarding the current condition of the sky. Check out local news stations online or talk to people who live nearby. They might provide some useful information. If you want to get the most out of your trip, you have to make sure that the weather is fine and sunny.

    While there’s nothing wrong with hiking on rainy days, it might pose extra difficulties to you. Always remember that you are already old; slippery terrain should be excluded from your list of preferences. Moreover, you can’t just ignore the hazards that low temperatures can bring to your body. The level of danger that hypothermia possesses is similar to both senior and young hikers. So be careful!

    Choose The Correct Clothing Layers

    It goes without saying that choosing the right clothing layers is essential. When hiking, you must consider wearing multiple layers of clothing. First, you need to put on a jacket. Then, add another layer underneath, which consists of a shirt and pants. Finally, finish up with socks and gloves. Your feet will thank you later because this way, you won’t feel cold at all. 

    But of course, you have to check the weather first. It will help you identify the layers that you should wear. During summer and sunny days, you don’t need to wear anything extra. You can settle with your hiking pair and shorts, including your sun protection items such as caps, sunglasses, and lotions.

    In winter, you will need to wear a base layer, mid-layer, and outer shell. You may also want to wear your winter boots and pants. 

    Inform A Trusted Person Where You Are Heading

    It would be best if you let someone know where you plan to go. This person could be either family members or friends. However, do keep in mind that they cannot accompany you every step of the way. Make sure that you tell them what kind of route you intend to take so that they can prepare accordingly. Also, inform them of any medical issues that you might encounter along the way. 

    Informing someone about your trip isn’t just a gesture of formality. Instead, it is a way of protecting your life and ensuring your survival. For instance, if you don’t return on the expected date you said, they can call authorities for rescue. The same thing if there’s a weather disturbance that suddenly took place in your destination.

    Be In A Group

    Seniors should hike in a group. Hikers usually enjoy being part of a team. Besides, having companionship makes things easier, especially when you’re tired. Plus, you’ll always find somebody willing to lend their hand whenever needed. But of course, you have no control over other people. So, try not to rely too much on others. Be independent and self-reliant.

    Always Hydrate Yourself

    When hiking, seniors should never forget to hydrate themselves. Hikers usually carry water bottles while trekking, but sometimes these things run dry. To avoid dehydration, drink plenty of fluids before starting your journey. Remember not to overdo it since drinking too much water can cause complications as well. Since you are already old, your hydrations may have changed already. You can consult your doctor about this matter.

    If you’re going to walk long distances, then you’ll definitely require more than one bottle. But even if you only walk short distances, you shouldn’t neglect to replenish your supply. You should assess the quantity of water that you need in your hike. If there are water sources available in your destination, you should bring water filters or purifiers. 

    Use Hiking Poles

    It’s alright if you admit that your legs are no longer as stable and sturdy as they used to be. Now that you are old, you might want to use poles for support purposes. This is because walking with poles will help prevent injuries from occurring. It also helps keep balance during difficult terrain. However, make sure that you don’t go overboard using them. Just like any other equipment, you must know how to properly utilize them. Otherwise, you could end up hurting yourself instead of helping yourself.

    Have Fun And Enjoy Nature!

    There’s no doubt that hiking is fun. However, this doesn’t mean that you cannot enjoy yourself at the same time. Hikes offer great opportunities to bond with family members and friends.

    Plus, these trips allow you to spend quality time together. When you plan a hike, try to include everyone in the group. Your kids may love climbing trees and jumping over rocks. At the same time, your spouse could prefer going through scenic paths. As much as possible, let them decide what kind of activity will suit their interests best. 

    It goes without saying that you must take care of your health. But if you really want to enjoy every moment of your hike, you have to keep up with your diet. Try eating healthy foods like fruits, vegetables, lean meats, whole grains, nuts, seeds, beans, etc. Avoid junk food because it contains unhealthy ingredients.

  • 8 Best Trails To Hike In Arkansas

    Many would agree that Arkansas isn’t the first place in the United States where people would want to visit. In fact, it is not a surprise that it’s not included in the to-go list of various tourists and travelers. Despite this, no one can downplay the fact that Arkansas is a beautiful place. It is studded with beaches, hot springs, and swimming holes. 

    At the same time, the state is also the home of exceptional hiking spots, which include trails in the Ozark Mountains. Hiking in Arkansas is best done during fall. If you hike in the summer, it would be too hot and humid. Many areas are great for beginners. But if you are proud of your hiking skills already, I suggest that you try them in Eagle Rock Loop. 

    In this post, I’ve listed some of the finest places you can hike in Arkansas. For hike-thirsty individuals, these hiking trails are the best gems that the Natural State can offer. 

    Best Places To Hike In Arkansas

    1. Whitaker Point Trail – Ozark National Forest

    You can find the Hawksbill Crag in the heart of the Ozark National Forest. It is considered a hiking treasure in the state. In fact, it is so well-known that the area is heavily trafficked by hikers all year long. To get to this destination, one should ascend first the Whitaker Point Trail. 

    The entire trail is roughly 4.7-kilometer long and can be traversed for two hours or more. It can take you on an exotic trip–deep inside a forested trail. While on the route, you’ll spot scattered falls along the way.  After you get out of the trail, you will be welcomed by an open crag that features superb rock formation. Specifically, the crag protrudes from the cliff, which causes it to resemble a beak. 

    2. Eagle Rock Loop – Ouachita National Forest

    In Arkansas, the longest backpacking loop that you can trek is the Eagle Rock Loop. As I mentioned earlier, this one is probably the most difficult hiking route throughout the state. However, it remains to be popular among hikers and serious outdoor enthusiasts. 

    It would take a regular hiker to finish this trail for three days, so you can imagine the degree of challenge that this route provides. This 42.6-kilometer trail is actually the amalgamation of the Athens-Big Fork Trail, Little Missouri Trail, and certain portions of the Viles Branch Horse Trail. 

    The Eagle Rock Loop has numerous access points, which is quite advantageous if you want to try something new from time to time. You also have the option to complete this loop either counterclockwise or clockwise. One of the famous starting points is the Winding Stairs Trailhead. 

    One of the most notable features of the Eagle Rock Loop is the number of water bodies that you can encounter while traversing its entirety. Moreover, it also provides a lot of designated faces where you can camp and spend the night. Also, let me remind you that the creeks that you’ll pass here have varying depths. If it is rainy, some of them are dangerous to pass through. 

    Despite these ordeals, many are still attracted to go on this trail. After all, it represents the quintessential wilderness of Arkansas. It features a wide array of waterfalls, rivers, tree groves, and exuberant vegetation.

    3. Lost Valley Trail – Buffalo National River

    If you are looking for a short yet plentiful hike, then the Lost Valley Trail is an exceptional choice for you. This one will lead you to the majestic Clark Creek; it will also let you course through numerous natural bridges until such time you reach Cobb Cave and Eden Falls. 

    Since the hike is generally short, you have more time to rest or explore the rock formations and caves along the area. The trail will also let you experience traversing through crushed stones and smooth, natural pavements. Keep in mind that the most alluring part of the trail will require you to pour a lot of sweat. But keep in mind that it is indeed worth it. 

    Of course, I also recommend preparing for some water trekking in the creek. It is one of the highlights of the hike. Many locals go there on the weekend to find solitude. 

    While on the Lost Valley Trail, you have the opportunity to reach the Natural Bridge. The latter is a limestone tunnel that runs with an overall length of 50 feet.  

    4. Centerpoint to Goat Trail – Buffalo National River

    The Centerpoint to Goat Trail is an exceptional hiking trail in Arkansas. This one is an out-and-back trail and is situated within the proximity of Ponca. You may not need to be an expert hiker to traverse this route. However, you have at least some experience, as it is rated as a moderate hiking trail. 

    This 9.5-kilometer escapade has commonly been trekked for various reasons. It is not only suitable for hiking, but it is also a wonderful spot for fishing, camping, and ultralight backpacking.  

    It’s not surprising that the Centerpoint to Goat Trail is touted as one of the frequently taken routes in the Buffalo National River premise. In fact, during regular days, the Centerpoint Trailhead’s parking lot can get full quickly. Tourists and hikers are eager to reach the Big Bluff, which serves as the vantage point to the Buffalo River, which has an elevation of 500 feet tall. Meanwhile, its side trail is called the Goat Trail and has a height of up to 350 feet. If you have a fear of heights, this hike is not for you. 

    5. Pinnacle Mountain West Summit Trail – Pinnacle Mountain State Park

    One of the most strenuous day hikes you can experience in Arkansas is the Pinnacle Mountain West Summit Trail. It is a rocky trail that has an overall length of at least 2.4 kilometers. Specifically, it is an out-and-back trail situated in the proximity of Little Rock. 

    This hike is nothing short of challenging. Even experienced hikers said that the trail itself is difficult, despite it being a relatively short hike. 

    You can start your journey on this trail by proceeding to the picnic grounds of the Pinnacle Mountain State Park. On your way, you will have to ascend so that you can reach the summit of Pinnacle Mountain. Along the way, you’ll be greeted by the lush wildflowers sprawling in the area.

    Once on top, your efforts will be rewarded. There, you’ll have a panoramic view of some of the most beautiful scenery in Arkansas, such as West Little Rock, Lake Maumelle, and the Arkansas River Valley. 

    You have the option to descend to East Summit Trail if you want to return to the ground. However, keep in mind that it is also a rugged trail.

    6. Yellow Rock Trail – Devil’s Den State Park

    The Yellow Rock Trail is one of the historic and oldest trails that exist within Arkansas. The trail itself has been a CCC-constructed outdoor route during the 1930s. It is also included in the National Trails System. 

    This 5-kilometer hiking route has moderate difficulty, so average hikers have the opportunity to complete it. One of its notable spectacles is the Yellow Rock Overlook. The latter provides a glorious view over the stunning Lee Creek Valley. On normal days, the trail can get crowded. I suggest that you avoid hiking here during weekends.  

    The maximum elevation of the Yellow Rock Trail is roughly 300 feet, so there’s always something to see around you. The trail is also studded with amazing rock formations. Even the path itself is mostly rocky. Hence, hiking poles are always required equipment here. Moreover, the trail is also dog- and horse-friendly. 

    Interestingly, there are two trailheads of the Yellow Rock Trail: the Camp Area A trailhead and the Highway 700 CCC. 

    7. Hemmed-In Hollow Trail – Buffalo National River

    If you want to have an excellent view of the tallest waterfall throughout middle America, then I recommend that you check out the Hemmed-In Hollow Trail. This trail is accessible from Highway 43, which is south of Compton. Meanwhile, its trailhead is adjacent to the Erbie Road and features a properly signed route that will lead you to the Buffalo National River Wilderness Area. 

    The Hollow Falls, which is squeezed between the Appalachians to the east and the Rocky Mountains to the west, is definitely a spot worth seeing here. Despite its enormous length, its water volume isn’t as grand as other falls. However, the unique geology that surrounds this water body makes the journey worthwhile. 

    Essentially, this hike is rated difficult by many hikers, especially if you pass through the regular route. However, there’s another less exhausting alternative here. You can reach the Hemmed-In Hollow by cruising through the upper portion of Buffalo River when it is canoeing season. You will start your journey in feet in the Jim Bluff downstream. After that, you will just have to do moderate hikes for at least an hour before you can reach the destination.

    8. Glory Hole Waterfall Trail – Ozark National Forest

    The Glory Hole Falls is considered one of the fascinating waterfalls throughout the Ozark National Forest. Specifically, the falls are created by a gentle stream that ebbs through the roof of an overhanging cave. Every time that the water is fully flowing, it adds to the spectacular wonders that you can see while you are hiking on this trail. 

    Specifically, the Glory Hole Waterfall Trail is situated in the Newton County, Big Piney District. It is a well-maintained path, with most of it will require you to trudge along old roads used by jeeps. However, keep in mind that there’s no designated official trailhead or parking area for this trail. 

    The “unofficial trailhead is situated adjacent to Highway 16, which is around 6 miles to the eastern portion of Fallsville.

  • How To Choose Rock Climbing Shoes

    Rock climbing is a fulfilling yet challenging endeavor. It requires practice and skill so that you can tackle the walls in front of you. Of course, aside from these things, you need to have the right gear to do this endeavor. 

    One of the items that you need to secure is a pair of rock climbing shoes. Keep in mind that this footwear is the one that helps you ascend and descend the rocks. If you get the wrong kind of shoes, you will not be able to complete the expedition. 

    These are the following considerations when choosing rock climbing shoes. 

    How To Choose Rock Climbing Shoes

    It is crucial that you will be able to check the following guidelines before you buy a pair of rock climbing shoes. In this way, you will be able to pick the suiting gear to maximize your performance and optimize your performance. 

    Type Of Rock Climbing Shoes

    Neutral Climbing Shoes

    These climbing shoes are designed to give their users comfort while they are on the move. Specifically, these shoes provide a flat platform so that your toes can lie comfortably. Because of these features, they are ideal for new climbers. But of course, they are great for veterans, especially for extensive multi-pitch climbs. 

    However, keep in mind that these neutral shoes are not tailored for technical routes such as overhanging rock climbs. Moreover, the thick and stiff soles of these shoes don’t have the same sensitivity as the soles of aggressive and moderate climbing shoes. 

    Moderate Climbing Shoes

    It is easy to distinguish a moderate climbing shoe. The latter has a curved structure, which is commonly referred to as a camber. Such architecture lets you use the shoe for technical climbs. I can confidently say that these moderate shoes are all-rounders; you can use them on multi-pitch climbs, slab climbs, and crack climbs. You can also use them if you are going to ascend on overhung routes. 

    One of the known drawbacks of these moderate shoes is the fact that it is not being designed for performance applications. This means that they aren’t that great if you are dealing with steep boulders and extreme overhung routes. Moreover, they are not as comfortable as neutral shoes. It is also notable that the thin rubber soles of these moderate shoes are susceptible to wearing out quickly. 

    Aggressive Climbing Shoes

    The structure of aggressive climbing shoes is characterized by extremely downturned toes. They also provide a tremendous amount of heel tension. Because of these features, aggressive shoes are suitable to deal with technical overhanging rock climbs. The design of these shoes enables your toe to exert as much force as possible so that they will be able to clutch small gaps as tightly as possible. 

    Of course, it is natural if these aggressive shoes are only worn during single-pitch sport climb or route climbs at the gym. It has to be indicated as well that they aren’t as comfortable as neutral and moderate climbing shoes. Moreover, their downturn structure can’t fit and isn’t compatible with cracks. 

    Essential Features Of Rock Climbing Shoes

    Type Of Closure

    • Strap – Strap closures, also called “hook and loop,” are known for the convenience that they offer. They are ideal closure systems whenever you are gym or boulder climbing, especially if you prefer slipping your footwear off between the climbs. 
    • Lace-up – With a lace-up closure, you will get versatility from your climbing shoe. Every time that you feel discomfort, you can just loosen the laces so that your feet can take a breather. 
    • Slip-on – A slip-on closure is akin to the design of slippers. Hence, it is always called that way. Slip-on shoes tend to be elastic, low-profile, and sensitive. They can be good for training, as they can help strengthen your feet. Due to the absence of laces and straps, slotting them inside thin cracks are quite doable. 

    Upper Material

    • Lined leather – If the shoe has a lined leather upper, its stretch experiences a significant reduction. Other manufacturers tend to line the toe part only to minimize the cost of production, as well as to optimize the stretch of the shoe. 
    • Unlined leather – Opposite to lined leather shoes, footwear with unlined leather uppers has no restriction when it comes to stretch. When trying this particular shoe, it is ideal to size them so that you feel your toes against the leather. 
    • Synthetic – Notably, synthetic rock climbing shoes don’t really stretch that much. They can soften after multiple uses, but only to a slight degree. Therefore, you shouldn’t worry about their fit changing over the course of time. Compared to solid synthetic, perforated ones offer more breathability and performance. 

    Outsole 

    The outsole of the shoe plays an important role in its performance. Essentially, this is the part that gets in contact with the rock. Hence, you want it to possess as much grip, stability, and endurance as possible. 

    • Outsole material – Most rock climbing shoes use rubber as their outsole material. But keep in mind that there are different variations of rubber, so you have to inspect them carefully. Some rubber outsoles are known for their softness, while others excel in clutching the ground. Firm rubbers are ideal for support provision and edging. Meanwhile, sticky ones are great for slab smearing. However, sticky outsoles aren’t that impervious when it comes to abrasion.
    • Outsole thickness – An outsole is thick if it measures around 4mm to 5mm. Shoes that have thick outsoles are extremely durable; they are also a great choice for edging. But at the same time, feel and sensitivity is being compromised here. Hence, it is often suggested that new climbers should get shoes that have a thick sole so that they can withstand the grind you are doing. The more you refine your technique, the easier it is for you to transition to shoes with thin soles. 

    Meanwhile, thin soles have a measurement of roughly 3mm to 5mm. Technically, they are recommended to be used on slab routes. Thin soles also provide users with a better feel and experience. 

    In Summary

    When choosing a pair of rock climbing shoes, make sure that you also consider these factors:

    • Your foot type – You need to know what kind of shape your feet are before buying any specific model. This includes whether or not you have flat feet, high arches, wide forefeet, narrow heels, etc. Also, check how flexible your ankles are. It’s best to buy shoes that match your needs.
    • Sizing – Make sure that you measure yourself properly. Don’t just go by the sizes provided by the manufacturer. Instead, try wearing the shoes first. Then, take note of where your toes touch the inside of the shoe. That will give you a good idea of which size fits you best.
    • Fit – Try on several pairs until you find one that feels comfortable. Remember that comfort doesn’t always mean having a tight-fitting shoe. In fact, some people prefer loose-fitting shoes because they allow for greater freedom of movement. So, choose something that suits your style.
  • How To Choose Climbing Ropes: A Detailed Guide For Climbers & Mountaineers

    Learning how to choose climbing ropes by yourself is an essential skill, especially if you are into ascending big walls and towering landscapes. These ropes aren’t just mere amenities; they are lifesavers. They can help you traverse your destination as safely as possible. They can also make impossible climbs doable. 

    But for a climbing rope to do those things, it should be durable and functional. Read on so that you can understand the fundamentals in selecting the ideal climbing rope for you. 

    How To Choose Climbing Ropes

    The following are the considerations that you need to take into account when choosing climbing ropes. I recommend that you sort it through so that you’ll be able to get the right rope for your next adventure.

    Different Types Of Climbing Ropes

    One should know that there is no such thing as one-size-fits-all when it comes to climbing ropes. Specifically, there are two different variations: static and dynamic. 

    A static climbing rope doesn’t stretch that much. Because of this quality, they are extremely useful whenever you are ascending, hauling your luggage, or lowering someone that has been injured or immobilized. You should never use these static ropes for lead climbs and top ropes; after all, they are not tailored or proven to be safe to be used on such applications. 

    Meanwhile, a dynamic climbing rope is known for its stretchability. Therefore, it works well in absorbing the impact or force if ever you fall from the top. When it comes to dynamic ropes, you have three options: twin ropes, single ropes, and half ropes. 

    Single Ropes

    Most climbers today are purchasing single ropes. The term “single” in its name simply refers to the fact that the rope is stand-alone; it is not utilized with other ropes. These single ropes are available in different sizes, which makes them useful in various climbing applications. Moreover, they have hassle-free usage, as compared to other types of dynamic ropes. 

    Interestingly enough, there are single ropes that are classified as twin ropes or half ropes. These single ropes are useful for different techniques in climbing. When choosing a rope, you have to make sure that it fits the bill. This means that it should only be used on the application that was proven to be safe. 

    You can know if that rope is a single rope if it has a circled number one on its end. 

    Single ropes are best used for the following climbing approaches: top-roping, big wall, sport, and trad climbing. 

    Twin Ropes 

    A twin rope uses a dual-rope system. Specifically, you have to clip the strands of the rope together, which is quite similar to what you do with single ropes. With this setup, you get adequate rope drags. Such a benefit enables you to use these twin ropes if you are trekking non-wandering terrains. Moreover, these twin ropes have a thinner construction than half ropes. Of course, that’s an advantage if you want a lightweight climbing amenity. 

    With a twin rope, you will be able to rappel twice the distance of a single rope. Furthermore, a twin rope gives security if one of the ropes gets broken during a descent. 

    On the flip side, using these twin ropes requires training and effort. You have to remember that using them will require you to belay and climb with not one but two ropes. Furthermore, there are instances where the weight of these two ropes is heavier than a single rope. 

    Twin ropes are suitable for the following climbing applications: non-wandering, ice climbing, and mountaineering. 

    Half Ropes

    Half ropes also use two ropes, which is plainly similar to twin ropes. Every time you ascend using these half ropes, you have to clip one of the ropes on the left protection and the other one on the right protection. If you can do this properly, you will be able to go straight and parallel using the rope. It is an efficient method of decreasing the rope drag, especially if you are in wandering routes. 

    If you connect the ropes of half ropes whenever you are rappelling, you will cover more distance than with a single rope. Furthermore, they also give an extra layer of protection if one of the ropes gets damaged.

    The disadvantages of half ropes are pretty similar to twin ropes. They tend to be heavy, and they require practice before you can use them efficiently. 

    Keep in mind that some models of half ropes are classified as twin ropes. Hence, you can use multiple climbing techniques with them. There are also triple-rated half ropes; you can use them as a single, twin, or half ropes. They are the most versatile options in the field. 

    Half ropes are suitable for the following climbing applications: wandering route, trad climbing, ice climbing, and mountaineering. 

    The Diameter Of Climbing Ropes

    The diameter of climbing ropes influences their performance. For instance, a thin rope is light, but it has less durability than thick ropes. You need to be skilled so that you can belay with them as safely as possible. Meanwhile, ropes that have thick diameters offer more durability and abrasion resistance. They can handle constant use and abuse. 

    You should use a thick rope if you are top-roping from a tall crag. For applications that involve multi-pitch ascents, you should get a light and skinny rope. 

    • Single ropes (up to 9.4mm) – These ropes are extremely lightweight, which makes them suitable for multi-pitch climbs. But keep in mind that they cannot handle multiple falls. They are technically difficult to use because of their minimal durability. 
    • Single ropes (9.5mm to 9.9mm) – These single ropes are also lightweight. However, they are versatile enough for you to be able to use them in various climbing applications–such as trad climbing. They have sufficient durability to deal with the arduous conditions in craggy mountains. Moreover, they are easier to use than extremely skinny ropes. 
    • Single ropes (10mm or more) – Single ropes that fall in this range are suitable for big-wall climbing, gym climbing, and top-roping. These climbing techniques are known for their difficulty; therefore, they can wear out climbing ropes easily. You have to get a rugged and sturdy rope if you want to conquer the odds. 
    • Twin ropes and half ropes – A twin rope have a diameter of 7mm to 8mm. Meanwhile, half ropes usually range from 8mm to 9mm in diameter. 
    • Static ropes – These ropes have a standard diameter of 9mm to 13mm. 

    The Length Of Climbing Ropes

    You should also decide the length of the rope that you should buy. Most of the time, dynamic ropes have a length that ranges from 30 meters to 80 meters. If you can get a 60-meter rope, then your needs are already covered. 

    • For outdoor climbing, you need a rope that has an adequate length. In this way, the rope’s half would be longer or equal to the route you will climb. For instance, if the route has a distance of 30 meters, then you need a 60-meter rope so that you can traverse it upward and downward. For other climbing applications, longer ropes are needed so that climbers can be lowered safely to the ground. 
    • For indoor climbing, you will only need short ropes. You can actually settle for 35-meter options or less. They are suitable for gym climbing because their routes are generally shorter than their outdoor counterparts. But of course, you still have to assess the route first before you pick a climbing rope. In this way, you can make sure that the rope will help you lower to the ground safely. 

    When it comes to static ropes, lengths may vary. In fact, some of them are sold with precise measurements so that you can really get the length that you need. After all, static ropes are versatile; they are used for hauling items, rescuing, and caving. If you are doing these climbs, you should be specific to the length of the climbing rope you pick. 

    Other Features To Consider

    • Waterproofing – Climbing ropes have to possess a certain degree of waterproofing. In this way, they won’t absorb water. If they get drenched and sucked water, they will become heavier. It reduces their durability, which, in turn, could cause them to be less resistant to the impacts caused by falls. Meanwhile, if the rope is exposed to cold temperatures, it might get stiff and difficult to handle. 

    To prevent these things from happening, dry treatment becomes a necessary feature for these climbing ropes. But of course, you may not need to have this feature, especially if you are just indoor climbing. You still have to assess whether such a feature is valuable or not. After all, ropes with dry treatment are expensive. 

    • Marking on the middle – Many of these climbing ropes have markings in their center. Usually, these marks are colored black. Their purpose is simple; they help you see the rope’s center, which is essential every time you rappel. 
    • Markings on the rope’s end – There are ropes that have marks on their ends to help you identify if you are reaching their threshold. It is a necessary feature whenever you are rappelling or lowering items and climbers. 
  • How To Choose Bivy Sacks: A Buyer’s Guide

    Learning how to choose a bivy sack is quite essential, especially for individuals who are looking for an emergency shelter that they can use. Bivy sacks can be used with sleeping bags; in fact, they are a tandem that can provide you shelter and protection during multi-day hikes. Many hikers bring these bivy sacks whenever they are trailing along and within towering walls. 

    In the past, these bivy sacks were just rough drafts; most of them were nylon slipcovers designed for sleeping bags. These covers are waterproof, which enables them to protect the sleeping bags from the elements. In that aspect, those old-model bivy sacks were sufficient. However, they didn’t excel when it comes to dispersing water vapor generated by your body’s temperature. 

    These days, bivy sacks have multi-functional construction already. Read on to learn more about these bivy sacks so that you can choose one that suits your needs. 

    How To Choose Bivy Sacks

    Fundamentally, modern bivy sacks have two layers of fabric:

    The top layer of these bivy sacks is typically tailored from ripstop nylon or any lightweight material. The said layer is then applied with a laminate layer, which makes the fabric breathable and waterproof. A common example of this laminate is Gore-Tex. 

    Meanwhile, the bottom layer of these bivy sacks is crafted from highly rugged nylon. Most of the time, the nylon is treated with urethane so that it can provide a degree of waterproofing. Keep in mind that this material is also used on the floors of 3-season and 4-season tents. 

    Furthermore, there are also other types of bivy sacks that have an architecture similar to a tent. These options have distinct features that aren’t available with normal bivies. The first one is the added reach or area where you are shielded from the elements. The second feature is an enclosure to which you are sheltered against insects and weather. 

    Because of these added features, many have grown accustomed to the service of these bivy shelters. For instance, ultralight hikers who are conscious of the weight they carry prefer these bivy shelters over burly tents. 

    Bivy Shelters vs. Bivy Sacks

    Essentially, bivy sacks are tailored for minimalist outdoors or mountaineers who want to shed weight. They have two fundamental functions, and they should be able to provide you with these things for them to be useful in the field. These are those functions:

    Bivy sacks ensure that the sleeping bags of hikers and mountaineers remain dry, especially in humid conditions. 

    These amenities also help increase the insulating capacity of sleeping bags. Specifically, it is said that a bivy sack can add at least ten degrees Fahrenheit of warmth. 

    Bivy sacks have openings on their heads. Of course, this serves as an entry point for moisture. You can prevent this occurrence from happening by pulling the drawstring of the head as tightly as possible. Once you can do this, the entry point will be reduced to the size of the hole of your nose. Some people find this setup too tight for their own liking. Meanwhile, others can deal with the restrictions to protect them from becoming cold and wet. 

    When choosing a bivy sack, it is essential that you consider the following features:

    • Zipper sliders provide opening spaces for your arms to move. In this way, you will be able to fix your gear, access your equipment, or even cook while still inside the bivy. 
    • Lengthy zippers also offer ventilation capabilities. 
    • Seams that have been welded or stitched for additional waterproofing.
    • Straps that help secure the bivy to your sleeping pad. 

    Meanwhile, bivy shelters are considered low-profile tents. Most of these shelters have meshed panels that are affixed to the opening hole of the head. They also have hoops or poles that elevate the fabric away from your face. These components effectively shield you from precipitation and insects. However, heavy downpours still require you to do waterproofing techniques to guarantee your dryness. 

    In a nutshell, I can say that these bivy shelters are designed for ultralight campers, backpackers, and mountaineers. They are also valuable for touring cyclists who spend days and weeks on the road. These amenities have a wedged headroom that creates an area where you will not feel restricted or claustrophobic while lying in your sleeping pad. 

    However, keep in mind that during rainy conditions, these shelters may not be as ergonomic and comfortable as many think. While they can shield you from the rain, the mere fact that you can’t stand inside them makes the experience more agonizing!

    Other Considerations In Choosing Bivy Sacks

    • The space provided by the bivy sack – Always remember that these bivy sacks don’t offer the same kind of space as tents do. Even a single-person tent is more spacious than a bivy shelter. But of course, this doesn’t mean that these bivy sacks and shelters aren’t a good option. They are still a great alternative to tents, especially if you are always on the move. It also allows interaction with the world around you, which makes your outdoor experience a riveting one! Moreover, they can also protect you from the rain and insects. But if you are not really comfortable with small spaces, then you have no other choice but to pick a tent. 
    • Ventilation of a bivy – When choosing a bivy sack or shelter, it is crucial that you pick those that have breathable laminates. As I mentioned earlier, an excellent example of this layer is Gore-Tex. With this laminate, the vapor generated by your body will be dispersed outside the bivy. It is an essential feature if you are situated in a cool and dry area. If it is raining, then the bivy you pick should have enough zippers so that you can vent some of the internal humidity without getting wet. It is manual work, but it can prevent things from being too uncomfortable. 
    • Waterproofing of a bivy – Of course, you should never discard the fact that these bivies have to be waterproof. After all, they are designed as an alternative to tents. Hence, it is just a given that they should provide you the same level of protection that tents give. Fortunately, it is possible for these bivy sacks and shelters to be waterproof–not just water-resistant. For instance, a Gore-Tex laminate can keep things dry on your end. It might feel wet inside when it rains, but that’s just a feeling.