Blog

  • Essential Tips For Backpacking And Camping In A Bear Country

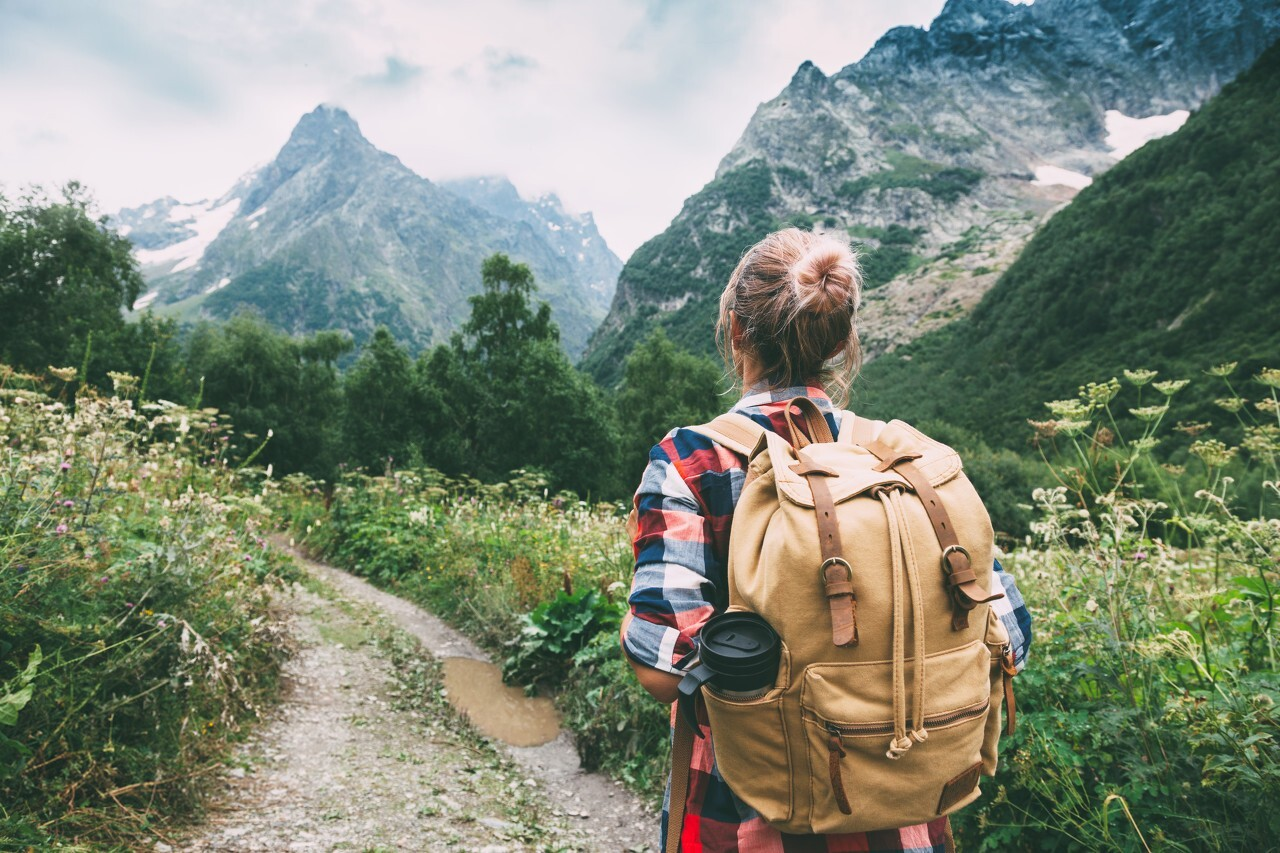
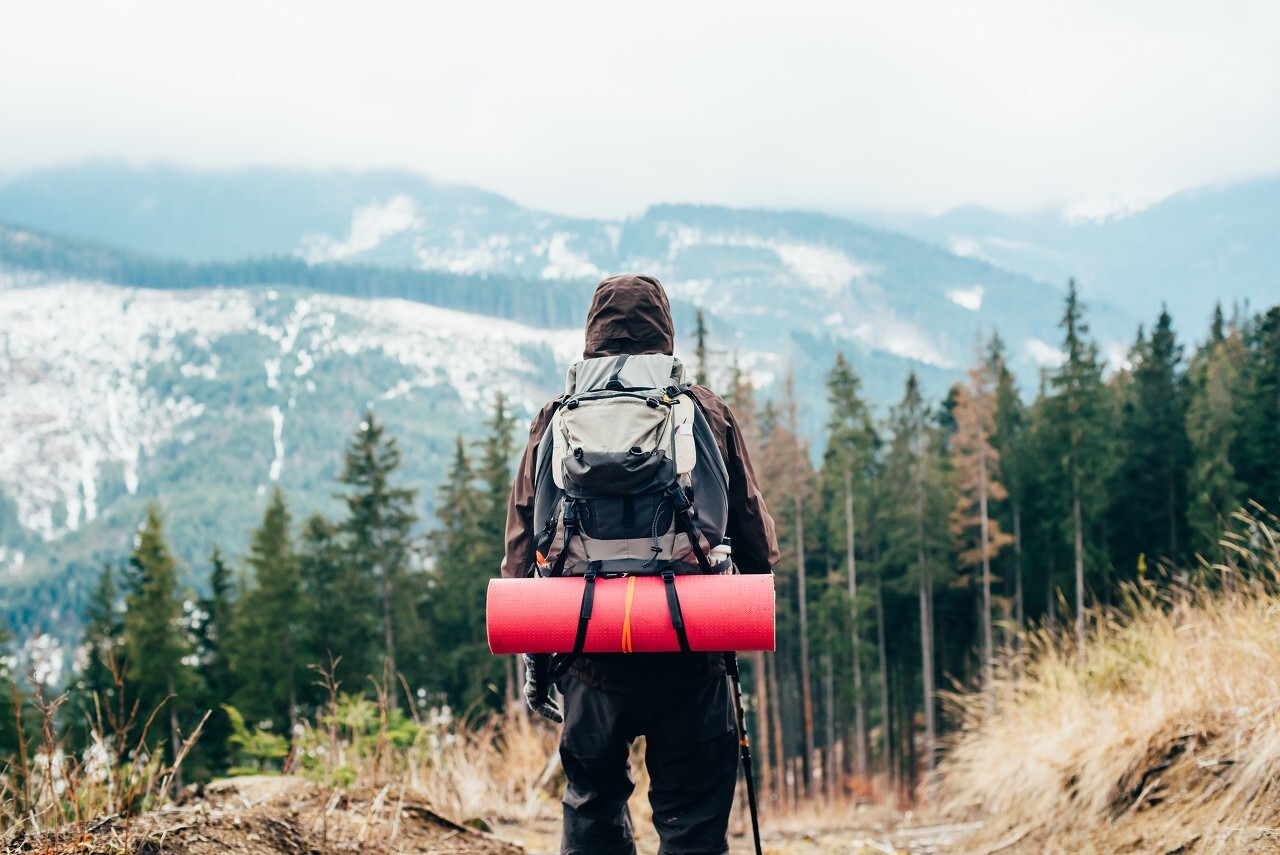
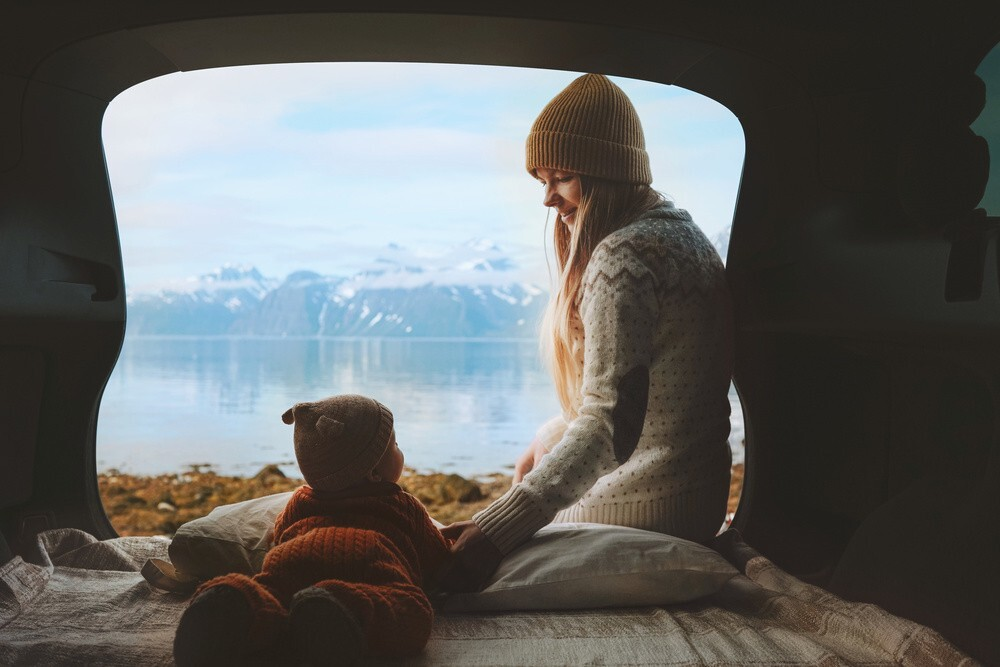
    Encountering bears during your camping or backpacking trip could be a wonderful experience. These creatures are magnificent and beautiful to watch. However, things could change easily if they are near you or start threatening your safety. 

    If you are heading to a destination where there are bears, it is essential that you know the fundamental precautions to deal with a potential encounter. 

    Tips In Backpacking And Camping In Bear Country

    Here are the important things that you need to know, understand, and execute before and during an expedition in a bear country. 

    Planning Ahead

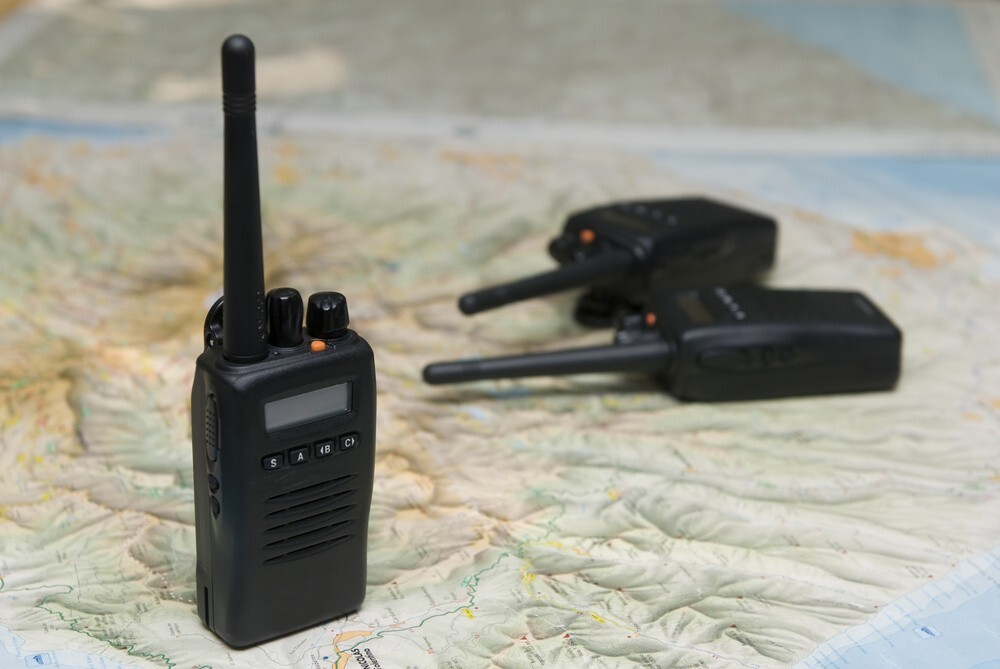
    Before your trip, it is necessary that you research your destination. Specifically, you need to know if there are bears in the area. If there are, try to look for any related policies and regulations. For instance, some parks will require you to bring bear canisters. 

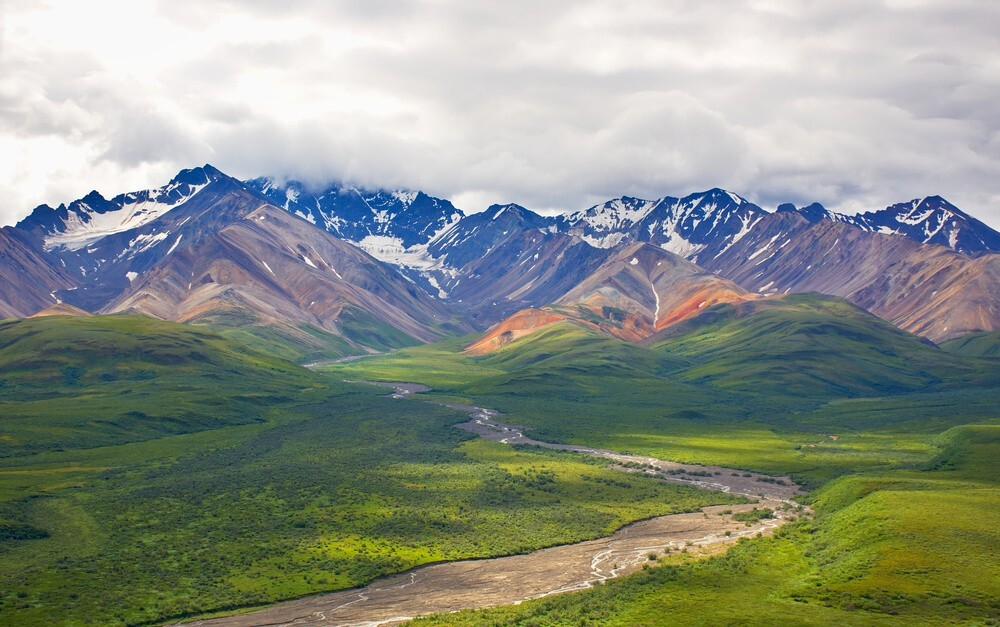
    In particular national parks where grizzly bears are present, such as the Yellowstone National Park and Denali National Park, many rangers and guides will encourage you to bring bear spray all the time. Meanwhile, other parks where there are only black bears will not be compelled to bring any bear spray. In fact, it might be prohibited to do so, especially if you are going to Yosemite. 

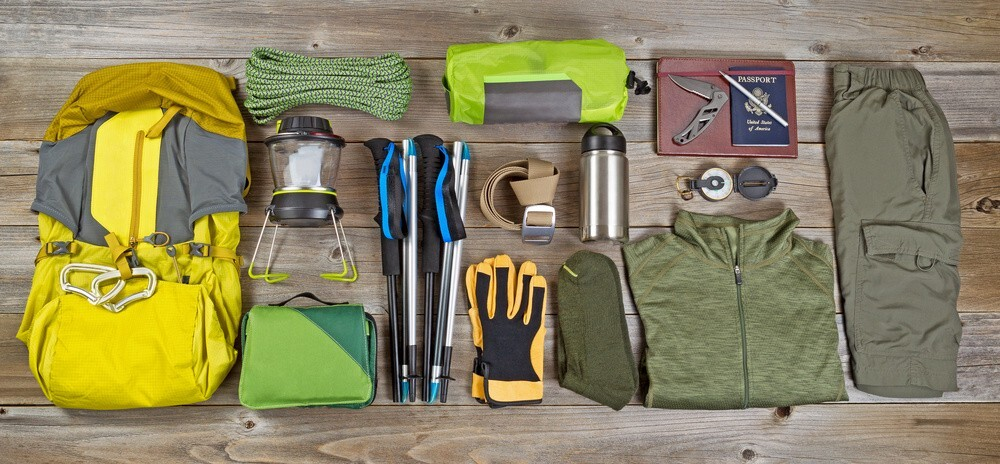
    Furthermore, you should also determine if there are metal lockers and bear poles on your camping and backpacking site. These amenities can influence the type of equipment that you’ll bring. 

    Avoiding Bears During The Trip

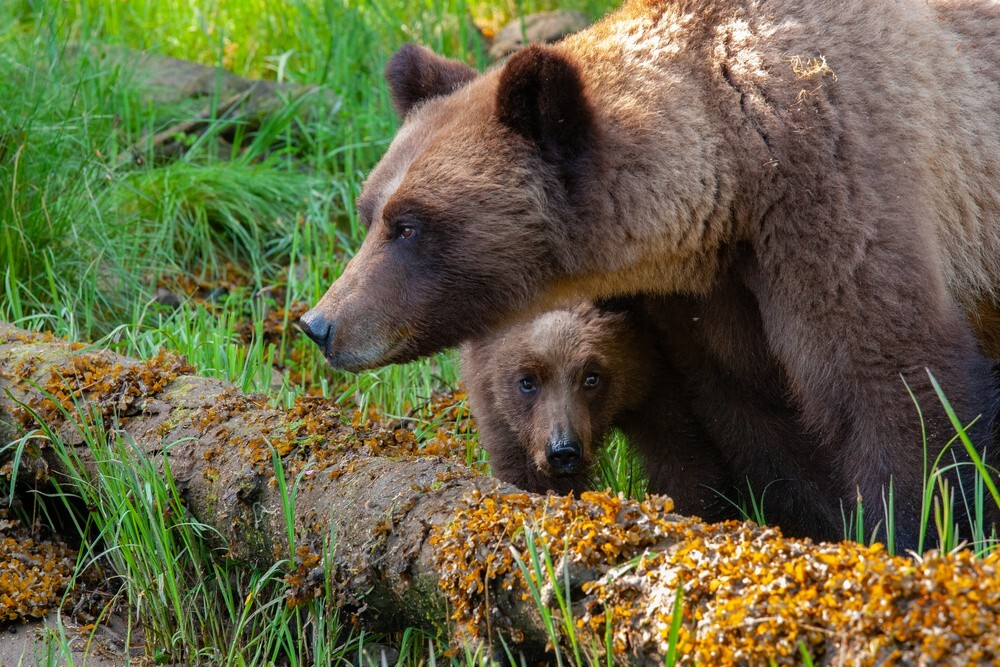
    There are instances where you will encounter a bear even before you reach your campsite. If you find yourself in this predicament, don’t panic. Your primary objective here is to be able to hike without catching the attention of the bear. You should move as subtly as possible, especially if there are mother bears and cubs. 

    The following tips can help you navigate your way to avoid a bear encounter in grizzly terrain. You can apply these tips if you are going to head to black bear territory. 

    • Don’t hike at dawn or dusk – This may seem obvious but hiking after dark is one of the most common mistakes made by hikers who want to see wildlife. It’s because animals tend to feed more often around sunset and sunrise. Therefore, when you go out early in the morning, you have less chance of seeing them. Also, keep in mind that wild animals like to sleep during the day. So, if you’re planning to camp overnight, make sure you set up your tent well away from their sleeping areas. 
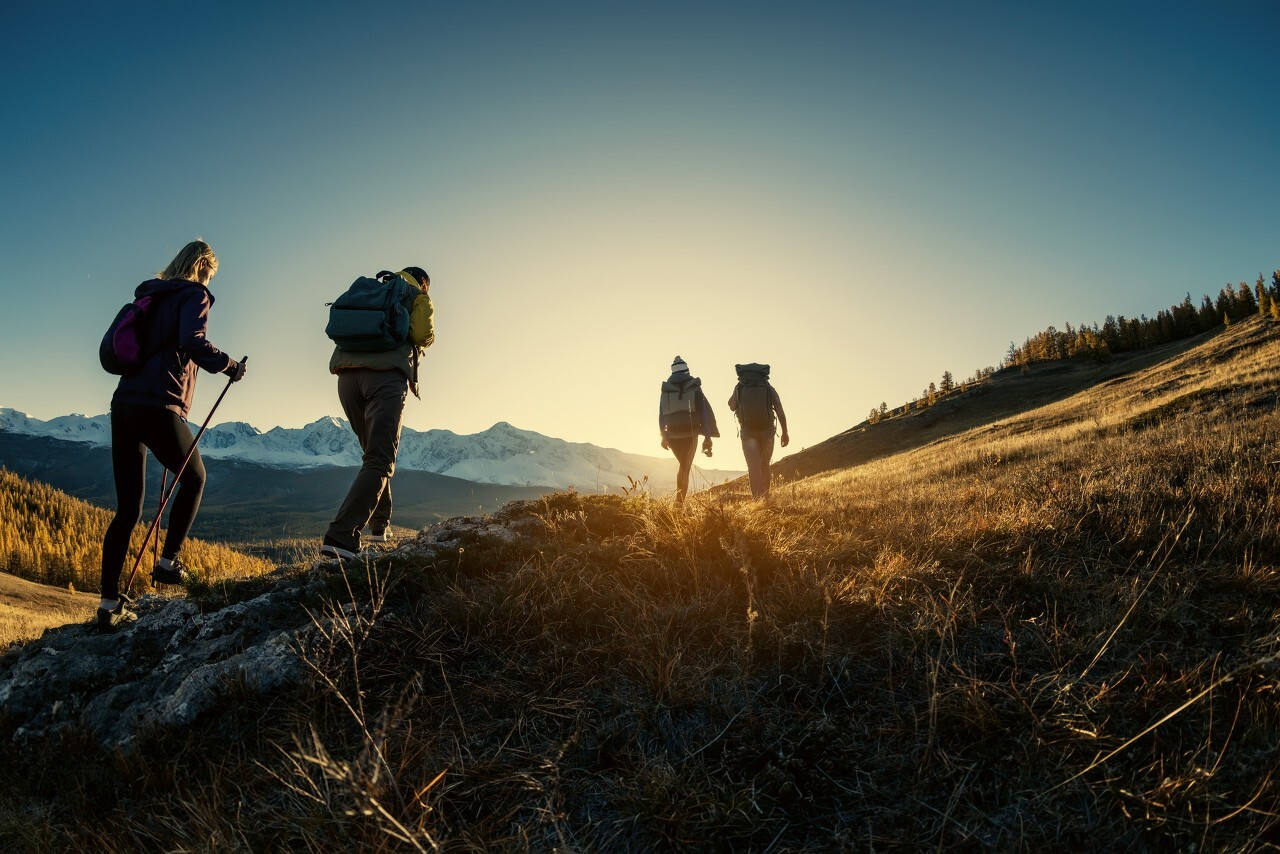
    • Stay in aggregate – When you travel alone, you increase your chances of being attacked by a bear. It has been proven that people who stay in groups (three or more people) have a lesser likelihood of being threatened by bears.
    • Create noises while hiking – You need to do this so that you will be able to notify the existing wildlife of your presence. Bears aren’t natural aggressors; they only attack if they feel there’s a threat around them. Once these bears are aware that you are there, they will try to distance themselves from you. However, you should never scream or whistle. These sounds are painful to the ears of the bear. Instead, you should just sing or clap your hands. Be wary of your surroundings, too. If there are gushing rivers, they might drown the sound you are making. 
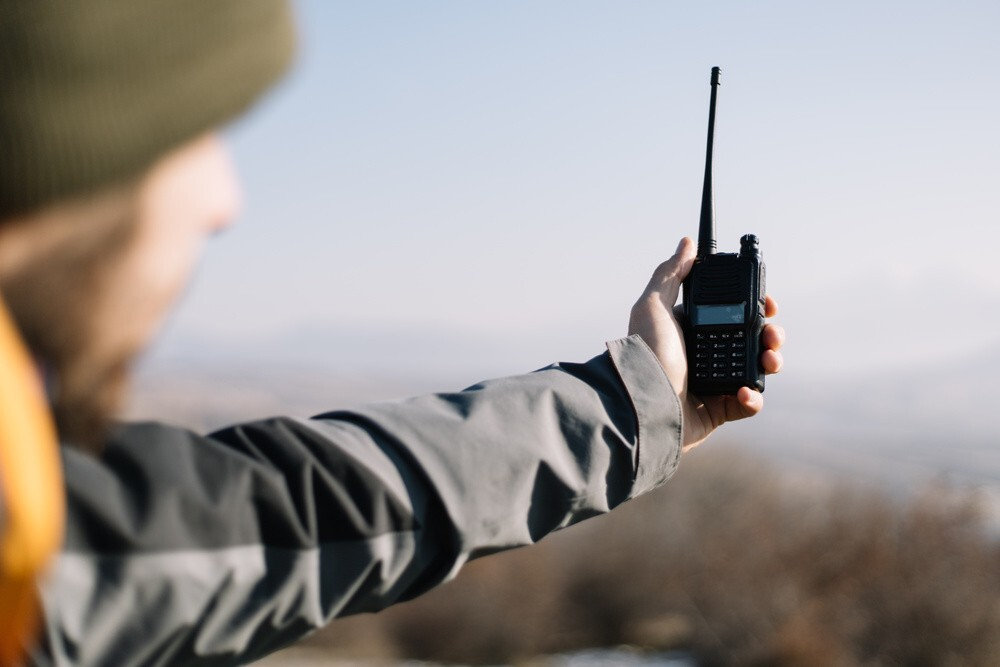
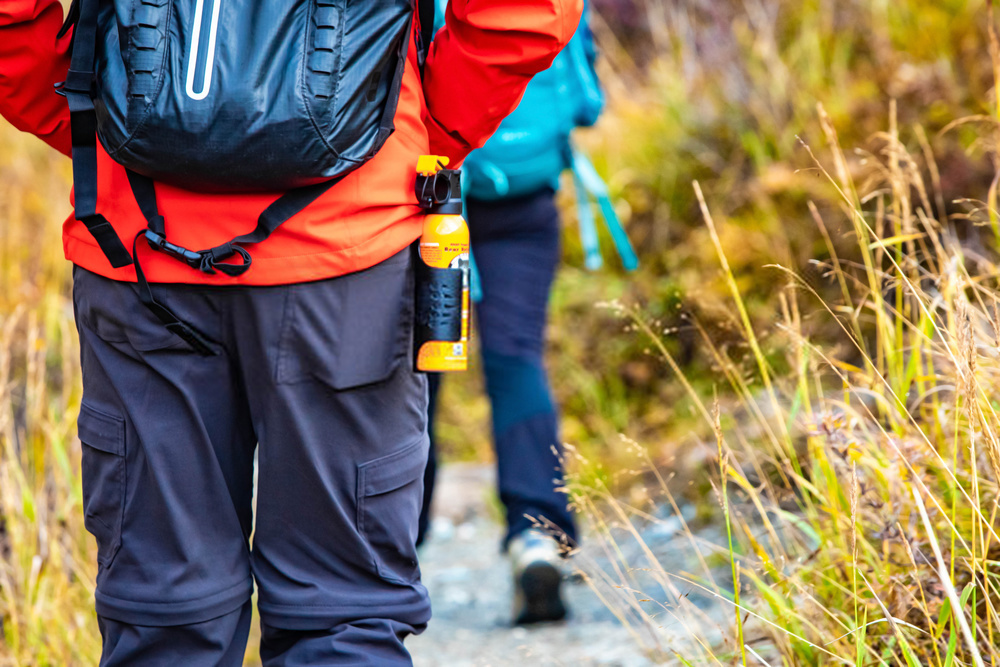
    • Bring a bear spray with you – There are times when you won’t be able to use noise to alert the nearby wildlife. That’s why you must carry bear spray with you. Make sure that you practice using it first before heading into the wilderness. Remember that you shouldn’t aim directly at the eyes of the animal. Rather, you should shoot its nose or mouth. 

    These bear sprays have red pepper on them. They can disrupt the respiratory system and eyes of any organism–including you. Hence, if the wind blows against you, the spray might head toward your face. Keep in mind that the effectiveness of these sprays is within the range of 10 to 30 feet. Always put the bear spray somewhere you can quickly access. 

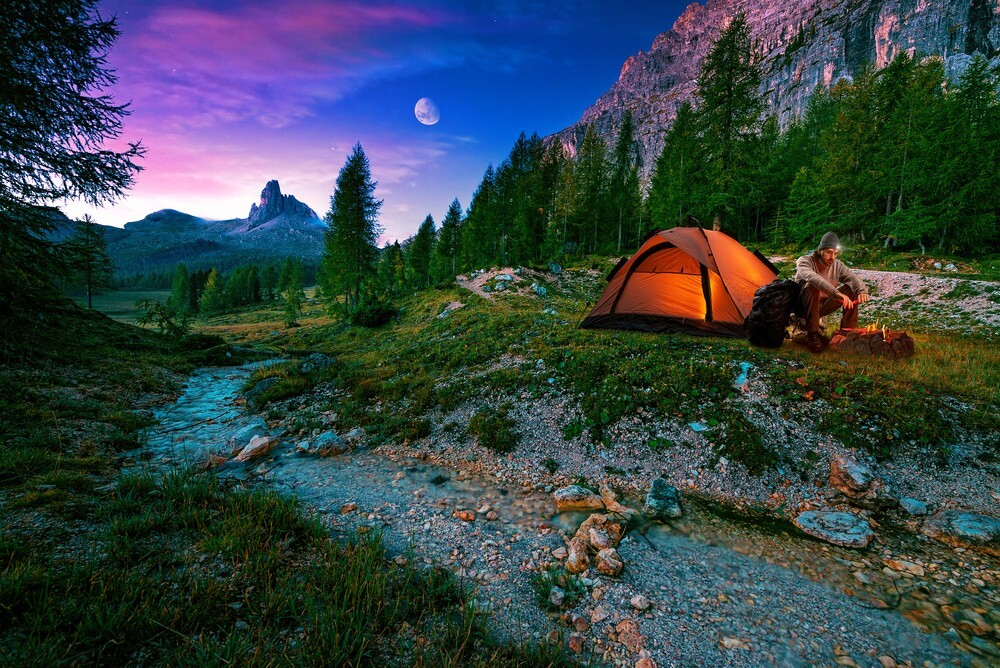
    How To Fend Off Bears From Your Campsite

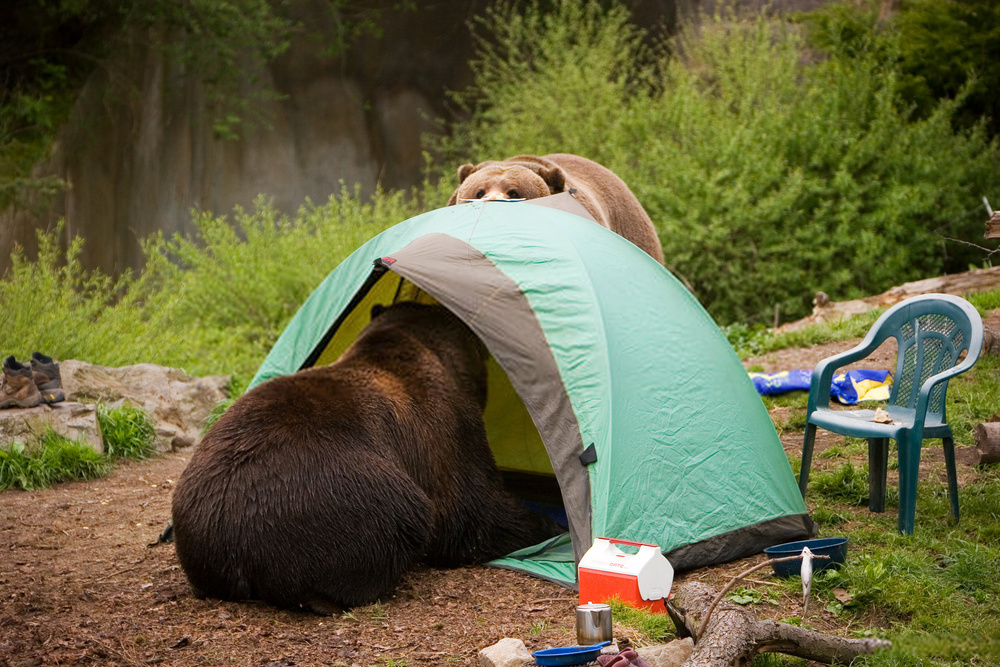
    Because of the frequency of human visitation to bear territories, it is not a surprise that there a lot of them have grown a liking to our food and delicacies. Of course, this is an issue since these foods are harmful to these creatures. Aside from that, it can drive the bears to visit and hunt food at various campsites, especially if they smell something sumptuous. 

    Bears don’t intrude at any campsite without any reason; if they are in your area, this means that there’s something attracting them. And there’s a good chance that it could be your evening or morning meal. To prevent these bears from entering your campsite, do the following things:

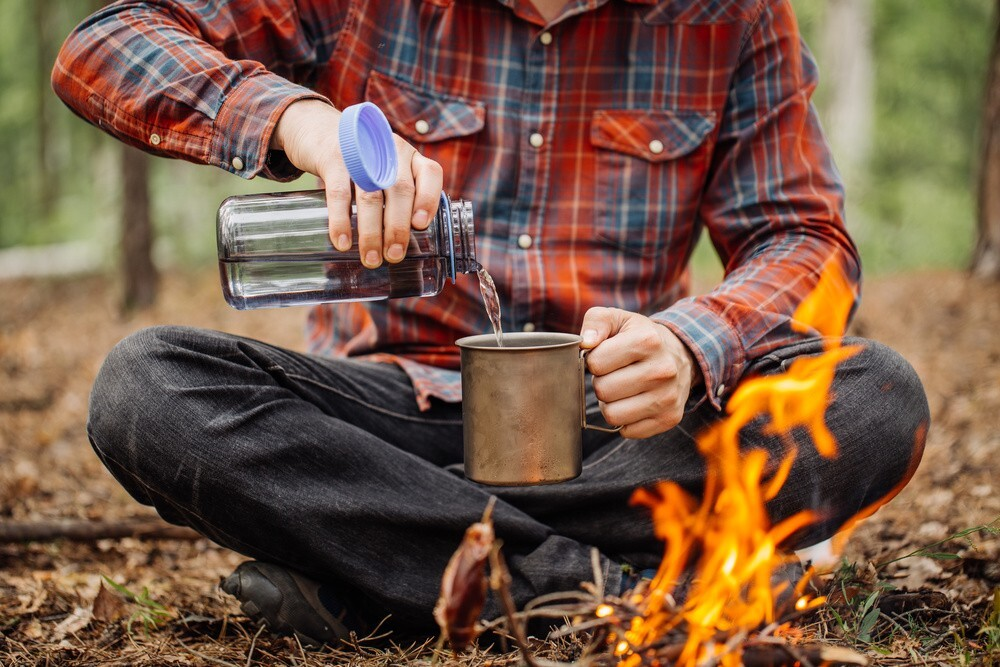
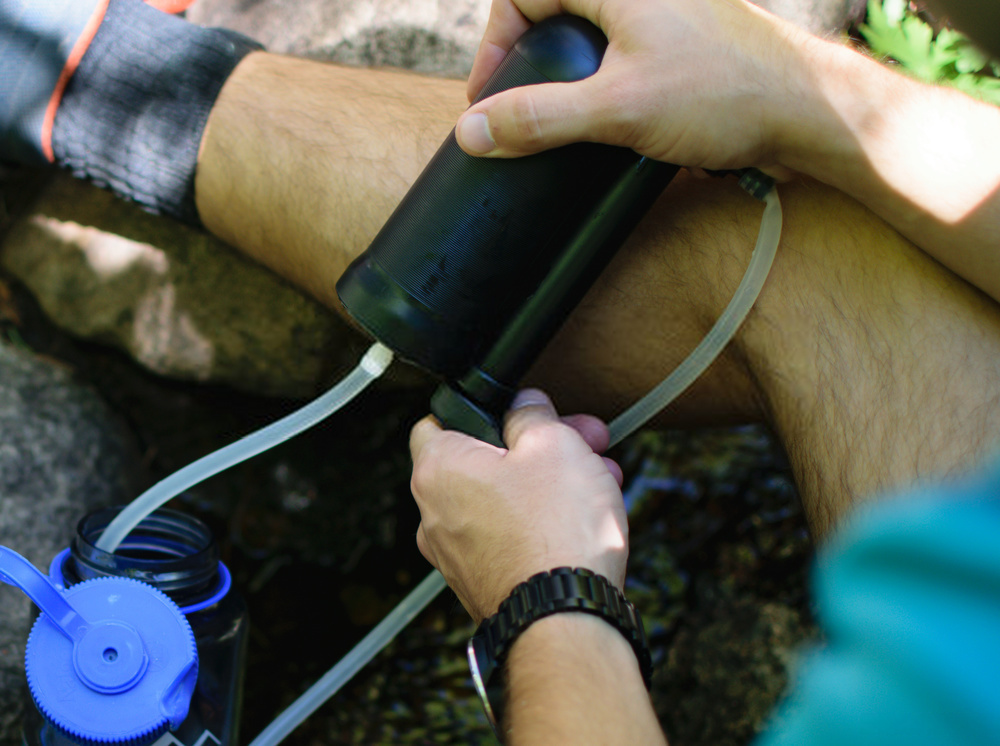
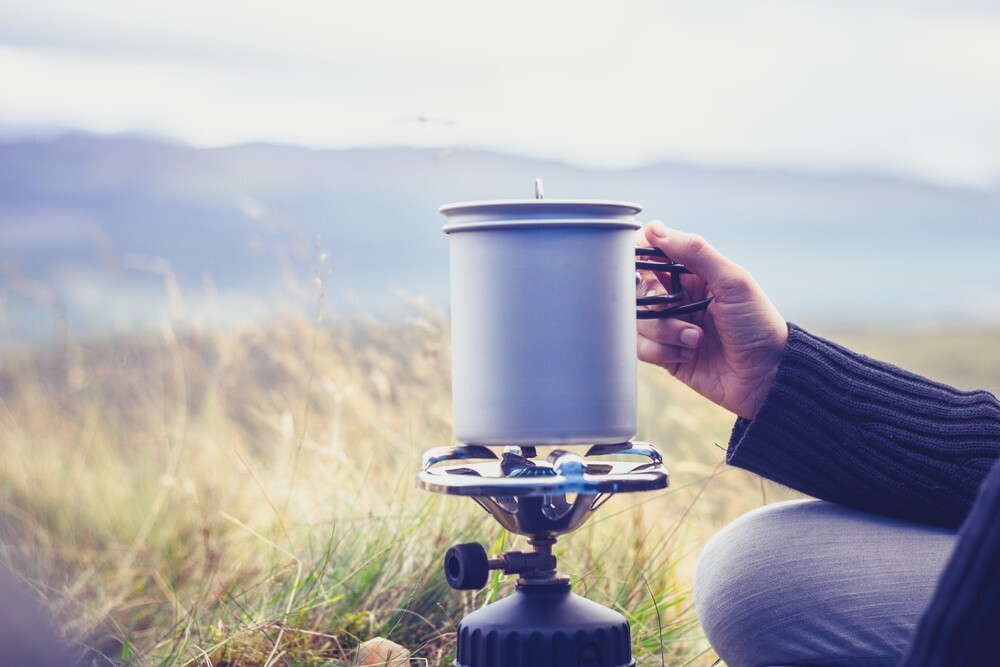
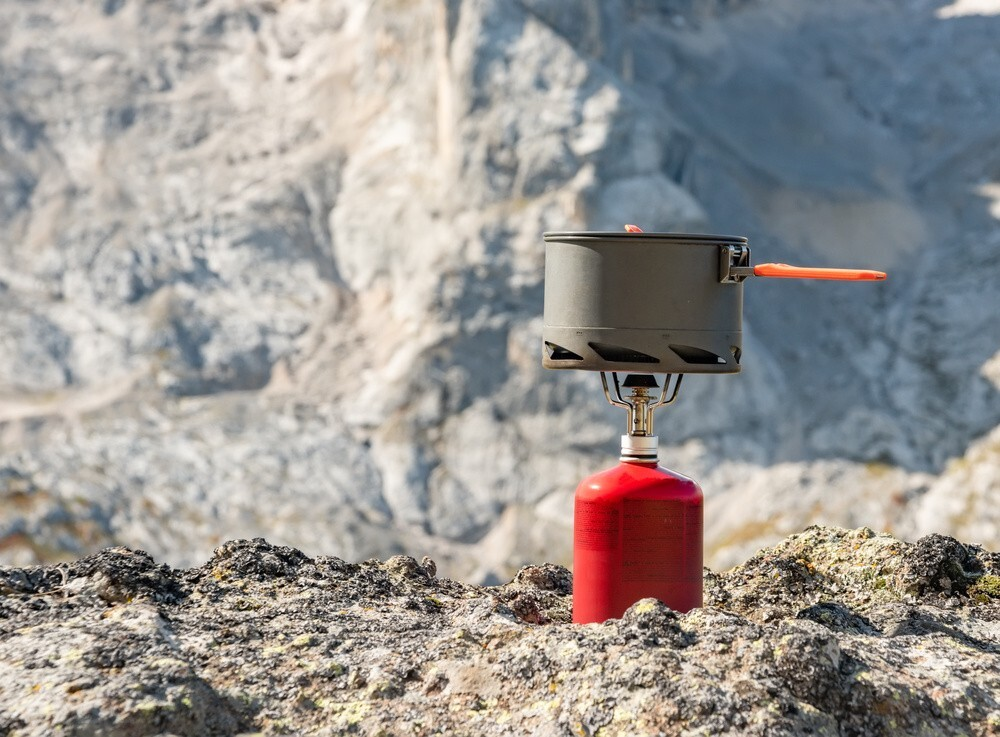
    • Store food properly – Don’t leave anything edible near where you cook. Put all your leftovers inside a container which you’ll place far enough from your cooking site. The same goes for your garbage cans. Place them at a distance from your camping grounds. 
    • Do bear-related food storage strategies – It is important that you have a bear canister, pole-hung bag, or metallic containers whenever you are in a bear country. This is because these items help keep away wild animals like bears. Also, make sure that you store your food well. For instance, you may want to hang your food up high. Or else, you can even bury it deep under the ground. But remember that you cannot hide everything from bears. So, always ensure that you’re storing some kind of bait as well. 
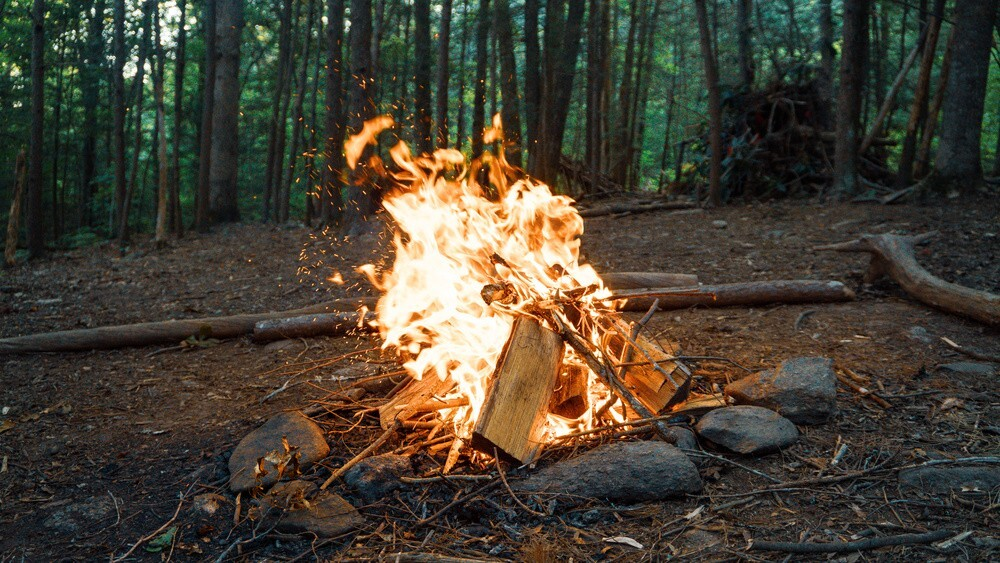
    • Don’t put anything odorous near your campsite – Bears are easily attracted to smell. Therefore, if you happen to find yourself in a campground where there are lots of smells coming out, then chances are that you’ve got a bear close by. Avoid putting your trash bins next to your tent. Likewise, avoid leaving open fires anywhere near your campsite. 

    What To Do If You Encounter A Black Bear Or Grizzly Bear?

    Most of the time, bears will stay away from the path of humans as long as they are notified of their presence. But at the same time, there’s no telling exactly how a bear would behave all the time. Therefore, it is essential that you exercise caution while you are in a bear country. 

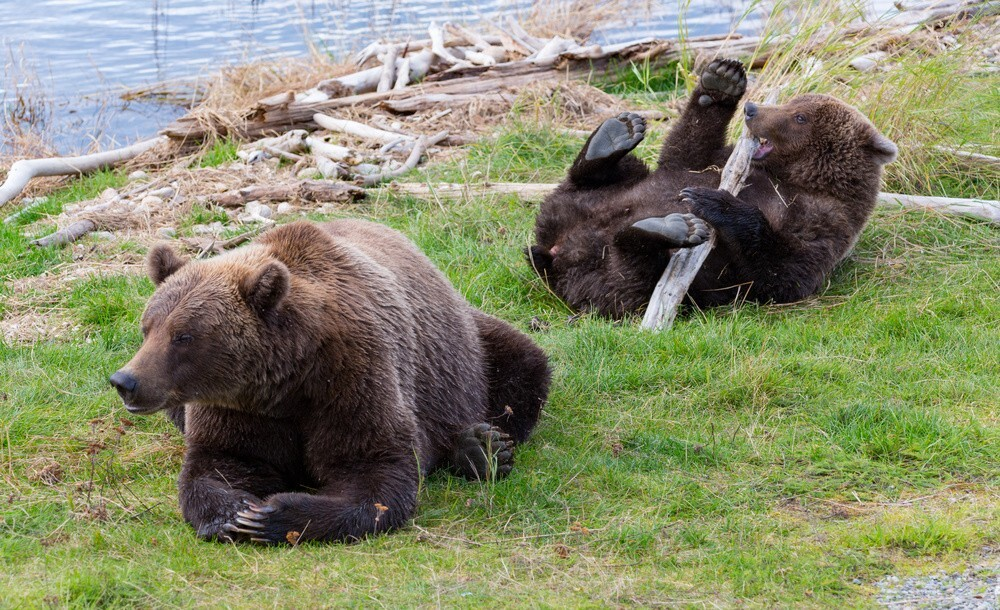
    The way you respond to these bears may vary depending on the kind of bear that you’ll encounter. Black bears and grizzly bears share a semblance in appearance, so it is not that easy to distinguish the two. 

    One of the distinct traits of black bears is the absence of shoulder humps. Moreover, they have tall ears and a straight face structure. Meanwhile, grizzly bears are known for their protruding shoulder hump and rounded ears. They also have a concave facial structure. 

    If you encounter a black bear, do the following:

    • You need to look bigger than the bear. Hence, you should raise your arms. You should also throw objects at it so that it will retreat. 
    • Get a stick or any available object for self-defense. 
    • If you are at a campsite, you need to put your food in the bear canister as you are moving away. You should never let the bear grab the food you are holding, even if it is a large cooking pot.
    • If the bear is seemingly interested in your food, drop it. After that, you should move away quickly. 
    • Even if the bear is apparently harmless, don’t drop your guard. Try to scare it away. 
    • Never play dead if the bear attacks you; fight back. Hit its nose and eyes. 

    If you encounter a grizzly bear, do the following:

    • Once a grizzly bear stands and stares at you, there’s a chance that it is assessing you. If this happens, you should not act up. Instead, look away and trace your steps back slowly. 
    • Grizzlies tend to make fake attacks. When they do this, their ears stand; they might start huffing their way toward you. Don’t panic in this situation. Remain on your location and try to talk to it. But at the same time, prepare your bear spray. Don’t ever turn your back. If the bear retreats, you should do the same, too.
    • You’ll know if the grizzly bear is making a full attack if it is silent and its head is lying low while it is charging. If this is the case, use your bear spray and jet it in the direction of the bear. When spraying, it should be low enough so that you can hit its head. 
    • If you don’t have bear spray, play dead. Line on your stomach and put your pack on your back. At the same time, cover your neck using your hands. Spread of legs and arms so that you wouldn’t be rolled over easily. If the bear flips you, then you should do your best to roll again so that you can return to your original position.
  • How To Camp Alone: 9 Tips For Solo Camping

    It is not a surprise that camping is often perceived as an activity for two people or more. Of course, I can’t also deny that being with your family and friends during this trip is downright exciting. However, this doesn’t mean that solo camping isn’t an appealing pursuit. 

    Going alone on a camping trip is exhilarating in its own right. Going on a solo trip to their favorite camping sites is a relieving thought for individuals who like solitude. And even if you are not into this thing, you should still try it even once. After all, it can give you the opportunity to organize your thoughts, have a breather, and enjoy the nature around you. 

    But of course, solo camping will require you to be extra responsible. In this journey, no one got your back except yourself. Hence, extensive planning must be done to ensure that the trip will be comfortable and safe. 

    I’ve listed some of the things that you need to do before and during a solo camping trip. Check them below. 

    Learn The Essential Camping Skills

    It’s not a good idea to go solo if you haven’t refined your camping skills. First, you need to be comfortable about the idea of camping and doing it alone. Keep in mind that even the most seasoned campers may find some challenges along the way. Therefore, it is important that you can hone your camping skills and learn some outdoor basics. 

    It is recommended that a solo camper knows how to do the following:

    • Navigation and learning the art of not getting lost
    • Pitching a tent
    • Building a campfire safely (always remember the Leave No Trace principle)
    • Finding water sources and filtering them effectively (using water filters)
    • Clearing your camping area from debris
    • Safe and proper food storage (especially if you are in a bear country)
    • Learning how to read the weather (always rely on weather forecasts)
    • First aid treatment and other emergency-response skills

    You may also learn some other stuff that is related to camping. But the list above is the fundamentals that you should master at all costs. After you have a good grasp on them, camping solo should be a doable excursion for you. 

    Have An Ample Time To Prepare

    Camping requires sufficient preparation. It shouldn’t be taken lightly, even if you are already used to doing it. Regardless if you are going to do it alone or with a company, you should be ready for it.

    There are a lot of things that you need to sort out before the big day. The first of these things is your gear. You need to bring the essentials of your trip, such as clothing, shelter, utensils, food and water, and other survival gear. You should also familiarize yourself with your destination. Get maps and other information regarding the area. Know the kind of terrain that you are going to deal with. In this way, you can adjust your gear accordingly, especially your footwear. 

    Also, there’s nothing wrong if you are going to practice in your house. Pitch a tent in your yard and sleep there so that you can gradually condition yourself in the outdoor setting. If possible, you should try and master your utilities, too. They would be useless if you didn’t know how to operate them. Be familiar with pitching tents, setting a camping stove, and using multi-tools. If you have a first-aid kit, better learn using it, as well. 

    Train Your Body

    Physical fitness is important for camping and other outdoor activities. Your body must be ready enough to handle the possible strains caused by hours of walking and trekking. Of course, you may want to skip this step if your destination is mostly accessible by vehicles. But if it will require you to trudge some trails and unpassable paths, training must be compulsory. 

    Walking and jogging daily can help you build your stamina. You might also want to traverse your local trails and nearest campsites to strengthen your endurance and ability to weather off discomforts caused by the heat of the sun, dirt, and other elements. If your destination has elevations, you should look for beginner-friendly hiking destinations. There, you would be able to improve your capabilities to deal with ascents. 

    Don’t Carry Too Much Load

    If you’re planning to go camping alone, don’t carry more than what you really need. This includes both physical items like backpacks and luggage and mental ones like books and music players. Remember that carrying excess weight makes you tired faster. Also, you’ll find yourself having trouble finding places where you could pitch your tent. So, make sure that everything you pack is necessary. 

    It is recommended that you learn how to streamline your load by identifying the only essential items for your trip. By having a good grasp of your terrain, the weather, and the time you are going to spend outdoors, you will be able to refine your camping equipment. 

    Prefer A Close Camping Site

    Campers aren’t restricted when it comes to their desired camping destination. They can explore any environment and wilderness they want. But at the same time, exercising prudence and discipline would allow them to pick the ideal destination that suits their needs and skill level. 

    If it is your first time going on a solo camping trip, it is recommended that you pick a close camping site. That means one which is not far from civilization or even near an urban center. These sites usually offer amenities, making it easier for campers to get supplies and services. On top of that, they are often located on flatlands, allowing easy access to roads and parking lots. 

    After completing your first solo camping, you can already extend your options when it comes to your next destination. Just don’t jump to the difficult ones right from the get-go. It is important that you can experience it all so that you’ll get used to the nuances and unspoken rules when you are outdoors.

    Inform Someone About Your Trip

    It’s best to inform someone about your plans before embarking on a solo camping adventure. In case something goes wrong during your journey, you’d have someone who knows exactly where you were last seen. And if anything happens to you while out there, they will know whom to contact immediately. 

    You can choose anyone among family members, friends, neighbors, colleagues, etc. The most suitable person depends on your situation. For instance, if you plan to travel long distances, then choosing a friend who lives nearby may work better. However, if you intend to stay within a short distance, then picking a neighbor would suffice. 

    Always Be Ready For Emergencies

    When you decide to go camping alone, you must always keep this fact in mind: emergencies happen unexpectedly. Therefore, you must prepare yourself mentally as well as physically. Make sure that you have enough food and water for your entire trip. Bring along some basic tools such as a flashlight, matches, fire starter, compass, map, knife, rope, whistle, cell phone charger, and emergency kit. Don’t forget to include these essentials in your backpack. 

    I suggest that you enroll in basic survival classes. You should do this because learning how to survive in harsh conditions is crucial, especially if you are traveling alone. If you haven’t done so yet, I recommend that you start with online courses offered by reputable institutions. There are many free resources available online. Some of them require registration, though. 

    Start Your Trip On Time 

    The earlier you leave home, the more likely you are going to be able to reach your destination without encountering delays. This way, you won’t waste precious hours waiting around for other people. Instead, you could spend those moments doing things like preparing meals, packing up gear, and checking weather forecasts. 

    Don’t Forget To Have Fun

    While going on a solo camping trip, remember to enjoy every moment of it. This includes everything from eating delicious meals to taking pictures of nature’s beauty. Also, make sure that you spend quality time with people around you. After all, having fun isn’t just limited to enjoying outdoor activities. It also involves spending time with loved ones. So, be careful not to miss those moments!

    You may also bring forms of entertainment such as books, music players, or even games. These items help pass the time while you’re away from civilization. They also provide an opportunity to learn new skills. 

    If you want to take advantage of the great outdoors, then you need to equip yourself accordingly. Remember that safety is paramount. That means being prepared at all times. As mentioned above, you must pack essential supplies, including food, clothing, shelter, and equipment.

  • What Is Fastpacking: An Introduction To The Backpacking-Trail Running Hybrid

    What is fastpacking? 

    I’m pretty sure that you have heard this term already. And even if you haven’t yet, it is not too late to get into it. 

    Essentially, fastpacking is the marriage between ultralight backpacking and trail running. If you like doing these endeavors, then I highly recommend that you try fastpacking! Here, you will need to be constantly moving; you have to jog or run throughout the trip. And if your destination has certain ascents, you need to hike them, too.

    Most of the time, fastpacking covers moderate to extensive distances. But for starters, a short route should be enough. This sport will require you to bring only the essentials of your trip. The lighter you are, the easier it is for you to trudge and traverse different terrains. Of course, that also lets you explore the deepest sections of your route. And compared to trail running, fastpacking lets you stay in the wild longer!

    What Is Fastpacking?

    Essentially, fastpacking requires you to blur the lines between backpacking and trail running. It is an excellent alternative to exploring different hiking spots and trail routes. You can do so by carrying light loads on your back while jogging through the wilderness.

    The most significant upside of fastpacking can explore more areas in a shorter amount of time than when trail running or backpacking. Since you have the essential gear with you, you would be able to rest, sleep, and run anytime you want. In fact, you can repeat this process as many times as you want. Of course, doing so would push you to your limits, but that’s the essence of fastpacking. It is about surpassing your physical and mental limits. 

    Many individuals who have been fastpacking already would agree that the adventure is truly liberating and immersive. It is a one-of-a-kind experience that they couldn’t get from other outdoor activities. 

    How To Prepare For Fastpacking?

    • Train your body – As mentioned earlier, fastpacking is all about pushing yourself physically. That means training your muscles and endurance levels. Start slowly at first, and gradually increase your speed until you reach your desired level. Remember, no pain, no gain. So don’t overdo it. Instead, focus on building up your stamina slowly. The best way to do this is by doing trail runs and hikes regularly. As much as possible, you should increase the frequency of your runs and hikes gradually. You should also train at the same elevation as your desired destination. In this way, your body will get used to the trip. 
    • One step at a time – There’s no need for you to rush things. When training for fastpacking, it is important that you begin on the smallest local routes. It doesn’t even matter if they are easy circuits. As long as you can complete them, that would give you a sense of accomplishment. Once you finish one route, you can start tackling larger and more difficult trails. While doing so, make sure that you are wearing the same backpack that you are planning to use on the big day. If you think that you are ready for fastpacking, you can look for out-and-back trails near your area. After that, you are free to explore new terrains within or outside your locality. 
    • Train with someone who is into fastpacking – If you are new to fastpacking, the challenges that you have to face will be tumultuous. Hence, it is always ideal that you can train with someone who has done it a couple of times. Experienced trainers can give you golden and never-shared tips that can help you complete the trip. You can also bring them on your move. Having a friend definitely elevates your first fastpacking experience. And the more you are on the trail, the safer things become. 
    • Prepare mentally – Before embarking on any journey, make sure that you’re ready psychologically. Don’t let fear hold you back. Be confident and positive. Your mindset matters just as much as how well you train your body.
    • Get used to the idea – Once you’ve decided to take part in fastpacking, prepare yourself emotionally. Make sure that you know what you’re getting into before starting off.
    • Have a realistic pace – It’s not a good idea to overdo things. You should never push yourself into danger. If you think you can’t move faster than you have desired, you are free to slow down. Just remember that there’s always another way around.
    • Get familiarized with the terrain – Being prepared doesn’t mean having everything under control. There may come the point where you need to improvise. Therefore, it pays to learn the basics of the area. Know its topography, weather patterns, wildlife, etc.
    • Learn basic survival skills – While fastpacking isn’t exactly camping, you still need to keep yourself safe. This includes knowing how to build fires, use tools, and stay hydrated. These are important life lessons that will help you survive even if something goes wrong.
    • Learn to navigate – Navigating is crucial for anyone who wants to travel alone. Knowing which direction to go and how far away certain landmarks are will allow you to avoid dangerous situations.

    What To Bring In Fastpacking?

    Fastpacking is a fascinating adventure because it is simple and in-depth at the same time. The trip will not require you to bring a lot of things. You simply need to stash all the essentials, but without compromising your convenience and safety.

    There’s still a need for proper planning to sort out the things you need for this pursuit. The right gear can help you achieve your specific goals; they can also let you acclimatize to your environment. 

    If you want to narrow down your fastpacking checklist, you can refer to the following guidelines: 

    • Weight – You should always mind the weight of your backpack when it comes to any outdoor application. This particular factor is dependent on other external influences, such as the season, weather, and even your preferences. For fastpacking, the most “ultralight” is a 12-liter pack with a base weight of around ten pounds or smaller. If you go this route, you will be sacrificing much of your comfort in exchange for unhindered mobility. On the flip side, individuals who want to have a comfortable sleep or mealtime should bring a 30-liter backpack with a base weight of at least 20 pounds. 
    • Backpack – Your backpack is an essential gear. Perhaps, it is the most important amenity that you should secure in your fastpacking trip. There are different types of packs, and each of them may offer you a varying degree of comfort and versatility. Some backpacks tend to get bouncy when they are full; such a tendency can be troublesome since it brings more strain to your shoulders. Other fast packers opt for backpacks designed for running. Some even opt for hydration vests and day packs! Of course, your needs are different from other people. Hence, you should try the myriads of options out there. You should prioritize comfort, support, and mobility in your selection. 
    • Clothing – You need to dress for the occasion. That’s a golden rule that you should follow whenever you are heading into the wilderness. There are various factors that can affect your outdoor clothing, such as the weather. In the aspect of fastpacking, you should consider clothes that are designed for running. They should be able to wick off sweat and moisture quickly. You should also bring a packet and lightweight jacket with you if it rains. Bringing an extra pair of shorts, socks, and a shirt is recommended, too. If the weather is cold, then you should bring a packable insulated jacket. 
    • Shoes – Your footwear is another crucial element that you must take care of before embarking on your journey. It is advisable to choose shoes that are suitable for hiking. These include trail runners, cross-trainers, and sneakers. However, you should make sure that these shoes fit well within your feet. Also, ensure that they do not cause blisters. A good pair of boots would serve you better than anything else. 
    • Food – Food is one of the basic necessities that every traveler requires. When it comes to fastpacking, food plays a vital role. You should plan ahead by bringing enough supplies for yourself and your companions. Remember that you cannot rely solely on what you find along the way. Therefore, you should carry some emergency rations just in case something goes wrong. 
    • Water Water is yet another necessity that you should never forget. The best option here is to use water purification tablets. Such products usually come in packets and bottles. You should only drink from clean sources like streams and lakes. Otherwise, you might end up getting sick. 
    • First Aid Kit First aid kits are very useful tools that you should keep handy during your adventure. They contain items that could help you treat minor injuries and illnesses.
    • Shelter – Shelter is another critical factor that you should always bear in mind. This includes tents, tarps, hammocks, bivy sacks, etc. Make sure that you have all the necessary equipment so that you will be comfortable at night. 
  • 16 Tips For Backpacking With Kids

    There are multiple benefits if you let your kids experience the outdoors. According to Sanford Health, outdoor activities can have a lot of benefits for children, such as improve children’s physical health, cognitive ability, and sensory skills. Hence, instead of just letting them stay inside your home while playing computer or video games, you should take them outside!

    But of course, backpacking isn’t that straightforward if you include your little ones in the equation. Hence, if you want the trip to be safe, fun, and memorable, you should do the following tips.

    Tips For Backpacking With Children

    Before The Trip

    • Start while they are still young – You should introduce backpacking and outdoor trips to your children while they are still young. The earlier they start, the easier it is for them to get accustomed to these activities. This will also help them develop a sense of adventure as well as independence.
    • Let your kids exercise – You can’t take your children on any outdoor trip if they have insufficient physical exercise. Before the big day, you should allocate a couple of days or weeks exercising with your kind. In this way, when it comes time for their first hike, they will already know how to handle themselves on trails.
    • Make sure they have proper gear – Make sure your child has all the necessary equipment before going on an expedition. It’s vital that they wear comfortable clothes with good ventilation to avoid any discomfort during the hike. Also, make sure that their backpack is big enough to carry everything needed for the day.
    • Practice at home – It is also essential that you do some dry-runs in your home. You should teach them how to wear and use their equipment properly. Moreover, show them how to pitch a tent in your backyard. After that, let them try to have an overnight stay in the kids’ tent. By doing this, your kids will have a good feeling about what they’ll encounter once they go out into nature.
    • Be observant – Part of the process is observing and guiding your children. While they are practicing, watch how they behave and react. Please don’t put too many expectations that they will make the right decisions immediately. Keep in mind that they are still young, and they have a lot of wiggle room to understand the fundamentals of backpacking, camping, hiking, and anything in between. It’s not a good thing to scold them if they do something wrong. 
    • Plan the trip with your kids – If you plan ahead of your trip, you don’t need to worry about things getting complicated later on. When planning, think about where you’re heading, what kind of weather conditions you expect, and other factors that may affect the trip. Letting your kid participate in the planning stage helps them learn more about the world around us.
    • Show them your eagerness – If you want your children to embrace backpacking, you should express your enthusiasm. Be excited about the trip. Don’t let them feel that you are just forcing them, or you are not into it. As long as you are passionate about this activity, then your kids will follow suit.
    • Bring their friends and pets – Your kids can get bored during the entire backpacking trip. Hence, it is always a good idea to invite their friends or bring along their pets. These companionship items will keep them busy throughout the journey. 

    During The Backpacking Trip

    • Pick an easy destination – If it is the first time for your kids, don’t burden them. You should pick a campsite that doesn’t go farther than two miles from the trailhead. In this way, you will be able to return immediately if there are emergencies or accidents.
    • Don’t forget the food – Food is one of the most important aspects of backpacking trips. Bring plenty of snacks and drinks so that your kids won’t run short of energy while trekking through the wilderness. They might even ask for treats like candy bars or cookies. This is why it is best to pack these foods in advance.
    • Keep them hydrated – Water is another crucial aspect of backpacking trips. Since children are typically active, they tend to move around. Hence, they easily lose to bodily fluids through sweat. In this case, you need to pack a sufficient water supply with you. Also, don’t forget to bring energy and sports drinks to replenish their lost electrolytes. 
    • Cater to the curiosity of your children – Don’t be too stern with your kids, especially if they are with you on an outdoor trip. For many adults, the things that kids do are useless. But in their perspective, what they do is exploring and learning. Since the outdoors is an excellent place for them to learn more about the world around them, try to stimulate their desire to be adventurous. Let them roam around, but make sure that you set some ground rules so that they can remain safe. 
    • Share the weight but not too much – If your little ones are capable of lifting some weight, then you should assign them a particular gear. This is excellent physical training for them. At the same time, it helps them develop their sense of responsibility and independence. However, you should always keep in mind that you shouldn’t give them bulky loads. As an adult, you are the one that should shoulder most of the luggage. Otherwise, they might be discouraged to go with you next time. 
    • Teach them independence – If you want your kids to become true backpackers once they grow older, you should start teaching them how to be independent on the trail. A good way to do this is by giving them their own supplies (such as water). Instead of sharing resources, give them the task of utilizing their own supply. Eventually, they will learn how to manage, conserve, and maximize whatever amenities they have. Another way of doing this is by assigning a particular chore to them while on the campsite. 
    • Smart trailing – If there are two or more adults in your backpacking trip, you should position one in the front and the other on the back. Your children should be in the middle so that you can keep an eye on them. Accidents can happen in an instant, so you should still be on guard when you are doing outdoor adventures with your kids. 
    • Safety above else – Regardless of where you go, it is crucial that you implement various safety measures to protect your kids from unwanted incidents. Let them carry an emergency whistle so that they can call rescue if they are lost. Moreover, flashlights are also essential since they help you find your way home safely after dark. Lastly, always ensure that you take  enough first aid kits so that any minor injuries can be treated immediately. 

    Essential Things That You Need To Teach

    • Navigation – It’s important that you can teach your children how to navigate their way while they are in the wilderness. They must know which direction leads to the nearest town, campground, etc. So, before setting out on a camping adventure, let them practice using maps and compasses. Moreover, you should also introduce the essence of navigational skills in a backcountry setting. In fact, you might want to enroll them in geocaching classes so that they can enhance their sense of direction. 
    • First Aid – First aid is very vital during backpacking trips. Make sure that you equip yourself with all necessary medical equipment such as bandages, antiseptic creams, gauze pads, tweezers, scissors, tape, etc. These items will come in handy whenever you encounter unexpected accidents. But most importantly, you should teach your kids how to use them properly. These tools would be useless if they aren’t utilized correctly.
    • Leave No Trace – Also, don’t forget about the “leave no trace principle.” Among the things that you can impart to your children, this guideline is the most crucial. When you’re hiking through the woods, make sure that you pick up everything that you bring into the forest. Don’t litter! And lastly, never ever burn anything down. The environment deserves better than what we’ve done to it.

    In Summary

    Backpacking with children isn’t easy. But at the same time, letting them know the joys that the outdoors can bring can make things worthwhile. Hence, you should always do your best to encourage them to get interested in becoming outdoor enthusiasts. That’s a generous favor that you can do for them. 

    I hope that you find this guide helpful. For other inquiries, feel free to ask me in the comment section below.

  • How To Stay Hydrated While Hiking And Backpacking: 10+ Tips That You Should Follow

    How to stay hydrated while hiking and backpacking?

    Hiking and backpacking are strenuous adventures. Hence, it is essential that you are fit and equipped with the necessary amenities to survive your trip. 

    One of the best things you can do is to ensure that you remain hydrated at all times. It is a simple tip, but it can help cover the miles and conquer terrain and altitudes. Not drinking water is a mistake commonly committed by hikers and backpackers. You shouldn’t be among them.

    Here are some hydration strategies that you should follow:

    How To Stay Hydrated While Hiking And Backpacking

    Know Your Needs

    The first thing you need to know about staying hydrated while hiking or camping is how much you actually need to drink. The amount will vary depending on what kind of hike you’re doing. For example, if you’re going for an easy day hike in the mountains, then you’ll probably only require one bottle per person. However, if you’re planning on spending several days trekking through rugged terrain, then you may have to consume more than just one bottle each time.

    You also need to consider whether you want to carry any additional supplies such as food or fuel. If so, then you’ll definitely need to take into account the weight of these items when calculating how many bottles you’ll need to bring along.

    You should also take into account these factors, too, so that you can determine the amount of water that you need to carry:

    • Climate – If the weather is humid or hot, then it is recommended that you drink a liter per hour. The same thing is true if you are hiking in high altitudes. While it is cool on the top, the air there is thin and dry. Hence, it is easier for you to get thirsty. If the climate is fine and you are not hiking on alpines, you can just drink at least half a liter in an hour. 
    • Level of physical activity – This factor depends on where you are hiking. If you are walking around town, then you don’t really need to worry about keeping yourself hydrated. But if you are out in nature, then you must make sure that you stay well-hydrated. If you are hiking, you lose a lot of body fluids in the form of sweat. You need to compensate for them. 
    • Individual requirements – Not all people have similar needs when it comes to water intake. For some, they can survive with at least 8 liters of water for 8 hours on a hiking trip. Other hikers might need to double that amount so that they can complete the trip. You simply need to take your previous experiences into account. Understand the needs of your body as it will help you determine the quantity of water that you need to bring. 
    • Overdrinking – There’s a condition called hyponatremia. It happens when a person drinks too much water but without replacing the lost electrolytes in the body due to physical exertion. In this aspect, hikers and backpackers are encouraged to include powdered sports drinks in their water. It helps them achieve safe levels of rehydration. Taking healthy snacks can also replenish the electrolytes in your body. 

    Hydration Tips

    Drink Water Before You Hike 

    If you plan to participate in outdoor activities like hiking, backpacking, rock climbing, etc., then drinking enough water before embarking on your journey is essential. When you start off, you won’t feel thirsty because you haven’t been exercising yet. As soon as you begin moving, however, you will become dehydrated very quickly. Therefore, it is essential that you keep yourself properly hydrated by consuming plenty of water throughout the entire duration of your adventure.

    Drink Often

    Instead of chugging water in large quantities, it is better that you take frequent but small sips. In this way, you ensure that you remain adequately hydrated even though you aren’t feeling thirsty. Also, try to avoid gulping down huge amounts of liquid since it could lead to stomach cramps. Instead, sip slowly while enjoying the scenery.

    Avoid Alcoholic Drinks Before The Big Day

    Alcohol has diuretic properties, which means that it causes dehydration. So, if you decide to consume alcohol during your hike, be careful not to overdo it. Drinking more than one alcoholic beverage every day may cause serious health problems such as liver damage. Moreover, excessive consumption of alcohol can result in vomiting and diarrhea. These symptoms indicate that you are already suffering from severe dehydration.

    Don’t Wait Until You Become Thirsty

    It is best that you drink water whenever you notice signs of thirst. Even if you aren’t thirsty, it is essential that you fill your body with the liquid that it needs. In fact, you should make it a habit to drink water regularly–even if you are not hiking or backpacking. But during outdoor activities, it is necessary to make this habit as frequent as possible. For instance, you can drink one to two liters of water before your hike. 

    Wear Sun Protection

    If you don’t want to get thirsty in a hot climate, you should wear sufficient sun protection. This is something that you should know already about. If your body is cool, it doesn’t lose too much water. Hence, your body should be equipped with essential gear such as hats, sunglasses, and protective lotions. Also, you can modify your layers to promote more ventilation. Don’t wear too many clothes, especially if the sun is blazing!

    Take Advantage Of Large Water Sources

    Researching your hiking or backpacking destination is essential when hiking. You see, it helps you identify if the area you are about to scale has water sources where you can fill up your bottle. If there are rivers and streams, utilize them to your advantage. In fact, you should drink at least a liter of water from these sources before you leave them. You don’t have to worry about the cleanliness of the water if you have water filters and purifiers. 

    Bring Water Filters Or Water Purifiers

    Water filters and water purifiers are essential tools for hikers and backpackers. If you are expecting a long day hike or multi-day trip, you should be packing these things with you. Their role is to remove the pollutants and contaminants in the water you took from the water sources you found. In this way, you’ll never have to worry about waterborne illnesses and poisoning (due to microplastics, heavy metals, and industrial wastes). A water filter deals with bacteria and small sediments. Meanwhile, purifiers are meant for dealing with viruses. 

    Examine Your Water Sources

    Keep in mind that even if you have water filters and purifiers with you, you can scoop water anywhere you want. That’s plain reckless. In choosing water sources, always go with those that are flowing (such as rivers and streams) and those that have pristine quality. Oppositely, you should avoid stagnant and murky puddles. Moreover, you should not take water from water sources that have animal wastes in the vicinity. 

    Drink A Lot When Hiking On High Altitudes

    When you’re hiking high altitudes, you need to consume enough fluids so that your body will remain hydrated. It is essential that you keep drinking water throughout your journey. You must do this because your body loses moisture faster than usual due to low air pressure. As a result, you may feel dizziness and headaches. These symptoms usually disappear once you start consuming liquids again. However, if they persist, then you might suffer dehydration.

    Drink A Lot When Hiking And Backpacking In Cold Weathers

    When you’re hiking during cold weather, you also need to stay hydrated. Many think that the low temperatures will reduce their need to drink. But that’s not actually the case. During winter, the air becomes dry, and the humidity gets low. These are the perfect ingredients for you to lose body fluid easily. To deal with this problem, you need to drink frequently. You may also want to drink hot water or beverages to ease the symptoms of frigidness. 

    Replenish Lost Electrolytes

    Every time you sweat, you are losing electrolytes from your body. And if you lose them, your stamina and overall performance in the hike would get affected. Of course, you can ignore the matter if you are just sweating for a couple of minutes. However, if you are doing vigorous physical activities like hiking, you need to deal with the problem. The best way you can replenish lost electrolytes is through sports drinks. Fortunately, tablets and powders are available so that you don’t have to carry bottled sports drinks. You can pre-mix them with your water containers and bring some extra pouches if you have to refill. 

    How To Deal With Dehydration

    Dehydration occurs when there isn’t a sufficient amount of liquid inside our bodies. This condition happens when we lack adequate amounts of water while exercising or traveling. Symptoms include headache, fatigue, muscle cramps, nausea, vomiting, confusion, irritability, thirst, and decreased urine output. There are two ways how dehydrated people could recover: by replacing the lost fluids via oral intake or intravenous infusion. For most cases, it is recommended that you replace the lost fluids orally.

    Drinking water should be enough to treat dehydration. Here, you should drink in small amounts but as frequently as possible. Furthermore, your body would recover faster if you add sports drinks and energy powders to the mix. They can help replenish the lost electrolytes and carbohydrates. 

    Don’t hesitate to seek medical assistance if you think that the condition is already severe. Dehydration can be fatal and should never be ignored.

    Be Wary About Overhydration

    Overhydrating yourself is another common mistake hikers make. If you overdo your water intake, it can lead to some severe problems. 

    Specifically, this condition is called hyponatremia. It is a rare condition, though. It primarily affects athletes and marathon runners. In this condition, the body experiences a dilution of sodium in the blood. Because of this, cells are affected, making them fully impaired. In the most extreme of situations, hyponatremia causes death. 

    Interestingly enough, the symptoms of overhydration are similar to dehydration. Hence, if you are wondering why you are experiencing fatigue and headaches even if you drank water, there’s a possibility that you overdid it. 

    To prevent this from happening, you need to include electrolytes in the water you drink. At the same time, you should not consume more than ten fluid ounces every twenty minutes. As a general rule, you shouldn’t chug more water than the sweat you are releasing. 

    In Summary

    Outdoor enthusiasts must know how to stay hydrated while hiking or backpacking. By following the tips listed here, you will avoid getting into trouble. Remember to always take note of any signs indicating that you might be suffering from dehydration. Also, remember to stay away from alcohol since it has diuretic properties, making you urinate more often. Finally, try to consume plenty of fruits and vegetables during hikes. These foods contain lots of potassium and other minerals that help maintain proper salt levels in your system.

    That’s it for now. If you have other inquiries, feel free to ask me in the comment section below.

  • How To Choose A Water Filter Or Purifier For Backpacking

    Do you know how to choose a water filter or purifier? If so, then this guide is for you. 

    Backpackers and hikers are required to have a constant source of replenishment. When it comes to this matter, water is an essential resource. Of course, the real challenge here is that when you are in an outdoor setting, potable water is pretty scarce. 

    Surely enough, you may encounter streams, rivers, puddles, and lakes along the way. But there’s no guarantee that they are safe to be taken in. Even if they have a pristine and unadulterated appearance, there’s still a huge possibility of being contaminated with bacteria, heavy metals, and other pollutants.

    Fortunately, you can combat this problem by having a water filter or purifier. With these devices, you will process any external water source and make them safe for consumption. 

    In this guide, I will discuss some of the essential factors in choosing a water filter and purifier. 

    How To Choose A Water Filter Or Purifier

    Before we discuss the technical aspects regarding water filters and purifiers, it is essential that we understand their difference first. In this way, you will be able to identify which of them you actually need in your adventure. 

    Water Filters And Water Purifiers: What’s Their Difference? 

    Usually, people use these terms loosely. For many, purifiers and filters are just the same. While it is true that their purpose is to make your drinking water as clean as possible, they achieve these things differently. 

    • Water filter – A water filter is designed to eliminate bacteria and protozoa in the water. These are contaminants that are common in outdoor water sources in the United States and Canada. If you are worried about E. coli, salmonella, cryptosporidium, and shigella, then you should pack a water filter with you. 
    • Water purifier – Meanwhile, water purifiers are designed to eliminate the existence of viruses in the water. It can be done through microscopic fibers, UV treatment, and chemical applications. The downside of most water purifiers is that they cannot screen out sediments. The only water purifier that can deal with these sediments is the MSR Guardian Purifier. 

    General Mechanisms Of Water Filters And Water Purifiers

    It is also essential that you know these water filters and purifiers work. To do this, you should understand their anatomy. 

    • All water filters include an internal cartridge or component that aids in trapping bacteria, protozoa, microplastic, and other types of pollutants. These elements have microscopic pores to ensure that they can do their job. In the long run, you need to replace or clean these cartridges. After all, they are susceptible to matter build-up. 
    • Meanwhile, water purifiers are using chemicals to eliminate viruses, which are impossible to filter if you just use a physical cartridge. There are also other mechanisms to kill viruses, such as ultraviolet light. 

    Keep in mind that a lot of water filters and purifiers are equipped with activated carbon. Activated carbon helps in reducing the smell and odor in the water. This element is also beneficial in removing contaminants in the water–such as pesticides. 

    Do You Need To Pre-Filter?

    One should understand that there are various elements that can pollute or contaminate water. For instance, debris and mud can easily compromise water sources such as lakes and rivers. 

    These particles can become a health concern. At the same time, they also impact the quality of the filter and its overall efficiency in doing its job. If the filter is processing too much mud, its lifespan is drastically lowered. 

    If you want to overcome this problem, you may need the service of a pre-filter. Fundamentally, a pre-filter is a component that helps eliminate large sediments and particles from the water. Before you process the water in the filter or purifier, you have to pass it first to a pre-filter. In this way, you can guarantee that your water filter or purifier will not be damaged easily. 

    You are free not to use a pre-filter. But there are a lot of benefits if you do so. For instance, it aids in improving the efficiency of chemical treatments. Moreover, it enhances the flow rate of water filters and reduces the need for you to clean the water filter from time to time. 

    But if you are using a UV filter, a pre-filter is mandatory. Just as I’ve said earlier, these water purifiers don’t have physical filters to deal with large sediments. 

    Types Of Water Filters And Water Purifiers

    You have different options when it comes to water filters and water purifiers. Here are they:

    1. Gravity Filter and Purifier

    Using a gravity filter and purifier is easy. Simply fill its reservoir and hang it somewhere. After that, gravity will do its thing by pushing the water to the filter before it proceeds to your water container. 

    Advantages:

    • They are quick and easy to utilize
    • They can filter large quantities of water at a time
    • Enables storing of clean water
    • Minimal effort on your part

    Disadvantages: 

    • Bulky and heavy
    • It’s not that easy to fully fill its reservoir
    • You will need to look for a platform to hand the filter
    • Generally expensive
    1. Pump Filter and Purifier

    A pump filter or purifier will require you to put it directly to the source and pump water from there. The pumped water will go through the filter before it proceeds to a reservoir or bottle.

    Advantages:

    • They can be used in shallow water sources
    • You can use them to process small quantities of water
    • Comes with replaceable cartridges and filters

    Disadvantages:

    • It is physically taxing to use them
    • They require extensive maintenance
    • They can be bulky or heavy
    1. Botter Filter and Purifier

    With a bottle filter, you simply fill it with water and drink into its mouth directly. They are just like your water bottle, except for the fact that they include a cartridge or filter inside them. Because of this design, they are a convenient choice for various backpacking and outdoor trips. As long as you can encounter water sources along the way, these bottle filters and purifiers are extremely useful.

    Advantages: 

    • Compact and packable; ideal for backpacking trips
    • Works well for single-person usage
    • A perfect choice if your destination comes with a lot of water filters

    Disadvantages:

    • Cannot filter water fast
    • Can only filter water in small quantities
    • Not for group use
    1. Straw Filters

    If you want something that is super light and compact, I suggest that you get straw filters. When it comes to portability, they are way better than bottle filters and purifiers. Their construction is akin to a straw. The only difference is that there’s a filter cartridge inside them to cleanse the water you drink. With straw filters, you can directly drink from a water source. There’s no need for a reservoir or container. Hence, it is an excellent choice for mountain bikers, trail runners, and hikers. 

    Advantages:

    • Compact and lightweight construction
    • Ideal for single-day trips on areas with numerous water sources
    • Great backup for water filters in multi-day backpacking trips
    • Extremely affordable

    Disadvantages:

    • Doesn’t have any means for water storage
    • Not a suitable choice for destinations with limited water sources
    1. UV Purifiers

    A UV purifier eliminates viruses through the aid of ultraviolet rays–hence, its name. But it doesn’t rely on the heat of the sun, though. Instead, the device is equipped with a component that generates UV rays to cleanse water. In a nutshell, UV purifiers work faster than traditional chemical purifiers when it comes to purifying water. But at the same time, you need to be hands-on when using them. 

    Advantages:

    • Speedy process of purifying water
    • Ensures that your drinking water has no viruses
    • Lightweight and easy to pack
    • Don’t produce unwanted taste or odor

    Cons:

    • It does not come with physical filters
    • Require the use of batteries on their operation
    • It doesn’t work well when processing large quantities of water
    1. Chemical Purifiers

    A chemical purifier is an effective choice if you want to deal with viruses, bacteria, and protozoa. Using it is pretty easy, too. You simply need to pour the chemical into the water and let it sit under the prescribed time. Most of the chemical purifiers today are using chlorine and iodine as their base. Moreover, they either come in pills, drops, and mixed agents. 

    Advantages: 

    • They are easy to use
    • Packable and lightweight
    • Inexpensive
    • Great for backpacking on international destinations

    Cons:

    • Does not come with physical filters
    • They add taste to the water

    Matters About Portability And Weight

    Since we are talking about water filters and purifiers for backpacking, it is essential that we put these factors into account. If the water filter and purifier are too big and heavy for you, you will have difficulties bringing them. For leisure camping, packability and bulkiness may not be a problem. But for backpacking and backcountry trips (where weight is an issue), you would need a water filter or purifier that is light and compact.

    But always remember that larger water purifiers and filters work better than their smaller counterparts. So this is still something that you have to keep in mind, especially if your destination has questionable water sources. 

    The smallest type of purifier that you can bring is tablets, drops, and pills. For filters, it would be these bottle filters and straw filters. Bringing these two on your journey might give you enough peace of mind. But then again, if you need a foolproof solution, you would really need those bulkier purifiers. 

    Flow Rate Of Water Filters And Purifiers

    There are cases where you’ll encounter the term “flow rate” when choosing filters and purifiers. Specifically, this term refers to how fast water can travel through a filter. It is commonly addressed as liters per minute. 

    Taking this factor into account is quite essential. After all, if you want to remain hydrated all the time, you need to have immediate access to water. If a filter’s flow rate is slow, you will need to wait for several minutes before you can drink from a water source. Oppositely, filters that have a high flow rate can give you access to clean water minus the waiting time. 

    But of course, you have to remember that the figures provided by manufacturers are just estimates. Sometimes, the actual flow rate may be faster or slower, depending on the quality of the water or the age of the filter. 

    In Summary

    Learning how to choose a water filter or purifier for backpacking is indeed essential. This particular knowledge will guarantee that you can utilize the water resources around you, preventing you from being dehydrated in the middle of your jaunt. There are various options to take, so you have to pick based on your needs and preferences. 

    Remember that you need a water filter when you need a defense against bacteria, protozoa, and sediments. For viruses and chemicals, water purifiers are the way to go. 

    As much as possible, don’t fetch water from muddy and murky water sources. Go for flowing sources, instead, such as rivers. You can guarantee that they have minimal contaminants and pollutants that you need to filter out. 

    Don’t forget proper hygiene, too, to avoid waterborne and foodborne illnesses.

    That’s it for now. If you have other inquiries, feel free to ask me in the comment section below.

  • 8 Best Places To Hike In Alaska

    Hiking in Alaska is definitely a trip that you should do even just once in your lifetime. It has a vast array of majestic glaciers, peninsulas, and crevasses. Local wildlife in the state has been preserved properly. From whales, bears up to the Alaskan ravens, this place presents itself as a must-visit destination for hikers and outdoor enthusiasts alike. 

    It’s not a surprise that Forbes ranked Alaska as the best state to hike throughout the entire country. And that’s not even out of sheer luck. After all, there’s no part in the United States where you can embrace yourself with thick woods, crystal-clear rivers, and well-storied peaks except in this alluring state. 

    Below are some of the best places to hike in Alaska. Whether you are an expert or beginner, there’s something for you here.

    Best Places To Hike In Alaska

    Denali National Park & Preserve

    Denali National Park & Preserves is one of the most popular hiking destinations in America. The park covers over six million acres of land, which makes it one of the largest national parks in the U.S. This sprawling expanse of wilderness offers visitors a wide range of activities from camping to fishing to mountain climbing. There are also plenty of trails within the park, so you don’t have to worry about getting lost while exploring its many nooks and crannies. 

    Once you are here, you’ll witness its beautiful taiga forest, which, in turn, will lead to snowy mountains and tundra sitting atop tall alpines. Of course, it is here where you’ll see the towering peak of Denali, which is considered the tallest peak throughout America. Wildlife is also sprawling here so that you can feel you are one with nature.  

    Kenai River Trail

    The Kenai River Trail is a backtrail within the proximity of Cooper Landing, Alaska. It is a 16.4-kilometer trail that stretches along the banks of a turquoise river. You can enjoy the scenic beauty of the trail by taking a walk through the lush green forests and meadows. If you want to get closer to nature, then take a kayak ride down the river. 

    Meanwhile, those that want to see the Kenai River canyon should traverse the first half-mile of the trail. It will lead you to the trail’s upper section. While you can still get good views of the river on the trail’s lower section, they aren’t that majestic. You are also allowed to camp along the Kenai River–and that’s where the lower section comes in. Backpacking stoves are essential here to reduce environmental impacts. 

    Resurrection Pass

    Resurrection Pass is a 72.3-kilometer trail within Hope, Alaska. It passes through the Kenai Mountains and is considered to be among the most famous multi-day route for backcountry trips throughout Southern Alaska. Interestingly, this trail is ideal also for mountain bikers and skiers, especially if the snowy season engulfs the entire state. 

    This hiking trail has historical connections with various gold mining spots in Hope. A trailhead can also be found close to the Cooper Landing and Kenai River. Resurrection is a beloved route for locals and tourists alike. It has a dynamic wilderness that provides complete camping amenities for backpackers. It doesn’t even require bushwacking. Resurrection Pass is also a good choice for starters because it features an easy-to-follow path. You’ll encounter various ecological areas here before you witness a great, vast tundra. 

    Winner Creek

    Winner Creek is an easy day trip if you’re looking to escape the crowds of Seward or Anchorage. This 7.9-kilometer trail offers excellent views of the bay and plenty of wildlife within Girdwood. You can start your hike at the base of Alyeska Resort and tread the trails and boardwalks until you hear the sound of flowing water. Continue hiking, and you’ll eventually find yourself across a picturesque gorge. You can rest here and snap some share-worthy photos. However, this isn’t the most iconic part of the trail; it is the hand-pulled tram that has been suspended on a mountain creek!

    Hiking along the trail will let you explore the historical and natural wonders of Chugach, which is a temperate rainforest located in the uppermost portion of the United States. This wooded forest is brimming with wildlife and also offers some traces of gold mining spectacles. Mountain bikers can also enjoy the trails and routes within Winner Creek.

    Exit Glacier

    It’s not easy to explore glaciers, as you can’t really stroll on most of them. Hence, if you are given the opportunity to explore one, you have to grab it. In Alaska, the Exit Glacier is among the few glaciers where you can stroll and hike. And you don’t even need to go that far to reach this place. Its distance from Seward is just a 15-minute drive. 

    Specifically, Exit Glacier is situated in Kenai Fjords National Park, and it has been considered one of the most visited glaciers in the entire world. It got its name from the backcountry explorers who first ventured into this place. This hiking route is 3,000 feet below the Harding Icefield. Simply descend to the Harding Icefield, and a grand, scenic ramp will greet you. It gives off an ancient feel; you’ll find old snowy forests and rushing streams here. 

    Chilkoot Trail

    From being a former trade route, the Klondike Gold Rush was transformed to become a highway for hiking enthusiasts. Today, it is known as the Chilkoot Trail–a 33-mile outdoor trail famous for its spectacular scenery and winter-driven wildlife. It’s one of the most popular hikes in Alaska; every year, it gathers more than 10,000 people to backpack, camp, or hike this corridor. As you pass through its routes, you will see numerous artifacts from the previous gold rush in the area.

    The trail starts in Dyea, a campground and a formerly bustling town. From its trailhead, the route will take you to a green rainforest alongside the Taiya River. Campers can stay in Finnegan’s Point, as it is the first campsite you’ll find in the area. It’s a beginner-friendly trail as the terrain is primarily flat and grounded. After Finnegan’s Point, you’ll experience a sudden drop in the temperature, thanks to the snowy mountains and ice fields within the trail. You’ll find a number of streams cascading the mountainsides. On your first night, set your camp at Canyon City. Here, you’ll find a lot of various artifacts from the gold-rush era.

    Reed Lakes Trail

    The Reed Lakes Trail offers visitors a chance to experience one of the most beautiful hikes in Alaska. The trail takes you through lush forests, past waterfalls, and the eyes of its local wildlife. It is a popular hiking trail in Alaska since it isn’t that technical as compared to other hiking trails in the state. It is just a 4-mile hike located in the Hatcher Pass area–approximately two hours from Anchorage.

    As you pass through the waterfalls, you will encounter a lake where all the water from the falls is being drained. Continue your journey until you reach a tarn where you can rest and take photos of the scenic wonders around you. The trail itself will also let you witness the towering peaks of Alaska. 

    Iditarod National Historic Trail

    One of the best places to hike in Alaska is the Iditarod National Historic Trail. After all, it’s the only National Historic Trail in the entire state. The latter includes a network of winter trails–fully extending up to 2,300 miles. It connects to various native villages in Alaska and supply routes back when the Alaskan Gold Rush was still at its height. 

    However, keep in mind some parts of the trail aren’t that accessible without wearing a snow cover. You may also need webbed footgear and ample defense against mosquitoes. But you can shrug off these things if you head to its sections on the Nome and Kenai Peninsula. Here, year-round hikes and trail runs are all possible. 

  • Hiking Etiquettes: To Other Hikers & Your Group

    Backpacking is a favorite activity of many people today. It is a popular outdoor adventure that many are invested in. Week in or week out, many are heading to various destinations to experience the beauty and thrill that nature offers. 

    However, did you know that the proper etiquettes can make your backpacking trip more enjoyable and safer? It also helps other backpackers experience the same delight as you do.

    I have listed some of these essential conducts below. Take time to read them and apply them in your next backpacking or hiking adventure. 

    Hiking Etiquettes

    While On The Trail

    • Give way to hikers going uphill – You can assist other hikers by giving way to them, especially if they are ascending. Uphill is harder than downhill, and you are giving other hikers a breather while scaling the steps. 
    • Give way to small groups – Just because you are hiking in a bigger group doesn’t mean that you can own the trail. Prudent hikers would always give way, especially to those small-group and individual backpackers. It is essential that the last person in the group say “hiker back” so that all members would switch to the right. 
    • Remain on the trail – There’s a benefit if you stay on established trails. First, it preserves the wildlife around you; you are not stepping into potentially endemic plants and creatures on the ground. Second, you are preventing erosion from happening. If you keep on trampling on erosion-prone areas, you are increasing the possibility of disasters in the long run.
    • Remember to greet other hikers – I know that this one is quite an odd thing to do. But there’s no harm if you are going to try this. It is a way of notifying others that you are a friendly passerby. Moreover, by doing this, you are indicating your presence to other backpackers. In emergency situations, that might really help you out. 
    • Rest away from the trail – When you drive your car on a busy highway, you wouldn’t want to halt in the middle because the other driver in front of you suddenly stopped to park. Similarly, you wouldn’t want others to block your way whenever you are backpacking or hiking, especially if the trail is narrow. If you want to rest, feel free to step away from the lane. In this way, you wouldn’t obstruct other people, such as those who are ascending. 

    While Hiking With A Group

    • Learn the art of communication – It is essential that you communicate to your group your plans for the trip. You should never be spontaneous when giving updates or instructions. As much as possible, the members of the group should already know what to do before the big day. Well, you can always re-adjust your plans, but you should do it comprehensively so that everybody gets notified. 
    • Adjust your pace – When hiking or backpacking with a group, it is important you consider your companions. If you have a member that walks or moves slowly, you should adjust your pace to them. If you think that it is too much, then inform everyone that they should hike based on the most comfortable pace. But at the same time, you have to make sure that you’ll meet at a certain location or landmark to rest or eat.  
    • Give others time to rest – Also, it is crucial that you are aware of the endurance levels of your party. If you are aware that someone is exhausted already, slow your pace and let them catch you. Once they reach you, let them have a break. Veer off from the trail so that they can regain their strength. Doing this is quite important, as it prevents potential injuries and unwanted incidents. 
    • Notify others if there are hazards and obstructions – As long as you are backpacking in a group, you have the responsibility to notify others of existing threats and problems in the trail. In unfavorable conditions, such as rainy weather, you should be keen on doing this task. Who knows? It could save someone’s life. 
    • Provide ample space – Since you are already in the wild, there’s no need for you to be physically close with each other, especially while on the trail. Aside from being uncomfortable, being too near to your group members gives off that awkward feeling. Just give space so that you can enjoy the breeze and scenery. 
    • Don’t nag and complain – If you aren’t enjoying the trip, you should just keep the feeling by yourself. If the unpleasant feeling is just because of a ruined preference, just don’t address it, especially if others are enjoying the activity. Considering other’s experiences is a must when it comes to backpacking as a group. However, if you are experiencing discomforts (such as body pains), don’t hesitate to share them. 
    • Bring your own tools – While it is true that you must become a team player in this situation, it is crucial that you don’t become a burden. Specifically, what I am saying is that you have to be responsible for your needs. You have to bring your utilities and gear. Don’t share cups and utensils with your other members. You should bring your own sleeping bag or tent if you are expecting an overnight stay. 

    Practice The “Leave No Trace” Principle

    The “leave no trace” principle is an important ingredient to responsible backpacking. It contains particular guidelines that can help you enjoy the trip but without damaging the environment, you are in. 

    Here are the core concepts of the “leave no trace” principle:

    • Plan ahead and prepare
    • Travel and camp on durable surfaces
    • Dispose of waste properly
    • Leave what you find
    • Minimize campfire impacts
    • Respect wildlife
    • Be considerate of other visitors

    In Summary

    Backpacking should be a fun and worthwhile activity. It is something that you and I can enjoy. However, we should keep in mind that we should do this pursuit without compromising the environment and other backpackers. It would be best if you are aware of your actions so that you can keep things peaceful, safe, and convenient. 

    That’s it for now. If you have other questions, feel free to drop them in the comment section below. 

  • 8 Proper Etiquettes In Two-Way Radios (That Can Improve Its Effectiveness)

    This world has been dominated by the latest technological advancements–from high-speed computers to smartphones. However, this doesn’t mean that the past tools and devices are no longer needed today. A good example is a two-way radio. 

    These devices have been existing for more than eight decades already. Until, it is still a vital utility that is being used by security personnel, rescue teams, and rescue responders. Even outdoor enthusiasts find these two-way radios exceptional communication tools.

    If your job requires the use of these radios, it is essential that you know how to use them. Keep in mind that they don’t work like your smartphones. Both the radio users can’t talk at the same time; you should wait for the other user to stop talking before you can talk. Hence, it is essential that you know some of the etiquettes that could help you use these radios efficiently. 

    Here are some of the essential two-way radio etiquettes that you should know. 

    Important Two-Way Radio Etiquettes

    1. Be Familiar With The Two-Way Radio Lingo

    There are particular phrases, terms, and words that are used in two-way radios. You use them every time you speak, greet, bid goodbye to other two-way radio speakers.

    You see, these codes are mandatory whenever using two-way radios. After all, your regular speech isn’t always transmitted clearly on these radios. Hence, mastering these codes would enable you to communicate messages over the radio more effectively. 

    Here are the standard codes used in two-way radios:

    • Stand-by – This means “please wait.”
    • Affirmative – A word for “yes” or “agreed.”
    • Negative – A word for “no.” 
    • Over – You hear this most of the time. The code “over” signifies that you have done talking. Use this at the end of the sentence so that other users will know that it is their turn to speak. 
    • Roger/roger that – It is a code that translates that you comprehended the message being relayed to you. 
    • Copy – Similar to “roger,” the word “copy” or “read” indicates that you understood the other user. However, these words are used within a sentence.
    • Out – A term signifying that the conversation is over. 
    • Wilco – When you hear this, it means that the other user will follow or comply with your requests or instructions. 

    2. Always Introduce Yourself

    Most two-way radios and walkie-talkies don’t give you caller IDs. Hence, if you use them, the other party won’t know who you are. The same thing is true with them. Because of this feature, anyone can use these two-way radios.

    Therefore, it is beneficial if you introduce yourself before you start talking. Moreover, don’t forget to address the individual you are talking to before you indicate your name or identity. By doing this, confusion won’t be stirred up.

    3. Don’t Forget To Pause Before You Talk

    Users of two-way radios must learn how to pause for a few seconds before they press the PTT button (press-to-talk) so that they can speak. This simple act will ensure that your very first words won’t be chopped. Otherwise, you will need to repeat what you have said, which would waste your time and the other party’s time. 

    In emergencies, time is indeed essential. The few seconds of pausing before speaking might save your life.

    4. NATO Phonetics Are A Must

    The NATO Phonetics are essential in radio communication. For instance, if you have to spell out something, there’s no need for you to use the actual letters since some of them sound the same. Instead, it would be best if you use the North Atlantic Treaty Organization (NATO) phonetic alphabet. This phonetic system is using words that are directly correlational to the standard English alphabet. Hence, you’ll never confuse anyone. 

    Suppose you are going to spell out the word CAR on a two-way radio, then you should do this like this: Charlie, Alpha, Romeo. 

    5. Always Be Concise And Direct To The Point

    When using a two-way radio, be aware of the time or duration you are speaking. You are not meant to talk over them for too long, which is the same way you do when you are using a smartphone. The intention of these two-way radios is to give short messages to another person. 

    But how about if you are going to deliver a communication that requires a detailed explanation? What if you want to send an instruction to other parties?

    Well, if you are going to do this thing, you have to utilize the word “break” right after you say one sentence, then release the PTT button right away. This will enable the other user to speak if they need to. If they said “affirmative” or “roger that,” then you can proceed to talk.

    In a nutshell, two-way radios must be one at a time.

    6. Don’t Interrupt Others When Talking 

    Corresponding to the previous etiquette, it is essential that you don’t interrupt the other speaker. When someone is talking, don’t interrupt. Let them finish before you talk. The only exception here is that if you are in an emergency and you need to inform them about your situation. If you are in this situation, you should repeatedly say the word “break, break, break.” Once the other parties hear this, they will let you speak right away.

    7. Try To Speak Clearly

    If you are using two-way radios or walkie-talkies in a normal setting, you should speak normally, too. Specifically, you need to talk at a moderate pace–not too fast, not too slow. Moreover, your voice should be audible enough. However, you should never shout either. When speaking, you should keep your mouth at a distance at the microphone of the radio–at least 3 inches afar. In this way, your voice won’t be too loud. 

    8. Always Be Wary That Others Can Hear You

    Whenever you are talking to a two-way radio, you have to be reminded that your conversation might not be private (even if you are using a two-way radio with privacy codes). A frequency is not exclusive to you or your group. So there’s a good chance that other two-way radio users can get in and hear you talking. Because of this, it is recommended that you avoid sending sensitive information on your radio.

    In Summary

    Additionally, it is essential that you speak in the English language whenever using a two-way radio. After all, it is the official language of two-way radios throughout the world–even if you are in a non-English speaking country. Once you can follow these said etiquettes, you will be able to use the two-way radio effectively. Communicating with your group or colleagues would be a lot smoother!

    That’s it for now. If you have other inquiries, feel free to ask me in the comment section below.

  • How To Choose A Two-Way Radio

    How to choose a two-way radio?

    For hikers and off-the-grid explorers, two-way radios are essential equipment. They allow quick and uninterrupted communication with other people who are currently situated in other areas. 

    Since we are talking about outdoor applications, it is necessary that the radios should be durable, rugged, and compact. But of course, they aren’t the only features that you need to consider. If you want a high-quality two-way radio, the following features should be taken into account. 

    How To Choose A Two-Way Radio

    The best way to know these two-way radios is by understanding their anatomy. Fundamentally, you need to have a grasp on how they operate and the things that make them function the way they do. 

    Below are some of the essential features of two-way radios. Be familiar with them so that you will be able to refine your choices. In this way, you can narrow your selection and get the two-way radio that suits your needs and budget well. 

    Essential Features Of A Two-Way Radio

    • Weight and size – In buying a two-way radio, it is crucial that you check its size and weight. You should be conscious of these factors, primarily if you intend to use the radio for backpacking and ultralight hiking. A lightweight and compact radio is undoubtedly beneficial, as it allows a single-hand operation. 

    For those who are winter hiking and skiing, make sure that the radio has an ergonomic, slip-free architecture. In this way, you can hold it even while wearing gloves. 

    • Channels – Unlike your typical radios, a two-radio has a different mechanism for its channel. Specifically, these channels are used for two-way communication. These days, most two-way radios have at least twenty-two channels. They come as either General Mobile Radio Service (GMRS) or Family Radio Service (FRS) bands. However, keep in mind that you need an FCC license before you can use a two-way radio with GMRS channels. 
    • Privacy mechanisms – If you are situated in a high-traffic area, a two-way radio with only two channels can easily get full. You’ll receive multiple receptions from other radio owners that you don’t know. To prevent this problem, a lot of radios today have the Continuous Digital Coded Squelch System (CDCSS) or Continuous Tone Coded Squelch System (CTCSS). These mechanisms enable you to utilize the channels without traffic through the use of privacy codes. 

    In a general setup, you can communicate to a person using a channel. For example, you talk to your friend via channel 6. With the privacy codes, you can have an isolated line in the said channel. An example would be talking to a friend on channel six and code 7. Through the CDCSS and CTCSS, radios can reduce the unwanted traffic off the channels. With the codes, your reception would be free from unwanted noises. 

    Keep in mind that a privacy code doesn’t necessarily encrypt your communication. It is still public but has been isolated. That’s why other radio manufacturers refer to these codes as interference eliminators. 

    • Coverage – There are a number of two-way radios that are claiming that they can communicate to other radios that are as far as 25 miles–as long as the conditions are right. Well, we are not the ones that can judge the veracity of these claims. However, what you need to know is that the real settings are not always optimal. Hence, the most reliable range for these radios would be around two miles or less. You are already lucky if you can get a 5-mile reception. 

    Radios that are exclusively FRS have a maximum output of half a watt on average. Their range usually extends from five to six miles. While it is true that GMRS models are capable of high outputs (as high as 50 watts), most of their recreational counterparts only offer one or two watts of output. In this way, their weight and bulk would be reduced. Their range can extend up to 25 miles, and the optimal range is 8 miles. 

    There’s a benefit if you choose these high-output radios. They can compensate for the dropouts, especially if you are surrounded by tall buildings or hills. As long as the radio is powerful, the signal that it generates remains strong. But at the same time, keep in mind that a high-output radio also eats a lot of power. Moreover, they are expensive to purchase. 

    • Noise filter – It is also beneficial that you get a two-way radio that has a noise filter. They can refine the signal and further improve your effective communication range. 
    • VOX – Interestingly, the VOX or voice-activated feature is not present in the older models of two-way radios. It became a thing just recently when manufacturers of these radios want their devices to be savvy and user-friendly. With the VOX, the radio automatically operates every time you speak on it. In short, it enables a hands-free operation. Hikers and bikers can benefit from this function. 
    • Lock-on keypad – It is pretty annoying if the settings of your radio get messed up due to accidental presses. This usually occurs if you put the radio in your pocket or pack. To prevent this nuisance from happening, some manufacturers integrated a keypad lock on their radios. 
    • Scanning capability – This feature exists to simplify the usage of two-way radio. With a scanning function, you will be able to go through all the channels within your radio. It lets you find the channel that your company is using quickly. At the same time, you can also utilize this function to detect channels that are free for you and your team to use. 
    • Weather channel – It would really be great if your two-radio includes a weather channel, such as NOAA so that you can stay updated with the latest changes in your area’s atmospheric condition. The information that you can get from these weather bands might help save your life one day, especially while you are doing some adventures in hazard-prone areas. 

    Other Factors In Choosing Two-Way Radios

    • Pairing compatibility – You see, it is better that you buy two-way radios as a pair. After all, if you want to fully utilize the full features of the radios, you need them to have the same specifications. In fact, even if your two-way radio is different from the two-way radio of the group, as long as they have the settings and features, you can make them sync with one another. But if you want to avoid the extra fuss, just go with radios with similar build and maker. 
    • Region of use – Keep in mind that two-way radios that are designed to be used on American soil are not allowed to be used outside the United States and Canada. In 2005, the frequencies of Canadian and American two-way radios had been synced together, ensuring that they are compatible with each other. In other countries, the North American frequencies can be used for military and government-related settings. 

    In Summary

    As you can see, it is not that difficult to learn how to choose a two-way radio. You simply have to know all the distinct features of these radios so that you can refine your selection based on your needs and personal preferences. 

    In a nutshell, two-way radios for outdoor applications should be lightweight and compact. They should also be rugged and offer hands-free mechanisms, if possible. Also, check if the radio you get requires a license to operate or not!

    That’s it for now. If you have other related inquiries, feel free to ask me in the comment section below.

  • How To Choose A Backpacking Stove?

    How to choose a backpacking stove? 

    For starters, cooking might be a thing that they want to try for their first camping trip. Of course, the idea of being able to cook your meals while in the wild is definitely riveting. Those who have been doing this errand for quite some time already have the insight that having the right cooking tools and a well-prepared menu is essential in enjoying sumptuous meals in the wild. 

    A camping stove is an essential cooking ware, especially if your campsite doesn’t allow the building of fires. Also, if you don’t have plans of looking for branches and igniting them manually, then you should have a reliable outdoor stove. 

    How To Choose A Backpacking Stove

    There are numerous things that you need to consider whenever buying a camping stove. You need to have an idea of how many people are there that you need to cook for. You might also have to delve into the type of fuel available for the stove, as well as the latter’s mechanisms. 

    Meanwhile, the following serves as a foolproof guideline when choosing a stove that you can take on your adventures. 

    Types Of Camping/Backpacking Stoves

    1. Canister Stoves  

    One of the most typical stoves used by backpackers and campers today is canister stoves. They are simple to use and don’t require rigid maintenance. You simply have to screw or attach the stove to the top of the fuel canister, and it will work the way you expect it. There are two fuels that you can use for canister stoves: propane and isobutane.

    Some of these canister stoves have a compact size. You can fold them so that they can fit in your pack. Their weight is almost non-existent. 

    Advantages of canister stoves: 

    • Lightweight and portable
    • They are easy to ignite; you don’t need to prime them anymore before they light
    • They produce adjustable flames; they have decent simmering, too
    • Once you unscrew the stove, the canister will seal itself; there’s no need to worry about leaks and spills
    • Other canister stove models have pressure regulators integrated into them so that they can function more efficiently

    Disadvantages of canister stoves:

    • They have small arms that aren’t compatible with huge pots
    • It is difficult to identify the remaining fuel inside the canister fuels; hence, it is essential that you bring extra canisters for good measure
    • They shouldn’t be used with a windscreen because that can result in the trapping of heat, which, in turn, would cause the fuel to explode
    • Canisters aren’t that useful when they are exposed to cold weather since they are prone to be depressurized; the only exception here is using a stove with a pressure regulator
    • Fuel costs of these canister stoves are pretty high
    • You have to learn how to dispose of the canisters properly to avoid environmental harms

    Interestingly enough, there are several variations available for these canister stoves! Here are some of them:

    • Remote canister stoves – This particular stove has its own base and fuel hose that directly attaches to fuel canisters. You can pack them compactly and lightly. However, they are bulkier than the standard canister stoves. You can flip over these stoves so that they can work in cold conditions and low temperatures. Moreover, they have broad arms so that they can hold big pots. 
    • Integrated canister stoves – Unlike conventional canister stoves, these integrated systems have a tall construction. They come with a burner that you can screw to the fuel canister. You can use them with cooking pots and French press–if you like to have a sip of your favorite coffee. Keep in mind that the general function of these integrated canister stoves is to boil water fast. They usually have a built-in pressure regulator so that they can work in cold conditions and elevated areas. But because they are tall, they are easy to topple.
    1. Liquid-Fuel Stoves

    Another type of outdoor stove that you should consider is a liquid-fuel stove. Specifically, these liquid-fuel stoves are using white gas for them to operate. This particular gas is highly efficient because it has been refined properly. Hence, there are minimal impurities on it. 

    With a white gas, the stove burns cleanly and efficiently. Furthermore, they can also function at low temperatures. In fact, they can work in freezing temperatures. When it comes to the per-ounce price, it is undeniable that white gas is cheaper than canister fuels. 

    Moreover, it is notable that these liquid-fuel stoves are also compatible with other fuels such as diesel, jet fuel, kerosene, and even unleaded gasoline. Due to this versatility, liquid-fuel stoves are great for individuals who travel internationally from time to time. After all, your fuel choices are limited if you are outside the United States. 

    Advantages of liquid-fuel stoves:

    • They are low-profile and can be packed compactly
    • Liquid-fuel stoves have exceptional stability even if the ground is not flat
    • You can identify if you are running out of fuel; simply peer on the fuel container to see the remaining contents
    • There’s no need for you to discard the fuel container or bottle; which is quite the opposite when it comes to canister fuels
    • A liquid-fuel stove has impressive functionality even under frigid conditions and elevated areas

    Disadvantages of liquid-fuel stoves

    • You are required to prime and maintain it regularly
    • They are prone to fuel spillages
    • Compared to canister stoves, they are heavier
    • They are costlier than canister stoves
    • If you don’t use white gas on liquid-fuel stoves, you have to deal with impurities, which, in turn, could cause the stoves to clog
    1. Camping / Backing Stoves With Alternative Fuels

    Having a stove that is using alternative fuels is quite a good deal. Specifically, they are an ideal choice for long-distance backcountry applications. Moreover, they are also useful in emergencies and survival instances. 

    The weight of these stoves vary; some are light while others are bulky and heavy. Here are some of your options when it comes to these alternatives:

    Stoves Using Wood As Fuel

    These stoves are the perfect alternative for people who don’t want to start a campfire from scratch. They serve as a portable platform so that you can burn the leaves and twigs on your area as quickly and efficiently as possible. You don’t need to carry fuel anymore, as long as your destination has stray branches and other kindling materials. Ultralight backpacking trips will benefit from these stoves. 

    Advantages: 

    • They are lightweight and compact
    • They have simple structure and operation; they don’t require a steep learning curve before you can use them properly
    • Other models of these wood-burning stoves can produce electricity while they are running
    • Other models of these wood-burning stoves are compatible with small grills

    Disadvantages:

    • You have to spend time to gather your kindling materials; if the weather is rainy or snowy, doing such an errand is difficult
    • Some areas and camping sites don’t allow the burning of twigs, branches, and leaves–especially if you are on elevated areas
    Stoves Using Denatured Alcohol

    I know that some of you haven’t heard of these stoves, but they do exist! In fact, they are quite popular for ultralight campers and backpackers. After all, these stoves only weigh less than two ounces. You don’t need to fuss over the fuel since you can just bring a bottle of alcohol, which isn’t that problematic. 

    Advantages:

    • They don’t require extensive maintenance; you don’t need to prime them, either
    • Denatured alcohol is cheap and available in most states and countries
    • Denatured alcohol tends to burn quietly

    Disadvantages:

    • It is not a secret that denatured alcohol doesn’t burn hot as compared to white gas and canister fuel; hence, it will take time for the alcohol to boil water
    • You will need a lot of this fuel so that you boil and cook food
    • These stoves will require the use of windscreen
    Stoves Using Solid Fuels

    You can also consider these stoves in your backpacking and camping trips. They are light and compact enough to fit inside your pack or pocket.

    Advantages: 

    • They are inexpensive; in fact, they are the cheapest outdoor stoves available today
    • They are lightweight; even a combo model will only weigh roughy 6 ounces
    • Of course, these stoves are compact and foldable
    • These tablets are quick to ignite; they are easy to put out, too

    Disadvantages:

    • Similar to denatured alcohol, tablet fuels don’t run hot; hence, they would need time before they can boil water
    • They produce noticeable smell or odor
    • Tablet fuels are prone to leave grease and messy residues in your cooking wares.

    Other Considerations In Choosing Camping Stoves

    Aside from knowing the different outdoor stoves out there, you must also be aware of the following factors. They will help you refine your selection and arrive at a pick that suits your needs, preferences, and intended application.

    Weight

    The weight of the stove matters for a lot of people. Some intentionally shed weight on their trips. If you are among them, the stove you pick mustn’t be heavy. Even an increase of few ounces can impact thru-hikers and ultralight backpackers. But of course, others don’t mind the weight. Glampers and tailgaters, for instance, are free to bring large stoves. 

    Burn Time 

    In choosing an outdoor stove, it is crucial that you pay attention to its burn time. In fact, you can always use this factor as a means of comparing two stoves. The more efficient the burn time, the easier it is for you to cook multiple meals per a particular fuel volume. 

    Boiling Time

    Another aspect that you have to consider is the boiling time of these stoves. A fuel-efficient stove should have a quick boiling time. For example, a canister stove can boil water fast; it also works well in simmering. Meanwhile, liquid-fuel stoves can still boil water fast even under cold conditions. However, their ability to simmer varies from one model to another. Of course, those alternative-fuel stoves can still boil. But at the same time, they aren’t that fast. 

  • How To Camp With A Baby? 5 Tips To Consider

    Bringing your baby outdoors seems to be an unconventional idea. After all, most parents think that their little ones are still too delicate to be exposed to the elements. Fortunately, it is a safe thing to do, especially if you know the ins and outs of camping with a baby.

    When you’re ready to get outdoors with your infant, do the following things to ensure their safety and enjoyment. 

    How To Camp With A Baby?

    A. Pick The Right Camping Site

    Choosing an appropriate camping site where you can take your baby can be a daunting task. There are so many factors to consider, from a distance down to the availability and quality of amenities present. 

    Interestingly enough, most of the common sites for camping are also suitable for your babies. Destinations like national parks and private grounds are all good choices, as long as the following considerations are met. 

    • Distance – As mentioned, it is important that your camping site is not too far. It is not practical and ideal to drive long distances, especially if you are with your baby. Travel-related stress should be removed from the equation so that your entire family can fully relax and unwind. Campsites that are close to your home are the best choices. In this way, you don’t need to prepare for the drive too much, and you can just head back if you have met unexpected things along the way. 
    • Amenities and utilities – When it comes to choosing your next campsite, make sure that you go for an option that offers decent amenities that your baby can benefit from–directly or indirectly. For instance, access to water and electricity might be crucial if you want to ensure the welfare of your child. Moreover, campsites with clean and hygienic bathrooms are also great choices. 
    • Noise and traffic – In choosing a campsite for your baby, you need to make sure that it has a decent distance between noise sources and other campgrounds. Keep in mind that children can easily get startled by noises and human activities. While you want a campsite that is not too far, you may also want it to be distant from various types of disturbances. 
    • Natural sheds – Do you want to bring your little one camping? Then make sure that they have enough roof on their head to shield them from the harmful UV rays and heat. Campsites that are too open are not suitable for your babies. Instead, go for those areas that have trees and other sources of shade,

    B. Sleeping With A Baby Inside A Tent

    Is it easy to sleep while you are on the premises of your home? Isn’t it right? 

    Now, have you ever thought of applying the same predicament in an outdoor setting? Will you be able to sleep tight? 

    You see, the new environment will force your baby to adjust a little. Hence, don’t get surprised if they will be up longer than usual. Preparation is the key here. You will need to sail with the waves. Drink an extra cup of coffee if you must.

    • Be adaptive – All people–regardless if they are young or old–have different sleeping patterns. Usually, these patterns change once an individual is exposed to a different setting, environment, or even temperature. Your baby is much more sensitive to these changes. If you are going to take them on a camping trip, you should expect that their normal sleeping time will be altered. At this point, you should be as patient as possible with your baby. If possible, you may have to let your little one stay up later than usual until they can doze off.
    • Use a large tent – Just because there are only a few heads in your family doesn’t mean that you can stick yourself in a small tent. For any other cases, that could work. But if you have your baby with you, abstain from doing so. A large tent gives enough stretching space for you and your little one. That could help your baby experience comfort during its sleeping time. The larger your tent is, the easier it is for you to bring a portable crib inside. 
    • Bring a portable crib – Having a portable crib is optional. But for those babies who are used to sleeping inside their cribs and play yards, the said amenities are a must. Of course, you need a large tent so that you can fit these sleeping tools. These cribs are also useful in ensuring that you restrict your baby’s movement whenever you have to do something–such as cooking or cleaning your camping grounds.
    • Pack some familiar items – I am pretty sure that your baby has favorite stuff. It could be a toy, book, or simply anything that they are so fond of. For them, these items can establish a sense of comfort and familiarity. Hence, bringing them on your camping trip should be a good idea. I am not saying that you should pack all those things. But a few of them should be enough for your little one to find comfort while you are away from home. 

    C. Food For Your Baby

    Adults can survive in the outdoors even with just minimal nourishments. For instance, energy bars can be sufficient for some hikers to complete a day hike. But it is a different story for your babies. They require a constant source of energy and sustenance to support their growth and development. 

    Honestly, it is a challenge to cook outdoors. You need to have the right cooking tools first, as well as essential utensils. Moreover, you have to plan ahead your menu. In this way, you will be able to prepare the ingredients that you will put inside your cooler.

    When it comes to your babies, the best foods for them are those that they are accustomed to eating. You can do some slight variations, but you should still stick to the same menu nonetheless.

    If you are breastfeeding your baby, there should be no fuss about this matter. But if they are already intaking solids, then you should take the following considerations into account. 

    • Maintain the cleanliness of your cookware – All the things that you use to cook food for your baby should be clean at all times. The same is true with the utensils you use for feeding them. In this way, you will prevent food poisoning and other scary repercussions. Boiling these items can help sanitize them. 
    • Opt for convenient alternatives – If your baby can already eat solid foods, you may want to try hassle-free food items such as squeeze packets that contain pureed veggies and fruits. You can pour small amounts of these purees into a spoon and feed them to your baby. If your child is old enough to eat finger foods, then you should give them soft foods, such as soft fruits. 

    D. Proper Outdoor Clothing For Your Baby

    Your baby needs extra protection whenever you are camping. The following clothing tips can help them keep them extra safe and comfortable.

    • Follow a layering system – Babies require to be dressed in layers if you wish to bring them outdoors. They are sensitive to the elements and temperature, so they do really extra protection from them. A base layer, mid-layer, and outer shell can ensure that your kid can navigate the outside world as safely as possible. 
    • Don’t use cotton garments – While cotton sounds comfortable, they aren’t the ideal material of choice when it comes to outdoor clothing. You see, cotton absorbs water easily. It doesn’t have good insulation and durability, either. Instead, you should opt for clothing that is made from wool and synthetic as they excel in keeping your baby dry and insulated. If you are exploring under cold weather conditions, you should equip your little ones with fleece jackets, fleece pants, and wool socks. If you expect some downpours, you better have a rain jacket for your baby. During fine days, it is enough that your child wears breathable shirts and pants.
    • Avoid overdressing – Of course, you should not overdress your baby, too. It can cause discomfort and possible injuries. As parents or guardians, it is your responsibility to check the weather forecast first before heading on the trip. In this way, you can determine the number of clothing layers that your baby needs. 

    E. Protection From The Elements

    Health institutions prohibit you from applying sunscreens and insect repellents to your baby if the latter is less than six months old. If your child belongs in the same category, you should try other alternatives such as wearing clothing layers. 

    Your baby should have a reduced amount of skin exposed. In this way, you will no longer have to apply repellents and lotions to them. You can also try other options, such as wearing insect-deterrent accessories and gear. Moreover, you can also protect your campsite through the use of citronella candles. 

    Meanwhile, the Federal Drug Administration states that children below six months old should stay away from sunscreens. Aside from limiting the exposed skin, you should decrease the time that your baby is basking under the sunlight. Accessories like umbrellas are also useful to block heat and UV rays.