Blog

  • 10 Best Places To Hike In The United States

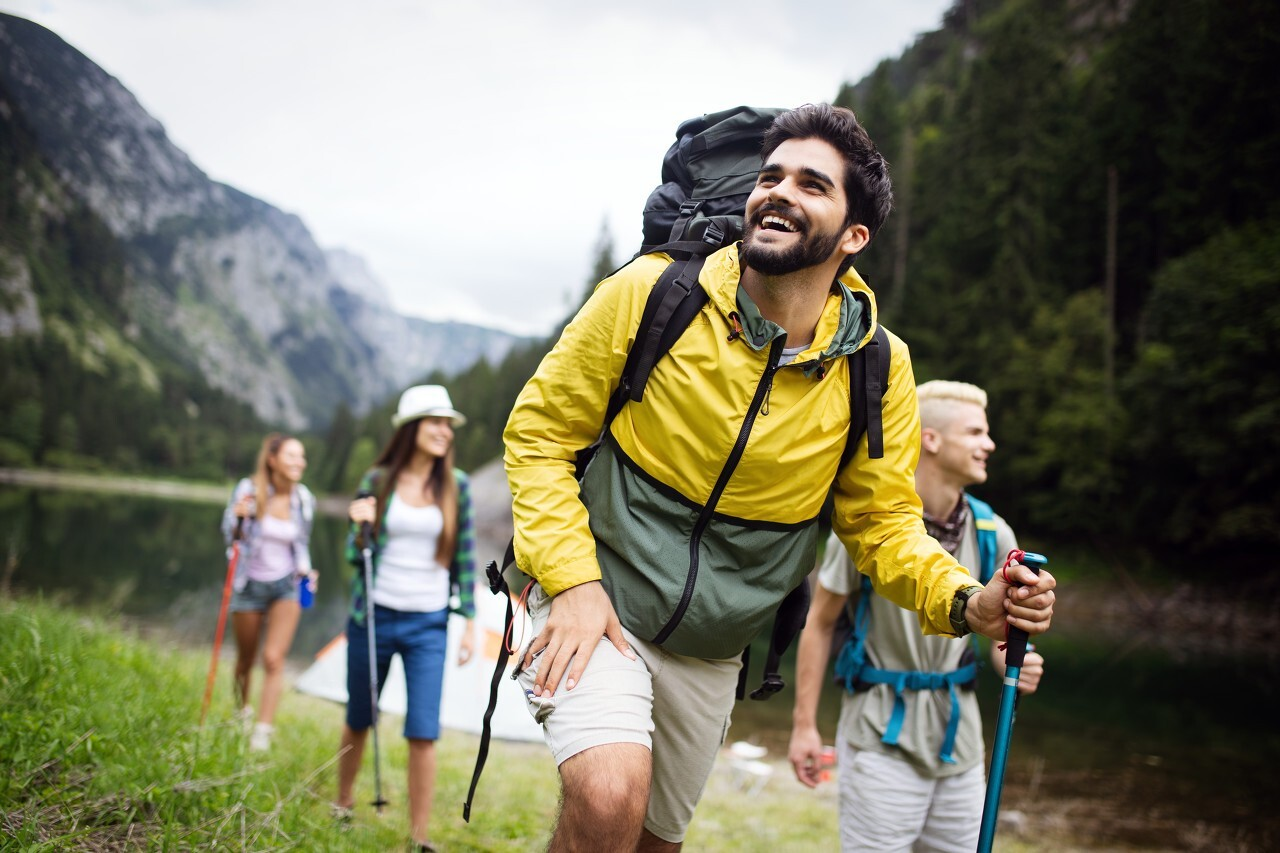
    Take a day hike, a weekend trip, or a longer hike, and you’ll find yourself pining to go back to the Great American wild again. And while there are many places you can go in the United States to get a taste of nature—from state parks to national and state parks to forests—there are a few places that stand out above the rest. 

    Luckily, plenty of great hiking locations in America are only accessible to footloose folks who are willing to put up with some trial and error.

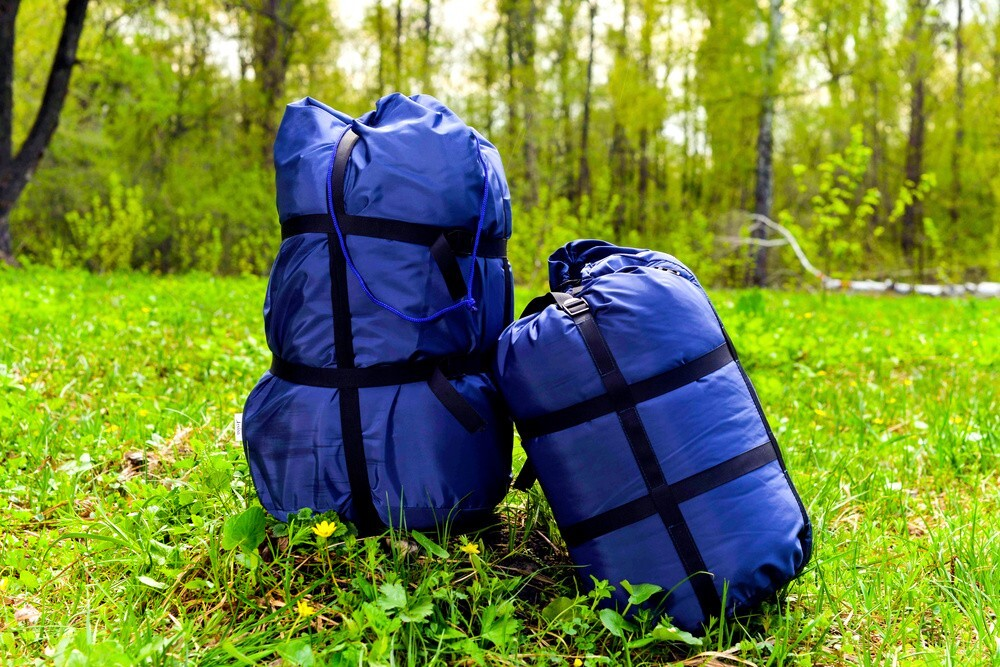
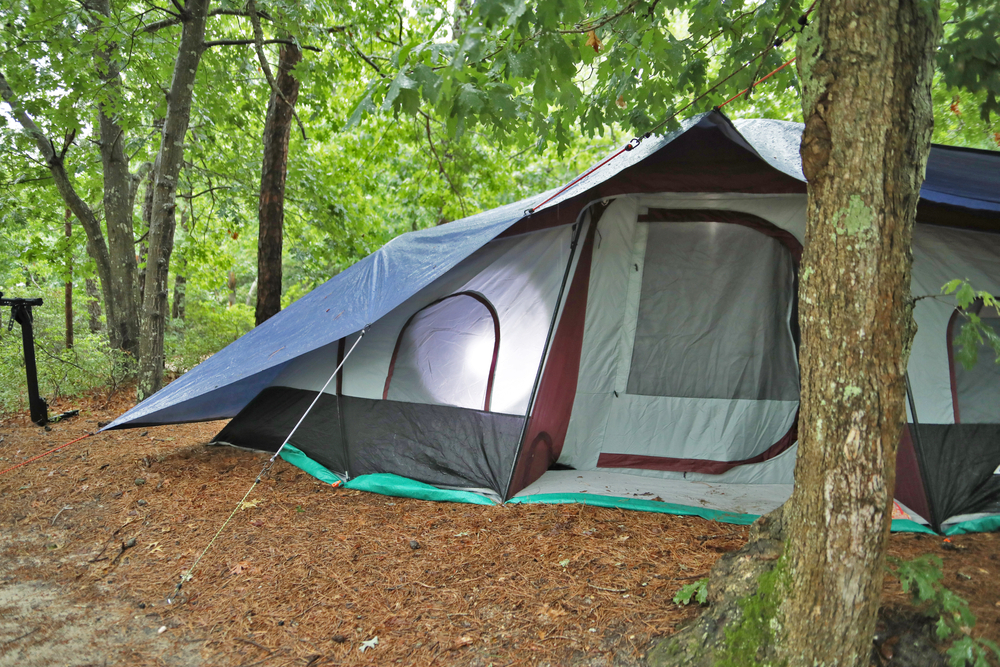
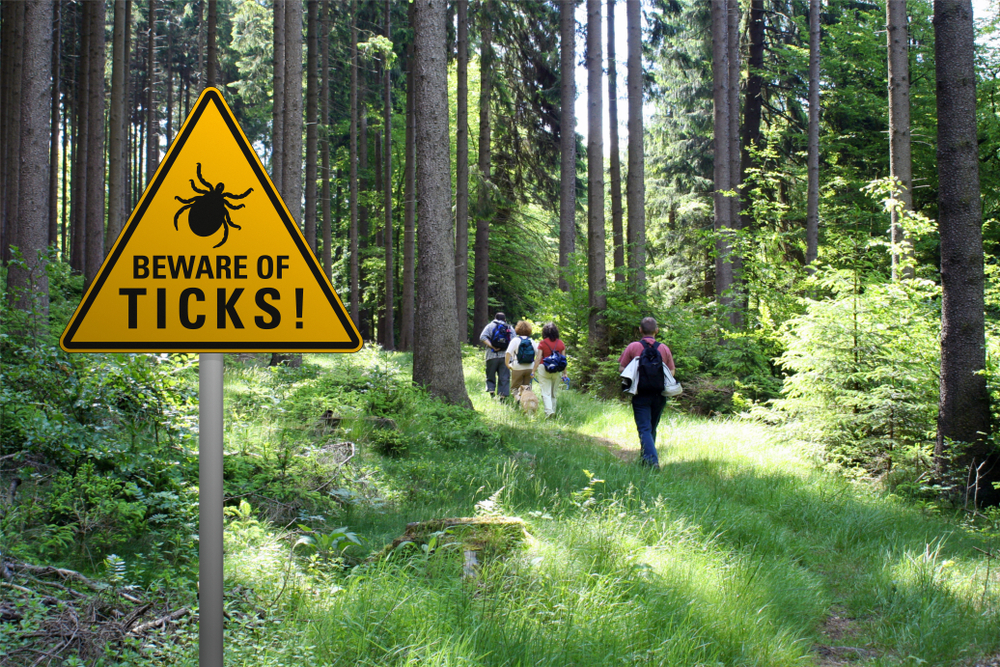
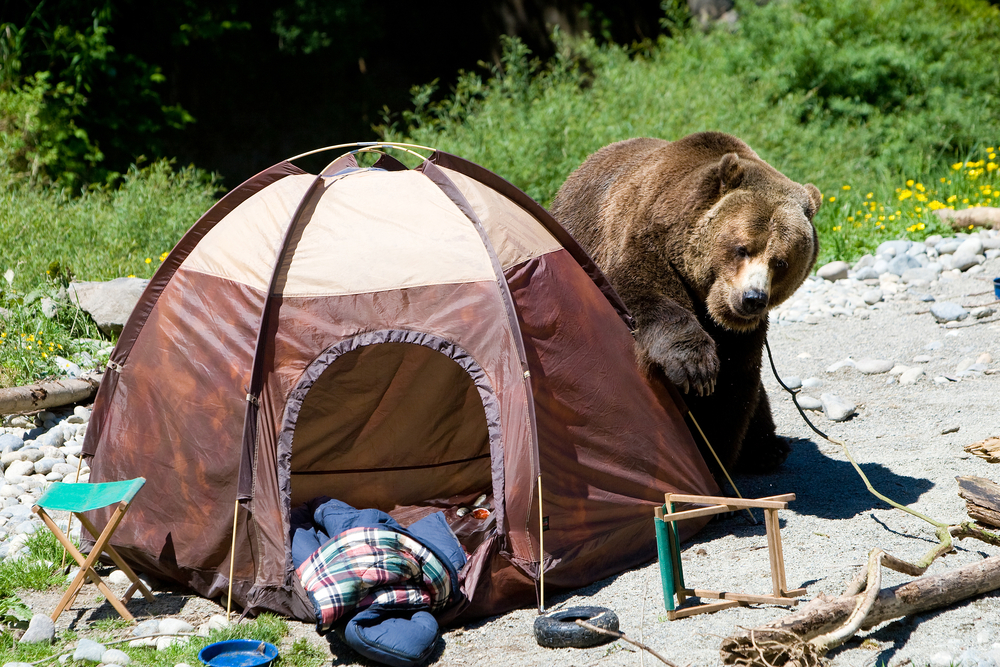
    Keep in mind that before you hike, make sure that you abide by various COVID-19 policies. In this way, you won’t be able to contract or spread the disease. Of course, don’t forget the essential Leave No Trace principles!

    Best Places To Hike In The United States 

    Penobscot and Sargent Mountains, Maine

    Perhaps the granddaddy of all backpacking destinations, Maine has some of the most beautiful and rugged lands in the United States. The state’s numerous hiking trails offer many options for every level of hiker, from short easy treks to challenging long-distance journeys. The Penobscot and Sargent Mountains, along with a number of other nearby sites, are among the most visited areas in the state and are located in the Appalachian Mountain chain of New England.

    Within the Acadia National Park, these summits are deemed to be the most rewarding route for hikers. The 5.4-mile trail begins at the Jordan Pond House and ends there, too–making it an exceptional loop. The hike itself is pretty technical, but once you are on the top of the Sargent Mountain, your hard work will be gifted with a majestic panoramic view of the Down East Coast. 

    Appalachian Trail

    The Appalachian Trail, part of the 2,200-mile-long National Scenic Trail, covers an extensive journey through 14 states. It is the longest hiking trail in the eastern United States. Moreover, it stretches from Springer Mountain in Georgia to Mt. Katahdin in Maine. The trail was built in the 1930s to provide a means of recreation for people living in the Appalachian region of the United States and promote tourism by providing a means for hikers to travel between the eastern and western United States.

    West Maroon Creek Trail, Colorado

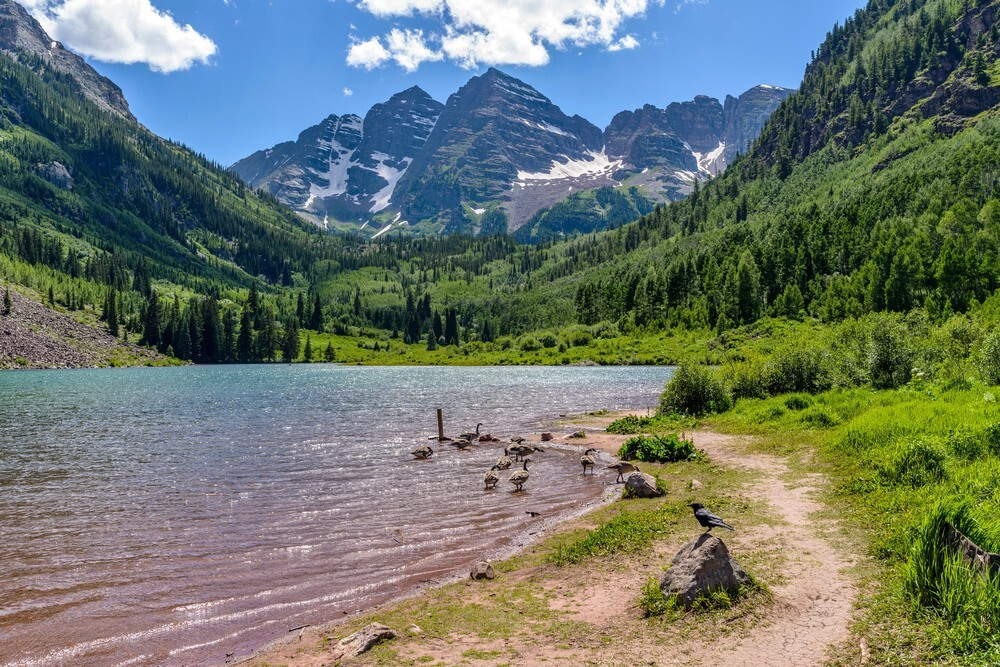
    This rewarding trek starts in Aspen and ends in Crested Butte, connecting the two towns. It is best experienced when wildflowers are at their peak – usually in July. Colorful flowers such as violets, larkspurs, and columbines shoot throughout the 10-mile hiking path, which has some of the most beautiful views in the Rockies.

    Colorado has many breathtaking sites, but one of the most photographed is Maroon Lake, with its reflection of the two Maroon Bells. The trail begins in and out of the valley where it crosses a glacial stream, winds through aspen groves, traverses scree fields, climbs Mount Maroon’s 3,000-foot peak before descending steeply. There are several shorter hikes for those who are not able to complete this twenty-mile hike.

    Mount Rainier National Park, Washington

    One of the world’s most iconic mountains, Mount Rainier National Park in Washington state, is a must-see for travelers. Mount Rainier is 14,410 feet high. However, its summit is not the only hiking destination you can have at this location. 

    More than 260 miles of maintained trails wind through the park, taking visitors through tranquil forests, meadows, and valleys. The Burroughs Mountain trek offers breathtaking views of Mount Rainier and the surrounding alpine scenery.

    Superior Hiking Trail, Minnesota

    In the state of Minnesota, the Superior Hiking Trail is one of the nation’s premier hiking trails. It spans over 310 miles and passes through six distinct regions, including the Boundary Waters Canoe Area, the northern forest, the St. Louis River region, the Arrowhead region, the Sand Lake region, and the Boundary Waters North Wilderness. 

    The Superior Hiking Trail offers a wide variety of hiking opportunities, from the most accessible short hike to the most challenging backpacking trip. Along with the physical terrain, the Superior Hiking Trail also offers a wide variety of hiking experiences, from long day trips to overnight hikes in the wilderness.

    Tongue Mountain Range Trail, New York

    The Tongue Mountain Loop is a long hike that takes hikers through the scenic New York State’s Adirondack Mountains. It is 25 miles long, and the trail varies from leisure walks throughout the foot of the mountain ranges up to the more technical ascents while within the peaks. Along the way, you will be able to witness the unreal beauty of Lake Georgia, which is a favorite scenery throughout the trail.

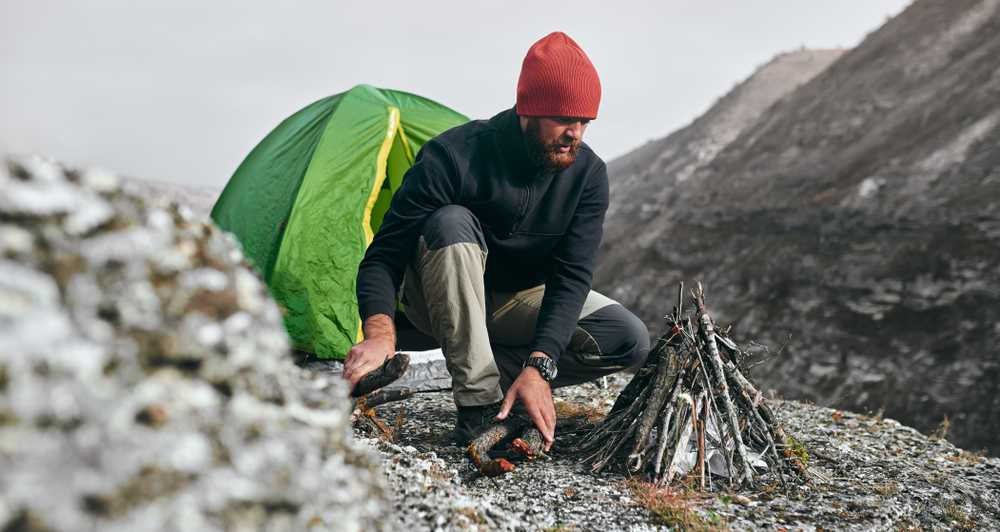
    The uniqueness of the Tongue Mountain Range Trail lies in the fact that it is composed of six summits: the Brown Mountain, Huckleberry Mountain, the French Point Peak, First Peak, Fifth Peak, and the Five Mile Mountain. The latter is considered as the highest part of Bolton. Interestingly enough, setting campsites and campfires are permitted throughout the various parts of the trail–as long as they are within the designation of the New York Department of Environmental Conservation.

    Great Smoky Mountains National Park, North Carolina / Tennessee

    The Great Smoky Mountains National Park is a stunning treasure for hikers. The 522,419-acre park is located in the Southwestern United States and covers parts of Tennessee and North Carolina. The park is named after the distinctive layer of clouds that form on the mountains during autumn, giving the park its name. The Great Smoky Mountains National Park is home to over 500 types of plants, more than 100 species of birds, and one of the highest concentrations of elk in the world, making it a great place to see wildlife.

    Keep in mind that the Great Smoky Mountains National Park is the most visited national park in the country. Hence, it supports a substantial tourism industry within the Sevier County of Tennessee. Attractions like Dollywood and Ripley’s Aquarium of the Smokers are among the things you can do while you are on the trails. You should consider Charlies Bunion Hike via the Appalachian Trail if you want an excellent hiking path to traverse while in the park.

    Mount Rogers, Virginia

    Mount Rogers is a mountain located within the George Washington and Jefferson National Forests in Virginia. With a summit elevation of 5,729 feet above sea level, it is touted as the highest elevation throughout the state. This exceptional trail extends to both Smyth and Grayson counties.  

    You can access its summit via the Grayson Highlands State Park by just treading a part of the southbound Appalachian Trail (around 3.5 miles). Once there, you will witness the towering tree groves. You’ll also notice four triangulation station disks erected by the National Geodetic Survey. Since the Appalachian Trail is less than half a mile from Mount Rogers, it became a favorite side-trip for many hikers. 

    Smith Rock State Park, Oregon

    Located in western Oregon, Oregon’s Smith Rock State Park is a beautiful spot for hiking. The rock formations that make up the park are tall, colorful, and stony. Specifically, the park is located in the heart of the High Desert, which is just within the proximity of Terrebonne and Redmond. Most of the time, it is open from dusk to dawn, attracting local and foreign hikers alike. 

    Furthermore, the park also features a number of basalt and tuff cliffs, which are all suitable for rock climbing. In fact, many believe that modern sport climbing in the United States was born in Smith Rock State Park. For hikers, the Canyon To Rim Loop is a must-visit destination. This trail offers up to 7 miles of moderate to difficult hiking terrains. Local guides suggest that the best time to hike is during the early morning so that you can see the wildlife in the area. 

    Kalalau Trail, Hawaii

    Kalalau Trail is one of the most beautiful hikes in Hawaii. It’s a strenuous 11-mile trail along the Nā Pali Coast OF Kauai Island. But certainly, you’ll get rewarded by some of the finest views you can have on this state. The tropical landscape and panoramic seaside views can relieve all the stress that you are feeling. 

    However, keep in mind that going to this Kalalau Trail requires a bit of preparation. It is equally challenging and exhausting, especially if you are planning to traverse it after a rainy period. If you are a day hiker, I suggest that you only cover the first three miles of the trail, which would lead you to Hanakapi’ai Beach. Here, you’ll also see eye-catching wonders. 

  • How Far Can You Hike In A Day?

    Hiking is one of the most popular activities in many parts of the world. If you plan to go for a hike, one of the first things on your list should be figuring out how long it will take to finish the activity?

    How far can you hike in a day? 

    Many hikers have asked this question, and frequently, the answer varies. This is because it depends on your physical condition and ability level. It also varies with the terrain of the trail. As a general rule, it’s easier to move fast if you are in flat areas. Of course, it is not that easy to move fast if you are in rough terrain or uphill portions.

    Of course, finishing the hike is the main point here. However, some people may have trouble finishing their hikes, or they may even injure themselves from overexertion. This results in having low morale, and this can disrupt your overall fun and enjoyment throughout the activity. 

    Then again, the key here is knowing yourself, your capabilities, and the terrain you are about to take. 

    How Far Can You Hike In A Day?

    The average hiking distance typical hikers can cover in a day will depend on several factors like fitness level, terrain, elevation, and pack weight. If we take that figure and apply it to 8 hours (minus rest breaks), it’s possible for someone with “normal” hiking capabilities to cover between 16-25 miles in a day.

    Some elite hikers have been documented covering triple that distance on some of the world’s best trails, but it will be hard to do more than 20-25 miles of hiking distance per day for most. This could be maintained over several days (a thru-hike) or just one really long day. So if you want to hike more than 25 miles in a day, you need to hike at a good clip to make up for the time.

    The Average Hiking Distance Per Day

    Hiking distance is one of those things that can be hard to measure since it differs so widely between people and conditions. The fastest people I’ve seen hiking are thru-hikers who have an average speed of around 3 to 3.5 miles an hour (with a quicker pace for some and slower for others). The average person who is just out for the day on a trail might move at around 2 miles per hour, while someone with more time and less focus will go 1.5 miles per hour or slower.

    If you can maintain those hiking speeds, then you’ll cover more miles on a day hike than if you have to stop for breaks. So unless you have years of experience, it is better to shoot low as far as distance and not overestimate yourself, especially if you are carrying a heavy pack!

    The best way to figure out how far you can hike depends on your own hiking style and pace, so there is no one “right” answer. The main thing you should be concerned with is your pack weight and how hard the trail will be.

    Your Pack Influences Your Average Hiking Distance

    With a heavy load on steep terrain, it is easy to average less than two miles an hour! That’s why lightweight gear can make such a big difference for the endurance hiker. That would mean that a 35 lb pack needs to cover less than 40 miles, while a 15 lb pack should do more than 60 miles in one day.

    A light backpack means you can go faster and farther, but it also means your body has less recovery time as you move along and increases the risk of injury.

    When I was younger and had more energy, I could do 20 to 30 miles in a day, but I’m up around 17 to 18 miles per day. That’s still not too bad, considering that I hike with a heavy pack. 

    But hiking isn’t just a physical activity. It’s also an endurance event. With that in mind, you have to figure out the longest you can hike at an average pace before you burn out. My average hiking distance per day is 20 miles. Beyond that, I start to get worn out mentally and physically. 

    However, some people have lower endurance, so their average is lower than mine. But that’s alright. It’s not a competition, anyway.

    The key is not to get too greedy. If you can cover 20 miles, then that’s amazing for a day hiker. But anything more than that, and you will be pushing yourself too hard. It’s much better to hike shorter days with less weight, so you have extra energy the next day!

    Fitness Matters

    Surprisingly, how far you can hike in a day has more to do with your endurance and fitness than it does with the weight of your pack.

    The amount of energy required to hike a trail is all about the distance you are covering. A five-mile hike will use up less energy than an eight-mile hike. That’s why it’s far easier to cover long distances when you hike a lot. When I was thru-hiking the Appalachian Trail, I never had any problems with my pack being too heavy, but every day I pushed myself as hard as possible for many hours at a time.

    Over time your body becomes conditioned to hiking, and you can go farther each day without stopping. That’s the key to endurance hiking. When you push yourself beyond your normal levels every day and do it over a long enough period, your body becomes conditioned to handle that type of workload.

    I found myself hiking more each day even though my pack weight was going up due to gear and food changes. When I was gearing up for a hike, I never had any problems with my pack being too heavy; I just trained myself to handle the extra weight. I guess that your average hiking distance per day can be maintained as long as you are fit. 

    The main takeaway is that it’s not about your gear but how your body handles the load. If you are not in great shape, then make sure to keep your loads light, so they don’t wear you out too quickly.

    Is Long Distance Walking Good For You?

    Long-distance walking can have significant health benefits, but you should always consult your primary care physician before undertaking a long-distance walk.

    According to the British Heart Foundation, regular walking is good for reduced levels of cholesterol and high blood pressure, increased blood flow throughout the body, and weight loss. The exercise will also help keep bones strong and muscles toned.

    As per Dr. Matt Tanneberg, a sports chiropractor and certified strength and condition specialist in Phoenix, Arizona, who often works with elite athletes, long-distance walking can be as good or even better than running.

    Yes, running is more physically demanding than walking, but studies show that long-distance walking can provide many of the same benefits as running.

    Walking and running are two very different fitness activities, so it can be difficult to compare the benefits against the other. However, keep in mind that walking will always have a leg up on running due to the higher recruitment of smaller muscles and slower motion capability.

    In fact, long-distance walking through the form of light hiking is definitely recommended. You should do this every day–if it is possible–so that you can experience the health benefits that it can give to you. 

    Benefits Of Long-Distance Walking

    1. Strengthens the Heart

    As patients age, the heart becomes weaker and less efficient at pumping blood throughout your body.

    The heart works harder to do its job, which increases the risk for cardiovascular disease.

    According to the American Heart Association (AHA), regular walking can help strengthen the heart muscle, thus reducing your risk of developing heart disease and stroke. It is recommended that you walk at least five hours a week to reduce your risk factors.

    1. Reduces Risk Of Type 2 Diabetes

    Type 2 diabetes is a condition in which the body’s ability to use glucose (blood sugar) effectively is hampered. The Center for Disease Control and Prevention (CDC) reports that, as of November 2012, around 29.1 million people suffer from type 2 diabetes in the US alone – this equates to around 9.3% of the entire adult population.

    The CDC also reports that the incidence of type 2 diabetes in Americans over 65 years old is currently around 18%. This huge figure will only increase as more people grow older, creating a very real health crisis.

    Research has shown that regular walking can help to reduce your risk factors associated with developing type 2 diabetes. Walking at least five hours per week is enough to significantly cut your risk.

    1. Increases Muscle Strength And Endurance

    Equivalent to a one-hour strength training session, walking is excellent for improving muscular endurance and overall muscle strength. Exercise strengthens the lungs and heart and bones and joints, all of which can help increase your physical performance, especially during physical activities.

    1. Lowers Blood Pressure

    As the body’s largest muscle group, your leg muscles are responsible for pumping blood and oxygen throughout your body. As patients age, their legs tend to weaken, which means they have a harder time pumping blood effectively throughout the body. Regular walking can help strengthen your leg muscles, so you don’t suffer from fatigue as easily.

    Walking regularly has been shown to lower blood pressure throughout the body, making it an excellent exercise for those who suffer from high blood pressure and heart disease. As patients age, their risk of developing these conditions rises dramatically – just 30 minutes a day can provide all the benefits you need to help prevent these conditions in the future.

    1. Improves Cardiovascular Health

    As the heart’s main muscle, leg muscles play a huge role in pumping blood and oxygen around the body. Strengthening these leg muscles using regular walking can help regulate cholesterol levels and increase your stamina and endurance throughout the day, all of which contribute to lowering your risk factors for cardiovascular diseases such as stroke and heart attack.

    Walking regularly is a brilliant way to improve cardiovascular health. Keeping your heart and lungs healthy can greatly reduce the risk of developing conditions such as high blood pressure, stroke, diabetes, and even cancer.

    1. Burns Calories And Fat

    One of the most obvious benefits of long-distance walking is that it burns a lot of calories. By simply walking for 5 hours every week, you can burn off around 800 calories – nearly half as many calories burned in a 30 minute run on a treadmill.

    If you incorporate speed into your exercise session, you will build muscle mass and burn more calories. Walking uphill or on steeper terrain will also boost your cardio workout, providing you with the ultimate calorie-burning session.

    The CDC reports that, in the US alone, obesity rates have hit 35% and are still growing – this hugely concerning statistic makes long-distance walking a fantastic exercise for helping to reduce weight.

    In Summary

    So how far can you hike in a day? The simple answer is, as far as your body allows. But there is a lot more to it than that. If you are out of shape, find lighter gear or choose easier trails. And if you want to hike long-distance, get in shape and put the work in early so your body will be ready for the day when you need it most. The more you train, the better your average hiking distance becomes. 

    I hope this helps someone out there figure out how to prepare better and hike farther with less effort.

    Have a good hike!

    If you have inquiries, feel free to ask me in the comment section below.

  • How to Choose the Best & Most Effective Insect Repellents

    It is important that you know how to choose insect repellers, especially if you have an upcoming outdoor trip. 

    Once you are in the wild, you will be exposed to a number of elements. But among them, these insects and critters are the most annoying. They can cause a lot of irritations and distractions to people. And in some cases, they can pose dangers. For instance, mosquito bites can lead to fatal cases of dengue and malaria. 

    Now, wearing the appropriate clothing can shield you from these insects. Foolproofing your campsite through bug nets and meshes can fend off these creatures. 

    But certainly, the best way to deal with them is by spraying or applying insect repellents. The correct repellent can ensure that you will never be pestered by those tiny, little pests. 

    How To Choose Insect Repellents

    Before we discuss things further, I have to emphasize that there are repellents that work well on specific bugs. Typically, the repellents you can buy on the market today are formulated against mosquitoes. But some of them have special ingredients that make them effective against ticks.

    If your destination is known for the presence of black flies, gnats, and midgets, you might need to get specialized repellents against them. They are not disease carriers, but they are still culprits of nuisances. Meanwhile, keep in mind that the effectiveness of a repellent against different species varies from one brand to another. 

    Also, you have to keep in mind that there’s no such thing as a repellent for stinging critters. If you are heading to an area where there are hornets and wasps, then you should look for those alternatives that work similarly to traps. 

    Type Of Skin-Based Insect Repellents

    One of the popular variants for insect repellents is skin-based products. The most common types are picaridin and DEET. There are also options that feature synthetic or natural formulations. 

    But when it comes to performance, chemicals tend to produce the most effective and long-lasting defense against insects. They also work on a number of insects such as mosquitoes and different species of flies. Meanwhile, plant oils such as eucalyptus don’t offer extensive protection. However, they can guard you against ticks and mosquitoes. 

    Many tend to go for plant-based insect repellents because of their safe formulation. If you are into all-natural products, you should go with these options. But then again, let me emphasize that their level of protection is not as great as compared to their chemical-based counterparts. They don’t last long, and the insects they repel are somewhat limited.

    There’s nothing to fear when it comes to these chemical repellents, as long as they have been approved by the EPA. Furthermore, use your due diligence in following the instructions for their usage–especially if you are applying them to your children and pets. Generally, most of these repellents will prohibit you from using them on children below six months old. 

    Meanwhile, here are the common types of chemical-based skin insect repellents:

    • DEET – This one is the most commonly used insect repellent. However, it is notable that this chemical can cause several damages to synthetic materials and plastic. Hence, if you sprayed them on your gear, you should wash them thoroughly. DEET may vary in concentration. The highest concentration is 100 percent, which causes the chemical to last for more than ten hours. However, you can get suitable protection at 30 percent concentration. You only need a highly concentrated formulation of DEET if you want something that can last longer. 

    Meanwhile, there are also these controlled-release versions of DEET. Their concentration ranges from 20% to 30%, and they can last for 12 hours at least. They are a great choice if you have children. Moreover, they also have mitigated impacts on synthetics and plastic. If you spot an insect repellent using DEET, try to research if it has been approved by EPA and other safety standards. 

    • Picaridin – Picaridin is a versatile choice, as it is effective in various numbers of insects. Specifically, this one is a chemical-based version of the natural repellent present in pepper plants. It can generate protection at 20 percent concentration. I suggest that you get a picaridin-based insect repellent that is contained in a spray canister so that you can protect yourself against ticks and mosquitoes for at least half a day. Picaridin lotions don’t last that long as compared to their spray counterparts. 
    • Natural repellents – These repellents are using natural oils such as citronella, peppermint, soybean, and lemongrass. While it is true that they have natural formulations, most of them did not undergo screening procedures from EPA, which would have assessed their level of effectiveness. Because of this, it is not surprising that these natural alternatives are not as effective as their chemical-based counterparts. 
    • Processed plant oils – While it is true that they are using plant oils, this doesn’t mean that these repellents have all-natural formulations. In the eyes of the EPA, they are already chemicals and have to be regulated properly to ensure that they are risk-free whenever used by humans. A good example of synthesized insect repellent is the IR3535, which is derived from amino acids. They can keep off mosquitoes and flies and have a duration of eight hours or more. 
    • Accessory insect repellents – Meanwhile, there are also insect repellents that you can actually wear, such as clips, necklaces, and wristbands. These accessories have been infused with natural oils to repel insects. However, they are found to be most effective against mosquitoes. Convenience-wise, these modified repellents are great. But for outdoor pursuits, they might be lacking. They don’t have to encompass effects, as they can leave some of your body parts unprotected.

    Insect Repellents For Your Campsite

    If you want to ensure that your area is bug-free as much as possible, you have to use specialized insect dispersal applications. These amenities are using chemicals that can prevent mosquitoes and other critters from coming in. 

    Interestingly, the protection that they can give is limitless, as long as they have enough fuel or content. You can use these devices if you don’t want to apply your skin with anti-insect lotions and oils. At the same time, they are a great use if you have no plans to leave your campsite throughout the duration of the trip. 

    However, they do come with vulnerabilities, too. For instance, they only work mostly against mosquitoes. Moreover, if the area is windy, then the chemicals they release will be dispersed. 

    There are two primary ingredients used for these devices: allethrin and citronella. Allethrin is a chemical that has been derived from synthesizing chrysanthemum plants. They are sprayed in the air via rechargeable batteries or butane fuel. As long as the device is operating, your area is free from mosquitoes. Meanwhile, citronella is often used in citronella candles. They release airborne repellents that scatter in the air. But at the same time, they aren’t as effective as those sprays.

    In Summary

    Insects are natural inhabitants of the wilderness. During your outdoor trip, you need to expect them. Some of these critters are harmless, while others are annoying and can potentially cause diseases and food spoilage. Hence, it is important that you protect yourself and your campsite from these little intruders. 

    That’s it for now. If you have other inquiries, feel free to ask me in the comment section below.

  • How to Choose the Best & Warmest Base Layers for Cold Weather

    If you want to have a comfortable and safe outdoor adventure, you need to know about the correct layering. Specifically, we are talking about your clothing here. The right set of clothes can help you counteract the weather, temperature, and other external elements that you’ll encounter during your trip. 

    Of course, layering starts in learning how to choose base layers properly. After all, your overall comfort is quite dependent on how your skin feels. If the fabric that is in contact with your skin is irritating, you’ll never experience convenience. Furthermore, your safety might get compromised.

    In choosing the base layers, you should take the following factors into consideration.

    How To Choose Base Layers

    In picking a base layer for your intended activity, there are certain things that should influence your decision. They are the following:

    Fabrics And Materials

    Essentially, if a garment or clothing is tailored to be a base layer, you can expect that it has a moisture-wicking construction. Basically, what you want from a base layer is the ability to manage your sweat and help regulate your body temperature. 

    If you aren’t that specific or keen when it comes to the type of fabric, then you might want to consider the following options:

    Synthetic Fabric 

    Synthetics are the typical options when it comes to undergarments and base layers. Polyester is a popular example, but you can also get other types such as rayon, polypropylene, nylon, or a combination of these materials. If the synthetic material integrates spandex, you can expect that the garment becomes stretchable and extra comfortable. It is also snugly but doesn’t feel too tight.

    Generally, synthetic fabrics are excellent when it comes to wicking perspiration. Hence, they can keep you dry most of the time. Moreover, they are durable too. Among all the base layer materials, synthetics are considered to be the toughest. But this doesn’t mean that the said material is impervious to damage. 

    It is also observed that some synthetics have special treatments so that they won’t retain odor on their surface. In short, you will never get stinky. If you are expecting a multi-day trip, such a trait is quite beneficial. 

    Silk 

    One of the notable qualities of silk is its extreme suppleness. Therefore, it is a decent option for a base layer, especially if your activity isn’t that rigorous. It works well on light and leisure adventures. 

    Silk does a decent job in wicking moisture and sweat. But if you get too sweaty, it will not hold off. Even those that have special treatments may still perform similarly to their synthetic counterparts. Since silk is soft, it is easy to wear, making it a convenient choice for a base layer. But at the same time, its durability is not that great. 

    Moreover, keep in mind that silk doesn’t negate foul smells. After you use them, make sure that you launder them properly. 

    Merino Wool

    Merino wool is not your typical wool. Instead, it is an upgraded version. It is notably superior when it comes to softness, thanks to its highly fine fibers. Moreover, it is compatible with other materials such as spandex, making it more fit and flexible.

    Since it is still wool, you can guarantee that it can wick sweat and moisture. Specifically, the water is retained on its core. But at the same time, it will not make you chilly. Keep in mind, though, that it doesn’t feel dry as compared to synthetics. Furthermore, it has a long drying time, too. 

    Merino wool is durable, too. But it doesn’t last long, especially if you wear it all the time. The constant wear-and-tear can easily weaken the fibers of the wool. If you want a rugged layer made from wool, you should go with those options that have synthetic blends. 

    You will love Merino wool if you don’t like to stink on your outdoor trip. This material features impeccable resistance against bacteria that generate odor, which means that you’ll never get smelly while wearing it.

    Weight Of The Base Layer

    You are free to ignore this aspect, especially if you have no problem wearing garments that are too light or too soft. But keep in mind that certain outdoor applications will require you to be specific to the weight of your base layers. 

    Heavy clothing suggests that it is tailored from durable and thick material. This piece of garment offers sufficient insulation, making it ideal for cold-weather adventures. During hot days, a thick and heavy base layer will make things uncomfortable on your end. If you are into winter camping and alpine hiking, you have no other choice but to wear heavy base layers for added warmth-retention. 

    However, you should always keep in mind that the primary function of your base layer is to manage your sweat and moisture. While it is true that these base layers can add warmth, insulation doesn’t really come from them. Instead, your body heat is mostly kept by the middle layer. 

    Fit 

    It is important for your base layer to be able to wick off moisture and sweat as efficiently as possible. Therefore, there’s a need for these base layers to have direct contact with your skin. If they are loose, they will not be able to do their job.  

    Your objective here is to be able to find a base layer that has a snug fit. Keep in mind that a snugly fit doesn’t mean that it is too tight. The latter restricts your movement and even inhibits the layer’s ability to absorb your sweat. 

    I suggest that you try the garment first to see if it is the right fit for you. If not, then you should move to your next option. There’s no such thing as one-size-fits-all when it comes to these outdoor clothing. Hence, you should always check the sizing charts and try on the garments. 

    In Summary

    It is crucial that you know how to pick base layers for your outdoor activities. These base layers are essential in optimizing your comfort and safety while you are on the move. The quality, construction, and fit of these garments will dictate your overall convenience every time you wear them. Therefore, you should take your time when picking one. 

    That’s it for now. If you have other inquiries, feel free to ask me in the comment section below.

  • Sleeping Bag Basics: Storage, Cleaning, & Maintenance

    How to take care of a sleeping bag? 

    Most of us tend to bring our sleeping bags during our overnight trips. And it is a reasonable thing to do since this utility is the one that gives us comfort and warmth while we are lying inside and outside our tent. 

    As much as possible, we would want to preserve the quality of our sleeping bags. Fortunately, you can achieve this feat through proper and regular care. Just follow the tips below. 

    How To Take Care Of A Sleeping Bag

    Interestingly enough, there are a plethora of ways you should be able to protect your sleeping bag from damage and quality deterioration. But in a nutshell, your due diligence and responsibility as an owner are the most important here. 

    A. While Camping

    Just because you are using your camping sleeping bag doesn’t mean that you can just leave it unattended. Of course, just like other outdoor tools and equipment, the correct usage of sleeping bags can ensure that they can withstand any conditions. 

    Specifically, you should keep your sleeping bag clean and dry while you are camping. Regardless if you have an insulated or down bag, their insulation would be more efficient if they are free from moisture, water, and other unwanted debris. 

    You should also do the following things:

    • Wear clean clothes – Hygiene is always important, even if you are in the wilderness. Never ignore simple practices like cleaning yourself and wearing new clothes before entering your sleeping bag. I know it is tempting to just insert yourself in the bag without changing clothes. But that will cause your sleeping bag to lose its insulation. The sweat, grime, and oil accumulated in your body can deteriorate the loft’s insulating capability. 

    Also, don’t forget to change the clothes you wore while cooking. You don’t want animals and critters to feast on you while inside your sleeping bag. 

    • Opt to sleep with a liner – A liner is beneficial when it comes to extending and preserving the quality of your sleeping bag. After all, they serve as a layer that separates your skin from the interior of the sleeping bag. Liners made from wool, silk, polyester, and cotton are all acceptable choices. Aside from keeping your bag clean, these liners also improve the bag’s temperature rating. For winter camping, these liners are handy.
    • Put a ground defense – If you are not going to sleep inside your tent, your sleeping bag needs some extra protection. Before you lay the sleeping bag on the ground, make sure that you put a pad first. There are suitable options for outdoor pads, such as those that have been tailored from rugged fabric. These pads don’t only protect your sleeping bags from being dirtied; they can also protect them from punctures and holes due to stray branches and stones. 
    • Be careful with the bag’s zippers – I’ve noticed that most damages on sleeping bags occur within or around the perimeter of their zippers. Specifically, it is common for these zippers to snag, especially if the sleeping bag has a two-way zipper. However, you can no longer change the structure and assembly of the bag. Hence, the best thing that you can do is to practice using the zippers and be extra careful when it comes to zipping and unzipping.
    • Use the bag gently – I don’t understand why some outdoor goers get rough on their sleeping bags. I am sure that most of these bags have a durable construction. Still, this doesn’t mean that you can abuse them intentionally. Don’t step or stomp on them. Don’t bring them too close to campfires, either.
    • Don’t lend the sleeping bag – I know that many of you are generous folks, and I genuinely appreciate that. But at the same time, you should put limits on your kindness, especially when it comes to your outdoor equipment. You may care deeply for your sleeping bag, but your friend or colleague may not treat it the same way. Hence, think twice before you agree on lending the bag. 
    • Puff out the air – Your sleeping bag should never have air inside it. That’s why you need to turn the bag inside out so that you can remove the excess air and moisture. You may air-dry the bag, but don’t prolong its exposure to sunlight. After all, UV rays can deteriorate its fabric and loft. If your sleeping gets wet, it requires hours of drying. Furthermore, you will need to dry it as immediately as possible to avoid further damages to the insulation.

    B. Proper Stuffing And Storage

    Of course, you also need to take care of your sleeping bag even if you are not using it. Don’t just throw it around or squash it like you don’t care about its price at all. 

    It’s common for these sleeping bags to be stowed inside a stuff sack while you are traveling to your destination. To ensure that the sleeping bag is free from any damages while inside the sack, I suggest that you do the following things:

    • Proper stuffing – Whenever you stuff a sleeping bag, make sure that you begin with its foot–with the zipper partially closed. Gradually press the sleeping bag’s foot on the bottom of the sack as firmly as possible. Continue stuffing the bag until it fills the entire sack. Doing this will release the air inside the stuff sack and prevent the stitches of the bag from getting worn. 

    If your sleeping bag features a waterproof exterior, turn it inside out first before you stuff it into the sack. If you don’t do this, the shell becomes an air trap, which can make stuffing a lot difficult. 

    • Use a large stuff sack – Don’t settle with a small stuff sack, especially if your sleeping bag is adult-size or bigger. The more space your stuff sack can offer, the easier you can push your sleeping bag inside it. 
    • About compression and waterproof sacks – A compression stuff sack works well for lightweight applications since it reduces the bulkiness of the sleeping bag. You put the sleeping bag inside the sack, then have the straps compress and downsize it even further. Just don’t let the sleeping bag be compressed for extended periods because that would reduce its loftiness. 

    Meanwhile, the waterproof stuff sack is the ideal choice for backcountry and backpacking expeditions. As long as there is an element involved, these weather-proof storage systems are needed. Again, you don’t want your sleeping bag to be drenched by water!

    • Storing the sleeping bag when not using it – It is essential that your sleeping bag is stored correctly every time you are not heading to the wild. The first thing that you need to do is to unzip the sleeping bag and dry it. Once you are sure that it is completely dry, store it inside its storage compartment, which should come together with the sleeping bag upon purchasing it. Of course, you are also free to buy a new storage sack if you find the current one lacking. 

    Let me remind you that you should never compress the sleeping bag inside its container. Otherwise, its loft will be affected. Don’t use watertight sacks, too, as they are prone to condensation build-up.

    C. Other Essential Care Tips

    • Wash the sleeping bag – Of course, sleeping bags have to be washed regularly. I have made a detailed guide on how to wash a sleeping bag properly in a separate post. You better check it out. Don’t let your sleeping bag remain dirty. Otherwise, it will lose its insulation and loftiness. Eventually, it will become smelly, too. 
    • Waterproofing – Most sleeping bags have durable water repellent integrated into their construction. They are applied to the bag’s shell to protect it from water and moisture. Over time, this application wears off, especially if you are using the bag regularly. Fortunately, there are third-party DWR treatments that you can buy in the market. Use them in the sleeping bag shell to restore its water defense. 
    • Damaged zippers and fabrics – Even the most durable sleeping bag is not immune to damages. You should be prompt in repairing them to ensure that the bag will work the way it is intended to be. If there are holes in the sleeping bag, sew them right away with the use of a sewing machine. But if you are not confident when it comes to hand skills, then you can opt for professional repair services. 

    In Summary

    You need to take care of your sleeping bag to ensure that it can give you the warmth and comfort that you need during your overnight camping trips. Proper care combined with responsible usage can help your sleeping bag last for many years.

    That’s it for now. If you have other related inquiries, feel free to ask me in the comment section below.

  • How to Choose the Right Size & Type of Hydration Pack

    Many are asking how to choose hydration packs correctly. Of course, this is a reasonable inquiry as it is an essential utility for day hikes and short outdoor excursions. 

    Basically, these hydration packs are tailored so that people can carry water with them on their trips, ensuring that they can access it conveniently to keep themselves hydrated. This quality is quite the opposite for water bottles where you still have to take from your backpack you can drink their contents.

    Interestingly, most hydration packs today will not hamper your journey at all. You don’t need to halt or move slowly before you can have a drink. You just have to take the tube connected to the reservoir and direct it to your mouth.

    Fundamentally speaking, the best hydration pack may vary depending on your intended application. You should also take into account factors such as fit and capacity. This guide will help you refine your choices.

    How To Choose Hydration Packs

    Before we proceed, let me remind you that most backpacks and daypacks today have interior sleeves on them that are compatible with various reservoirs. If you ever find such a bag, all you need to do is integrate a reservoir and pack your portable hydration station!

    But if you are searching for a hydration pack exclusively, you should check the following guidelines.

    The Type

    These days, hydration packs are divided into two: hydration waist packs and hydration backpacks. Just as their names suggest, their primary difference lies in their placement or how you carry them. 

    Within these categories, they are plenty of options that you can choose from. Some are designed for biking, running, and hiking, and even snowy expeditions. Of course, they can guarantee that they can let you have a sip anytime you need it. 

    Specifically, here are some of the categories that you need to check out.

    Hydration Backpacks

    • Hydration backpacks for hiking – A hydration backpack somewhat resembles the appearance and structure of standard backpacks used in hiking and trailing. It has sufficient space that lets you carry your essentials such as food and extra clothes. These packs vary in size. There are small ones for overnight trips and burly options for extended adventures. 
    • Hydration backpacks for cycling – There are also packs specifically tailored for biking and mountain cycling. These packs have a unique compact design that makes them less cumbersome to carry. Their slim profile also improves their weight management so that users won’t have difficulties carrying them while they are pedaling. Meanwhile, hydration packs for mountain cycling are somewhat bigger than road biking packs. The extra size is for you to bring your tools and extra clothing.
    • Hydration backpacks for running – These hydration packs can either come as running vests or running backpacks. They sound the same, but they aren’t. Running vests have a slim profile and snug fit so that they remain stable and don’t hinder your action. There are a plethora of pockets on their shoulder straps. However, they don’t have a hip belt included in their construction. On the other hand, running backpacks possess hip belts and a number of pockets that you can access easily while you are on the move. They have more storage space, which is ideal for trail runs.
    • Hydration backpacks for snow activities – Choosing this pack means that you are doing stuff like snowboarding and skiing. Specifically, these low-temperature hydration packs have innovative construction that prevents the water they carry from freezing. 

    Hydration Waist Packs

    Hydration waist packs are designed to be placed around your waist. Instead of reservoirs, these packs include a water bottle in their construction. Furthermore, it is also noticeable that their storage space is not as big as their counterparts. 

    These packs are an excellent option if you intend your trip to be quick and light. Adventures like day hikes and trail runs don’t really require extra gears, so you are free only to bring these hydration waist packs.

    The Fit

    Whenever choosing any type of backpack, you should always mind the fit. It is the one that determines if you are going to experience comfort while carrying the pack. 

    So what’s the right fit? 

    Basically, the appropriate fit for you should match the length of your torso and not your height. Moreover, the excellent fit provides a snug hold on your hips, even if your pack doesn’t have a hip belt. 

    • Torso – Needless to say, hydration packs also vary in size, which, in turn, should accommodate a myriad of torso lengths. Of course, not all manufacturers follow the same sizing table, so you might want to check these details first before buying. Meanwhile, other hydration packs have suspension systems that you can adjust so that they can conform to the length of your torso. 
    • Waist – The hip belts of hydration packs can accommodate a plethora of hip sizes. You can guarantee that there’s a size for you, regardless if you are in the 20 inches category or 35 inches or higher. Again, you should refer to the manufacturer’s sizing guide to ensure that you are getting the correct size. 
    • Women – There are hydration packs out there that are specifically tailored for women. One of their noticeable features is their contoured shoulder straps and hip belts. Such a design is compatible with most women’s bodies. Moreover, their torso length is short and narrow. Even if you are a guy, you can still use these women’s hydration packs, especially if you have a small frame. 

    The Capacity

    The capacity of a hydration pack is divided into two: the capacity of the reservoir and the capacity of the primary storage compartment. 

    Reservoir Capacity

    Keep in mind that a single liter of water weighs around two pounds already. Hence, we can easily say that water isn’t as lightweight as it appears to be. Therefore, when carrying a hydration pack, you have to make sure that you have a good idea of the amount of water that you need on your trip. But then again, you still have the option not to fully fill the reservoir if weight is an issue for you. As long as you can grasp your needs, it is alright to pack light. 

    • 0.5 liter or less – This one is definitely a waist pack that can carry up to two bottles of water. It is ideal for lightweight activities like walking or jogging. 
    • 1 – 1.5 liters – Still a good choice for lightweight activities. It is also an excellent option for hikers and bikers. 
    • 2 – 2.5 liters – Hydration packs that belong to this category are highly sought, given that they strike the perfect balance between weight and reservoir capacity.  They have no problems if you refill them from time to time since they are designed for that.
    • 3 liters up – If your trip is exhausting enough that you need to drink water at regular intervals, this option is the best for you. With such a capacity, refilling will never become a thing. It is also a suitable pack for those who want to go on terrains where water sources are rare to non-existent–such as deserts. 

    Features

    • Raincover – A rain cover is a nice addition to any hydration pack, especially if you are anticipating rain, snow, and other harsh elements. 
    • Cold-weather components – If you are looking for a hydration pack that you can bring in your cold-weather expeditions, make sure that they have insulated parts. Specifically, the reservoir, bite valve covers, and sip tubes should have sufficient insulation so that they won’t succumb to the low temperatures. 
    • Clips – It would really be great if the hydration pack you get has a number of clips integrated on their shoulder straps. In this way, you can easily position the tube to your mouth for hassle-free drinking
    • Detachable tubing – A removable tubing is a nice feature, especially if you are expecting constant refills on your trip. By detaching the tube from the reservoir, you will be able to refill conveniently.
    • Shutoff switch – A switch on the bite valve is quite handy. It can prevent the water from spilling whenever you are not drinking from the valve. 
  • What Is the Best Time of Year to Buy a Tent?

    When do tents go on sale during the year?

    When buying outdoor gear, especially tents, there’s nothing wrong if you are conscious of their price tags. Of course, this is an essential consideration that you have to take into account. Not all of us have equal capabilities when it comes to resources. Some of us have no qualms about buying expensive gear and equipment, while others have to wait for the best deals to come. 

    If you are among those who want to “strike while the iron is hot,” then knowing when these tents go on sale is essential. Needless to say, there are particular periods of the year when these tents mark down their prices. You should never miss these opportunities, as they can give you high-quality tents without spending big. 

    So when should you buy a tent? 

    When Do Tents Go On Sale During The Year?

    Many are always on the lookout for discounted tents. But at the same time, they don’t have the willingness to opt for used tents. You see, used tents are cheaper than their brand-new counterparts. You don’t need to wait for any period just so you can get them. They are just there, waiting for their next owner to buy them.

    If you have hesitations when it comes to second-hand outdoor gear, then you have no other choice but to get new ones. And you might need to wait for particular periods before you can get them without paying for their original prices. 

    Here are the times of the year where you can get tents (and other camping and outdoor equipment) on sale:

    During A Season’s End

    Tents are on sale once their prescribed season is over. For instance, if you are looking for a 4-season tent on clearance, then you should buy them during late winter or early spring. During these periods, manufacturers and stores are trying their best to liquidate and empty their inventories. In this way, they can put new items on their shelves in preparation for the upcoming season,

    Of course, the amount that you can save depends on various factors. Some stores tend to cut off large numbers from the price tag so that they can be sold quickly. Others opt to provide special promos such as “buy one, take one” or bundling them with other items and sell them at less the cost if you purchase them separately. 

    At this point, it is essential that you are aware of the original prices of these products. You see, there are still outlets that still implement underhanded tricks to fool their customers. For example, they just advertise “clearance sales” or “discounts” on their items but even without marking down the prices. They just fool people by making them think that they have saved money–even if they didn’t. Don’t let the hype take the rationality away from you. 

    Cyber Monday and Black Friday

    It is not a secret that a lot of items are on sale during Black Friday and Cyber Monday. However, if you are just looking for discounted tents, you should wait for the next Black Friday. After all, Cyber Monday is dedicated to electronics, appliances, and gadgets. 

    Meanwhile, Black Friday is for everyone. It doesn’t matter what kind of item that you want to buy; in this season, you can see them on sale! Tent manufacturers and outlets are no exception when it comes to this “special day.” They participate in the sales and the provision of special offers and promotions. 

    In fact, some of them give limited-time vouchers that you can use to get free shipping, additional discounts, and other perks that could make your purchase worth your money. It is something that you might want to seize if you want to get the best out of your bucks!

    Year-End And Christmas Sale

    The market is always alive and blooming during December. It is this month where clearance sales and discounts are scattering left and right. They present you with the right opportunity to get your dream outdoor equipment without breaking your bank account.

    Many outdoor manufacturers and stores will also grab this season to attract customers to buy their goods. If you are looking for a discounted brand new tent, you should shop during a Christmas or Year-End Sale. It’s a guarantee that you will find affordable, high-quality tents.

    Tips In Shopping Tents For Sale

    The following methods can help you get the best deals from your favorite tent brands and outdoor outlets:

    Get Subscribed

    The first ones who can get in the line are those who have prior information that a sale is going to take place. If a particular platform is offering to include you in their mailing list, don’t hesitate to do so. While most of their emails are usually for promotions and information dissemination, there are still instances where they announce upcoming sales and special offers to their customers.

    Typically, these perks are only given to those individuals who are on their mailing list. If you are an outsider, you would never really know if there’s a flash sale going on. Furthermore, you should not worry about subscribing. You always have the option to unsubscribe, especially if you have already acquired the tent that you want.

    Hunt For Coupons

    There are multiple ways you can get exciting coupons to your preferred stores and retailers:

    • Scout coupon websites – These days, there are a number of coupon sites that are littering on the Internet. Not all of them are legitimate, but there are some that give you secret deals and discounts. You should search diligently to ensure that you can find a valid coupon that you can use upon purchase. Some of the sites that you need to check out are the following: EMS, REI, Cabelas, and Backcountry. 
    • Honey app – If you are using your smartphone to shop for tents and outdoor gear, you should download the application Honey. Honey automatically provides coupons to your purchases. It is a great application to have since it gives you coupons even if you think that there are none available. You can also download Honey on your desktop as an extension plug-in. 

    In Summary

    It is not shameful if you want to buy your outdoor gear while they are at a discount. Being frugal is essential these days, after all. Items like tents are not actually cheap, especially if you are aiming for those that feature exceptional infrastructure and ergonomics. Hence, if there’s an opportunity that you can get them at their marked-down prices, do so.

    That’s it for now. If you want to know more about tents and other things related to the outdoors, feel free to ask me in the comment section below.

  • Where To Find Used Tents For Sale?

    Where to find used tents for sale?

    Over time, many people have grown inclined toward camping and other outdoor activities. Of course, the number of benefits that these endeavors bring can never be counted by all of your fingers. 

    Every time we talk about the outdoors in general, tents always come into the picture. In a nutshell, having a tent gives you the freedom to stay wherever you want, especially if it has the right features and infrastructure. There are different types of tents. They vary in style, shape, size, and even application. 

    Furthermore, tents also differ in their prices. Some are less than a hundred bucks, while others go more than a thousand dollars. When buying a tent, it is expected that the brand-new models are expensive. Others don’t mind the figures; however, there’s a number of outdoor enthusiasts who don’t have the luxury to spend big on tents. Their best option is to get those used tents. 

    If you are going the same route, you might need to know where to get these used by definitely not abused tents.

    Where To Find Used Tents For Sale?

    Fortunately, there are numerous platforms where you can get these used tents. I can give a plethora of examples. 

    eBay

    First, you can always go on eBay. Anything under the sun is probably present in this massive online aggregate buy-and-sell site. There are a number of outdoor tents that are being listed on this site on a daily basis. You can find popular brands here, too. And if you are lucky enough, you can get tents that are still in a brand-new condition minus the original cost. Some of my tents are purchased on Ebay, so it’s something that I can vouch for. 

    REI

    If you want an outdoor-oriented platform to buy used tents, you can always try REI. Many of you assume that REI is just for high-end, brand-new outdoor equipment. However, this site also offers used tents. And the best part about REI is that it has strict scrutiny over second-hand tents. Specifically, REI only offers gently-used tents. It is an additional guarantee that the tent you will get is still in good condition. Furthermore, they are less than their original prices, so it is a good deal for you. 

    OutdoorsGeek

    Another site that I can refer to is OutdoorsGeek. It is an excellent site to hunt used tents, especially if you are conscious of quality and brand. The site has been a household name when it comes to selling second-hand tents. OutdoorsGeek sells both gently used and clearance tents, which is ideal for those who want to get the most out of their money. Moreover, you can guarantee that their tents are authentic. No cheap rip-offs!

    The North Face Renewed

    Are you a fan of The North Face? I am pretty sure that a majority of you here would love to get your hands on any tent that this brand manufactured. Of course, the quality of their products, especially their tents, are superb and innovative. The downside is that The North Face brand isn’t that cheap. Fortunately, it launched its online used gear platform called “Renewed.” The quality of their used items is indeed impressive. The folks at The North Face always check and conduct necessary repairs to their second-hand products before selling them to the site. However, I just noticed that the selection is quite limited. Hence, it is already a big deal if you can seize something from them!

    Gear Trade

    You can also try Gear Trade if you are looking for outdoor tents and other similar equipment. Gear Trade offers extensive selections that are brimming quality and affordability. You will find a myriad of second-hand tents here. However, I just want to remind you that the tents listed here don’t last long. They just come and go because there’s a lot of people who are constantly buying here. Furthermore, with the ongoing pandemic, the volume of used tents advertised on this site has decreased.

    MEC Gear Swap

    MEC Gear Swap is definitely an interesting choice for those who want to get already-used tents. Unlike other platforms here, this site doesn’t act like a “direct” seller. Instead, MEC Gear Swap works as a middleman for those who want to sell and buy outdoor gear. Because of this unique mechanism, many people opt to do their transactions here because of the added security present. But at the same time, there are still some scammers that are lurking here. 

    In Summary

    Whenever you need a tent for your outdoor endeavors, it is crucial that you can check its qualities and features. Of course, it is a given that fresh-from-the-factory tents offer the best of these factors right from the get-go. However, if you are not ready to get them because of financial matters, then you can always purchase used tents as alternatives. 

    There are a number of used tents up for sale these days that are still in good condition. That’s a testament that their previous owners had implemented the proper maintenance regimen on them. If you can just get these tents, you’ll have a great outdoor shelter in your next adventure without spending too big. 

    The sites I’ve listed above are some of the reliable platforms where you can get used tents for sale. You might want to start searching for them before taking your hunt to other areas. 

    That’s it for now. If you have inquiries, feel free to drop them in the comment section below.

  • How Much Do Tents Cost?

    How much do tents cost? 

    This question is quite tricky to answer. After all, the price range of these amenities can go as low as $50 and as high as $1,000. Most of the time, the price of these tents is dependent on their features, specifications, and even their brand. For instance, we can’t deny that big players like Marmot, REI, and Mountain Hardwear are more expensive than their entry-level counterparts. 

    Of course, the numbers are not a problem, especially if you are really willing to invest in expensive tents. If you want to explore the summits and harsh conditions, you would need these high-end outdoor shelters–such as 4-season tents. 

    In short, the real question here is how much you are willing to spend. In the next sections, we will discuss the prices of various types of tents. In this way, you will be able to decide which one to get. 

    How Much Do Tents Cost: A Detailed Rundown

    We can make accurate estimations when it comes to the price of outdoor tents by classifying them based on their type.

    Surely enough, this doesn’t mean that a dome tent is more expensive or cheaper than a geodesic tent. It could go vice-versa, depending on the features, architecture, and intended application. 

    However, we can make things simple if we can categorize the tents. 

    Dome Tents 

    Dome tents are the most common type of outdoor tent. They are easy to distinguish one from other tents. A typical dome tent has flexible poles that intersect in the center, allowing it to assume a dome shape. It has different capacities–from 1-person to 8-person. 

    Dome tents also feature either single-wall or double-wall designs. A double-wall dome tent has an inner layer, usually tailored from mesh. Furthermore, the double wall is in the form of a rainfly. Single-wall dome tents are durable, too. However, they don’t have that breathability. 

    Overall, these tents have enough headroom. But don’t expect that you can stand straight inside them. Pitching them is easy, too. 

    For their price, dome tents range from entry-level to high-end ones. You can see some of the notable dome tents and their respective prices below. 

     Seasonality CapacityFloor AreaPrice
    REI Co-op Quarter Dome SL 1 Tent 3-season1-person18.9 square feet$299.00
    The North Face Sequoia 4 Tent 3-season4-person58.1 square feet$399.00
    Marmot Tungsten 2P Tent 3-season2-person32 square feet$214.00
    Coleman Sundome Tent 3-season2-person35 square feet$64.00
    Core 9 Person Extended Dome Tent 3-season9-person144 square feet$144.95

    A-Frame Tent / Ridge Tent

    In the past, it was quite difficult to see other tent shapes aside from the ridge. The ridge, or A-tent, got its name because of its triangular architecture. It is considered the original and iconic shape of tents. 

    In the past, these A-frame tents had canvas canopies and were supported by either wooden or metal poles. These days, these tents feature lighter construction, such as the use of fiberglass or aluminum poles. They don’t typically use high-denier fabrics since these tents are not usually a favorable choice for backpacking or mountaineering applications. 

    The tent is easy to set and pitch. Furthermore, it boasts ample stability. But on the downside, it is bulky, and the tent doesn’t have enough headroom. The ideal application of A-frame tents is leisure camping and any outdoor application where the weather and distance are not a problem. 

    Here are some of the popular ridge tents and their prices. 

     Seasonality CapacityFloor AreaPrice
    Eureka! Alpenlite XT 4-season2-person31 square feet$399.00
    OneTigris Backwoods Bungalow 3-season2-person32 square feet$199.98
    Eureka! Timberline Backpacking Tent 3-season2-person36 square feet$209.00

    Multi-Room Tents

    If you are going in a pack or large crowd, having a multi-room tent is an ideal move. Well, you can segregate into single or two-person tents. However, the benefit of a multi-room tent is that it can streamline the bulkiness and weight of your pack. Basically, having a single tent that can house multiple people is a good deal to pick, especially if you are not planning to head out on extended expeditions in harsh terrains. 

    Multi-room tents also provide enough storage space for your belongings. Even a model without awnings or vestibules can still have sufficient area where you can stash your belongings. Hence, they are a perfect choice for groups of friends and families. 

    Needless to say, these tents may get pricey, especially if you pick something that has impressive infrastructure and features. However, I’ve seen models that are pretty inexpensive.  

    One of the proven downsides of these multi-room tents is their size. They are heavy and bulky. Furthermore, it takes time and effort before you can pitch them. They are also prone to the effects of strong winds. To prevent these problems, it is recommended that you only use this tent on simple camping trips. Never take them on unfamiliar or challenging terrains. 

    Check the following multi-room tents and their current market value. 

     Seasonality CapacityFloor AreaPrice
    NEMO Wagontop 8 Tent 3-season8-person125 square feet$749.00
    UNP Camping Tent 3-season10-person162 square feet$189.99
    CAMPROS 8-Person Tent 3-season8-person126 square feet$169.00
    Coleman Elite Montana 8-Person Tent 3-season8-person112 square feet$157.99

    Geodesic / Semi-Geodesic Tent

    With a geodesic tent, you will get the best features of a dome tent. At the same time, you can also get stability as an extra benefit. A geodesic tent has a geometric shape. This is due to the fact that the tent has multiple poles that intersect with each other repeatedly. The intricate patterns of the poles provide a geodesic tent with impressive hold and stability. 

    Most of the time, these geodesic tents are more favored than dome tents for technical outdoor applications. They have impressive support to withstand harsh atmospheric conditions. 

    Their downside is that they are typically large when packed. Furthermore, it requires practice before you can pitch them properly. But if you can weather these issues, geodesic and semi-geodesic tents are great all-rounder shelters. 

    Their prices are fairly reasonable. Because of their intended application, it is not surprising that they are always placed in the mid- to high-end categories.

    The following are some of the popular geodesic tents and their respective prices.

     Seasonality CapacityFloor AreaPrice
    ALPS Mountaineering Tasmanian Tent 4-season2-person34.5 square feet$236.24
    Mountain Hardwear Nimbus UL 1 Tent 3-season1-person19.7 square feet$330.99
    MSR Mutha Hubba NX 3 Tent 3-season3-person39 square feet$549.00

    Backpacking Tents

    A backpacking tent is generally any tent that is designed for backpacking. If the intended application requires extended or long-distance hikes, you need a backpacking tent. Typically, this tent is smaller and lighter than most of its counterparts. After all, backpacking has emphasis when it comes to shedding your backpack’s bulkiness and weight. 

    It is not surprising that backpacking tents have a limited number of poles so that you can pack them compactly. They also have low vertical height; their capacity is restricted to single or two persons only. But don’t fret; they are made to be sturdy and stable. They can withstand the weather and difficulties of being away from established camping sites. 

    Price-wise, these backpacking tents range from mid-tier to high-end categories. The following are some of the exemplary backpacking tents that outdoor enthusiasts use today.

     Seasonality CapacityFloor AreaPrice
    Marmot Tungsten 2P Tent with Footprint 3-season2-person32 square feet$214.00
    REI Co-op Passage 2 Tent with Footprint 3-season2-person31 square feet$159.00
    Exped Lyra II Tent 3-season3-person30.1 square feet$279.00
    Kelty Salida Camping and Backpacking Tent 3-season2-person30.5 square feet$149.95
    Bessport Camping and Backpacking Tent 3-season2-person28.6 square feet$65.00
    NEMO Dragonfly 2 Tent 3-season2-person29 square feet$399.95

    In Summary 

    The price of tents varies based on their features and intended use. It is not a surprise that most tents that are geared for extensive applications are more expensive than those leisure-type and straightforward tents. It is just proof that the quality and material used on a tent heavily influence its price. In a nutshell, there’s no fixed answer to the question “how much do tents cost.” It’s more proper to consider your needs and financial capacity before buying an outdoor shelter.

    That’s it for now. If you have inquiries, feel free to ask me in the comment section below.

  • How To Choose Hiking Boots: A Detailed Guide

    How to choose hiking boots? 

    Whenever you are heading into altitudes, you have to mind what you wear. Your footwear, for instance, plays a vital part in your performance, stability, and protection while you are hiking. Therefore, it is quite crucial that you pick the best hiking boots for your needs. The wrong boots can be a hiking mistake that causes discomfort, injury, or endanger you.

    In this post, I will discuss some of the essential considerations that you should mind whenever choosing a pair of boots for hiking. In this way, you’ll get the most out of your money and convenience. 

    Let’s get started.

    How To Choose Hiking Boots: The Basics

    To make things simpler, it is essential that you realize that the process of choosing outdoor gear requires trial and testing. This concept applies to hiking boots and other related footwear. Basically, you would want your boots to fit your intended application, including the terrain you want to tread. 

    The following are the fundamental considerations in picking hiking boots.

    • Type and variation – Not all boots are the same. There’s no such thing as one-size-fits-all for this particular equipment. In fact, the gamut of selection is so extensive that you need to write down your requirements and preferences first. There are options for heavy-duty mountaineering down to ultralight hiking.
    • Architecture – You would want to understand the construction of a hiking boot before buying into it. Specifically, you should have a grasp of components like midsoles, uppers, outsoles, and lowers since they form part of the overall performance of the footwear. If you can understand the nuances, you will be able to narrow down your selection. 
    • Fitting – Finally, you would want your hiking boot to provide a perfect fit for your feet. It’s the only way you can experience comfort and support while you are on the road. If your boots don’t have the correct fit, you’ll also be prone to experience blisters and injuries. 

    Choosing Hiking Boots Based On Type

    • For backpacking – A hiking boot tailored for backpacking is capable of handling heavier loads, even in extended trips. If you are planning to do some backcountry hikes, it is recommended that you get this one. A backpacking boot is known for its high-cut construction. Specifically, this boot can wrap the region above your ankle for additional support. Moreover, they excel in durability, too, as proven by their stiff midsoles. They are downright perfect for off-the-grid and on-the-trail trips.
    • For day hikes – Hiking boots vary from high to mid-cut options. They are designed for short backpacking trips or day hikes (trips that do go beyond overnight). They work well if you are carrying light loads only. Furthermore, it is noticeable that these boots are quite flexible. They don’t require extensive break-ins. However, keep in mind that they don’t excel that well when it comes to durability and support departments. 

    Construction And Parts

    Always be a sleuth when it comes to inspecting the construction of hiking boots. A single flaw can make a particular option not suitable for you. 

    Uppers 

    It is important to note that the materials used in the boot influence its overall durability, breathability, water defense, and weight. Here are some of the most commonly used materials in constructing hiking boot’s uppers.

    • Full-grain leather – This one is standard, as it’s abrasion-resistant and highly durable. It also adds to the water resistance of the footwear. Most of the time, full-grain leather is used in backpacking boots designed for multi-day trips. They also handle harsh terrains and have the stability to manage heavy loads. However, keep in mind that this leather is not within the lightweight department. 
    • Nubuck leather – I am pretty sure that some of you have encountered the term “nubuck” already. Basically, nubuck leather is a variation of full-grain leather but has been buffed so that it would look like suede. It is ultra-durable and offers excellent defense against the elements. It also provides a semblance of flexibility. However, you need to spend time breaking the leather in, especially if you intend to have a multi-day hike. 
    • Split-grain leather – A split-grain leather is not a stand-alone material. It is often used together with nylon mesh to create a boot that is light and breathable. The term “split away” refers to the way the leather is divided into the soft exterior and rugged interior. Of course, its obvious advantage is cost, as less material is used in the construction of the boot. But at the same time, it has low resistance against the elements. 
    • Synthetic leather – Keep in mind that synthetic leather is not genuine leather. It is made to mimic the performance of the real thing. Basically, synthetic leathers are made from nylon and polyester. They are the material of choice for many boots today. The leather is easy to break in and dries quickly after getting drenched. Compared to genuine leather, synthetics are downright cheaper. Its main disadvantage is that it wears quickly due to stitching. 
    • Waterproof materials – Hiking boots may also possess waterproofing capabilities if their uppers are tailored with waterproof membranes. A popular example of this is Gore-Tex. Such a feature is helpful, especially if you are hiking on wet terrains or rainy conditions. But keep in mind that these boots can get damp and hot during hot days because of their poor breathability. 
    • Insulation – Winter hiking boots and mountaineering footwear have insulation on their uppers. In this way, they could induce heat retention and warmth to the feet while hiking in cold weather. 

    Midsoles

    It is the midsole that provides footwear the cushioning that it needs. It also helps mitigate shock and aid in assessing the stiffness of the boots. A stiff boot is essential for hiking, especially if you are heading on difficult terrains. The stiffness prevents your feet from experiencing stings if you ever step on sharp or rough objects.

    Today, midsoles are constructed either via ethylene vinyl acetate (EVA) or polyurethane. 

    • EVA – EVA is lighter and softer than polyurethane. Moreover, it is cheaper, too. Most hiking boots use EVA in different densities to cater to different needs and preferences when it comes to support and cushion.
    • Polyurethane – On the other hand, polyurethane is more durable and stiffer than EVA. Hence, it is a prime choice for mountaineering and backpacking boots.

    Outsoles 

    Since we are talking about hiking boots, then their outsoles should be exclusively rubber–with the occasional inclusion of carbon. Rubber is a prime choice because it is tough but offers impact absorption. Outsoles that have thick and deep lugs are ideal for mountaineering and backpacking. Such features are necessary for the boot to have a sufficient grip on the ground. The broader the lug, the more it can generate traction. Muds don’t stick inside them for too long. 

    You can also find the heel brake on the outsoles. It improves the friction on the boot and the ground, preventing you from slipping whenever descending on trailing slippery terrains. 

    Interior Support

    Plates – These are the inserts known for their flexible structure. They are placed in between the outsole and midsole. They usher protection to your feet so that they won’t get scratched by stray objects on the ground–such as branches. 

    Shanks – The shanks are inserts within the outsole and midsole of the boot. It is there to optimize the stiffness and carrying capability of the midsole. Shanks have different lengths. There are those that encompass the entire midsole; others are only half. 

    Fit And Sizing

    Before you start shopping, you should know what’s the ideal fit for you. A pair of boots suit you if it’s snug on all parts–but not too tight. It should also have enough room for your toes to move. Also, don’t forget to wear socks whenever trying on a pair of footwear. You’ll be able to assess whether or not you have to adjust your boot size.

    There’s no love lost if you are going to measure the length of your arch and feet. Once you get the figures, you can refer to the sizing charts of various boot manufacturers. Keep in mind that you should have around an inch of space between your insole’s end and your longest toe. 

    If you think that you are having difficulties with fit even though you have tried all sizes available, then you might consider wearing orthotics. They can significantly improve one’s fit if used appropriately. You might also want to check aftermarket footbeds or insoles.

    Of course, try some lacing techniques so that you can adjust the snugness of the footwear. Little things like this can help your feet experience more comfort and support from your hiking boots.

    In Summary

    This is just a simple guide on how to choose hiking boots, but it is already enough to cover all the fundamentals. Keep in mind that you have to take into account your preferences when it comes to refining your choices. In this way, you’ll arrive at an option that is desirable and suitable for you. 

    That’s it for now. If you have other related inquiries, feel free to ask me in the comment section below.

  • 10 Common Camping Hazards And How To Deal With Them

    When camping, all the things that go into your head are how to have fun. Of course, that’s one of the primary reasons why this outdoor activity is a never-ending trend. Leisure, adventure, expeditions–you name it. They are the magnets that attract people to head out and be off-the-grid. 

    However, it’s not all fun and games when it comes to camping. Hazards and risks are always looming in the corner. Unfortunately, even the most careful and prepared campers aren’t that immune to SHTF situations. Sometimes, they are inevitable. 

    To stay afloat in the face of these emergencies, you need to know what they are first. In this way, you can take the necessary measures to prevent and overcome them. 

    Common Camping Hazards And How To Deal With Them

    Poison Ivy

    Poison ivy is one of the most common threats to people who enjoy the outdoors. While many people consider it a harmless plant, others find it to be extremely harmful. Poison ivy, or Toxicodendron radicans, is an evergreen shrub that can grow from one to four feet tall.

    Commonly mistaken for a vine, this leafy plant has tan or yellow berries at the end of its branches. The plant produces milky juice that is highly toxic, even for non-poison ivy-sensitive individuals. Poison ivy is capable of spreading by seeds, roots, and above all by means of spores, which travel through the air and are carried by wind currents.

    Remedies:

    • Apply alcohol to the affected area
    • Cold compress
    • Don’t scratch your skin
    • Use topical creams and lotions
    • Take antihistamines
    • Take a bath

    Lyme Disease

    Lyme disease used to be a relatively uncommon vector-borne disease in the United States. However, increasing numbers of people—including campers, hikers, bicyclists, and others—have been exposed to this disease in the great outdoors. 

    Lyme disease is caused by bacteria that are transmitted by the bite of infected ticks. These are commonly found in the woods but can also enter a home through cracks in the foundation or through window screens. Symptoms of Lyme disease typically begin with a bullseye rash, which is sometimes accompanied by fever and fatigue. Once the rash appears, it may appear in the form of circular or oval shapes. Often, there will be a red ring that surrounds the site of the rash. 

    Prevention:

    • Wear long garments when camping or going outdoors
    • Apply insect repellent

    Remedies:

    • Lyme disease is treated with antibiotics. Hence, the intervention of physicians is necessary to prevent the disease from spreading.

    Bears

    Camping is a wonderful way to spend time with friends and family, but it can also be dangerous when bears are in the area. Bears are intelligent, predatory animals, and if left alone, they will usually avoid people. 

    However, if they are accustomed to people, they might target people for food. And that will put you in danger, too. If you enjoy camping, you should not be too afraid of bears, but you should still take precautions.

    Prevention:

    • Don’t hike at dusk or dawn. 
    • Always be alone. Be in a group while you are hiking or trekking. 
    • Try to make noises while you are on the move. But don’t use whistles and bells. 
    • Bring bear spray at all times.
    • If you see bear cubs, stay away from them.
    • Never approach bears. 

    Discouraging bears:

    • Don’t leave your food outside.
    • Implement proper food storage methods so that you’ll never be targeted by bears.
    • Put fragrant and odorous items far away from your tent.

    Hypothermia

    Many people go camping without planning to prepare for the elements, with the result that tents and other shelters may become too cold during the night. This is hypothermia, and it is a very dangerous condition with potentially lethal results. 

    Hypothermia is a dangerous condition that can occur when the body’s temperature drops below the critical levels.  Symptoms can include irrational behavior, confusion, slurred speech, and lack of coordination. If the victim is left alone in the cold for too long, he or she can become unconscious and even die.  You may be able to prevent hypothermia by taking some simple precautions.

    Prevention:

    • Check the weather forecast first before heading out.
    • Be equipped with sufficient insulation.
    • Wear the right gear for cold weather.
    • Stack your body with enough calories, fat, and carbohydrates.
    • Don’t wear cotton; instead, pick wool and synthetic fabrics.
    • Bring extra clothes. 

    Remedies:

    • Be gentle in handling a person who is suffering from hypothermia. 
    • Take out the wet clothing and change it with dry ones.
    • Wrap the body with blankets.
    • Shield the body from cold surfaces.
    • Give warm food or beverages. 
    • Apply warm and dry compress. 

    Mosquitoes

    If you’ve been camping anywhere, you’ve probably seen the dreaded mosquito. It’s not only a nuisance but also potentially dangerous. These critters are attracted to carbon dioxide and your scent.

    Mosquitoes are blood-sucking insects that can be found in an array of different habitats, including jungles, tropical forests, deserts, and wetlands. Due to its variety of habitats, the mosquito has been found on every continent except Antarctica. They are potentially dangerous, especially if they spread fatal diseases like dengue and malaria. Immediate medical intervention is necessary once a person suffers from these conditions. Symptoms like recurring fever, nose bleeding, and skin rashes are the sign that you need to rush someone to the nearest health facility. 

    Prevention:

    • Settle on a dry camping site; don’t go near areas with stagnant bodies of water.
    • Cover yourself with the appropriate camping clothing.
    • Don’t put up scents to avoid attracting mosquitoes. 
    • Use mosquito repellents on your skin.
    • Set a campfire.
    • Always shut your tent’s doors and windows.

    Dehydration

    When it comes to camping and backpacking, we usually take a lot of water with us. That’s because we’re all aware of the risks of dehydration, including heat exhaustion. They can lead to heat stroke and hyponatremia, which, in turn, results in death and permanent brain damage. When we’re out in the wilderness, it is very easy to forget that we need to make sure we’re getting enough water to drink. And that’s something that you need to avoid at all costs.

    Prevention:

    • Drink water before the trip.
    • Veer off from alcoholic drinks before hiking or trekking.
    • Drink water before you feel thirsty.

    Remedies:

    • Take oral rehydration salts.
    • Bring a water filter on extended trips; they will let you drink nearby sources of water without getting poisoned or infected.
    • Rest and don’t rush things. 

    Snakes

    Snakes are among the most dangerous of all wild predators. Hikers and campers should be aware of the ways these animals may be found slithering along during their travels. Snakes are most often found in areas where humans and prey animals are present, such as hiking trails, farmlands, or woodlands. In some cases, snakes may be lured into a personal campsite or garage. 

    Depending on the kind of snake, a bite can be fatal. Sometimes, it doesn’t take an hour before their venom wrecks your body. Prevention is always the best defense when it comes to snake bites. You would want to steer away from these creatures before any tragedy can take place.

    Prevention:

    • Choose a snake-free camping ground
    • Clear the clutter around your campsite. 
    • Learn proper food storage methods.
    • Make sure that there are no holes in your tent where the snakes can enter.
    • Shake your sleeping bag before and after using it. 
    • Cover critical areas such as your legs, ankle, and feet with rugged clothing.
    • Always be wary where you are walking. Be mindful of your surroundings.
    • Spray insect repellent. Alternatively, you can pour vinegar on the perimeter of your campsite.
    • Don’t provoke or stay too close to the snake. Treat all snakes as dangerous. 

    What to do when you are bitten:

    • Call emergency hotlines such as 911.
    • Remain calm when bitten. 
    • Take out any restrictive clothing or accessories that can cause swelling in the bitten area.
    • Use an immobilization bandage as quickly as possible. 
    • Don’t suck the blood. 

    Lightning

    It’s a fact that lightning is a serious camping hazard. More than a few campers have lost their lives as a result of it, with even more lightning victims left with permanent injuries or disabilities. A risk of getting struck by lightning while camping comes from the fact that many of us campers have no idea where lightning bolts might strike us at any given moment. Unfortunately, it’s almost impossible to detect lightning before it starts its strike.

    Prevention:

    • Always check the weather. Forecasts can tell you if there’s a possibility of lightning storms. 

    How to stay safe when there’s a lightning storm:

    • Don’t stay near objects that are taller than their surroundings, such as trees, boulders, and posts. Canopies are safe as long as they have a uniform height. 
    • Steer away from conductors like metal objects and wet items. 
    • Distance yourself from metallic equipment such as fishing poles, crampons, and climbing tools.
    • Go out from the water. 
    • Don’t stick together if you are camping in groups.
    • Curl down. Do the “lightning position.”
    • Once you hear roaring thunder, it is time that you should head back to your shelter. 

    Getting Lost

    Camping is a great way to get away from the hustle and bustle of everyday life—there’s something peaceful and rejuvenating about being surrounded by nature. But, for many people, it can also be a scary experience. That’s especially true when it comes to getting lost in the woods. Again, prevention is better than cure when it comes to this matter. You can always stay on track so that you’ll not lose sight of your campsite. 

    How to avoid getting lost while camping:

    • Stay on the trail, especially if you are not familiar with your location.
    • Don’t camp or hike by yourself. Bring someone with you.
    • Know how to use the map and compass. 
    • Be observant of your surroundings. Try to spot landmarks and easy-to-identify objects because they’ll serve as your guiding posts.
    • Bring a whistle with you.
    • Bring a GPS.

    What to do if you are lost:

    • Stay calm and keep a level head.
    • Build a campfire. The smoke produced by the fire can help your rescuers spot you.
    • Search for trail marks and other significant landmarks that you can use to guide your way back.
    • Blow your whistle. 
    • Look for a temporary shelter. 
    • Contact someone for help.

    Flash Floods

    While flash floods are not a problem most of the time, they can be dangerous for people camping in the woods. Although most of these floods are caused by heavy rain, they can also occur due to other natural factors. 

    The best way to avoid this disaster is by finding a safe spot. The location should be away from the water and any trees, as the damage will be more severe if the trees start falling. It is recommended to carry a shovel and a tarp or sleeping bag, and an emergency blanket as these will help protect you from the water.

    How to avoid flash floods:

    • Check the weather forecast. Do this multiple times in the day.
    • If the atmospheric condition is getting gloomy, start evacuating. Don’t leave your safety to chance.
    • Pitch your tent at elevated places.
    • Avoid pitching your tent at the bottom of the hill, ditch, or ravine.
    • Don’t be too close to any bodies of water such as rivers. 
  • Tent Repair: How to Patch & Fix Rips

    How to repair a ripped tent? Is this task even doable?

    You see, your tent is a precious amenity. In every outdoor adventure, a tent gives you the shelter that you need for convenience and protection. 

    But if you are heading on a backcountry or backpacking trip, there’s a possibility that your tent gets damaged. This is especially true if you are going to camp in a woody area where there are a lot of stray branches. They can pierce and rip the fabric of your tent. 

    The same thing can happen if you are doing an expedition on a rocky mountain. The sharp and jagged rocks there are capable of tearing your tent. 

    If these unfortunate things happen, people think that the immediate solution is to throw the tent and buy a new one. Honestly, that’s absurd and impractical, especially if the damage is just present in a particular part of the tent. You can still fix the problem if you are diligent enough to do so.

    If you want your tent to last for a few more adventures, do the following repair tips. 

    How To Repair A Ripped Tent

    Cut Loose Threads From The Torn Part

    Every time a garment or fabric is ripped, it leaves loose fabrics and threads. Such a situation happens, regardless if your tent is made from polyester or nylon fabric. You need to take out these protrusions because they can cause further tearing and ripping to the tent. 

    To do this, you simply need to take a pair of sharp scissors and begin trimming the excess threads. Be careful, though, as you don’t want to make accidental cuts to the tent. 

    Start Cleaning The Damaged Area 

    Before you can start repairing your tent, it is important that you can clean it first. Dirt, debris, and stains can prevent you from effectively fixing the torn part of the tent’s fabric. 

    You should scrub your tent thoroughly to remove the blemishes. After that, rinse and dry it properly. If you see that your tent is clean, you can just apply alcohol to it. Make sure that you include the interiors of the tent in the cleaning process.

    Steam The Damaged Area

    This step is not that necessary anymore, but it can help in doing foolproof repairs. There’s a possibility that your tent’s fabric has been riddled with folds and creases. They can complicate the process of repairing the damaged part of the tent. 

    Similar to ironing your clothes, heat can remove the grooves and ridges in the fabric. You should also steam both the exterior and interior of the tent, ensuring that the material is smooth and flat thoroughly. 

    Use Repair Tape Inside The Tent

    One of the best ways to repair a ripped tent is by applying repair tape to its interior. Specifically, you are going to patch the tape to where the rip took place. Make sure that the tape is bigger than the torn area–about half an inch to all sides. 

    Use a pair of scissors to trim the tame so that its edges become round. A round corner is less prone to peeling as compared to a sharp one. 

    After that, you can start peeling the backing from the tape and apply it over the ripped area. While patching, make sure that you don’t create air bubbles. Put sufficient pressure on the patch so that the tape will seamlessly integrate with the tent’s fabric.

    Apply A Sealant On The Outside Of The Tent

    It is not enough that you only patch the interior of the tent. To make a seamless repair to the tent’s material, its exterior should be fixed, too. To do this, you will need a sealant or adhesive, preferably a unit that provides waterproofing. 

    Use a small brush and apply the sealant along the sides of the tear. Do this thoroughly so that you will not miss anything. You can extend the area where you are applying the sealant by around a quarter of an inch. The sealant aids in increasing the weatherproofing and overall strength of the patch. 

    In some cases, the repair tape should be enough. But if you don’t want to take any chances, then you should use these sealants. 

    Dry The Repair

    Of course, it’s not recommended that you use the tent right away after you finish repairing it. You should let the tape and adhesive dry for at least a day to ensure that they will set properly. But after it’s done, your tent is ready again to take on any outdoor adventures. 

    In Summary

    It is not that difficult to learn how to repair a ripped tent. You simply need the right tools to get it done. Of course, it takes a little diligence on your part to ensure that your outdoor equipment is well-maintained. 

    That’s it for now. If you have other related inquiries, feel free to ask me in the comment section below.