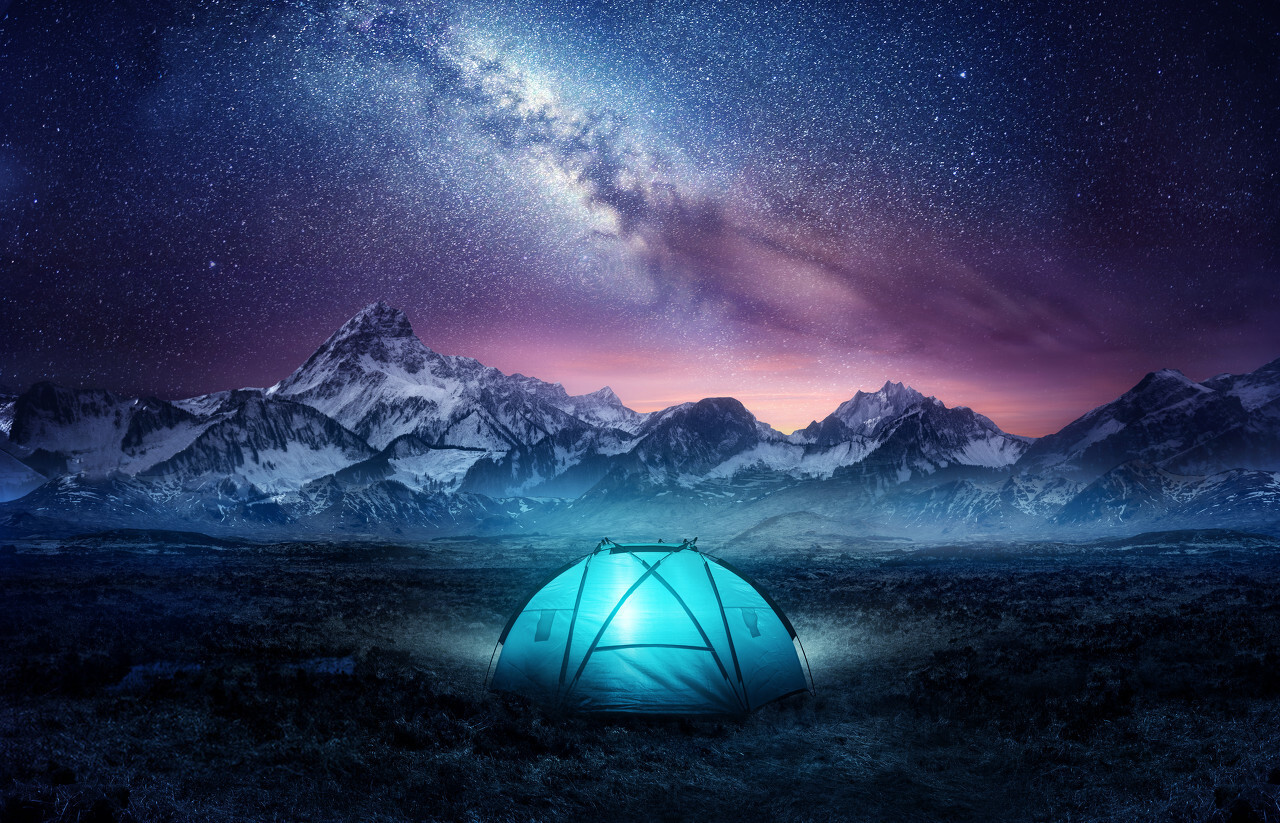
When searching or buying a tent, it is essential that you have a good understanding of this matter. After all, the weight of the tent can actually affect your overall experience on your trip. And depending on the kind of outdoor adventure that you want to do, you may either want a light or heavy tent.
Of course, there are a number of factors that influence the tent’s weight, such as its shape, size, and materials used on it. Therefore, there’s no such thing as a standard or average when it comes to how heavy or light a tent should be.
If so, how is the weight of a tent determined?
Exploring The Tent’s Anatomy
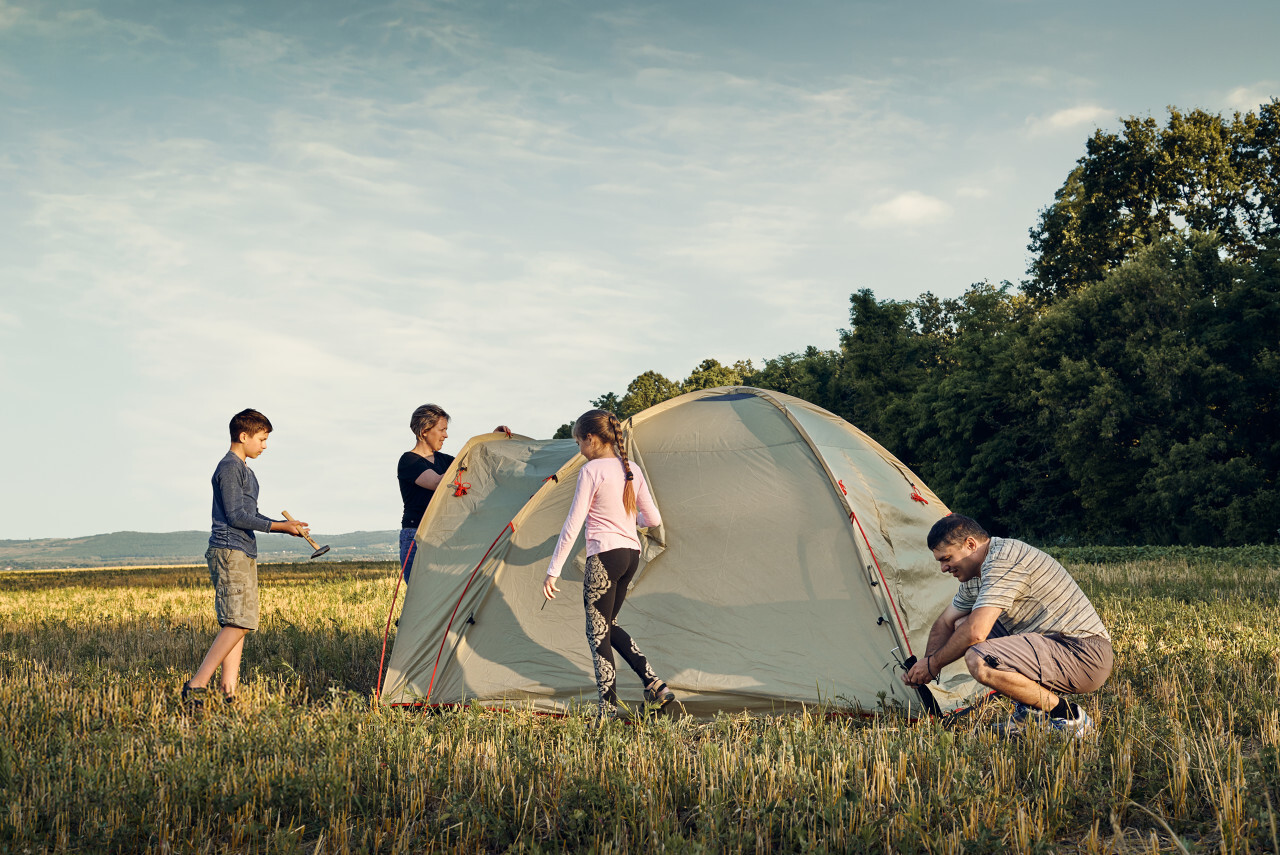
As I’ve said earlier, the weight of a tent is influenced by different factors. Technically speaking, the things that add to the tent’s weight are the following: the tent fabric or canopy, poles, and rainfly. These are the common parts of a tent, especially if we are talking about backpacking and hiking tents. It is safe to say that their combination is the sum of the entire weight.
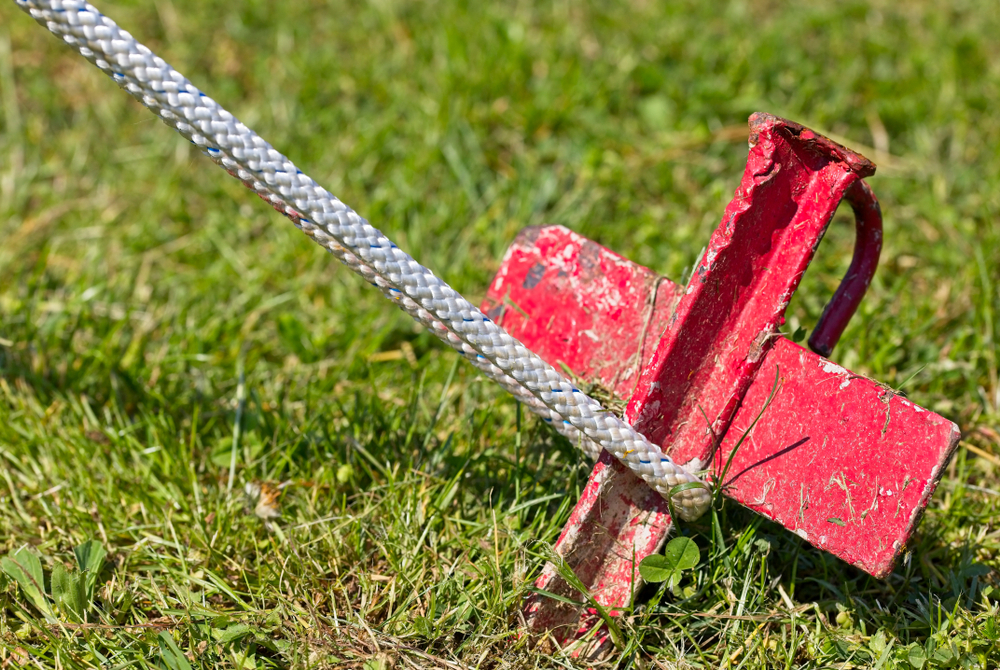
Some tents have extra components, such as guy lines, footprints, stakes, and carry bags or sacks. These things are optional, though, and you may not be required to bring them on each of your outdoor trips. But if you decide to do so, expect that they can add to the weight that you’ll carry.
Trail Weight vs. Packed Weight
There are two common terms being used when assessing the weight of the tent: trail weight and packed weight. Each of these terminologies refers to two different things. But overall, they still imply the exact weight of the tent.
Trail weight – When someone mentions the word “trail weight,” this automatically means the weight of the rainfly, poles, and tent body. Nothing more. Nothing less. Because of this, trail weight is also known as the minimum weight of the tent. If you are going to put trail weight and packed weight side by side, the difference that you’ll get would be around 5 ounces to 8 ounces. The figures are not too big, but if you are a backpacker, every single ounce counts.
Packed weight – A packed weight is the overall weight of the entire package once you purchase it in the tent. So aside from the rainfly, poles, and tent body, packed weight also includes guylines, stakes, stuff sacks, and other components. Accessories like patch kits and pole repair sleeves are also included in the packed weight–if they are a part of what you have purchased.
For the ultra-lightweight tent category, you might see the term fastfly weight. The latter indicates the weight of the footprint, poles, and rainfly. In short, there’s no canopy or tent body here.
How Much Do Tents Weight?
To answer this question, we should check how tents today are being constructed today.
Fabric
The fabric is the tent’s body or canopy. It is one of the primary layers that separate from the environment that you are in. It also protects from the elements, as well as the ever-changing temperatures and annoying (and potentially harmful) critters.
In the past, manufacturers used cotton canvas as the primary tent fabric. But this one is heavy and prone to water retention, which means that if it gets soaked, it becomes heavier. Innovations led to the creation of synthetic materials such as nylon and polyester. These two are the standard choice for tent manufacturers because of their strength, water resistance, and streamlined weight.
Between the two, nylon is the lighter and stronger one. But it is mostly used in pricier tents. Meanwhile, polyester excels in durability and versatility.
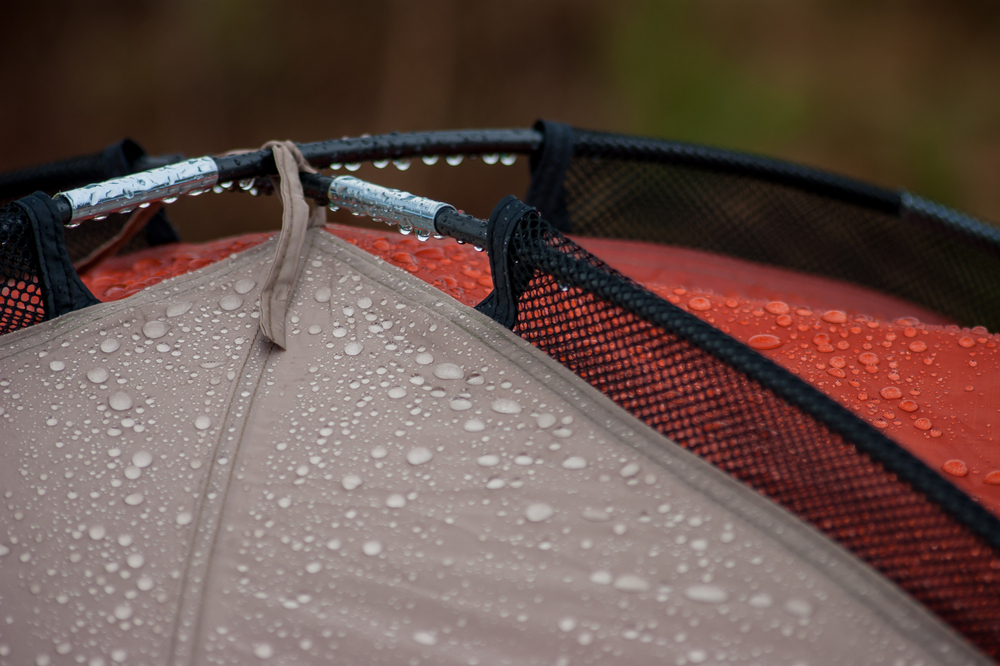
Poles
The poles serve as the frame of the tent. Basically, a tent’s structure is dependent on the arrangement or architecture of the poles. Some tents minimize their weight by reducing the number of poles used on them. It is not surprising that a lot of backpacking and mountaineering tents out there feature two-pole assemblies.
Therefore, the more poles there are, the heavier the tents become. At the same time, one should know that poles constitute a significant chunk of a tent’s weight.
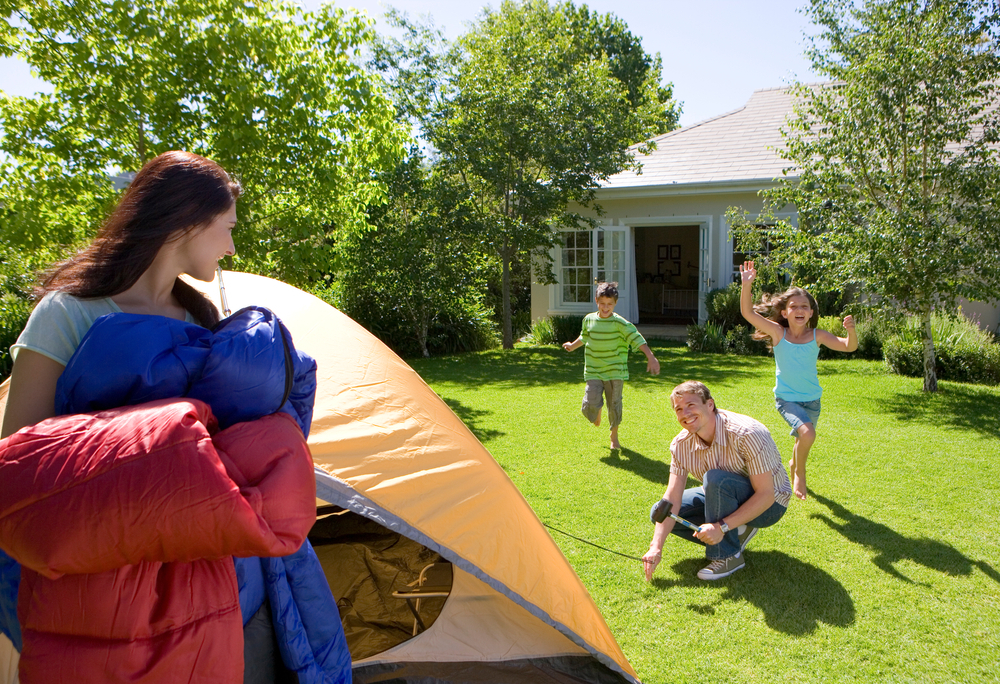
Traditionally, tents use steel poles because of their sturdiness and rigidity. But their main problem is their weight. Steel is extremely heavy and is not an ideal choice if you are making weight-sensitive outdoor applications. There are still tents using steel poles these days, but they are mostly found in leisure and family categories.
Today, most backpacking, hiking, and mountaineering tents either have fiberglass and aluminum poles. Fiberglass poles are lightweight and compact since they can be folded and collapsed. But at the same time, they are prone to breakages, as they are not the flexible type. Hence, they are not that suitable for 4-season applications.
Meanwhile, aluminum poles are strong, durable, and can handle windy conditions without splitting into two. They are commonly found on 4-season tents because of the said characteristics. However, keep in mind that they add to the expensiveness of a tent.
Seasonality
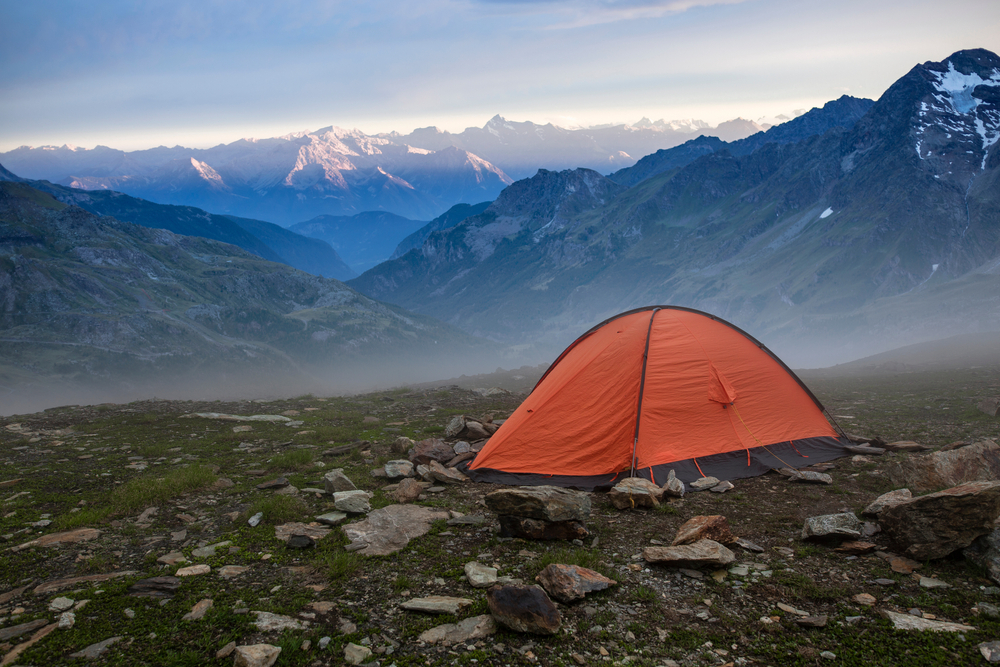
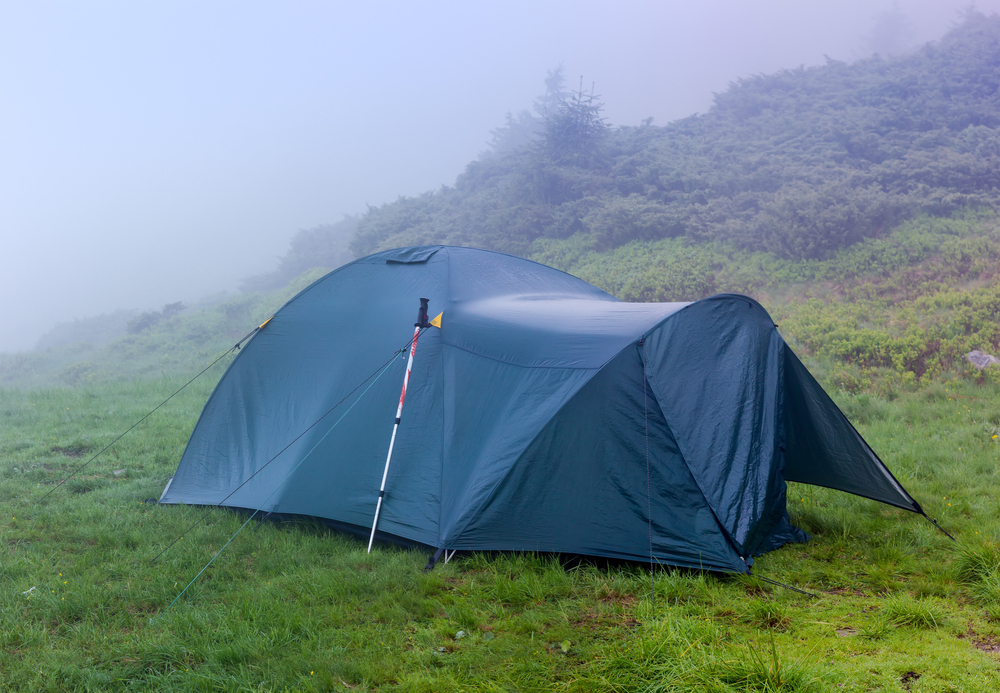
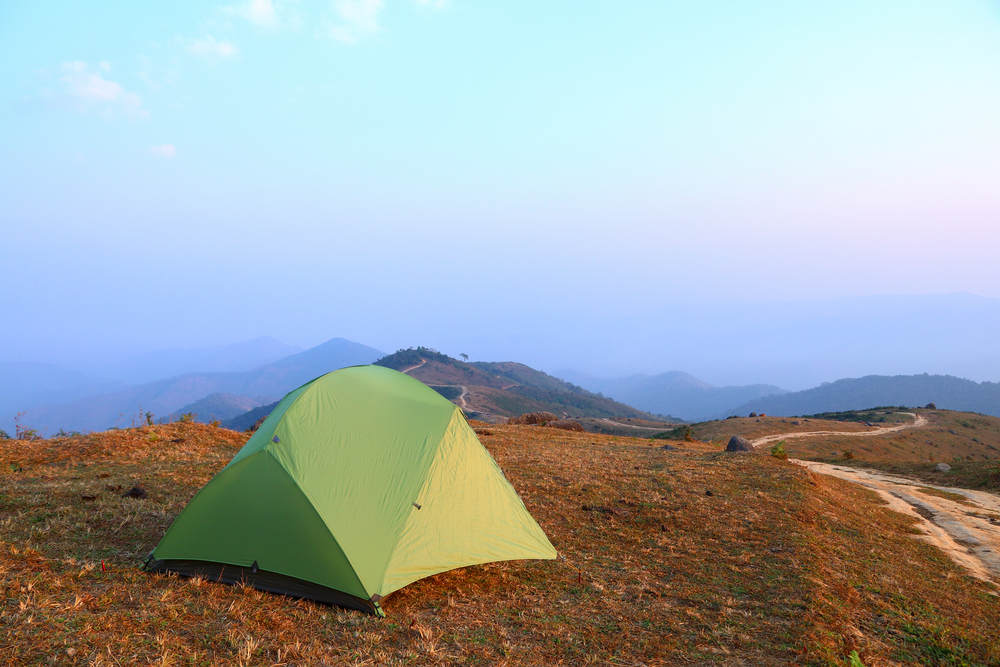
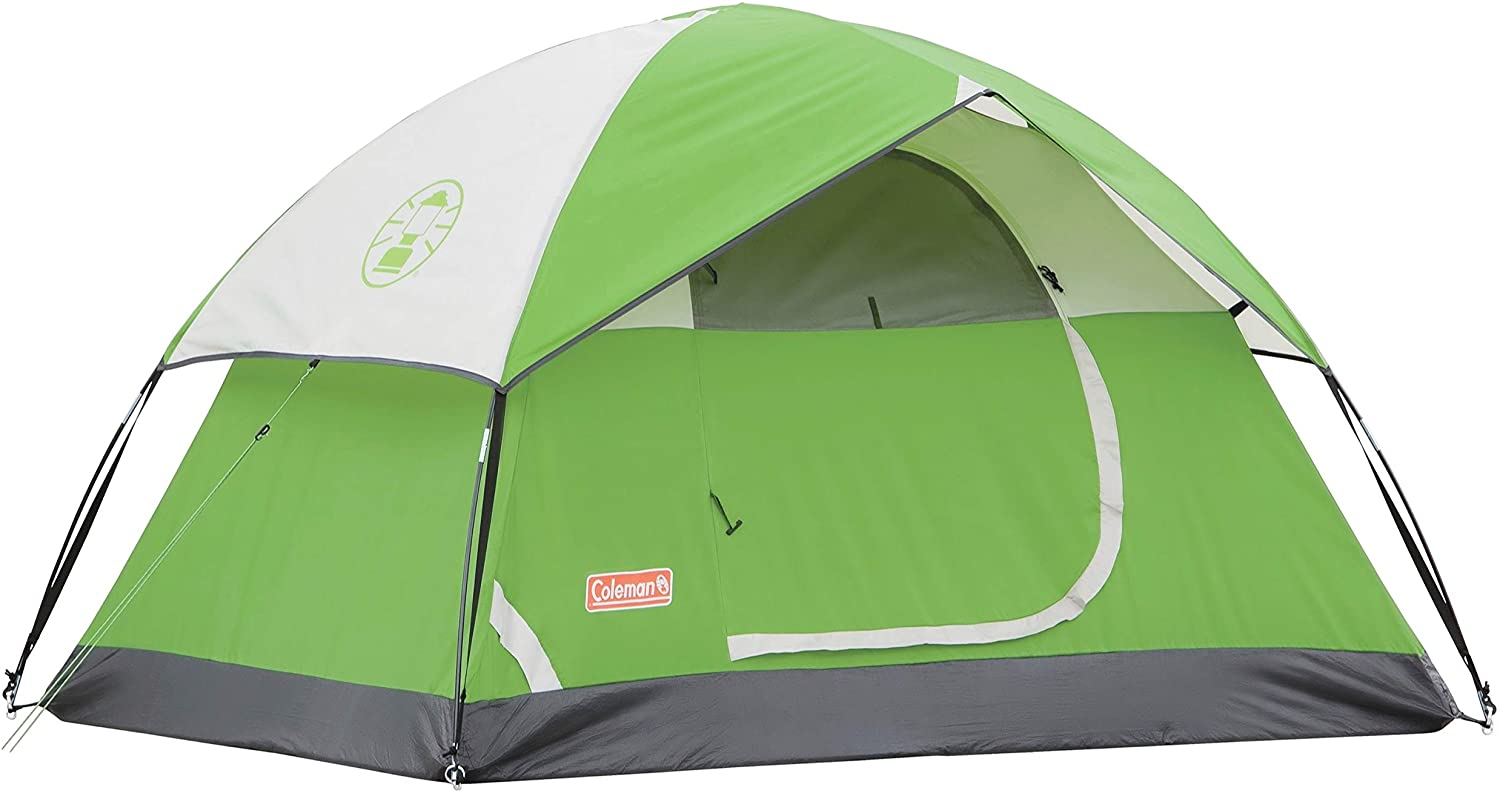
3-season tents – These are light outdoor shelters built for the comparatively temperate temperatures of spring, summer, and fall. They are by far the most common option for tents. They usually include a lot of mesh panels to help with the airflow. Insects are kept out by mesh panels. However, sands can still pass through them. Three-season tents can endure downpours when properly erected with a rainfly, but they are not the greatest choice for prolonged exposure to hard storms, strong winds, and heavy snow.
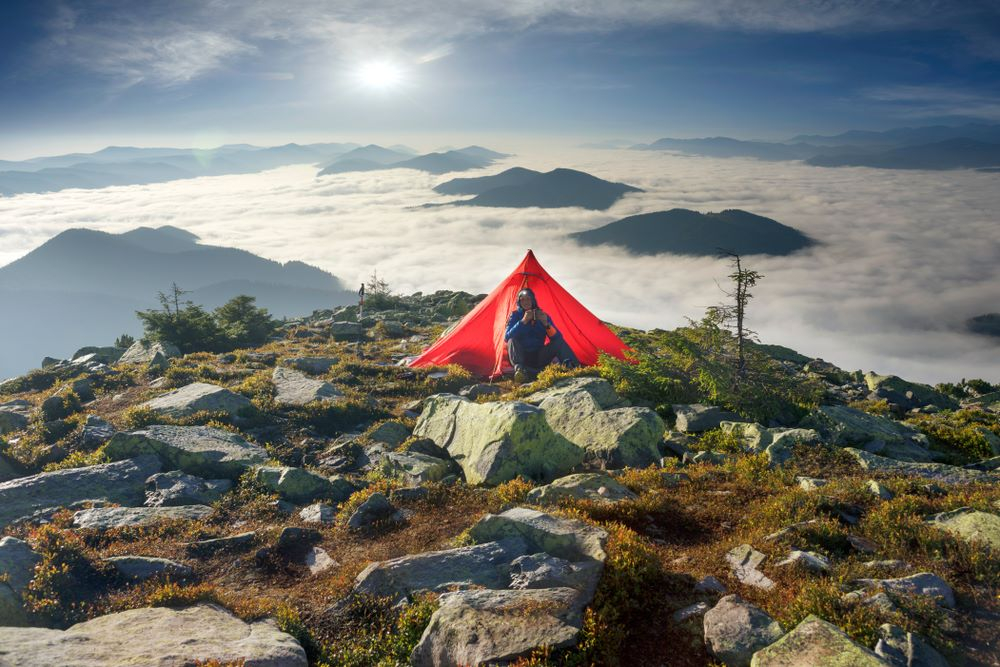
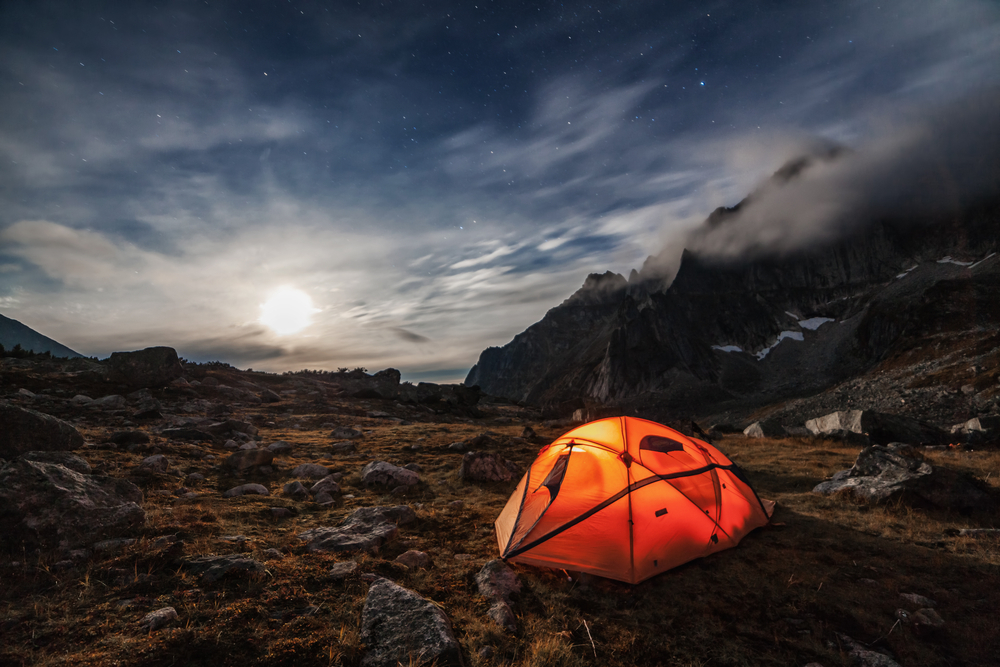
4-season tents – Mountaineering tents are designed to endure strong winds and heavy snow loads and can be utilized regardless of the season. Their primary role, however, is to remain steadfast amidst extremely unfavorable weather, which occurs primarily during the winter or on high altitudes.
In comparison to 3-season tents, they have more poles and sturdier fabrics. Most of them have rounded architecture, which reduces the possibility of snow accumulation on flat roofs. They have a limited number of mesh panels. Meanwhile, their rainflies are close to the ground. This obstructs ventilation, making them feel hot and damp even in mild weather. A 4-season tent, on the other hand, provides a safe haven when the winds pick up.
Capacity
This one is entirely understandable. If you have a small tent, then you shouldn’t expect that it would weigh heavier than a big tent. Having a one- or two-person tent will give you convenience in the weight department.
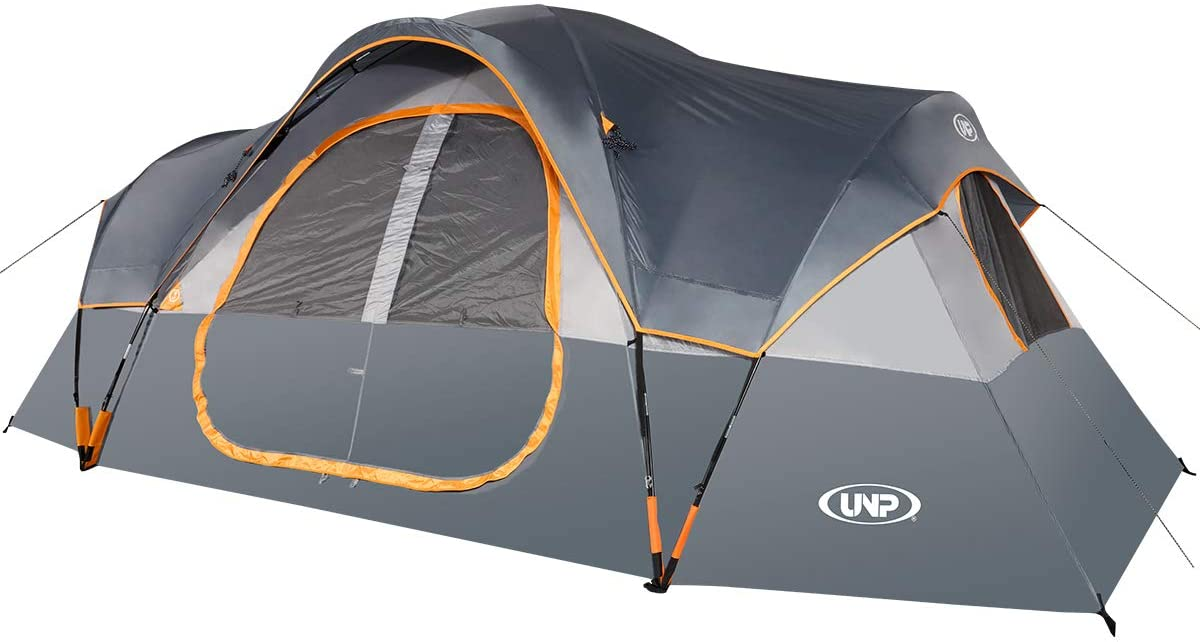
Of course, a bigger tent means that more materials are used in its construction. That’s a simple analysis that we can all agree upon.
But is this proof that small tents are better than bigger tents? That’s something that you need to decide. You see, each of us has different preferences and needs. For solo campers, a two-person tent is already plentiful. But for large groups such as families, even a 6-person tent may not be enough. Hence, there’s a need for you to assess your current requirements.
Comparing Tents
Ultralight tents – Ultralight tents abandon the standards and eliminate all extraneous features found in regular and lightweight tents. They usually lose weight by using more expensive yet premium materials. They can weigh anywhere from 1 to 2 pounds.
You should acquire something more sturdy if you want to spend a week on the route in a densely rocky or woody destination. If you plan on hiking for a week in desert locations with scorching temperatures, then ultralight models will suffice.
Lightweight tents – Lightweight tents are not actually similar to ultralight tents. They are quite pricey, though, in exchange for an efficient way of shedding eight. A typical ultralight tent excels in weight management, comfort, versatility, and convenience in setup. The weight of these camping tents ranges from 3 to 4 pounds.
Traditional tents – Most traditional tents weigh around 6 pounds and higher, depending on their size and capacity. While it is heavier than lightweight and ultralight tents, it is easier to set up and more comfortable on the trail. These tents are constructed from more durable materials. Moreover, these tents are less expensive and more adaptable than their counterparts. Replace steel stakes with titanium stakes if you want to cut weight on your traditional tent without spending a lot of money.
In Summary
Understanding the dynamics of a tent will let you have a grasp or idea of its weight. By just knowing its seasonality or capacity, you can determine whether or not the tent is a burden on your trip. Keep in mind that no weight is wrong when it comes to tents. You just have to assess your needs and requirements.
That’s it for now. If you have other inquiries, feel free to ask me in the comment section below.
How Are Tents Made: Materials, Fabric, & More
How are tents made?
Tents may not make the world go round, but if you’re a camper or an outdoorsman, you’ll need a good tent. After all, anyone who’s ever been caught in a rainstorm in a cheap domed shelter knows how miserable a bad tent can be. But, what do you really need to know when buying one?
Of course, you would want to know first how these tents are made. Once you have a good grasp of this, you will be able to distinguish which tents have shabby construction from those that have impressive architecture.
This post is a sneak peek at this particular matter.
How Are Tents Made?
In general, tents today are constructed with either two or a single layer. A two-wall tent features an external part that protects you from the element and an inner layer that serves as your personal space. These tents are beneficial for hiking and backpacking, as they can shield you from the rain, snow, and UV rays. They also have enough insulation for temperature regulation and preventing condensation.
Meanwhile, single-wall tents only have a single layer of fabric that separates you from the outside world. These tents are lightweight and easy to pitch. At the same time, they have excellent ventilation, too. But at the same time, they are not designed to be exposed to heavy precipitation. After all, they aren’t waterproof.
Fabric Material
When building tents, manufacturers have to be specific when it comes to the fabric they use in building the canopy. Traditionally, cotton is the material of choice because of its inexpensiveness and decent durability. Today, cotton is utilized as a component for the inner tent because they enable breathability, which, in turn, prevents condensation from happening.
However, the downside of cotton is that it is heavy. At the same time, it has an extended drying time, which means that it gets drenched for a long time if it gets wet due to rain. Moreover, it makes the canvas more susceptible to rotting.
Modern tents today use polyester and nylon. These two are considered superior alternatives to cotton. They are rugged but offer a more streamlined weight. In addition, if they receive a proper chemical application, these fabrics can ensure foolproof weatherproofing.
Meanwhile, PU coating is also available for these nylon and polyester tents. The said coating improves the defense of these fabrics against UV rays. Hence, it is not surprising that most 3- 4-season and 4-season tents are made from these materials. The weather on the outdoors is already erratic, so you want to shelter yourself inside these structurally protective tents.
Also, tents these days have fine mesh on their walls and access points (i.e., doors and windows). They allow ventilation inside the tent without letting bugs and critters come inside. They are essential in any tent, especially if you want to experience the utmost convenience while on the trip.
Poles
One of the things that burden campers in the past are the weight of the tent. One of the major contributors to a tent’s weight is its frame or poles. In the past, manufacturers only relied on steel poles, which are durable but extremely heavy. Manufacturers tried to innovate and find alternatives for this material until they arrived at fiberglass and aluminum.
Fiberglass is durable and lightweight. Moreover, they are easy to pitch because you can just unfold and link them together using cords. But at the same time, they can become too flexible that they often experience bents and breakages. Manufacturers know this problem, which prompts them to only use fiberglass poles on 3-season tents or tents that are designed for leisure use and glamping. In short, you can’t take these tents on terrains where the weather is harsh. Otherwise, the fiberglass poles would not hold off.
If you are a backpacker or mountaineer, your best bet is a tent that has aluminum poles. They are lightweight, durable, and impervious to bents. The only downside is that they can get expensive. But if you are not so worried about the price, these tents with aluminum poles are worth buying.
Guy Ropes / Guy Lines
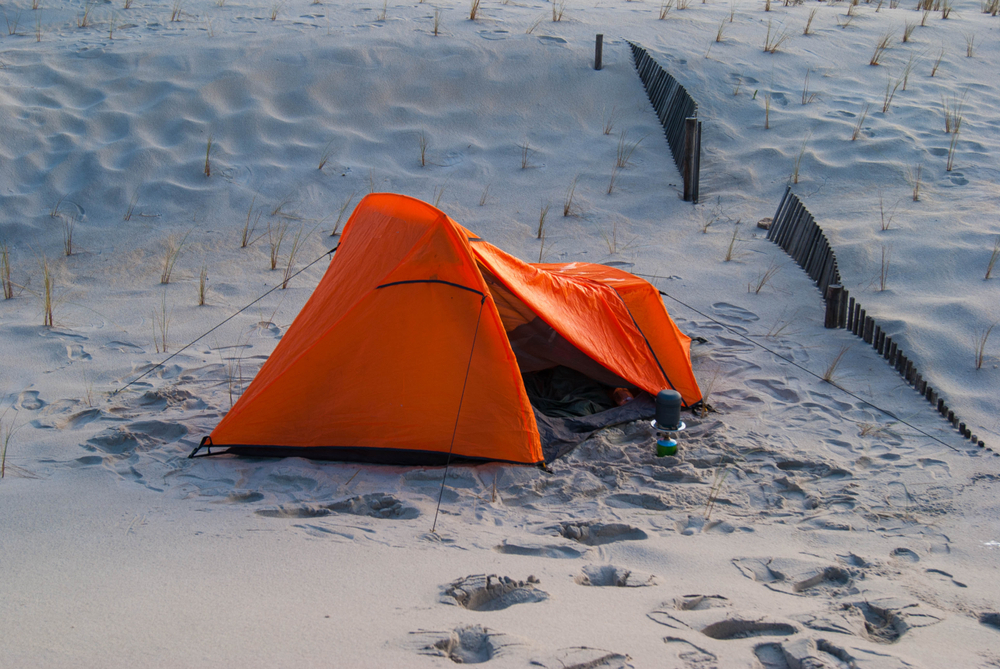
Not all tents are constructed to have guy ropes. But it is definitely a good thing if you get a tent that has these particular components. The purpose of guy lines is to provide stability to the tent by pinching the latter to the ground. Usually, these ropes are paired by stakes; the ropes are tied to the stakes, then you bury the stakes down.
With these lines, you can make the tent immovable and more secure, which is suitable in windy conditions or terrains where the substrate is not that stable–such as sand. Smaller tents are constructed with guy lines as bigger ones can remain stable even without them due to the presence of heavier fabrics and frames.
When using these ropes, make sure that you don’t stretch them too much. Otherwise, they can cause the stitching on the exterior fabric of the tent to rip or get torn. It is also a good idea to buy extra ropes if you think that the ones provided by the manufacturers are quite brittle.
Waterproofing / Water-Resistance
Tents are designed to be either water-resistant or waterproof. Don’t confuse these two terms together, as they are not the same. When a manufacturer says that their tents are water-resistant, this means that the tents can handle light rain and snow. But they won’t be able to hold against heavy downpours. Eventually, they will be prone to water and moisture breaches. Meanwhile, a waterproof tent features impermeability, meaning that the water can’t pass through them.
Most of the time, tents offer waterproofing through their rainfly. Their waterproof rating, which is called the hydrostatic head, measures the resistance of the tent against water pressure. Specifically, the hydrostatic head is expressed by manufacturers as millimeters.
Entry-level tents today have approximately 1000mm hydrostatic heads. Some of them don’t even reveal this information on their labels, knowing that they don’t have any sort of waterproofing at all. For tents that have a 1000m hydrostatic head or less, they are more suitable for summer adventures rather than on winter or rainy expeditions.
Most of the 3- 4-season and 4-season tents have a hydrostatic head of 2000mm or higher. The bigger the numbers, the better. You will be able to use these tents in harsh atmospheric conditions without being compromised.
Interestingly, tents today have been constructed with groundsheets. These groundsheets are different from tent footprints, as you need to purchase the latter separately most of the time. These groundsheets have a waterproof rating, too. Usually, manufacturers construct groundsheets with a hydrostatic head of at least 5000mm. With such architecture, you guarantee that the bottom part of your tent is impervious to the elements.
In Summary
All tents are made up of a combination of various parts and components. Even the entry-level ones can offer intricate and well-detailed construction. When you start to think about it, a tent isn’t something so simple. It is quite challenging to design and build a good tent. Moreover, making them work properly in the wild is even a different story. Hence, we should be thankful that reputable and high-quality manufacturers do the dirty work for us.
That’s it for now. If you have other related inquiries, feel free to ask me in the comment section below.
What Tents To Use For Mountains?
What tents to use for mountains?
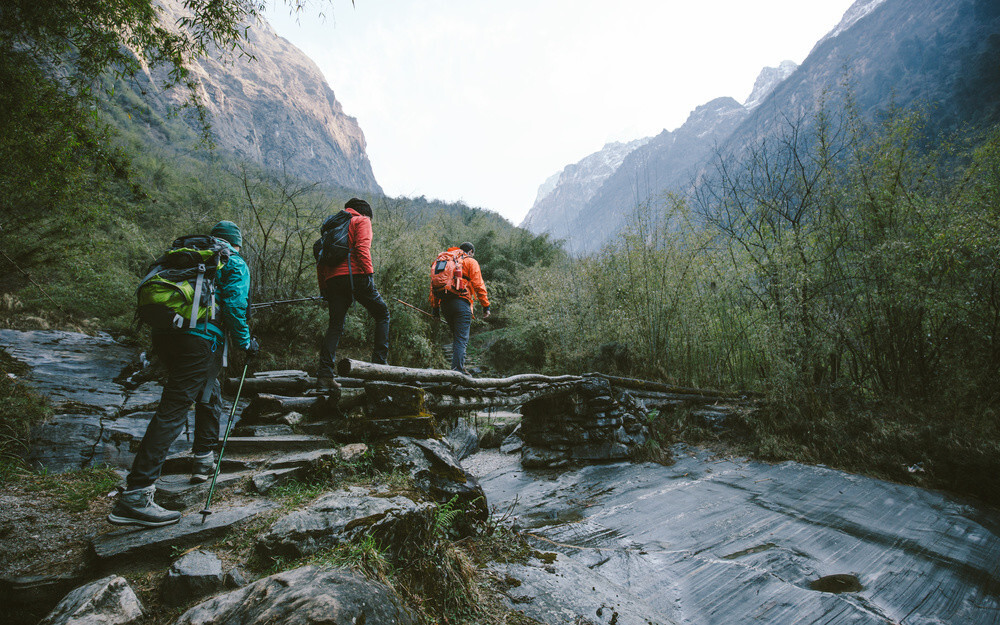
Once in a while, you’ll realize that “normal” backpacking and camping don’t quench your thirst for adventure. At this point, you can always turn on the mountains. Mountain hikes are always fun. Depending on the terrain you are heading to, it can get thrilling, too.
But keep in mind that mountaineering, in general, requires sufficient preparation. You have to ensure that you have trained your body and mind before the trip. At the same time, you should be equipped with the appropriate gear. It’s better that you over-prepare than being too overconfident.
Your tent, for instance, can serve as the line between safety and danger in the mountains. It serves as your shelter. It is one way of saying that you need the tent to be fully equipped with the essential features that can keep you warm and protected.
Here are some of the guidelines for choosing a mountaineering tent.
What Tents To Use For Mountains
If you are planning to climb a mountain or camp in the winter, you must consider buying a good mountaineering tent. The primary benefit of purchasing a mountaineering tent is comfort. The tents are designed to keep the weather conditions under control. They are also portable and easy to set up. With this, you can stay comfortable in any situation. The quality of the tents is also essential.
Seasonality
One of the crucial aspects when it comes to choosing a tent for mountains and mountaineering purposes is seasonality. Specifically, you need to ask yourself when you intend to ascend a mountain? Is it in winter or summer? You should also assess the natural conditions of the mountain. Some summits are frigid and filled with snow all year long.
3-Season Tents
If you are planning your trip during summer, spring, and fall (with minimal to zero chances of snow falling through), the best choice is a 3-season tent. Three-season tents provide decent water resistance or waterproofing. They typically feature mesh panels on their walls, doors, and windows to optimize air circulation and ventilation. Keep in mind that these 3-season tents can handle light rain and snow. However, you can’t really say that they can handle strong winds and severe storms.
If you intend to head during winter on terrains riddled with glaciers, complicated ranges, and elevated ascents, then you need a 4-season tent. In fact, only 4-season tents can serve as your shelter on the applications stated above. Most of these tents have durable and rugged construction. Their poles and fabrics are tougher than their 3-season counterparts. You’ll find minimal ventilation on these tents for the sake of fortifying their infrastructure. Their rainfly typically extend to the ground for foolproof protection. Of course, these 4-season tents aren’t that suitable for hiking in warm weather. It can get hot and damp inside them!
Again, choosing between a single- or double-wall tent matters depending on the mountain or environment that you want to thread.
Single-Wall Tents
A single-wall tent got its name from the way it is constructed. Basically, this tent features one wall that is both durable and waterproof or water-resistant. Such a design might not be ideal for some people. But for some backpackers and mountaineers, these single-wall tents are the best choice. After all, single-wall tents are lighter than double-wall tents. They are easy to pitch, too, which might be useful during emergencies or difficult situations. But at the same time, these single-wall tents have poor ventilation, which makes them susceptible to internal condensation. In short, these single-wall tents on mountains are typically dry and cold.
Double-Wall Tents
Meanwhile, double-wall tents feature a single-wall tent that has a separate rainfly. The rainfly is the one that shields the tent and its users from the external elements. With the presence of rainfly, you can freely open your doors and windows even if it is raining or snowing outside. Needless to say, the drawback of these double-wall tents primarily lies in their weight. Specifically, they are heavy. Furthermore, you need to stake them on the ground tightly so that the rainfly can withstand the snow and wind.
With a double-wall tent, the storage increases, too. After all, a full-coverage tent creates a natural vestibule where you can store your equipment and camping amenities.
Tent Shape
There are numerous tent shapes today. But not all of them are suitable for mountaineering purposes.
Since mountains require you to ascend on high elevations, those tall cabins and ridge tents will be rendered useless. Of course, your favorite glamping tents might not work well on any mountaineering applications.
The correct shape for mountaineering tents should be an arch, tunnel, or dome. Notably, these tents have restricted usable internal space. This means that their interior is quite cramped. Most of them are designed for 1-person to 4-person use only. But because of their streamlined construction, they can easily weather off strong winds. They can shed off snow, too, as they don’t have a flat roof where water and ice can accumulate.
Special Considerations
If you want your tent to last longer in service, then it is essential that you buy a separate footprint for it. Most of the time, these footprints aren’t included in a tent’s package, but they are indeed valuable for preserving the structural integrity of the tent. A footprint is a type of sturdy fabric that is placed on the ground to protect the tent from abrasion. Furthermore, it also serves as a wall to shield the tent from water and moisture.
When buying a footprint, make sure that its size matches the floor size of your tent. Otherwise, it would cause water to run inside your tent.
Moreover, it is also essential that you understand the features that a tent possesses. For example, you might want the tent to include mesh pockets where you can store your vital accessories, such as a gear loft. Do you want a tent to possess multiple doors or a single door is enough for you?
How About Mt. Everest?
The concept of a tent is simple: it’s a waterproof shelter that keeps you dry and safe in bad weather. But the idea of a tent is much more than that. Tents are almost as iconic as the mountains themselves, and the best tents are famous for being light, strong, and comfortable. That’s why people go to great lengths to pick their tents—we’re talking Everest-level tents here. But how do you choose one?
Well, the thing is, you need multiple tents if you are planning to climb Mt. Everest. A large, entry-level tent is ideal for the BC (base camp) because it gives you sufficient privacy and space, especially if you are in a large expedition team.
Separate tents are required at C1 (Camp 1), C2 (Camp 2), C3 (Camp 3), and C4 (Camp 4). The ideal tent for C1 can also work as your tent for C3 or C4. The reason for this is because you can traverse BC to C2 in a single sweep, especially once you have acclimatized.
High-quality tents are essential for Mt. Everest. Don’t ever climb the summit if you only brought a shabby shelter. Your best options here are 4-season tents from brands like Mountain Hardware, Marmot, and North Face. REI and MSR can be suitable tent brands, too.
In Summary
The tents that you should use in the mountains actually depend on the latter’s environment and weather. There are specific tent requirements for each of these applications, so you need to assess your destination first before deciding the kind of tent that you should buy.
That’s it for now. If you have other related inquiries, feel free to ask me in the comment section below.
How To Wash A Sleeping Bag?
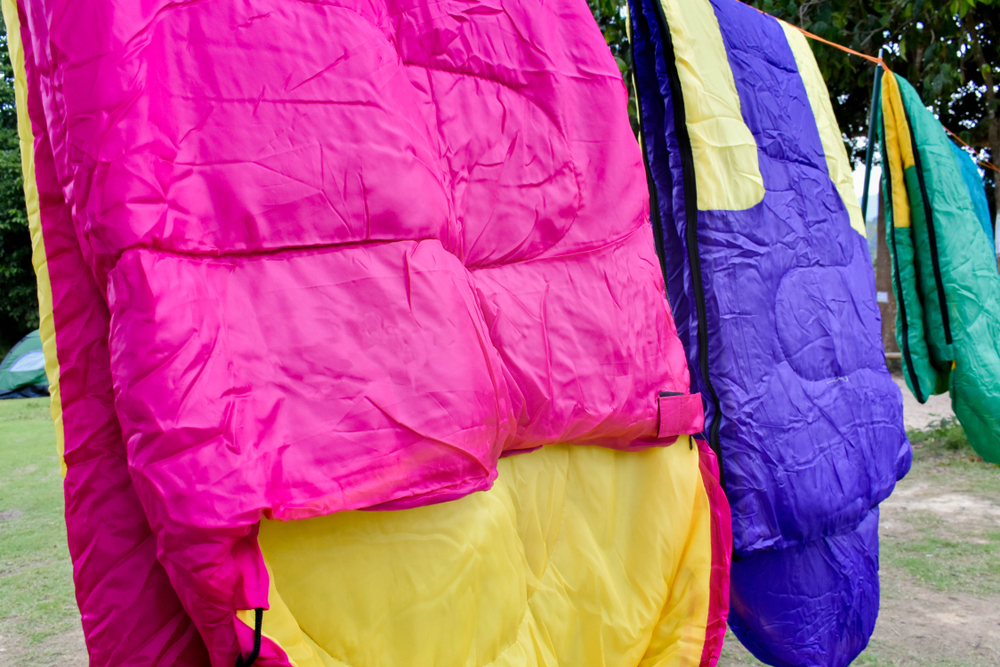
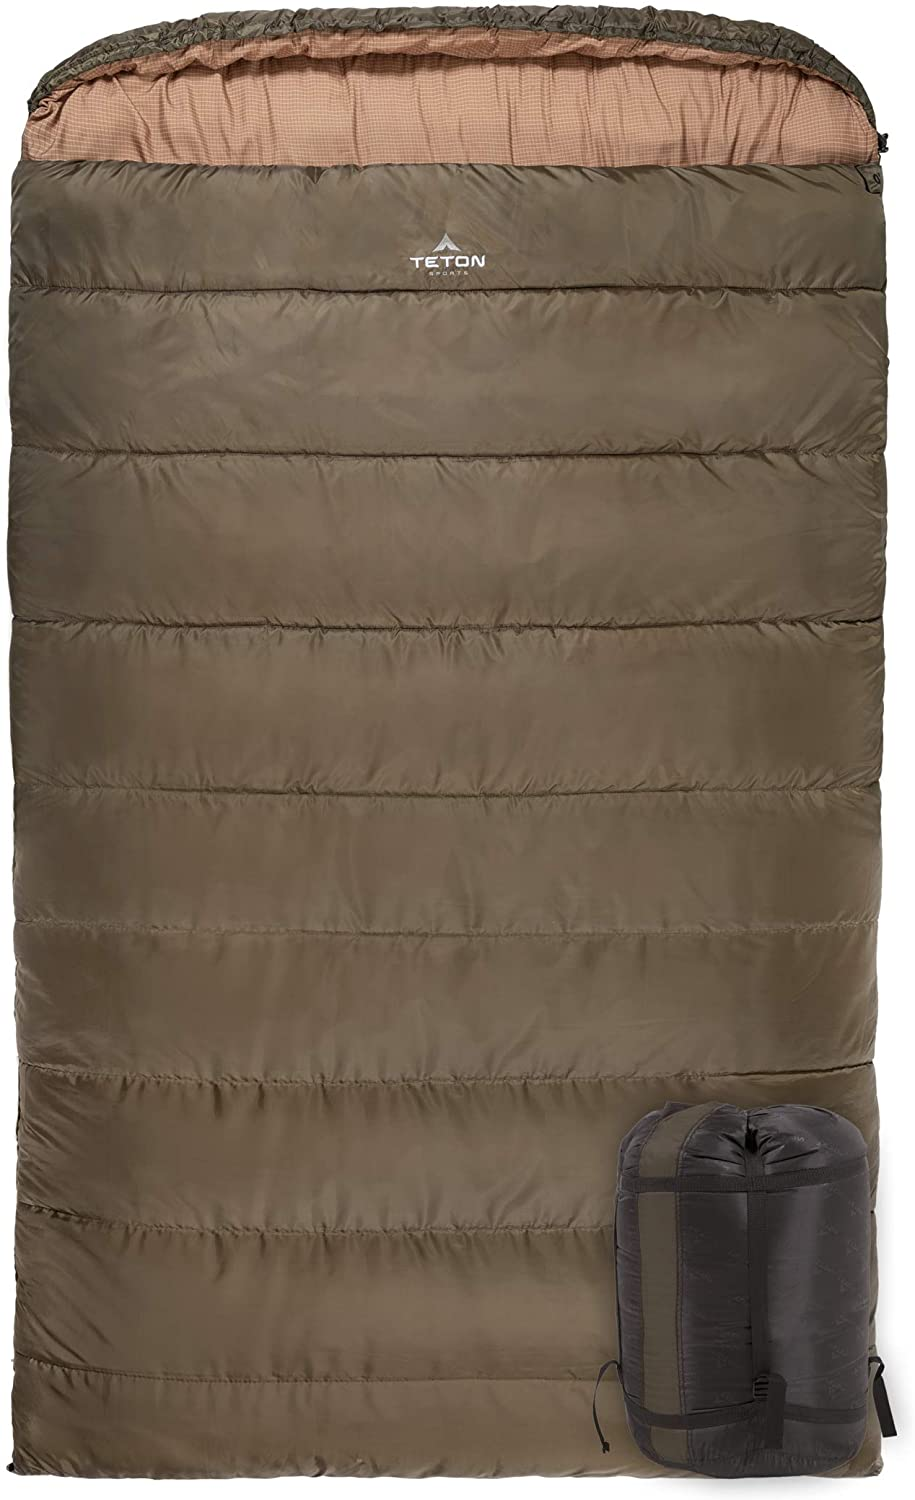
Learning how to wash a sleeping bag is an essential skill. After all, these sleeping bags are used in various outdoor applications. They can be used inside the tent or outside, leaving them dirty and grimy.
Of course, you can’t just let that mess sit in your bag. You see, the accumulation of dirt, debris, and oil will build into the bag’s fill–regardless if it is synthetic or down. Once this happens, your bag will lose its warmth and fluffiness (or loft).
Fortunately, there are various means on how you can restore your sleeping bag’s cleanliness.
How Often Should You Clean Your Sleeping Bag?
The truth is, there’s no limit when it comes to the frequency of washing your sleeping bag. But at the same time, there’s no real need to wash them after each of your trips. In fact, you are free to wash your sleeping bag even once a year.
But if you are using it frequently, it is a good idea that you wash it from time to time. You can do this before storing the bag after a season. In this way, your sleeping bag will be free from residues, dirt, and body oil prior to stashing them.
In cleaning your sleeping bag, you should remember the following:
Don’t do dry cleaning – Keep in mind that the chemical used on dry cleaning is too harsh for the fibers and fabrics of the sleeping bag. They can shed the oil treatment of the down, which helps in maintaining the loft.
Take care of it while camping – Just because the sleeping bag is meant for outdoor use doesn’t mean that you are free to dirt. You should try to keep it clean as much as possible. It is recommended that you use liners while you are sleeping inside them. Furthermore, don’t insert yourself while wearing dirty clothes. Moreover, you can also remove the air inside it to prevent condensation.
How To Wash A Sleeping Bag
A. Machine-Washing A Down Sleeping Bag
The first thing that you need to do is to find a commercial washer. With this washer, you can guarantee that the bag is fully contained and rinsed. If you don’t have access to nearby laundromats, you can opt for your front-loading washer. Don’t use a top-loading washer that comes with an agitator because the latter can damage the fabrics of the sleeping bag.
Use a gear wash that is specifically designed for down fills. You can use any cleaning formula, as long as it states that it is safe to be used on items that have down. Don’t use detergents because they can decrease the loft and clump it.
When machine-washing, make sure that you unzip the bag fully. Otherwise, the slider is susceptible to snags and breakages.
Typically, you will need to machine-wash the sleeping bag using warm water. Configure the machine into a gentle cycle only.
After washing, rinse the bag thoroughly to ensure that no cleaning chemicals are left. You see, the residues of these commercial cleaners can prevent the down of the bag from becoming fluffy again. You should try your best to eliminate the moisture inside the bag.
When taking out the sleeping bag from the washer, make sure that you support its entire body. It is an excellent way of preventing the seams from being ripped and strained. Squeeze the remaining water, and you can dry the bag already.
B. Machine-Washing A Synthetic Sleeping Bag
Similar to down sleeping bags, you should try your best to load a synthetic sleeping bag inside a laundromat. If this option isn’t available, you can use a front-loading washer instead. Again, avoid those machines that have agitators on them as they can ruin the sleeping bag.
It is essential that you use the correct cleaning solution for your synthetic sleeping bag. In this context, you can use specifically-tailored cleaners that state that they are safe to be used on synthetic products. Please don’t settle for detergents as they can decrease the fluff of the synthetic down.
The bag should be fully unzipped so that the slider won’t snag or break.
Use warm water and put the machine into a gentle cycle. Or you can follow the bag’s instructions in the appropriate setting.
Rinse the sleeping bag two or more times to strip off the residues of the cleaning solution. You should rinse thoroughly so that the bag becomes wet but never drenched.
In removing the sleeping bag from the machine, support its entire body and not just a single end. After that, squeeze the bag a little more before you proceed to dry it.
C. Hand-Washing A Sleeping Bag
Use a bathtub and fill it with warm or cool water. Warm water is still preferable since it helps in removing grimes and debris.
After filling the tub, put the appropriate cleaning solution on it–regardless if it is for synthetic or down sleeping bags. Don’t use excess soap because it is difficult to rinse.
Place the bag in the water-filled tub and start cleaning the bag. Make sure that you work thoroughly on those areas that have evident soiling or dirt. After you manually remove the blemishes, let the sleeping bag soak in the tub for an hour.
After that, you can already drain the tub of its contents and squeeze the sleeping bag to remove the excess water.
Fill the tub again with water to rinse the sleeping bag. After that, you should clean the bag again with soap and let it soak in the tub for another fifteen minutes.
Drain the tub and squeeze the remaining water again. Do this procedure again until such time no soap is left.
After this, you can take your sleeping bag to a commercial dryer so that it can be dried. If you are drying in your home, make sure that you set it to a low setting. Using high heat can melt the fabrics. If you don’t have a dryer, place the sleeping bag on a flat surface (in an area with no sunlight and humidity). You are also free to hang the bag and wait for it to dry.
Spot-Cleaning A Sleeping Bag
It is also essential that you spot-clean your sleeping bag before washing them. You need to ensure that the linings on foot and head of the sleeping bag will be cleaned first. These are the parts that are quite prone to dirt build-up.
Spot-cleaning a sleeping bag is not a difficult task. You simply need a soft bristle brush and mild soap. Apply the cleaning agent to the area and scrub it using the brush. Do this process as gently as possible.
After that, you can wash the area you worked on using a wet sponge.
In Summary
Now that you know how to wash a sleeping bag, I am pretty hopeful that you’ll be diligent enough to do this errand. Trust me. Doing such an errand will bring you convenience in each of your outdoor trips. Who wants to sleep in a dirty and smelly sleeping bag anyway?
That’s it for now. If you have other inquiries, feel free to ask me in the comment section below.
7 Principles Of Leave No Trace
The principles of “leave no trace” are a sacred set of practices that an outdoor enthusiast should observe. Specifically, they serve as simple yet effective commandments that minimize the environmental impacts of outdoor activities.
If you are a beginner in hiking, camping, or backpacking, it is essential that you are aware of its repercussions. While it is true that it is enjoyable and healthy, you should mind the possible effects that it can manifest on the environment.
The “leave no trace” principles were created to ensure the adverse effects of human presence on Mother Nature. In fact, they are applicable to various areas–from your area’s park, local camping grounds, and even your backyard. You can use them in any outdoor activities, too.
Philosophy Behind Leave No Trace
Leave no trace is a set of principles that encourages people to enjoy the outdoors responsibly. It can seem a little tricky to understand, but it’s not that complicated when you break it down. For most people, the principles boil down to seven guidelines for making your outdoor activities as safe and environmentally friendly as possible.
“Leave no trace” means different things to different people. It’s not just about reducing the impact we have on the environment; it’s also about being considerate to the people around us while we’re out enjoying the great outdoors. For some people, that means picking out your poop; for others, it’s looking out for wildlife. Others see it as a means of packing an extra trash bag so you can clean up after other people who didn’t.
7 Principles Of Leave No Trace
1. Plan Ahead And Prepare
“Plan Ahead and Prepare” is the first principle of the International Leave No Trace (LNT) ethic. You see, outdoor goers have to prepare for their trips to ensure that they will be safe and enjoyable. At the same time, it helps them mitigate the damages that they can cause to their route or destination. Without planning, it is entirely possible for damages to occur–both in the natural and historical resources.
Importance of Planning Ahead:
It keeps your group safe
It lets you apply the leave no trace principles
It helps in making your trip successful
It increases the time you have to enjoy your environment
Things To Consider:
Terrain
Weather and temperature
Environmental regulations
Land boundaries and restrictions
Estimated travel time and food allocation
Number of people who will make the trip
2. Travel And Camp On Durable Surfaces
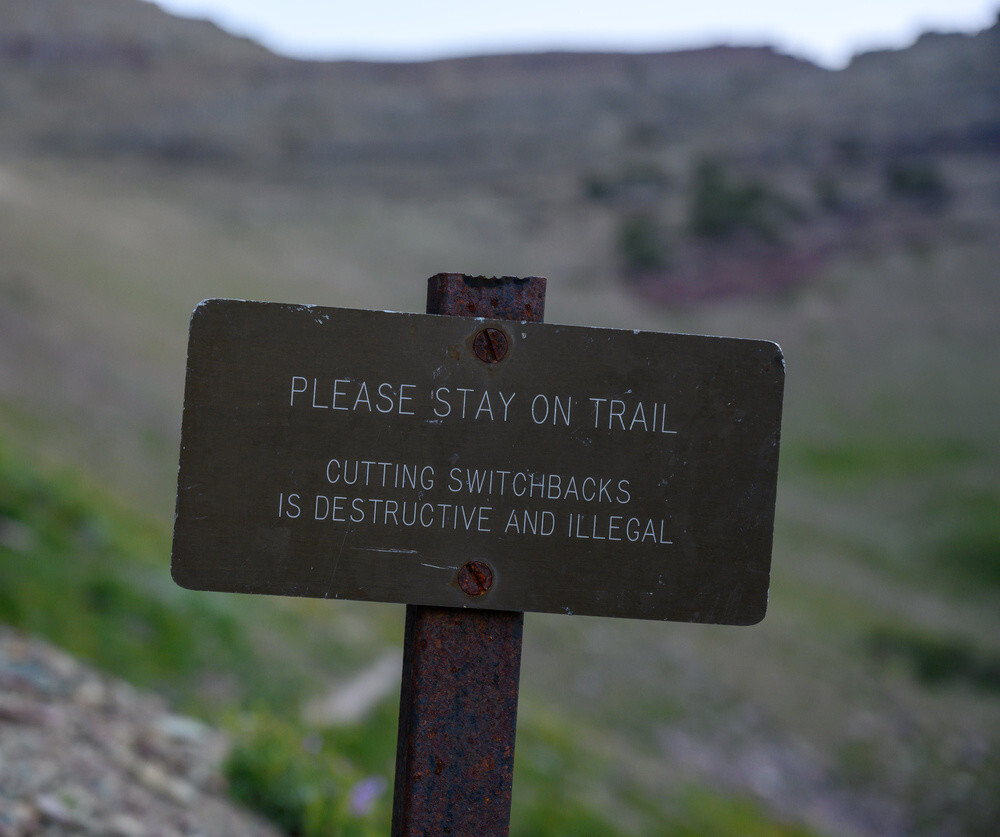
Camping and hiking on existing trails and campgrounds are a great way to enjoy the outdoors with minimal impact on the environment. But if you want to practice the “leave no trace” principle, make sure to camp on durable surfaces that can handle your tent and all of your gear. Camping on soft surfaces like pine needles or wet soil can damage plants, compact soils and cause erosion. Always camp on a durable surface like gravel, sand, or dry grasses.
Travelling Off-Trail
Nature is beautiful. One of the fascinating elements of nature is the diversity of habitats and ecosystems. I enjoy exploring these wild, beautiful places. I am no expert, but I have been exploring off-trail for a few years. I find that it brings me closer to nature, which is why I love it.
Traveling off-trail is not a defined activity. It is a way of moving through nature in a way that treads lightly. There are several components to this, which includes being prepared for the environment, knowing the area you are exploring, carrying out no waste, and being safe and mindful of the surrounding environment.
Factors To Consider In Travelling Off-Trail:
Durability of the vegetation
Size of the group (the more you are, the easier it is for an area to get trampled badly)
Ideal Durable Surfaces In Backcountry And Frontcountry:
Existing campsites and trails
Camping grounds that are located 200 feet from any bodies of water
Small campsites with minimal vegetation
Recommended Locations In Unsullied Areas:
Areas where vegetation is small or absent (make sure that you don’t camp tightly to avoid the creation of trails and campsites)
Stay away from areas where human impacts are just starting
3. Dispose of Waste Properly
When you go out on a camping trip or any other outdoor activity, one of the top things that you need to think about is how you are going to dispose of your waste. When you’re in the woods, you can’t just take your garbage and throw it in the nearest ditch; you have to find a proper place to dispose of it. It’s important to remember that the woods are home to lots of animals and plants that need to be protected. Improper disposal of waste can ruin the area around you.
Here are some of the things that you should do to keep your adventure waste-free:
Check your camping ground and other areas you passed through for trash, wrappers, and leftovers. Make sure you have a disposable bag or container to hold these litters in place.
For human wastes, you should bury them on catholes. These catholes should have a depth of 6 inches to 8 inches. It should have a distance of at least 200 feet from any bodies of water, trails, and camping sites. Once you are finished burying them, cover the catholes. It would be better if you disguise them, too. Keep in mind that you need to pack your human waste in some areas such as Mount Rainier, Grand Canyon, and Muir Base Camp.
Use a disposable bag for your hygiene products such as napkins and toilet papers.
When it comes to washing your dishes and yourself, you have to fetch water from any water source. Look for a clear spot at least 200 feet away from streams and lakes before you start your errands. Furthermore, it is recommended that you use biodegradable soap only.
4. Leave What You Find
When you do outdoor adventures, it is vital that you can minimize your footprint and the damages you cause to the environment. One way of doing this effectively is by not taking anything from Mother Nature. The concept is pretty simple: you are just a visitor; you are not allowed to take anything. That’s not yours anyway, even if there’s no one guarding it.
Do the following things to practice this wonderful outdoor principle:
Do not tarnish or alter structures and objects with historical significance
Do not pick flowers, plants, and rocks.
Do not take away native species from your location. At the same time, you shouldn’t introduce non-native species, too.
Make sure that you clean your boots, bikes, and other outdoor gears before your trips
Do not make any artificial structures
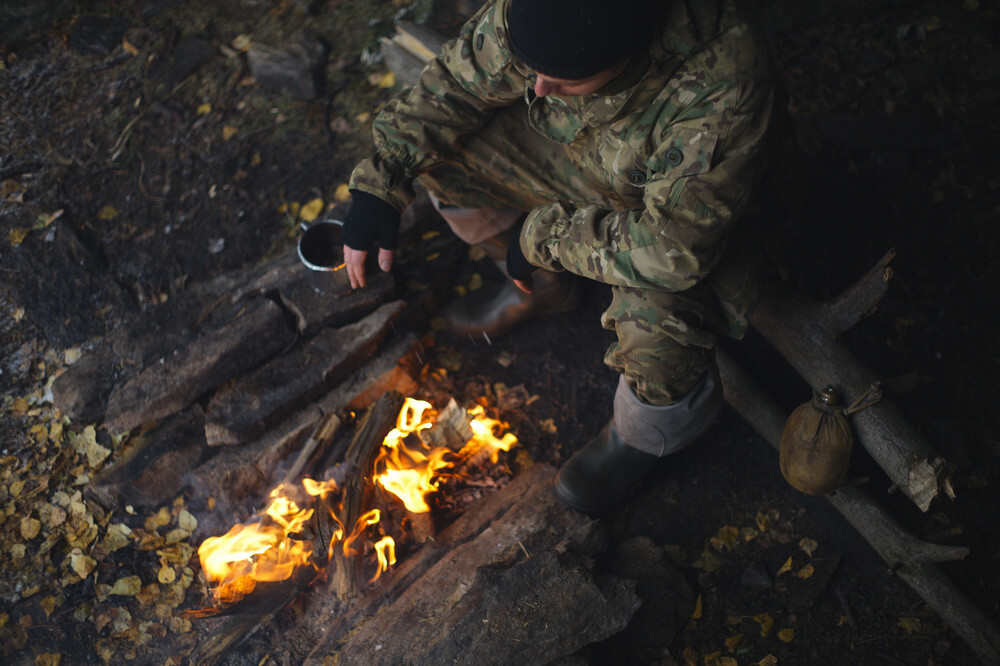
5. Minimize Campfire Impact
As a camper, you want to leave the wilderness just like you found it. But it may not be so easy to live up to that goal. Campfires are a big source of impact on the land, and they can be challenging to manage. When the fire is burning, it is also burning off some nutrients in that soil. Since the opening of the pit is generally much larger than the fire, it also allows the winds to move the soil around, which can lead to erosion. This erosion can also take away nutrients that the plants need.
Here are some tips to help you minimize the impact of your campfires on the wilderness:
If your camping site permits fire, make sure that you only use established fire pans, mound fires, or fire rings.
Make sure that the fire you create is only small. Furthermore, only use sticks that can easily be broken.
Let the coal and wood be burned into ash completely. After that, put out the fire, and scatter the cooled ashes.
Firewood that came from home is not allowed. It could introduce pests to the area. As much as possible, you should get your firewood from local sources only.
6. Respect Wildlife
The wilderness is often seen as a place that’s free of the problems of the modern world. It’s a place where people can get away from the stresses and worries of their daily lives. However, it’s important to remember that human beings aren’t the only intelligent animal on the planet. We may be at the top of the food chain, but that doesn’t mean we should be disrespectful to other animals.
You can coexist with other creatures via other holistic and wholesome means. Here are some of them:
Don’t get close to the animals. As much as possible, you should only observe them from a distance with the use of a camera or binoculars.
Don’t ‘feed the animals. Doing this could potentially damage their health and affect their behaviors. It also makes them prone to other forms of danger.
If you bring your pets, control them. If you can’t do this, you better leave them at your home.
Don’t distract animals when they are nesting, mating, or hibernating.
7. Be Considerate With Other Visitors
How do you want others to treat you? Of course, you want people to be nice to you, right? Hence, it is not surprising that others would expect you to do the same thing for them. Respect begets respect. And it is a concept that entirely applies in various outdoor activities.
To be a courteous guest in the wilderness, do the following things:
Remain respectful to other outdoor goers.
Give way to other people who are using the same trail as you.
Move to the downhill portion of the trail if you encounter packs of mules and horses.
Camp away from high traffic trails and campsites
Don’t talk too loudly.
Control the behavior and action of your pets.
How Can Kids Practice Leave No Trace?
There are an estimated 60-80 million kids involved in organized sports in the United States, and the number one rule that all parents and coaches should follow is to leave no trace. Kids of all ages are becoming more and more interested in the outdoors, and with a little guidance, they will learn proper leave-no-trace skills that will stick with them as they grow and continue on their own outdoor adventures.
Well, as parents or guardians, it is your duty to teach your young ones the importance of leave-no-trace. We are the ones that can shape them into people who respect wildlife and advocate for environmental protection.
The principles of leave-no-trace apply to kids. What you do, they should follow. And if they commit mistakes, you have to correct them. Since they are still young, there’s a lot of opportunities where you can teach the fundamentals. You can guide them on making the “leave no trace” policy a habit that they will do every time they go camping or hiking.
Activities That Are Leave-No-Trace Friendly
Just because you observe “leave no trace” doesn’t mean that your next outdoor trip would become boring. In fact, you are still free to do the things you want even while preserving the sanctity of the wilderness. You can still enjoy the view and explore the scenic landscapes without becoming a cause of environmental damage.
For specific activities and games that you can do while practicing leave-no-trace, refer to the following list:
LNT Audit
Bandana Bonanza
Durable Surface Hopscotch
Will You Make It?
Playa Wildlife Clues
Campfire Impact Trivia
LNT Beach Ball
Who Is The Leave No Trace Organization?
Leave No Trace is a nonprofit organization that was founded in 1983 by a small group of backpackers who recognized the need to protect the outdoors from adverse impacts caused by overuse. Their goal is to promote and inspire responsible outdoor recreation through education, research, and partnerships.
Leave No Trace strives to educate the public on how to enjoy outdoor recreation responsibly, to teach people that they can enjoy the outdoors and wildlife without harming the environment.
How To Survive In The Wild: 15+ Tips That You Need To Learn
How to survive in the wild?
Perhaps this question came across your mind already. Initially, you didn’t bat an eye about this. However, a sudden weeklong trip to the outdoors with your family and friends made you think about this matter again.
Of course, survival is an important matter that you shouldn’t shrug off, especially if you are planning to venture into unexplored terrains. During SHTF situations, you should respond accordingly and promptly to ensure that you won’t be in peril.
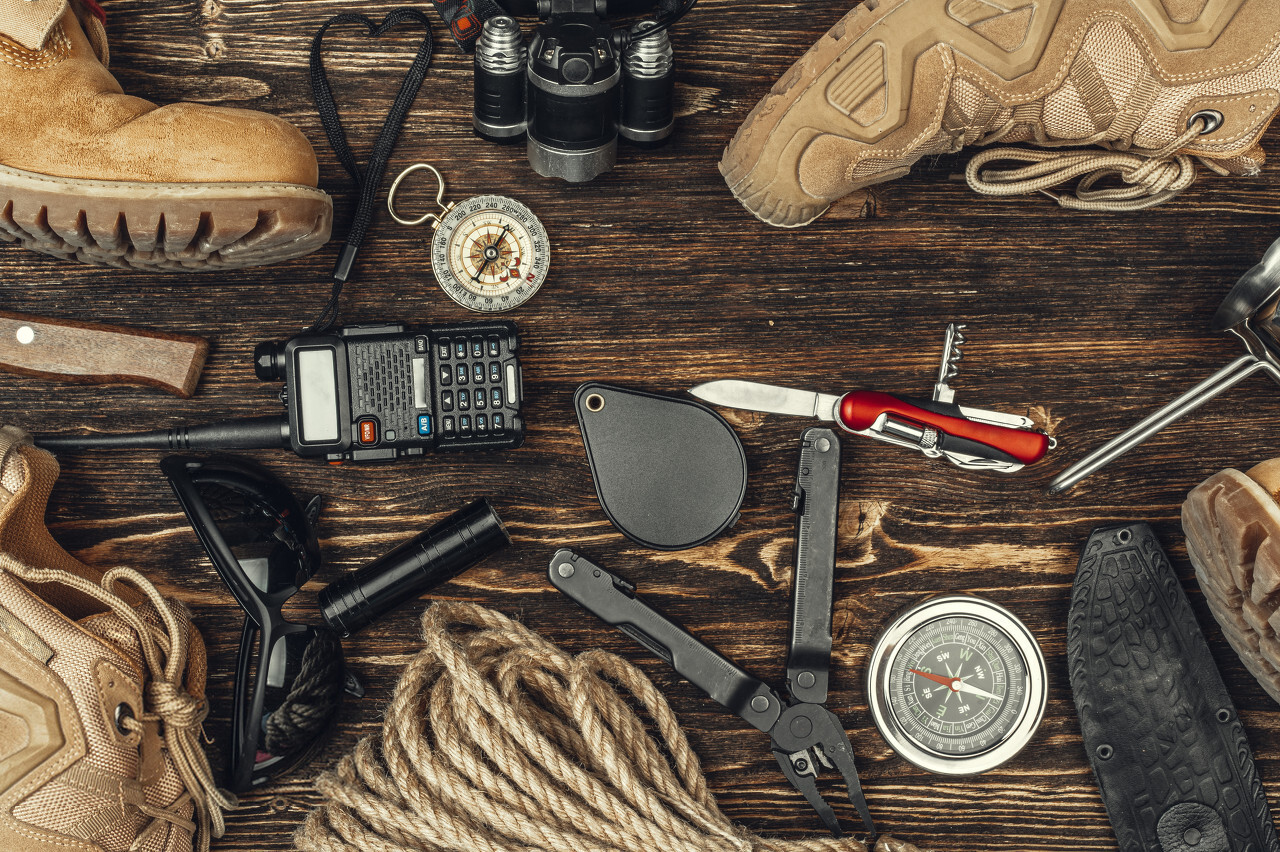
Essential Survival Gears For The Wilderness
Surviving is difficult if you don’t come prepared. Besides your skills, you need to be equipped with the right utilities to combat various emergencies and dire situations.
If you are thinking about survival, you should invest in the following things:
Firestarter – A fire starter is a crucial tool for your survival kit, as it can create fire from cold tinder, even on a wet or windy day. Regardless of your wilderness survival skill level, a fire starter is a must-have piece of gear in your survival pack. You never know when you’ll need a fire to keep you warm, cook your food, or even signal for help.
Multi-tool or survival knife – A multi-tool is a small handheld tool that can do many different tasks. They’re made to be lightweight and portable, so you can take them with you when you’re outdoors. They can be useful when you’re building a shelter, gathering wood, or during other outdoor tasks. Whether you’re hiking, backpacking, camping, or preparing for an emergency, a multi-tool will help you carry out a wide variety of tasks.
Map of your location – Maps are a crucial tool for any outdoor survivalist. They allow you to properly prepare for a backcountry hike, hunt, or other outdoor activities by allowing you to identify landmarks and other essential features that you may encounter along the way. While basic topographic maps are available for free at most local outdoors stores, if you want a higher quality map that shows more details, you’ll need to purchase a map made for navigation purposes such as GPS maps.
Compass – It’s true: even the most experienced outdoorsmen can get turned around in the mountains or the wilderness. If you don’t have the compass, finding your way back might be difficult. Fundamentally, a compass is a tool that helps you figure out where to go. However, its pressing function is to help those who got lost navigate their way back.
First aid kit – A first aid kit is a must for any outdoor trip, along with the right survival knowledge. With this utility, you will have an easy and inexpensive way to ensure you will be able to patch up any wounds and injuries that you may sustain during the trip. But then again, a survival kit would be useless if you don’t know how to use it. Hence, it is vital that you get proper training on how to use and assemble one.
Survival whistle – One of the most important things to have with you if you’re headed into the great outdoors is a whistle. A whistle can help you stay in touch with your friends and family when you’re exploring and can be a lifesaving item if you’re lost or in danger.
Paracord – Paracord, or parachute cord, is one of the handiest things to have in your survival kit and is a definite must for any outdoor adventure. You can use a paracord for a wide variety of things, including lashing together items, as a tow rope, to make a stretcher or a snare, as well as a fishing line. The uses are endless because a single cord can be made into multiple things due to the many braided strands. You can even unravel the cord itself, removing the inner strands, and have a rope to tie down items.
Water filtration – Water is an essential part of your outdoor survival kit. You might be able to live without food for weeks, but you can only go about three days without water. This is why it is crucial to have a good water filter with you at all times. Water filtration is one of the best ways to ensure you have a safe water source during emergencies.
Flashlight – Be it a natural disaster, outdoor activity, or regular old bad weather, flashlights can be a lifesaver in an emergency. In addition to adding light to dark areas, flashlights can signal for help and ward off dangerous animals. Given the importance of flashlights in an emergency, it’s important to invest in a flashlight that is both rugged and bright.
Tarps – In the wilderness, there are a lot of scenarios where you can easily fall prey to the cold, wet weather. In such situations, a tarp can be the difference between surviving or not. A tarp is a sheet of plastic or canvas material that is used to provide shelter in an emergency. It is an essential piece of equipment for people who want to be prepared for the worst. Tarps can be used to provide shelter from rain, snow, and wind. It will also act as a ground cloth to protect you from the damp, muddy ground.
Signal mirrors – Signal mirrors are small, glass or plastic mirrors used to reflect sunlight to send signals. They were initially used by the military and are now used by outdoor enthusiasts who need to signal for help. Right now, they are typically used for signaling rescue planes, helicopters, or other rescue personnel in emergencies.
Dry bag – A dry bag can keep your food and gear dry even when you’re not, making it essential for outdoor survival. Specifically, this utility is a water-tight container where you can keep your extra clothes, food, and camping gear in. If you’re lost in the middle of the wilderness or have to swim to shore in an emergency, a dry bag can help you protect your things from being lost or damaged.
Space blanket – A space blanket is a thin sheet of material designed to keep people warm in cold weather or cool in hot weather. It reflects your body heat back to you, which is called a thermal barrier. It is also waterproof and windproof. A space blanket is a must-have for any outdoor activity where the weather may be unpredictable or unsafe.
Radio – If you are ever caught in an emergency situation, you will realize that a radio is a precious resource that can help you stay safe and informed and locate loved ones. Whether it is a severe weather situation or an isolated natural disaster, radio signals can help you receive up-to-date information and keep in touch with the world.
Keep in mind that this list only shows the basic outdoor survival utilities. Some outdoor survivalists and preppers have recommended other specific items that you should carry every time you head on a wilderness trip.
But for starters, the things that I’ve listed above should be enough.
How To Survive In The Wild?
There are various unexpected things that you can encounter in an outdoor activity. Of course, these things could either be good or bad. But if it is the latter, you have to be prepared.
Now, there are a lot of scenarios that can play out. And honestly, it isn’t easy to pinpoint which one has the highest chances of happening. The best thing that you can do right now is to get ready. Before you go, pack your gears, prepare yourself, and be equipped with the right survival skills.
Here are some of the essential survival tips that you can do for every different scenario and setting.
On The Woods
Find water
When it comes to outdoor survival, finding water is one of the most important tasks you should do. Having water in the outdoors is crucial for you to live another day. You need water to stay alive, and that’s the truth.
While it is true that there are various water sources that you can find in areas like forests (i.e., rivers and streams), most of them are unclean. Hence, if you find one, make sure that you filter them first with your water filtration system. If you don’t have a filter, boil the water for five minutes.t
How to find water? Well, try searching for an animal and follow it. Animals require to drink water, too. If this is not possible, try to go to areas with low elevation. After all, water bodies tend to flow downhill. Alternatively, you can dig a well in areas where it is moist and full of vegetation.
Create fire
To create fire, find a parched part of the land and clear it until only dirt remains. Place rocks around the area so that the fire won’t spread. Don’t set fire on areas near vegetation or combustible items.
After that, gather materials that can help you start the fire, such as dried branches, grass, or wood shavings. Having a fire starter, match, or lighter is extremely helpful at this point. But if you have none of them, learn the traditional method of lighting fire.
Look or build a shelter
Given that you will be stuck in the woods, it is essential that you make a temporary shelter. To do this, look for a flat area–at least 100 meters away from streams and rivers. Don’t build your shelter on exposed ridges and hilltops. They can get windy and cold.
Also, scout the area for boulders and rotten trees. They might fall or roll over you. Here, you should learn to construct various survival shelters, such as the A-Frame.
Fend off animals
When you are in the woods, wild animals would be present. And it is extremely important that you step away from them. You wouldn’t want direct confrontations against bears and leopards. But if you are in a wooded area, the most common threat is the snake.
To avoid them, don’t camp in grassy and dark areas. Don’t stick your hands into holes, as snakes usually make them their homes.
If you get bitten, wash the wounds with water and soap. Try to be still because walking and breathing will just hasten the spread of the venom. Don’t forget to tie a bandage two to four inches above the bitten area.
As a reminder, noises can help fend off aggressive creatures. When you are walking, make sounds so that animals will know that you are there. Also, cook food 100 yards away from your camping site. If you encounter a bear, don’t scream or run. If you get attacked, lay down and protect your neck and head. Try to play dead.
Mountains / Peak Bagging
General guidelines
The risk of strains and sprains is high due to the extreme conditions of the hike. Hence, you need to be alert at all times. Before the trip, make sure that your body is fit and received the proper training.
Don’t move at night. In this setting, the visibility is low, and other risk factors are too high. You are also prone to temperature changes.
Also, be equipped with the proper gear. It is expected that the temperatures above will get low. If you are thinly clad, you’ll suffer from hypothermia and other life-threatening conditions.
Bring utilities that can help you create fire and warmth, such as fire starters and insulation.
Don’t forget your radio or satellite phones. They can aid you in calling for help from below!
Avoiding avalanches
Some mountains are icy and snowy throughout the year. Therefore, they are always prone to avalanches. If you are trekking in these areas, don’t create too much noise. After all, high volumes of noises can start a rampaging deluge.
Look for paths that are tightly compressed when walking on snow. You can test the course by driving a stick on it. Don’t go on areas with a steep and high slope. If the area has a convex shape, don’t go there. They are quite prone to avalanches.
You should never tread routes that are sunny. If the heat is high enough, the snow could melt. The best thing that you can do here is to go to areas where there are trees that serve as canopies. Irregular terrains are suitable, too.
During avalanches
When you spot an avalanche coming in your way, you need to step aside. Don’t descend, and don’t face it either.
If it is too difficult to avoid the falling snow, look for something where you can cling tightly.
An avalanche can bury you. Therefore, it is essential that you bring an avalanche beacon with you. It would help rescuers find you immediately.
Spotting and surviving crevasses
These crevasses are natural gaps and seams in a glacier. These crevasses are easy to spot, even if you are far. However, there are some of them covered by a thin layer of ice, making it difficult to spot them. If you feel that there are crevasses around, avoid them, especially if you don’t have the right equipment to rope your way out.
If you fell into a crevasse, finding help is difficult. If you are alone, you have to start making shelter and building fire to survive the night. For others to see you, throw a noticeable or bright-colored fabric outside.
Making shelter
The higher you get, the more difficult it is to build a shelter. On the ground, you have a lot of options where you can construct your temporary shelter. But up there, your options are pretty limited. You can either settle on rocks or snow. Relying on your tent or outdoor shelter would be the most ideal.
Making a shelter in these hostile regions is a challenge, and it would require you some technical know-how to achieve such a feat. You don’t go mountaineering or peak bagging if you don’t have the right survival knowledge at your disposal. Most of the time, your skills, experience, and knowledge can spell the difference between life and death.
Long Hikes / Thru-Hiking / Foot Trailing
Remain calm
This piece of advice applies to all of the emergency scenarios that you could encounter in the wild. Regardless of where you are, you need to keep your mind composed. In this way, you will be able to think properly. Your survival can depend on the sharpness of your mind. Quick-thinking lets you avoid further disasters.
Look or build a shelter
You can follow the procedures that I’ve mentioned earlier in the first section (On The Woods). Find places like caves and canopies because they can serve as natural shelters.
Consider bringing tents, hammocks, sleeping bags, or other forms of lightweight shelters before you hike.
Stay warm
If you already have a shelter, take off your clothes so that you can dry them. After that, insert yourself into a sleeping bag to get warmth. If you don’t have a sleeping bag, then you should construct a fire.
Determine your location
Given that you are lost, you have to assess your situation and pinpoint your location. Use a GPS, map, or compass to ascertain where you are currently located. You can also think of the last familiar location you passed and make preparations to get back there.
Be attentive to landmarks and other noticeable parts of the route you took. They can help you trace your back.
Get replenished
Before you hike, make sure that you brought enough food and water with you. You have to replenish yourself, even if it is just a hike. And in unexpected situations, the food and water that you brought could put your survival afloat.
Since you are in a tight spot, you have to ration your resources. Don’t eat all of your stuff at once! Who knows? The area where you are stuck may not have any natural resources that can feed you.
If you have a water filtration system, you can look for water sources like rivers and streams. Even if you don’t have food, as long as you have water, then you can still survive.
Get help
There are various things that you can do to call help. If you have a radio or a smartphone, contact the emergency lines. If they are not available, you need to wait for rescue. At this point, you would want the rescuers to find you quickly. Signal fire and survival whistles are among the usable amenities here.
Camping And Bushwacking
Learn to navigate
Again, I have to emphasize the importance of navigating. Since camping is an outdoor activity where you can bring a lot of stuff, you should be able to bring various navigational items like a compass, maps, and GPS devices.
Identify dangerous plants
There could be dangerous species of plants in your camping area. Make sure that you can identify them, as they can cause dehydration, diarrhea, and rashes. In fact, before you head out, you have to do your research first. You can ask locals or site managers about this particular matter.
Learn to catch fish and animals
Unless you are a vegetarian, one of the survival skills that you need to learn is to catch fish and other small creatures. If you are going to camp near water bodies, it would always be prudent to bring various fishing tools such as rods, hooks, and lines.
Make spears and traps to get land-based creatures. But don’t ever attempt to capture aggressive animals. Don’t get those that have poison on their bodies.
Hydration
When it comes to survival, water is considered to be a top priority. Of course, we are aware that potable water is not readily available outdoors. Therefore, you need to make them clean first before drinking them.
You can strain water through the use of a water filtration system. Purifying water through boiling is also a viable idea, especially if you have the tools to do so.
You can locate sources of water by following animals. You can also find them by yourself by going downhill or digging areas with rich vegetation.
Building fire
Let us say that you failed to bring a match of lighter in your camping trip. How could you create fire, then? Well, the traditional method can work. Get a rock and several sticks and rub them against each other. The friction should be able to generate heat.
You can also use a magnifying glass to generate fire. We learned how to do this trick back in grade school.
Get shelter
Let just hope that you have brought your tent or outdoor shelter with you. Otherwise, you will really need to find a quick shelter–or build one right away. You can make your own cover using wood, ropes, leaves, ropes, and tarps. Even a makeshift shelter is already better than being fully exposed to the elements.
You could also look for caves or other natural formations that can act as temporary shelters.
Dealing with injuries
Treating injuries is a must for any outdoor activities. But doing so requires you to learn the right first aid skills. At the same time, you need to have the appropriate tools. I deem that these things are mandatory, considering that medical help won’t be readily available.
Take stock
Keep in mind that being able to adapt to any situation is quite important. In fact, the speed at which you can adjust yourself would be a crucial aspect of your survival. Nobody knows how long you will get stuck. Therefore, you should be able to familiarize your environment and utilize all available resources.
How To Get In Shape For Hiking?
How to get in shape for hiking? Are there any foolproof and effective methods to get in your prime condition for your next big outdoor hike?
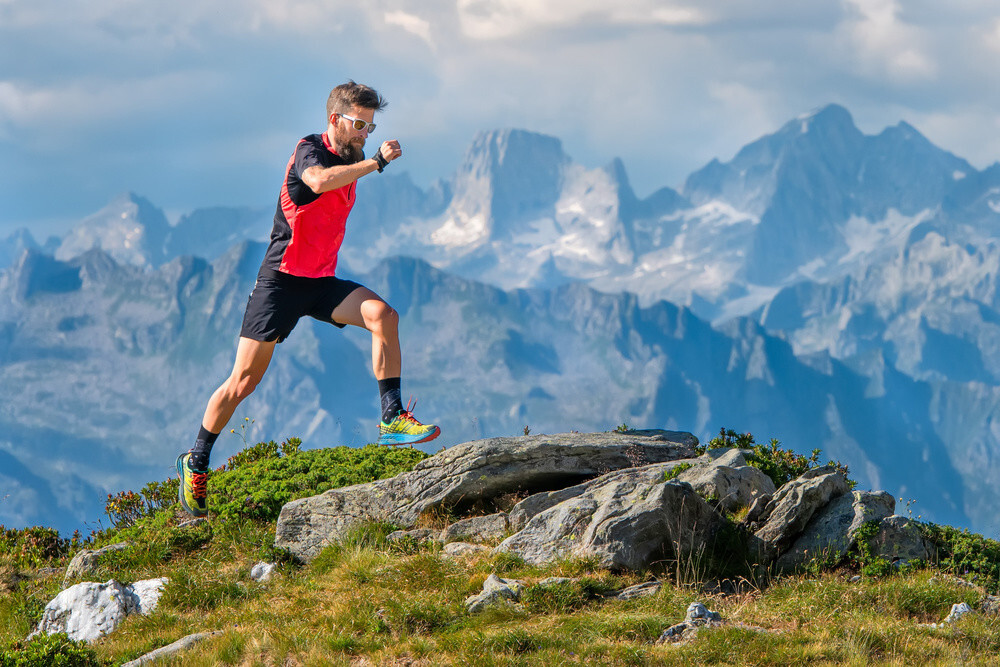
If you’re anything like me, you hike because you love nature, you love all the exercise and fresh air, and you love to escape everyday stress.
But if you’re anything like me, you also love to eat. And it doesn’t take more than a mile or two up the trail to realize that being in shape for hiking means more than just being able to walk all day. You need a fair bit of stamina to keep up with your friends, and you need to be lean enough not to topple over when you’re trying to scramble to the top of a ledge.
Of course, we are here to ensure that you will not quickly get exhausted on your trip. Fortunately, it is not that difficult to do.
How To Get In Shape For Hiking?
We all want to get into shape as fast as possible, but finding the right workout for you isn’t always easy. Some of us love running; others like to take a more balanced approach, while some prefer to exercise at home. What works for one person may not work for you since our bodies respond differently to different workouts, depending on genetics and other health factors.
Here are some of the routines that you can do to prepare your body for any hiking excursion.
Weight And Strength Training For Hiking
As an avid hiker knows, you need to be in good shape to be able to do long hikes. Weight training will allow you to hike longer distances without becoming tired. Of course, you have to ensure that you can carry your pack, alongside your body weight.
If you are a little flimsy, you will not handle such a task, especially if you are going to deal with sharp steeps and high inclinations. I can already imagine the rigor!
It is a common hiking challenge to get comfortable carrying a backpack, which can be tricky for beginners. One of the most important things to consider when training yourself to have a backpack when hiking is that your body needs time to adjust to carrying a backpack. And for this, you will need to start small. First, try wearing a backpack when you go grocery shopping. Then, try carrying the backpack to the bus or train station. If you start to experience any pain, stop, and take a break.
Furthermore, focus training on the following muscle groups and areas:
Shoulders – While training for a hike, you want to work on both your upper and lower body. Hiking is generally regarded as a lower body exercise, but strong shoulders are necessary to carry your pack and protect your back. Strong shoulders will also give you better posture and make you more efficient on the trail.
Neck – You may not know this, but your neck is another part of your body that can be strengthened for hiking. When hiking, you will inevitably encounter situations where you need to utilize your neck muscles for stabilization. For example, when hiking down a steep slope, you will have to keep your head and neck steady for balance and control.
Upper back – If you’ve ever gone hiking into the mountains, you might have noticed that your upper back (the area between your shoulders and your neck) is the sorest part of your body. This is caused by hiking with a backpack, which requires you to carry more weight on your upper back. The solution is simple: a solid upper back workout.
Lower back – For many hikers, the lower back is the limiting factor for carrying heavier backpacks. It takes years to develop the upper back muscles to a point where a bag can be carried without pain and fatigue. It’s not just a matter of doing a few workouts with a heavy load; you must train your upper back for hiking regularly.
Abdominal muscles – The best way to get a great stomach for hiking is to first concentrate on building up your upper body and core strength. After you have a strong upper body, you can begin to train your abs directly, ready for hiking in the mountains. The first step is to build up your overall strength, and after a few months, start focusing on stomach exercises. Ensure you are using weights that are challenging for you and that you are increasing them as time goes on.
Legs – For hikers, nothing is more important than building up leg muscles. You wouldn’t build a house without learning how to hammer the nails or lay bricks, and if you want to enjoy hiking, you should build strong, healthy legs, too. Generally, hiking, as a sport, trains you to keep your pace for an extended period and ascend and descend steep inclines.
Here are some of the recommended routines that you can do:
Strength Training For Legs:
Glute bridges – 10 times
Reverse lunges – 10 times (per each side)
Squats – 30 times
Step-up – 10 times (per each side)
Side lunges – 10 times (5 for each side)
Strength Training For Abs – Crucial For Hikers
Bird dogs – 20 times (10 for each side)
Overhead reaches – 15 times
Superman – 15 times
Side planks – 15 times
Strength Training For Upper Body
Shoulder retractions – 15 times
Cat cows – 10 times
Pike push-ups – 10 times
Planking – 30 seconds
Push-ups – 15 times
Aerobic Exercise
Aerobic exercise, such as running, including hiking, is one of the best ways to keep your body strong and healthy. It will help you with your hiking because it makes your cardiovascular system more efficient. It will also help you lose weight, allowing you to hike longer distances.
If you do not have enough energy, you may not be able to climb the mountain you are planning to climb. That is why aerobic is so essential: it helps us to save our energy.
Endurance Training For Hiking
Hiking is a great sport and activity that is enjoyed by millions of people every year. However, just because you like to hike, it doesn’t mean that you are fit enough to do so safely. Anyone who hikes with little or no training is more likely to sustain an injury due to hiking.
You can do several things to get into shape and improve your hiking ability before you head out on the trail, and regular endurance training is one of the most important. One way or another, you have to ensure that you can survive the entire duration of the hike.
Here are some of the exercises that you can do to enhance your stamina.
Running and walking – Before you hit the trail, you have to do highly similar routines, such as running and walking. Both of these exercises can help you strengthen your endurance. They are easy to do; you can do them anywhere, too. There are various running and walking programs that you can follow. Look for something that can suit your needs. For starters, running two times a week should be already enough. On the weekends, try to do long walks. Every week, increase the regimen by around 10%.
Hill intervals – It would also be great if you include high-intensity training in your workout. For the purpose of preparing yourself for a hike, this would require you to find an area that is filled with short inclines. Once you found the perfect spot to train, gear yourself with your usual hiking equipment. After that, start making several repetitions. Walk the incline as fast as possible. Descend after you reached the top, then repeat the process again.
Increase the frequency of your workouts – One of the best ways to enhance your endurance is to increase the number of times you do your workouts. The more you get your body active, the more it gets conditioned for the hike. This principle is applied by athletes. It is not enough that you take long runs and walks. You also have to do short but regular routines. Continue doing these things for months, and you will experience a leap in your endurance. Keep in mind that they don’t even have to take two to three hours.
Breathing exercises – Breathing exercises are an essential part of any hiking workout. When you’re hiking at altitude or in a hot environment, your breathing can become shallower and quicker than is right for you. In fact, you might not even realize you’re doing it, which can lead to sickness or injury. But there are several simple breathing exercises you can do to help relax your breathing and return it to a more regular rhythm that will help you feel better.
One of these is by pulling the air to your lungs via your diaphragm. Do this routine a few times per day. Specifically, breathe with your noise while one of your hands is pressed against your abdomen. While doing this routine, it is essential that your chest shouldn’t move at all.
Be mentally prepared – You can be 100% physically prepared to hike for your next big trip, but if you don’t know how to be mentally prepared for hiking, you could still be setting yourself up for failure. It’s all about knowing what to expect when you’re out on the trail and if you are or aren’t prepared for certain situations.
Your mindset is vital for any outdoor activity. You have to learn how to be comfortable leaving your comfort zone. You have to prepare yourself to overcome new challenges and reach new goals. Hiking will take you to the limits, and it will require sheer will power to pursue such a feat!
Start doing those exercises I listed here. I know they are difficult, but they can help in building your mental toughness!
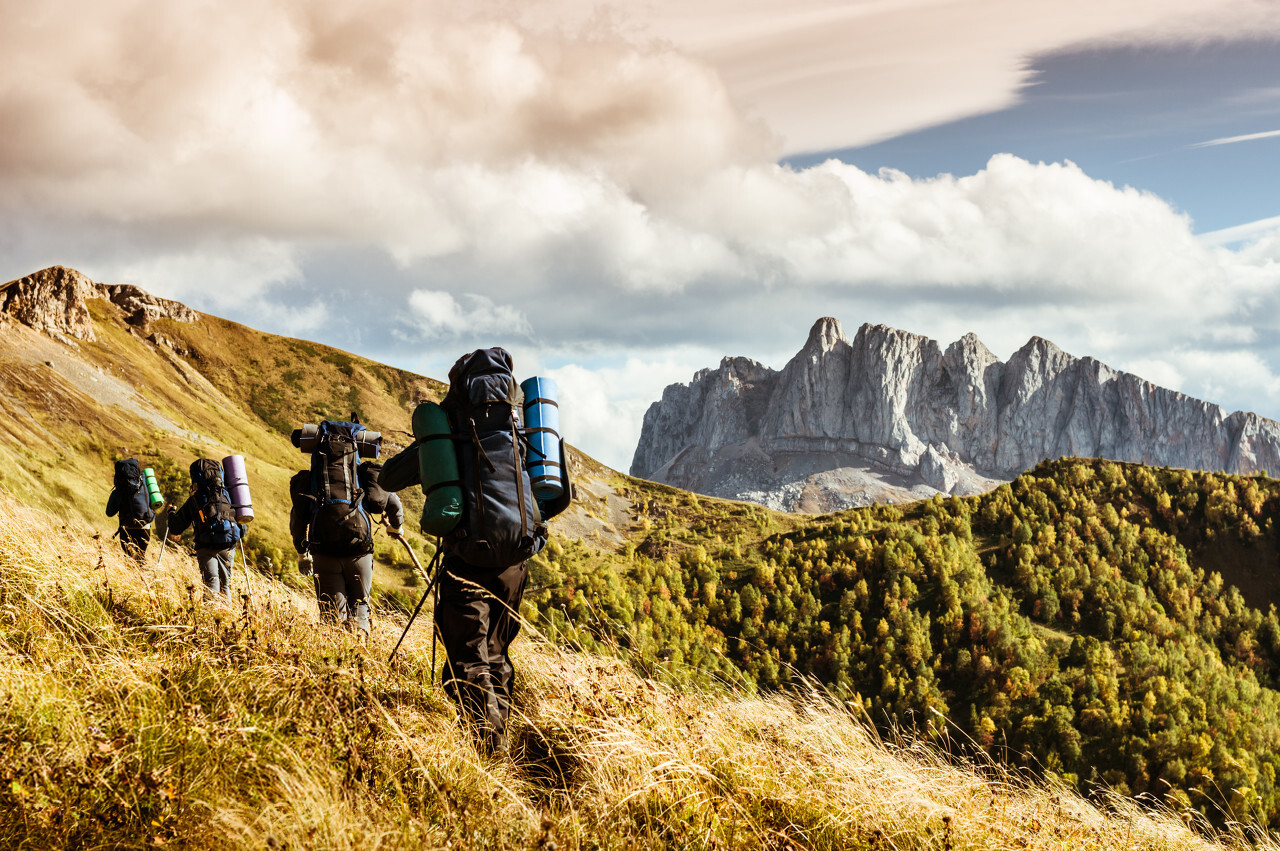
Uphill Vs. Long Hike
You can also hike as a form of hiking. I mean, the best way to train how to hike is to hike. Exposing your body to the conditions of hiking is an efficient conditioning method. It helps prepare your muscles and bones for the possible ordeals of the trip–especially if you are hiking on harsh areas or technical terrains.
At this point, you have to realize that experience is the key to a successful hike!
Now, you have two routes here: uphill and long hike. Both of these hikes have their respective perks and advantages.
Uphill hiking is an essential training approach for those hikers who are planning to take routes filled with multiple hills and climbs. It is not easy to conquer these areas if you are not trained to do it. You have to build the essential skills to complete the course. Furthermore, uphill hikes improve your balance and strength.
Meanwhile, long hikes are crucial for people who are going on an extended expedition. Some hiking routes out there require several days to finish. Hence, the key here is building your stamina and strength. You should have the endurance to shove exhaustion away; at the same time, you also need to be strong enough to carry your hiking gears, which are mostly loaded in your back.
Regardless of your choice, both uphill and long hiking requires you to have proper training. Therefore, the exercises that I recommend above should become mandatory already. Doing them will also prevent potential accidents and injuries while you are hiking.
Training Schedule For Beginners
A training schedule for hiking is a necessity to increase your stamina and endurance when you want to hike mountains and terrains for an extended period.
I suggest that you allocate eight weeks of training before your major hike. If it is your first hike, then you can extend the preparation time to 10 to 12 weeks. The longer you can prepare, the better.
Here is a recommended regimen that you can follow:
Two days (non-consecutive) for strength and endurance workouts.
Two days (non-consecutive) rest days; if you need that you need more days, then do so.
Three days (non-consecutive) cardio workouts; do these sessions until two weeks before the big day.
From cardio workouts, switch to long hikes in the last two weeks before your hike; each of them should last an hour. Make sure that you are wearing a weighted backpack. You can also mix a long hike to your strength and endurance training.
Two days before the hike, you should rest already.
Exercises To Get In Shape For Hiking
Before you train, consider the following suggestions:
Make the exercises tailored for you; if it is too much, don’t do it.
Don’t continue exercising if you are experiencing unusual pain. If your body is sore after exercising, rest for a couple of days.
Exercising is not a race. Hence, it is alright if you do it at your own pace. After you get used to it, you can increase its frequency and repetitions. Adding resistance after a couple of weeks should be doable.
Warming up
Warming up before exercising is not only crucial for performance, but it’s also essential for preventing soreness and injury. Warming up increases blood flow and prepares our muscles for the work that’s ahead. While there are a number of ways to warm up, the most important takeaway is that you should warm-up before your workout.
For hiking, the warm-up should consist of brisk walking for 5 to 10 minutes.
Before you exercise, make sure that you do breathing exercises. It will help you regulate the air in your body. Rest for a minute after you completed a set before you repeat it again.
Exercises should also be done in succession. It should be one at a time.
Hip roll
One of the best and most efficient methods to get in shape for hiking is regularly engaging in a hip roll exercise. The benefits of a hip roll exercise for hiking is that it strengthens the glutes, hamstrings, and core. These are the muscles that you need to be strong so that you can hike safely.
Jump squats
A jump squat is a simple exercise, but it can provide profound benefits on the trail. While hiking, jumping squats can strengthen the muscles you’ll use the most, like your quadriceps and calf muscles. They also help you achieve a full range of motion and build endurance. By improving your fitness, you’re reducing the risk of incurring an injury while hiking.
Step up workout
Step up exercise for hiking is one of the easiest forms of exercise you can do. It only requires you to use your own body weight, and you can do it anywhere you want. It also increases your calorie burn, so you’ll get even more out of your hike. All in all, it’s a win-win situation. Step up exercise for hiking is actually simple. You just need to find a small staircase where you can climb repeatedly.
Heel down workout
Heel Down Exercise is an exercise that lets you practice your hiking techniques. This type of exercise’s primary purpose is to teach you the proper hiking techniques before you go out and hike. It is also a fun way to hike without really hiking.
Hip clock
While hiking, a hip clock exercise will help you to keep a steady pace and pace yourself during the hike. This is essential to reach your destination comfortably. If you are hiking in a group, failing to maintain a steady walking pace can make the hike more difficult for others. Practicing this exercise will help you pace yourself during your hikes and keep you and your hiking buddies from tiring out too soon.
Bridge with hamstring curl
Bridge with hamstring curl exercise is a moderately difficult exercise, which combines two exercises – known to be the most effective at strengthening the gluteal muscles – that are often used for bodybuilding workouts. The bridge is a very popular exercise used in Pilates, yoga, and other stretching exercises, while the Hamstring Curl is performed in a weight lifting contest.
Tips For Getting In Shape While Hiking
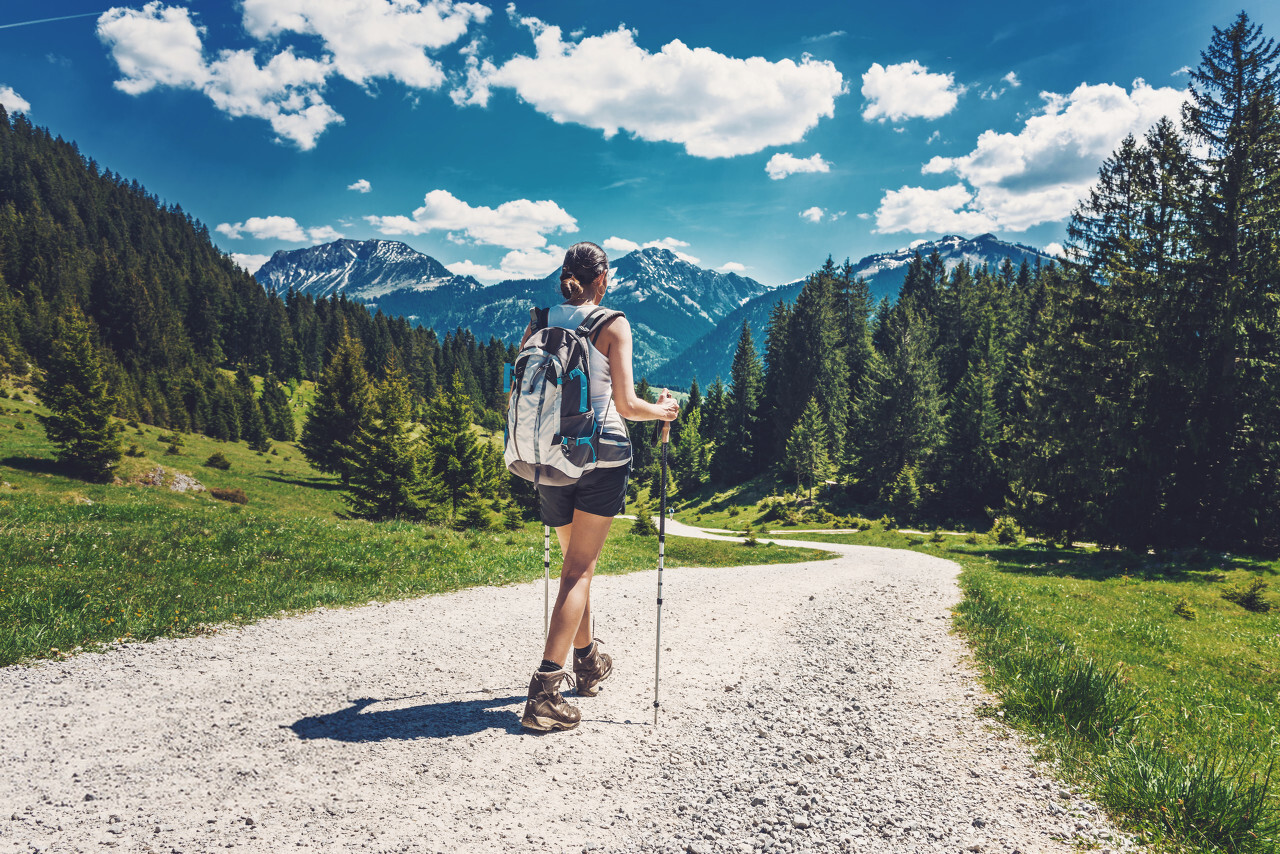
Hiking is an incredible way to unwind and experience nature, but if your body isn’t in the right shape, hiking can be brutal. If you are in reasonably good shape, hiking can be an enjoyable way to get some exercise and see the wonders of the natural world. If you aren’t in condition, hiking can quickly become a painful experience.
Here are some tips that you should follow to get your body and mind in their top condition before your hike.
Allocate adequate time to prepare
Improve your cardiovascular health
Strengthen your legs
Make sure your back is strong and durable enough to carry a loaded backpack
Never ignore your core
Learn exercises that improve your balance
Be mentally prepared
Conclusion
I can’t emphasize enough the importance of how to get in shape for hiking. Failing to prepare will make you extremely prone to injuries and accidents. In fact, being out of shape will prevent you from completing a trail.
Getting in shape will provide an excellent foundation for handling the physical rigor of hiking. It will allow you to focus more on enjoying the views. It also lets you set a faster pace. The more fit you are, the easier hiking will be for you!
I hope you find this guide helpful. For other inquiries, feel free to ask me in the comment section below.
Benefits Of Rucking: 13 Reasons To Try This Exercise!
What are the benefits of rucking? Is it a suitable outdoor activity that you should pursue?
The short answer is yes.
But of course, I am going to explain its perks in detail. For starters, rucking is a form of exercise that involves carrying a weighted backpack for long distances. Rucksacks can range in weight from 1 to 40 pounds, depending on the length of the hike or mission.
The benefits of rucking are many and varied, so let’s take a look at some of the most important provisions to your mind and body.
What Is Rucking?
Before we highlight the benefits of rucking, allow me to give you an overview of this particular exercise.
Rucking is a form of walking or hiking that involves wearing a weighted backpack. While it’s not a new form of exercise by any means, rucking is becoming increasingly popular, especially among soldiers and first responders.
Rucking is typically thought of as a form of aerobic exercise. While that’s not entirely wrong, rucking is more than just walking with a weight on your back. In fact, rucking is a whole-body workout that can help you burn calories, build muscles, and improve your cardiovascular health.
Rucking is not only beneficial for outdoor enthusiasts and military professionals, though. It also provides an easy way for almost anyone to get in shape, whether you’re training for a physical fitness test or you just want to try a new hobby!
How Is Rucking Related To Military Backpacking?
Rucking came about as a method of getting fit during military boot camp. Soldiers had to be prepared to march for miles and miles with a pack on their back, and rucking training helped your body get used to the physical stress of that.
Nowadays, rucking is a fun, non-competitive way to get fit that harkens back to military roots. And, you can do it anywhere: in your city, around your neighborhood, or even on the trails.
When individuals participate in rucking, they are often watched by other people, as is common in a military setting. As a result, rucking is an exercise that demands a great deal of endurance and strength. However, rucking is also a stress reliever for many people, as military backpacking can be.
What Is The Proper Form Of Ruck Marching?
The proper form of ruck marching has been the subject of much debate in the rucking community, as more and more people are taking up this popular fitness activity. Many ruckers who have been doing the sport for years have noted that the way they ruck march is how it’s supposed to be done.
However, nobody can argue that the correct form of ruck marching is walking with a rucksack on your back. Specifically, you need the central mass of the load near you.
It is also recommended that you put the weight in the lower part of the pack so that it would be within your hip level. But at the same time, others prefer to put the load higher because they find it comfortable. Once you get used to rucking, you can experiment with different load placement.
Don’t forget that the weight should be balanced from both sides. As much as possible, you have to make it secure. It should not move or wobble around.
Benefits Of Rucking
This time, allow me to discuss the several health benefits of rucking.
1. It Is Simple
Rucking is the best activity for you if you prioritize simplicity. You simply need the right rucking backpack, some weights, and a pair of rugged rucking shoes, and you are good to go. It is not similar to other physical exercises and fitness routines where you need to invest a lot.
2. It Is Generally Cheap
How much are the gym fees these days? Probably the membership fees monthly of a standard gym goes from a hundred bucks or more. In some places, a day in the gym could cost you roughly $10 at least.
Now, are these prices worth paying for fitness? Probably yes. Probably not.
But if you are living frugal, such amounts might not be suitable for you. Hence, rucking becomes an excellent alternative. As mentioned, you only have simple amenities for this exercise. A pair of good shoes and a rucker would be enough to sustain you for years. That’s a one-time investment for long-term use!
3. You Can Do It Anywhere And Anytime You Want
Rucking is usually done on a trail, on the road, or a track. Some choose the road or the track, while others prefer to ruck on a trail. But where is the best place to ruck? The truth is that there are many options.
As long as there’s enough for you to run or walk, you are free to ruck a load. And you don’t have to be time-conscious, too. This exercise is doable in any part of the day. You can even ruck, regardless of the season!
4. You Can Do It During Your Travels
Unlike other forms of exercise, you can do rucking while you are away from your hometown. Going to other places for vacation is not an excuse for you to leave your ruck in your house. You can carry them while you are sightseeing or touring. It is very doable.
In fact, you might encourage some locals and tourists in the area to do the same thing! And the best part of it is that it will never be illegal. I have yet to encounter a law that forbids rucking!
5. It Strengthens Your Cardio
When most people think of cardio, they think of treadmills and ellipticals. While those machines can burn a lot of calories, there are other ways of doing cardio that can be just as effective.
One of them is rucking. As explained, this exercise is a method of walking that builds endurance and strength by rucking weighted backpacks. Although the military has used ruck marching for years to train their soldiers, civilians can also reap the benefits of this low-impact form of cardio.
In fact, according to the American College of Sports Medicine, adding a weighted backpack to your workout routine can help you lose weight and burn more calories than walking without a rucksack.
The weight that you carry also improves your overall strength. It can beef up your structure while enhancing the durability of your legs. Furthermore, it helps in the correct spine posture and the formation of your abdominal, shoulder, and lower back muscles.
6. Rucking Helps You Resist The Impacts Of Old Age
As people age, mobility becomes a problem. Many seniors lost their ability to walk or run due to the deterioration of bones and muscles. Moreover, it is difficult for them to balance because their hips and pelvis are becoming unstable.
If you are rucking properly, you will be able to maintain your muscles and bones’ health. It helps in keeping your strength and endurance at the top level. Rucking also helps enhance your “endurance muscles,” which will have a positive effect in your old age.
But even if you are still young, you can experience these benefits already. Specifically, the muscle conditioning provided by rucking can make you more resistant to injuries. A strong spine and core can protect you from any bone and muscle-related hazards while sporting and adventuring.
7. You Can Pair It With Other Bodyweight Exercises
Rucking can be done simultaneously with other exercises. You can use the weight in the backpack for an upper body regimen. Alternatively, you can also bring calisthenics while you are lifting a load. It is also possible to use a suspension trainer while rucking. In this way, you will be able to do lower body exercises anywhere you want.
Here are some of the exercises that you can do while rucking:
Pushups
Backpack swings
Backpack rows
Overhead presses
Burpees
8. Anyone Can Do It
Of course, I have to emphasize that rucking is for everyone. Even children can do it.
After all, you don’t need to start heavy in rucking. You don’t need to impress anyone. You can start light, which means that you can encourage your friends and family to do the same thing.
But depending on your physical capabilities, you can ruck heavy loads right from the get-go.
Before you start rucking, consult your attending doctor first. Histories of injuries may prevent you from rucking.
9. Rucking Is A Natural Exercise
Humans are designed to lift heavy objects on their backs. Back in the day, people don’t have machines and devices that do the carrying for them. Hence, they have no other option but to carry their things on their backs. Farmers have to lift sacks of rice. Hunters used to bag their trophies on their posterior.
And did these things ruin their health? They didn’t. In fact, it strengthened their bodies.
The only thing that ruins your health is being sedentary. Eating junk while not exercising is a primary cause of illness. Before you look at the difficulties of rucking, take a look at the benefits that it can give you.
Again, let emphasize that rucking is a natural form of exercise that our bodies are designed to. You’ll get used to it eventually.
10. It Trains The Shoulder
The shoulder complex is made up of three joints–the acromioclavicular joint, the sternoclavicular joint, and the glenohumeral joint–as well as numerous muscles. When these three joints and the muscles that surround them work together, they form a unit with many functions. You should train them properly to ensure that they remain fit to do the tasks that they are supposed to do.
Rucking is beneficial because it trains the shoulder joints and muscles. After all, they have to work together so that you can lift a weighted backpack correctly. Keep in mind that rucking is used by the military to prepare soldiers for combat situations where they might have to carry a heavy load for an extended period. Your shoulders and back are directly responsible for these tasks.
When you ruck regularly, your shoulders benefit from it directly. And that’s a good thing!
11. It Burns Calories Faster
Walking helps you burn calories. Running can do the same thing, too. However, rucking can do it better.
The reason for this is quite simple. The presence of weights puts additional stress on your legs and upper body. Carrying heavy loads makes it difficult for someone to move. It would require a lot of energy to do so. Hence, it should not be a surprise that you are burning more calories while you are rucking than walking without weights.
However, remember that the rate of calorie burn differs from one person to another. One of those factors is the weight. If you weigh more than another person, you will burn more calories.
12. Rucking Is A Social Activity
Rucking is a clever way to combine three things that most people love: walking, socializing, and fitness. As I said, anyone can do it. Hence, you are free to invite your family and friends to try the exercise.
If you have no social proximities that are interested in rucking, you can join rucking clubs in your locality or community. I am pretty sure that you can find a circle that will accept you.
13. Rucking Enlivens Your Mood
Among all the benefits of rucking, mood enlightenment is perhaps the most appealing and wholesome. Physical exercises that are done outside can improve your mood and relieve you from any form of stress.
According to multiple studies, prolonged stay in parks, forests, and peaceful environments can improve one’s mental health. And not only that, but it also reduces your chances of acquiring cardiovascular diseases.
If your ruck during the daytime, you get enough Vitamin D dosage from the sun. That’s more than enough reason to get this started on this exercise!
How To Get Better At Rucking?
Rucking is the act of walking with a weighted rucksack on your back. You’ll see it referred to as GORUCK and GORUCK Challenge, and it’s used to prepare people for a variety of real-life situations.
It can be used for learning how to move under heavy load. It teaches learning how to move with a team, and it can even help you lose weight. Rucking is a great way to lose weight. It’s also a great way to get in shape, stay in shape, or get back in shape. As with any exercise, the key is to have a plan.
Here are some of the things that can help you get better at this activity.
Do It Slow
You don’t need to rush in rucking. You can begin carrying at least 10% of your body weight. If you are 80 kilos, you can carry an 8-kilo load. The distance that you need to cover should not be too extensive. Start rucking for a mile or two. That should be enough for starters.
Make Your Progress Gradual
You’ll get better rucking if you continue adding weights to your backpack. You should add at least 3 kilos a week and improve your distance by a mile. The gradual increase should be enough to condition your body to the exhausting aspect of rucking.
Practice Proper Posture
Posture is important in rucking. It is a way of enabling yourself to handle the heavy load without experiencing any injuries and strains.
You should practice standing straight, with your spine and head properly aligned. This is a simple yet effective means of preparing your body for rucking. While you are rucking, make sure that you don’t lean your body too far forward. It can make things difficult for you.
If you have issues with your posture, I suggest that you don’t ruck. Consult your doctor on how to address this matter.
Do Stretching Exercises
Always remember that rucking is a low-intensity exercise. Slowly, it will wear your muscles. To prevent the cooling of your muscles while in a stiff and contracted position, you have to stretch after your rucking routine.
Specifically, you have to stretch your hip muscles (i.e., groin flexors), hamstrings, and glutes. In this way, you will relieve your lower back from potential strains. Don’t forget to stretch your calves, too, as rucking punishes them heavily!
Conclusion
The benefits of rucking are clear: it’s a cheap, portable way to carry large loads, and it is a great way to tone the glutes and legs. It is an exercise that you can start now; you don’t need to spend big for it, too.
Your biggest investment in rucking is your determination to get better at this exercise!
I hope that you learned from this guide. For other related inquiries, ask me in the comment section below.
Camping Luxuries: Gears, Gift Ideas, & More
As you can imagine, the biggest “luxury” in luxury camping is comfort and convenience. At its heart, luxury camping is about experiencing the beauty of nature without sacrificing the perks of modern living. As a result, all sorts of opulence can be built into a luxury camping experience.
There are a variety of luxury camping gears that can make your adventure worthwhile. These items veer away from the standard outdoor utilities, given the fact that they are designed to sprinkle splendor in any of your outdoor excursions.
Check out this extensive list of unique glamping gears that you should consider investing.
Best Luxury Camping Gears
Tents And Shelters
Tents have been around for thousands of years and were made out of animal skins, and have been used by the military, explorers, and many different groups.
But today, there’s no point in making them rigid and uncomfortable. Manufacturers have been able to create outdoor shelters that are stylish and ergonomic at the same time!
The DANCHEL OUTDOOR Waterproof Oxford Yurt Bell Tent is an elegant, ultramodern tent that offers users a spacious and luxurious abode where they can escape from the stresses of the outside world. It is constructed from high-quality waterproof Oxford polyester fabric, which is durable and can withstand the elements, even in harsh climates.
The tent features a bell-like shape, which gives it its unique, eye-catching look. It is particularly well-suited to users who enjoy spending time in nature since it is both lightweight and portable, making it an easy-to-carry option. You can use the tent for multiple purposes, and not just for camping. It is perfect for parties, festivals, and wedding events!
Even the most avid campers might be daunted by the thought of setting up a traditional dome tent, which can be tricky and take some time. So for those who want the benefits of a dome tent without the hassle, the Vidalido Dome Camping Tent offers a complete luxury package.
This conical tent has enough interior space and height for people to move around. It can fit up to 5 people, which testifies its spaciousness. Of course, this glamorous tent is durable, too. Tailored from the anti-tear 190T polyester and 150D Oxford fabric, you can guarantee that it can make you happy for a long time. Even its assembly poles are rugged, too. It comes with a vestibule where you can chill and lounge!
If you’re like me, you love camping. But, you also love convenience. The E-Z UP Camping Cube solves this problem with a handy, easy-to-carry tent that can be set up in just minutes. It’s the best of both worlds: you get all the enjoyment of camping, with none of the hassles.
The E-Z UP Camping Cube is not just luxurious; it is spacious, too. It accommodates up to six people and can even house your pet, thanks to its built-in pet entry. The tent comes with large screened windows for enhanced breathability and view without dealing with insect bites.
Its stability on its assembly is coupled with the durable construction and materials that it has. It can protect you from harsh elements, especially strong winds and harsh UV rays.
The Coleman Sundome is one of the popular tents of the Coleman brand, and it stands that way for a reason. This dome-style tent can be used for either camping or as a party tent if you don’t want to sleep in it. The Coleman Sundome Tent is made of heavy-duty polyester taffeta that is waterproof and durable to hold up to the weather. Its corners are fully welded, and the seams are inverted so that no water can ruin your glamping experience.
Of course, no rain or heat can ruin your camping while inside this tent. It comes with a durable rainfly that shields you from the element. Moreover, the frame of this tent is sturdy enough to withstand winds as strong as 35 mph. Ventilation is not a problem either, thanks to its ground ventilation and large windows.
The UNP 10-Person Camping Tent is the perfect tent for families who want to indulge themselves with a luxurious glamping experience. This one offers the space that you need to move around. It can fit up to three queen air mattresses easily. Ventilation is superb, thanks to its meshed windows and roofs. Of course, these access points also allow you to get an uninterrupted view of the outside world.
The tent also features divider curtains, which allow some privacy to their users. Interestingly enough, the divider can be used as a cinema screen. Just bring a projector, and you will be able to have a movie night outdoors. Construction-wise, I have no qualms about this tent. Its fabric is made from 185T polyester, which offers durability and water-resistance. It also includes awnings and vestibules, which thoroughly improves your camping experience.
They’re called “bubble tents,” and they’re all over social media. Since they popped up in the market, interest in these modular, inflatable shelters has exploded. These cool-looking tents are made by various companies, but the most popular is possibly Alvantor. The latter’s bubble tent is one of the hottest items for outdoorsy millennials right now.
The tents are made from fiberglass and PVC, which makes them super-lightweight, waterproof, and easy to assemble. In fact, it features an automatic pop-up. You never have to assemble anything here. Its assembly is durable and stable, as the tent is supported by multiple steel frames.
Everything here is transparent and well-protected. Its spaciousness allows it to accommodate up to ten people. For outdoor parties and cook-outs, this bubble tent is definitely a one-of-a-kind choice.
Best Luxury Sleeping Bags And Gears
When it comes to camping, the first question that comes to people’s minds is this: where are we going to sleep?
Of course, tents are not generally designed to have mattresses on them. Hence, campers have to get sleeping amenities like sleeping bags and cots to have a comfortable rest in the outdoors.
And since we are prioritizing luxury here more than anything else, our selection of sleeping gears should be extravagant. Consider the selection below.
7. TETON Sports Mammoth Queen-Size Double Sleeping Bag
TETON Sports has always been a brand that produces a lot of great stuff. They are known for making high-quality products at affordable prices. One of their best products that they make is the Mammoth Double Sleeping Bag. It is a best-seller in the market because of its exceptional quality. It is not only suitable for backpacking, but it works well in satisfying leisure campground camping.
This is a double sleeping bag, so it houses two people. If you want to cuddle with your partner or share warmth during a winter camp, this sleeping bag works fine. It is designed to give you space to move around, too, thanks to its rectangular construction. With its plush interior, you’ll feel cozy while inside this bag.
8. Disc-O-Bed Duvalay Luxury Memory Foam Sleeping Pad & Duvet
Since most of us here are driven by the desire to have a luxurious camping experience, we should not hesitate to pick the best utilities right from the get-go. For a sleeping bag that can send you directly to Cloud 9, the Disc-O-bed Duvalay Memory Foam Sleeping Bag should be the ideal choice. It features the combination of a luxurious topper and duvet. It will make you feel that you haven’t left your home at all.
This one works well for different camping trips, whether you want to settle on the ground on your motorhome. All of its components are washable, making it easier to maintain. It is easy to pack, too, thanks to its lightweight and compact construction.
The REDCAMP Cotton Flannel Sleeping Bag is another fabulous sleeping bag that you should consider in your glamping checklist. It is designed to accommodate adults up to 6’6″ tall. It has enough internal clearance so that you can freely move around. If you don’t want the feeling of being choked, then this roomy sleeping bag is perfect for you.
The durable polyester ripstop fabric of this sleeping bag can withstand constant use. It is also water-resistant, which is enough to resist moisture and any watery nuisances. Meanwhile, it has two pounds of filling flannel that remains comfortable down to 10 degrees Celsius. You’ll be able to use this in both cold and warm conditions.
10. Therm-a-Rest Basecamp Self-Inflating Foam Camping Pad
The Therm-a-Rest Basecamp Self-Inflating Camping Pad is a great outdoor mat for those looking for the best of both worlds: the comfort of foam, with the added insulation of an inflatable pad. It also features a lightweight design and will add more comfort to any sleeping bag you use it with.
This item is equipped with a proprietary WingLock valve. It helps in inflating and deflating the pad three times faster than most of its counterparts. The pad itself is 77 inches x 25 inches x 2 inches, which certifies its spaciousness. It works with any sleeping bags, too. The thick thermal foam embedded in this luxurious sleeping bag provides guaranteed warmth and comfort during cold nights!
11. KingCamp Luxury Self Inflating Camping Sleeping Pad
As a self-confessed luxury camping addict, I have tried to do everything I can to ensure I have the best camping gear on my next adventure. I’ve bought the best sleeping bags, a high-quality camp stove, and of course, a luxuriously soft sleeping mat. I’ve never been able to find a luxury camping mat that I really loved, though, and that’s a shame. I’m sick of having to settle for a sub-par sleeping mat just because it’s the best option out there. But things changed when I encountered the KingCamp Luxury Self Inflating Camping Sleeping Pad.
This one is designed to provide its users with the best sleeping experience while outdoors. It has a plush texture and comfortable warmth that lets you doze off in a matter of minutes. The mattress is made from 30D stretch fabric with TPU coating for waterproofing. You can guarantee that this item will remain rugged and tear-resistant even in constant use.
And since this sleeping pad is thick, you will never have to worry about touching the ground. It can keep you properly elevated, keeping your back from experiencing strains.
Camping in a tent on the ground is a far cry from the comfort of a good hotel room, but sometimes that’s what you get when you’re roughing it. However, when you’re camping, there is one purchase that can make things a lot more comfortable: the camping cot.
For this particular need, the Coleman Queen-Size Camping Cot is an excellent option to try. This camping mattress provides significant ground elevation for optimal support and comfort. If you don’t like being too close to the soil and insects, such a design is extremely beneficial. It can support a weight of up to 600 pounds; its mattress is ultra-comfortable, while its frame offers guaranteed rigidity.
Since this queen-size cot is not that portable, it is perfect for backyard or campground camping. For glamping, I am 100% sure that this luxurious cot will give you a fun and pleasurable sleeping experience.
Best Luxury Cooking Amenities
What is camping without food?
If you want to ensure that you have a good time while you are off-the-grid, you have to make sure that your tummy is full. Mouth-watering delicacies can always be the highlight of each of your camping trips.
Of course, having the right utilities can make these tasty treats happen.
The Coleman Company Triton 2-Burner Propane Stove is a two-burner stove that comes with a large cooking area which makes it easier for you to cook your food.
It has unique features such as WindBlock panels that shield the burners from wind and other elements. They also let you adjust the pan sizes that you can use with the propane stove. Specifically, it can hold one 12-inch pan and one 10-inch pan at the same time. Moreover, this unit comes with a PerfectFlow technology that enables it to generate stable performance, regardless of the external temperature.
You’ll also enjoy its PerfectHeat technology because it minimizes fuel usage when cooking. With this stove, you don’t need to use many propane tanks on your camping trips. That’s a minus hassle for you!
For a long time, I couldn’t get into “luxury camping.” Sure some of the gear looked nice, and I’d read some of the reviews, but I couldn’t really connect with it. Then I got sent the Lodge Cast Iron Camp Dutch Oven to review, and that changed everything.
I’ve never been a big cast iron user—I prefer my 12-inch non-stick pan—and I’ve never really understood why people would want to spend all that money on a pot that’s going to get dirty anyway. But this pan is different. It is wonderful and useful in every glamping trip that you have. It features a flanged lid that enables it to hold hot coals. You can also flip the lid for griddling.
Interestingly, this unit is pre-seasoned cookware. Hence, you don’t need to add synthetic chemicals to make your food taste good. You simply need to add vegetable oil or soy, and you are good to go. And the more you use this oven, the better its taste becomes!
The Grillster is a tabletop gas grill that is capable of serving multiple people simultaneously. It features a 146-square-inch enameled steel cooking grate, which is downright spacious. It is also dishwasher safe!.
Meanwhile, the cooking grates, drip tray, and warming rack are all metal. The Grillster is powered by propane, and it has built-in flame tamers so you can get it hot before grilling.
Despite its unique capabilities, this unit has a compact design. It only weighs 10 pounds and has a measurement of 19 inches x 11 inches x 10 inches. You can transport it conveniently, and it is an excellent cooking amenity for tailgating, camping, and backyard cookouts! Assembly is not a problem of this grill either.
This lightweight camping kettle is fun to use and easy to clean, and the price is great! It is a high-quality camping kettle that offers the ultimate convenience and portability.
It is made of anodized aluminum and is easy to use and clean. The lid has a strainer that you can use to strain your hot beverage or soup. The handle is sturdy and fits well in your hand, and the pot is spacious enough to make your favorite coffee and tea. Moreover, the kettle optimizes the heating time. You don’t need to wait long before the water boils.
One Overmont Camping Kettle can make up to ten cups of beverages. Its continental spout enables the steam exit, preventing any risks of scorching injuries.
17. STANSPORT – Deluxe 24-Piece Enamel Tableware Set
STANSPORT Enamel Tableware are famous for their durability, resistance to rust and their ease of maintenance. They are ideal for every type of camper or traveler. These are a few reasons why thos cooking cookwareset is the premier choice of outdoor enthusiasts for over 100 years.
All the contents of the STANSPORT Enamel Tableware are dishwasher-safe and oven-safe; they can withstand up to 350 degrees Fahrenheit. They are non-porous and non-leaching. The 24 piece set includes four 10.5-inch plates, four 6-inch bowls, four 12-ounce mugs, and four flatware sets for knife, spoon, and fork.
If you are planning to have a nice outdoor cookout with your family and friends, you need to have this camping tableware set.
The Coleman 1 Gallon Beverage Cooler is a great cooler for any outdoor activities. It has a carrying handle that makes it easy to carry around. It also has a removable drain plug for easy cleaning.
The Coleman cooler has a capacity of one gallon and is made from sturdy plastic material. This is a great feature for any camper because the cooler will not be as heavy as other stainless steel coolers. You’ll enjoy having this mini cooler if you want to keep your drinks cool at the beach or on a picnic at the park.
If you’re looking for a lightweight cooking set that is portable enough to take with you on camping trips, look no further. The MalloMe Camping Cookware Mess Kit Gear can take your outdoor cooking experience a step higher.
This kit is a bundle of all the cooking wares that you need to create delicious meals on your campground. It comes with an anodized aluminum nonstick pot, pot cover, nonstick pan, bowls, folding stainless steel spork, soup spoon, spoon spatula, cleaning sponges, and a drawstring pouch.
Impressively enough, this 10-piece cooking ware can collapse into a small package. Such a design enables you to store and transport the items as conveniently as possible.
For those who like to head out into the wilderness and enjoy the peace and quiet, the GCI Outdoor Slim-Fold Outdoor Cook Station can be a perfect addition to their camping trip. Whether it is a short overnight trip or a longer adventure, this particular workstation is a worthy investment.
This folding cook station will let you prepare your food and delicacies conveniently. It has a spacious counter and multiple storage for cookware, camping stoves, and other cooking utensils.
The item can be folded compactly. Once unfurled, the powder-coated steel frame will reveal the aluminum countertop, plastic side tables, and storage racks. The aluminum counter, specifically, can hold up to 48 pounds of weight. Meanwhile, the lower rack can handle 35 pounds of dry goods and ingredients.
Best Luxury Camping Chairs And Tables
Luxury camping focuses on the finer things in life–the very best in outdoor recreation and adventure travel. But you can’t enjoy these things if you don’t bring tables and chairs with you.
Of course, camping is designed to be free from these things. But if it is possible to have these amenities, would you really forego them? Chairs, for instance, will let you relax and stretch your body. With them around, you don’t need to sit on rough and dirty grounds. Meanwhile, tables improve the organization of your camping items and food.
When you are camping, you can never have enough space. Whether you are trying to prepare a gourmet meal or just trying to spread out your sleeping bag and other items, you need space. Th
The Coleman Outdoor Folding Table is an excellent option for anyone who is in need of extra space for their camping gear and other items. This table is very versatile, as it can be used as a table or a seat. Its top is made from aluminum, while it is frame crafted from coated steel. It is downright stable and never wobbly!
The snap-together design lets you fold and assemble the table quickly!
21. AHB Outdoor Folding Camp Table with Storage Organizer
Surrounded by the pristine beauty of nature, it’s easy to understand why so many people like to get out and enjoy the great outdoors. But if you’re like most campers, you’ll soon find that lugging around bulky camping gear is a tremendous pain.
That’s why you’ll love our AHB Outdoor Folding Camp Table with Storage Organizer. It weighs just fifteen pounds, but can be used to hold your food, drink, cooking utensils, and just about anything else you’d need for a camping trip. The table also features a convenient capacity lockers, so you can keep your important items safe and dry no matter how inclement the weather may get.
The Cosco Deluxe Molded Folding Table is the perfect table for any picnic, camping trip, or outdoor gathering. It’s made of sturdy polyethylene that holds up to 225 pounds and is excellent for indoor and outdoor use. This table features a convenient carrying handle for easy portability and folds down for compact storage.
Since it is rated as an all-season tabletop, you can use it for both outdoor and indoor applications. It is exceptionally stable, thanks to its extended frame design. The lightweight construction also improves its overall usability. That’s something that you wouldn’t want to trade off while doing luxury camping.
23. Coleman Camping Chair with Built-In 4-Can Cooler
This is the ultimate camping chair for the ultimate camping trip.
The Coleman® Quad Chair Cooler is the chair you’ve been dreaming of for your next camping trip. This chair features a built-in can cooler that keeps your drinks cold and within reach. And with the Coleman® Quad Chair’s durable steel frame and comfortable front and rear seats, you’ll be sitting pretty for hours.
This camping chair offers a cozy design that lets its users sit comfortably. It has an ergonomic cushioned seat and back support so that you’ll never feel aching back. Its setting height is around 18 inches; hence, this chair is quite suitable for tall people. And guess what? It can also support up to 325 pounds of sitters!
Whether you’re sitting on the beach or just hanging out on your porch, this rocking chair from the GCI Outdoor is a great spot to take in the views. Made with a durable aluminum frame, it has a padded seat made of polyester fabric.
The Freestyle Collection offers a modern, elegant and functional approach to outdoor furniture. This rocker recliner has a curved steel frame with over-sized, contoured footrests covered in durable PVC. The armrests are padded and include drink holders.
It also has a patented spring-action feature that enables it to rock smoothly virtually anywhere! It is perfect for any campsites, but it works magnificently on lawns and patios. The chair opens and closes safely due to its EAZY-FOLD technology.
25. AmazonBasics Outdoor Zero Gravity Lounge Folding Chair
The AmazonBasics Outdoor Zero Gravity Chair is designed to provide comfort and relaxation while you’re watching the sunset, enjoying a picnic, or just soaking up the sun. The zero gravity chair is the perfect way to relax and enjoy the outdoors. The ergonomic design provides maximum comfort while lounging, and the chair’s double bungee support system connects the Textilene fabric to its frame, making it extra durable and safe.
Lightweight, portable, and easy to set up, it folds down to less than one inch in depth. The Zero Gravity Effect of the chair lets it transition seamlessly from upright seated position to full recline and vice-versa.
Best Luxury Camping Hygiene Items
Luxury camping is fun until someone gets dirty and smelly.
I don’t know about you, but I don’t want that to happen to me. Being a camper or outdoor enthusiast is not an excuse to get rid of your personal hygiene. You are there to relax and unwind, not to make yourself a little too nasty.
Fortunately, there are a number of glamping amenities that can save you from such a foul predicament.
26. ADVANCED ELEMENTS 5-Gallon Summer Shower/Solar Shower
Enjoy the luxury of a hot shower after a long day on the trail with the Advanced Elements Summer Solar Shower! This lightweight shower is easy to set up and folds into its own carrying case for easy transport. This solar shower heats water to 104 degrees Fahrenheit for a comfortable outdoor bathing experience.
It includes everything needed to take a shower: shower bag with folding shower head, hose with on-off valve and shower arm, and adjustable shower head bracket. This product is made with durable materials. The shower bag is made from strong vinyl; the hose is made from durable polyester, and the showerhead is corrosion-resistant plastic.
With the SereneLife Outdoor Portable Toilet, you can enjoy the great outdoors anywhere you go. The toilet features a self-contained water storage tank that can easily be removed from the toilet for quick and easy filling. It also sports a comfortable seat that is made of high-density polyethylene that is durable, light, and easily cleaned.
This portable toilet provides the ultimate solution for outdoor enthusiasts who don’t want to compromise their comfort. Self-contained and odorless, this toilet is the ideal companion for your luxury camping trip. It is equipped with a splash-free rotating pour spout and a piston pump that enable quick and discreet emptying of your wastes.
28. GigaTent Pop Up Pod Changing Room Privacy Tent
Create your very own private changing area wherever you go. The GigaTent Pop Up Pod is a high-quality, easy to assemble privacy tent that protects your privacy from onlookers while changing or showering. Great for the beach or when changing in public or semi-private areas.
The height of this privacy pod extends to 6 feet; it offers immediate space for your personal needs, such as potty needs and showers. You can also use it as an immediate shelter if the weather suddenly changes. Since it doesn’t come with quirky installations, you will be able to use it anytime you need it.
The construction of this privacy tent is downright durable. It is made from high-quality polyester taffeta, which is both rugged and waterproof. The steel frame ensures that it can stand steadily against strong gusts.
29. MGFAION Female Urination Device
Our MGFAION Female Urination device is the perfect companion for your weekend getaway. Lightweight and compact, it is perfect for your next camping excursion. The device is designed to work with most women’s anatomy and has a wide funnel to avoid spills.
The device also helps women to do their thing without squatting. It is used in campings, emergencies, outdoors, travel, and other places where toilets are not available.
The MGFAION Female Urination Device is made of silicone. It is lightweight, portable, and reusable. Moreover, it is easy to clean and store. It is perfect for women to use on outdoor trips, travel, and elsewhere.
30. Premium Hanging Travel Toiletry Bag for Women and Men
Toiletries are essential in every camping trip. But storing them is a problem, even for space-savers. Fortunately, you can get rid of this problem by having this Premium Hanging Travel Toiletry Bag. It is a sharp contrast from ordinary plastic containers and bags. This one is made from rugged fabrics, which make it an ideal camping amenity. Moreover, the item is downright odor-free.
Available in multiple colors, this toiletry bag organizes and holds your toiletries tight and spill-free. It comes with 18 vertical leakproof pockets, two large zippered pockets, and one mesh section. You will be able to store your essentials here without any fuss.
31. IONPA DM White Compact ION Power Electric Toothbrush with Travel Ready Cap
This toothbrush from IONPA DM White Compact ION Power Electric Toothbrush is the perfect tool to help keep those pearly white in check. The IONPA DM Electric Toothbrush features the latest in sonic technology to bring you a complete brushing experience. The toothbrush has a travel-ready cover to ensure that it won’t get dirty.
The item has a smart mechanism for cleaning your teeth. Specifically, it breaks the bond of the dental plaque so that it will be loosened from your teeth. It also has a Smart Timer that pauses every 30 seconds and reminds the user of the recommended two-minute brushing time.
Of course, the brush is extremely comfortable to the mouth. It is suitable for those who have sensitive gums and teeth. Its memory function lets it remember the last setting you used on the toothbrush.
Best Luxury Camping Lights
If you plan to stay in the campgrounds for a night or two, you have to invest in camping lights. Sources of illumination don’t only make your camping experience fun but safe, too.
Of course, if we are going to take into account the style of the camping lights, they can even be used to set the tone or mood of the evening. Whether you want to make a romantic or festive night, you can use these luxury lights to your advantage.
These tent lamps are the best companion for your camping. They can use any triple-A alkaline batteries and can still provide up to 15 hours of illumination in their high-light mode.
The bulbs can generate up to 150 lumens of brightness, ensuring that they can brighten up your area. However, the best feature of these bulbs is their water-resistant construction. The durable ABS plastic has an IPX8 rating, making it resistant to water-related damages.
You can also fasten the lamps on tents, trees, and other available platforms in your campsite, thanks to their highly anti-falling carabiners.
This portable and multifunctional camping lantern works as a magnificent lighting source for your camping trips. It is rigged with 30 bright LEDs, enabling it to cut it through the darkness easily. One lamp can already lighten your tent.
The lantern is collapsible, portable, and lightweight, making it a must-have for camping trips and other outdoor activities. With a maximum light output of 140 lumens, it provides bright light for up to 7 hours. The lantern is powered by 3 AA batteries (included) and offers water-resistant construction.
This string of warm white LED lights is ideal for decorating the interior of your camp trailer as well as the exterior. The weatherproof string lights are designed to give a romantic ambiance to any outdoor setting. If you are planning to have an intimate night or a grand evening of proposal, these strings can make the moments extra wonderful.
The lights are easy to install and detach, and they look great both day and night! All of the installation accessories are already included in the package. They are also available in different lengths for better flexibility. Of course, the cords of the string lights are made from thick and rugged rubber. They won’t snap in two.
Just because you are luxury camping doesn’t mean that you don’t need a flashlight anymore. In fact, your night at camp might get ruined if you don’t have this particular item. From finding lost items down to finding your way back to your tent, these flashlights can help you out.
The GearLight LED Tactical Flashlight S1000 is a premium option for an outdoor flashlight. It is a compact and powerful tactical flashlight that is small enough to fit in your pocket, yet bright enough to throw a beam of light over a long distance.
This rugged police-quality tactical flashlight has a compact yet powerful high-intensity CREE LED Bulb that is designed to last a lifetime. The GearLight LED Tactical Flashlight S1000 is rugged, durable, weatherproof, and waterproof and runs for up to 15 continuous hours on a single set of batteries. This top-of-the-line flashlight for the outdoors is made from the highest quality aircraft grade aluminum with a rugged yet elegant black finish.
Other Luxury Camping Accessories That Can Bring Fun And Comfort On The Scene!
36. Carpathen Campfire Roasting Sticks for Marshmallow and Hot Dog
Carpathen Campfire Roasting Sticks are ideal for cooking your favorite summertime treats. This set of 10-inch stainless steel sticks is strong and durable. But unlike other roasting sticks, these sticks have a telescoping design, just like your radio antennas. Hence, you can extend them up to 34 inches. Now, you don’t need to draw yourself near your campfire just to have a tasty delicacy.
The roasting sticks are easy to clean. They are food-safe, too, ensuring that you will not consume any unwanted chemicals. They are quite durable for a price that will not rip your pocket!
The PUMA Evercat Dispatch Duffel is the perfect companion for your next weekend getaway. It’s lightweight, spacious, and sturdy, so you can pack it with everything you need for your time away. It’s made from tough polyurethane and comes with PUMA’s signature logo.
Made from polyester, this women’s duffel provides exceptional item organization. It is spacious enough to handle all the essential items that you need for your outdoor adventures.
The FlexWare Collapsible Sink is the ideal solution for outdoor dishwashing. This sink is designed to be used as a washbasin or a small bathtub. It is easy to fold and store when not in use. The sink is made of high-quality, flexible plastic that will not scratch or damage the interior of your camper but still holds up to the great outdoors.
Its dual carrying handles enable you to move it whenever you want. Since it is made from thermoplastic rubber, you can guarantee that it’s dishwasher-safe and BPA-free. Its rugged plastic rim and base ensure that this sink is stable wherever you place it.
You can’t enjoy your outdoor excursions if there are insects bugging you. It works perfectly in blocking these critters and nuisances. As long as this net is covering your area, you can rest easy that not bites and scratches will touch your skin.
The fines mesh fabric construction of the mosquito net is more than enough to block the entry of mosquitoes, flies, bugs, and wasps. It is breathable, too. It won’t suffocate you at all. It also has an ergonomic hexagonal design to optimize the protection it provides.
The Ruff ‘N Ruffus Portable Foldable Pet Playpen is an innovative way to provide the accessories and toys your pet needs to stay happy and healthy they travel with you. It is a portable playpen that features a padded and reinforced floor to keep your pet comfortable. The materials used in its construction are water-resistant, too.
It comes with a removable zippered top that you can use when you want to put some shade on your pet. The playpen itself is lightweight and portable. It also has a carrying case that simplifies its transport.
41. Stanley Adventure All-in-One, Boil + Brewer French Press Coffee Maker
Missing your coffee or favorite drink while camping is a big letdown. Fortunately, you can avoid such a predicament by having the Stanley Adventure All-In-One. Just as its name suggests, this French press can be used for brewing, boiling, and cooking. It can hold up to 30 ounces of water, making it a perfect choice for groups of campers.
Its nesting design enables it to save space while packing or storing it. It features a melt-resistant nylon lid that optimizes the thermal efficiency of the set. Meanwhile, it comes with an integrated pot and locking pot handle for hassle-free use.
42. FosPower Emergency Solar Hand Crank Portable Radio
The FosPower FOSPWB-2376 is not just your run-of-the-mill portable radio. It features the integration of a 2000mAh power bank that lets you charge your phone during emergencies. Powering it is quite easy, too. You can charge it via its solar panel or operate via AAA batteries. Aside from the power bank, the radio can also serve as a flashlight.
12 Useful Pop-Up Camping Tips For First Time Pop-Up Campers
Pop-up camping is a great way to travel. It’s economical, environmentally friendly, and flexible. It’s like hotel hopping without leaving your home.
But of course, we are all aware that these pop-up campers are not as big as your standard motorhomes. They fall in between RVs and tents. While they provide convenient advantages, there are still some things that you need to do to ensure the overall success of the trip.
For many experienced pop-up campers, the following tips should be followed religiously.
Pop-Up Camping Tips
Tip 1: Get The Right Pop-Up Trailer
Pop-up trailers, also known as camping trailers, are small portable travel trailers that are made for camping. There are several different kinds of pop-up trailers, such as travel trailers, toy haulers, and folding camping trailers. They are also referred to by other names such as pop-up campers, collapsible campers, folding camping trailers, and folding campers.
So what makes a pop-up trailer great? Well, it should have the basic amenities. It should contain a shower, toilet, and air conditioning unit. You may want to install heaters, but they will add to the cost of operating the trailer.
Don’t buy a camper that has leaks and signs of water damages. You don’t want to be drenched in water if precipitation falls in. Always inspect the structural integrity of the camper. Don’t take for granted any hints of deterioration. That would certainly manifest once you are camping already.
Tip 2: Mind The Space
It is quite challenging to manage the space of a pop-up camper. After all, they can only hold a limited volume or weight.
On average, a pop-up camper is capable of holding up to 300 to 600 pounds of weight. Hence, you may only want to bring in your essential clothing and amenities.
Of course, just like backpacking and camping, you don’t need to bring all things that come to your mind when doing a pop-up. Just prioritize the essentials. Of course, I recommend that you leave your expensive and luxury items behind the safety of your home.
Toiletries should be limited, too. If you want to take photos, bring a smartphone instead. You don’t need to bring a point-and-shoot or a professional DSLR camera.
Tip 3: Have A Camping Checklist
The first time I went camping, there were lots of things I needed to consider on my camping checklist. One of the most important factors is to remember to bring all the required camping items. You do not want to be caught in a situation where you need an item you do not have. There are many other essential factors that you should add to your camping checklists, such as first-aid supplies, food supplies, firewood, campground rules, and more.
A well-designed checklist can help you make sure you have everything you need and reduce the stress of forgetting something vital on your trip.
Tip 4: Park Your Camper In A Stable Ground
You don’t want to park where the ground is uneven. Otherwise, it could pose inconveniences and damages to your camper. Specifically, camping in these places can tilt your pop-up camper. It could disorient the placement of your appliances and other camping amenities.
Stability is a key factor when choosing a place to set up a camper or other outdoor shelter that you are going to live in. If your ground is too soft, muddy, or uneven, you will be uncomfortable during your stay. The ground should be firm enough to support your camper so that it does not sink too far into the ground. If it is too soft, you will have a hard time setting up your shelter and will find yourself tripping over things.
Tip 5: Follow The Leave-No-Trace Principle
Leave no trace. It’s a mantra preached by hikers, campers, and naturalists, and for a good reason. It’s the principle that guides us to live more responsibly in the wild and to take care of our surroundings so that we can enjoy nature for years to come. What is a leave-no-trace principle?
A leave-no-trace principle is an ethical guideline to minimize the negative impacts that you and your group members can make while in the backcountry. The seven principles are as follows:
Plan ahead and prepare, travel and camp on durable surfaces.
Dispose of waste properly.
Leave what you find.
Minimize campfire impacts.
Respect wildlife.
Be considerate of other visitors.
Tip 6: Plan Your Meals
Pop-up camping presents a different set of challenges than preparing food at home. While out in the wild, you have to deal with less-than-ideal cooking surfaces, unpredictable weather, and limited refrigeration. As such, meal planning is an integral part of the overall camping experience.
Still, you want to have a wide variety of foods to choose from, some of which are quick and easy to prepare, others that will require a little more effort. You can always plan your meals in advance to ensure that you know what to cook, the ingredients you should bring, and the right cooking tools you need.
Interestingly, many pop-up campers recommend that you should just pre-make your food. In this way, you will not require yourself to bring many cooking tools, utensils, and food ingredients, which could take up the space of your camper.
Tip 7: Dry Your Pop-Up Camper After Rain
It is common for pop-up campers to develop mold and mildew after a night of rain. The same thing happens when you camp in an area where it is highly humid. To prevent this sticky predicament from happening, you have to make sure that the awning and canvas of your camper are dry.
Tip 8: Do Fun Camping Activities
The thought of spending a night in a pop-up camper isn’t everyone’s idea of a good time, but if you think about it, this is a really easy and cheap way to have a lot of fun! You can take your time to find the perfect campsite, and after a long day of hiking, canoeing, or biking, you’ll be glad to have a place to rest your head and enjoy the quiet of the wilderness.
Surely enough, your options to have fun are not limited to these activities. There are a lot of fascinating and delightful things that you and your family can do while you are off-the-grid. In fact, the activities that you can do are limited to your preferences!
Tip 9: Make Your First Pop-Up Camping Trip Close To Home
Pop-up camping is an activity that can be enjoyed by anyone, regardless of your level of experience. While it may seem like a daunting activity to try for the first time, you can make it easy on yourself by camping close to home.
Since the majority of your time in the camper will be spent outside, you will want to make sure you have an area that has nice weather and is close to home. Make sure to bring an extra sleeping bag with you if you want to sleep outside. Always make sure to have a back-up plan in case the weather does not cooperate.
Camping close to your home will let you have a good time. It will eliminate the need for you to travel long-distances (which is an exhausting matter for first-time campers). Furthermore, it lets you head back on cases of emergencies.
Tip 10: Bring A Portable Generator
If you have a pop-up camper who owns a pop-up camper, you already know how hard it is to keep your appliances running while you are away from home. This is where portable generators come in.
Portable generators are one of the most important accessories for anyone that wants to go camping. They have many uses, including powering large appliances, air conditioners, lights, and much more. These generators can maximize the convenience of your trip by having reliable access to clean electricity.
Tip 11: Use A Pop-Up Lift System
If you want your pop-up camper to be lifted properly, you should consider investing in a pop-up lift system. Pop-up systems are easy to use, affordable, and can be installed in a few easy steps.
Tip 12: Check The Weather Forecast
When camping outdoors, even in the most beautiful and scenic places, people still have to deal with Mother Nature. It’s entirely possible that your camping trip will be amazing, but you will inevitably have to deal with some kind of weather. That’s why it’s essential to plan ahead by checking the weather forecast and making sure you’re prepared for whatever comes your way.
How To Clean A Tent: Step-By-Step Guide
How to clean a tent?
Whether it’s for a camping trip, festival, or if you just want a nice change of scenery for the night, a tent is a must-have item for any outdoor enthusiast. Not only do they provide protection from drenching rains and winds, but they also give you a roof over your head while you’re sleeping under the stars.
Tents are essential for every outdoor enthusiast. Hence, it is important that we can take care of them.
One of the proper maintenance that you need to implement is regular cleaning. Over time, you will see stains and dirt draping on the surface of the tent’s fabrics. You might also notice unusual odors that are not originally there. You can deal with these issues by proper cleaning.
How To Clean A Tent?
One should realize that cleaning a tent is a mandatory requirement. It is not optional. In fact, you should clean your tent every after you use it, especially if you came from a muddy terrain or area with unfavorable weather and conditions.
Cleaning your tent helps you preserve its quality. Moreover, it allows the shelter to be extra livable.
What You Need:
Water
Dish soap
Gear or tent cleaner
Clean cloth and sponge (non-abrasive)
Tub
Step-By-Step Cleaning Of Tents
1. Take your tent in a large tub. Next, use a clean sponge or cloth filled with dish soap. Use the cloth or sponge in spot-cleaning areas that have noticeable dirt and stains. Do this process as rigidly as possible to ensure that you will not miss any blemish.
2. After you have dealt with all the stains in the fabrics of your tent, you can already fill the tub with lukewarm water. Cold water also works.
3. Once the tub is filled with water, take your tent/gear cleaner and pour it. Make sure that you follow the instructions in the cleaner so that you can use it properly. Overly using these commercial cleaners might damage your tent’s materials.
4.Unzip open the tent’s doors so that you can unfurl it from the inside.
5. Soka the tent (including its rainfly) to the tub filled with tent cleaner. Let it soak there for a couple of minutes. Alternatively, you can follow the cleaner’s instructions when it comes to the time that is needed for the tent to be drenched.
6. After soaking, you can already drain the water in the tub. Fill it with clean water. You should repeat this procedure to ensure that the soap and cleaner will be rinsed off from the tent.
7. You can dry the tent naturally. Simply hang it in a shaded place and wait until it becomes dry.
Step-By-Step Deep-Cleaning Of Tents
Climbing into a tent and falling asleep is usually a sign of a great day spent outdoors, but all that dirt and dust you tracked into your tent can lead to some less-than-ideal sleeping conditions.
If you want to make sure you are getting the best night’s sleep possible, it’s time to deep clean your tent. It’s not as bad as it sounds—you just need to do a thorough rinse of your tent, so you don’t wake up with a gritty mouth and itchy eyes.
For tents riddles with bad odor, mildew, or mold growth
Your tent is not impervious to the elements. Moisture can seep in, causing mildew and mold to form. They can cause deterioration in the tent. Moreover, they cause a foul smell, too. To deal with these problems, you should get enzyme cleaners. Pick a commercial cleaner and use it according to its directions. Don’t soak the tent to these cleaners for long periods. After all, it can cause hydrolysis. The latter is a chemical process that ruins the waterproof applications of the tent.
For tents with pine saps
Pine saps are ubiquitously annoying. Fortunately, you can always remove them from your tent. The only thing you need to do is to spot-clean your tent with the use of mineral oil. However, I recommend that you don’t scrub rigidly. If you don’t have mineral oil, you can use wet wipes, sanitizers, or any alcohol-based applications. Rinse the tent thoroughly after all of the pine sap is removed.
For tents with dysfunctioning zippers
Tents are supposed to protect you from the elements when you’re outdoors. If the zipper of your tent is not functioning properly, it might fail to live up to its promise. In all weather conditions, a properly working zipper is the difference between a night of restful sleep and a sleepless night out in the wilderness.
The problem might be caused by dust, sand, or mud that is stuck in the teeth of the zipper. You can take them out by using a toothbrush. Use the brush to scrub the elements away from your zipper. If the dirt is clasping the teeth tightly, rinse the zippers in the water while brushing it.
For dirty poles and stakes
You only need to wipe them with a clean rag soaked in water or cleaner.
Conclusion
Camping tents are designed to keep you dry from the rain. They also have ground coverings to keep you warm and comfortable. In fact, other tent variants have separate rooms that you can use for cooking and other activities.
Despite the given rigidity and functionality of tents, it does not mean that you can ignore cleaning them. You will have to clean your tent and take proper care of it in order to avoid damage and ensure that it lasts.
Learning how to clean a tent is an essential skill for an outdoor enthusiast. It helps you maintain the structural integrity of your tent, which effectively prevents you from replacing your tent prematurely.
I hope that you find this guide useful. For other inquiries, feel free to ask me in the comment section below.
How to Connect Tents Together
How to connect two tents together?
Well, you might not have thought of this question at first. But sooner or later, you’ve realized that two is better than one.
If you think about it, tents are actually designed to be stand-alone. Hence, the concept of connecting them together does not actually expand their space. You are just affixing the tents so that you can minimize the area you are occupying. It benefits families and groups of friends who don’t want their outdoor shelters to be apart from one another.
If you connect two 2-person tents, you don’t get a single 4-person tent. Instead, you only have two 2-person tents that are attached together.
How To Connect Two Tents Together
There are multiple ways you can piece two tents so that you can combine them into a unified shelter. Some of these methods are plainly ingenious and crafty, so learning them is quite fun.
Method 1: Clipping The Doors
One of the most reliable ways of affixing two tents is by clipping their doors. It is an easy approach, especially if the tents have the same door sizes. After all, you don’t need to make adjustments anymore.
Therefore, if you are aiming to connect two tents right from the start, then it is better to bring similar tents or those that came from the same brand. Of course, both of the tents should have two doors. In this way, you still have a separate entry and exit point in your tent while its other door is attached to the door to another tent.
You can clip the excess materials of the doors’ edges so that you can tie them together.
Binder clips are incredibly essential in this attempt since they are effective linchpins for tents. Even if the doors are not of the same sizes, these clips can still glue things like magic.
However, keep in mind that these clips can leave gaps between the doors, causing precipitation and insects to come in. To deal with this issue, you simply have to get an overlapping rainfly and erect it on the overhead of the tents.
Method 2: Creating A Makeshift Hallway
Connecting two tents doesn’t require you to bind them together. You can be extra creative in this process. One way of doing so is by making a makeshift hallway between the doors of the tents.
To do this, you simply need rugged cords, stakes, and a camping tarp. The larger the tarp, the better.
The first thing that you need to do is to place the tents opposite of one another. They should be at least 6 feet apart to create a decent hallway.
Once you have the right or ideal distance, you can already start punching the stakes on the ground. They will serve as the supporting posts for the line or cord. Attach the cord to the stakes and make sure that they are tied tautly.
Once the “pillars” are in place, get the tarp and hang it over the cord. You can also stake the tarp so that it doesn’t get blown by the wind.
Do you want longer hallways but don’t have enough stakes? Use sturdy and equally long branches as alternative supports.
Method 3: Using The Bigger-To-Smaller Approach
This option is quite the unorthodox one, but it is definitely an amusing way to connect tents. This particular method requires you to bring tents of differing sizes. There should be a bigger one, and then the rest would be the smaller ones.
You don’t need special tools to attach them to one another. However, you will need the tents to have removable walls so that you can achieve this feat.
Place the smaller tent inside the wall of the bigger tent. Use a rainfly or tarp to cover the entry points from the elements. Use clips and binders to secure the tarp.
You can repeat the aforementioned procedures if you have other smaller tents. As long as they have draping walls, you can easily make connections. You can create a small community with other campers, making your adventure fun and exciting.
Conclusion
As you can see, the process of connecting two or more tents is not that complicated. In fact, you can try multiple methods and see which one is the most suitable and least complicated for you.
However, let me inform you that there are tents that are designed to be connected with other tents. Brands like Coleman, for instance, have these particular tents that use special mechanisms for hassle-free attachments. You are free to choose them. But at the same time, keep in mind that they do come with a cost. But if you think that the price is just right, then go for them!
I hope that you find this guide useful. For inquiries, feel free to ask me in the comment section below!